Whether you’re a seasoned developer or just starting out with WPGraphQL, you’re likely familiar with its user interface. Now, there’s an exciting update: a new plugin that transforms not just the UI’s look but also enriches it with additional features.
In this article, I’ll guide you through the latest WPGraphQL-IDE plugin, showcasing the enhanced visuals and new functionalities that elevate your experience with WPGraphQL.
Table of Contents
Prerequisites
To benefit from this article, you should have experience using WPGraphQL, a WordPress install, and the WPGraphQL plugin installed. If you do not have a WordPress installation, consider using WP Engine’s headless sandbox.
Atlas
The all-in-one headless
platform for radically fast sites.
Installation
To install the plugin, navigate to the GitHub repo and download the wpgraphql-ide.zip here.
Once you download the plugin, go to your WP Admin and install and activate the plugin on the add new plugins page. Once you have WPGraphQL and WPGraphQL-IDE installed, you are good to go.
WPGraphQL
An extendable GraphQL
schema & API for WordPress.
The Old GraphiQL IDE
Before we take a deep dive into the new UI, let’s quickly go over the old one. When downloading WPGraphQL, the default UI looks like this:

The old IDE features a classic white background. It uses a light color scheme that provides high contrast with dark text, which can be easier to read under certain lighting conditions but can get really hard on the eyes or glare over long periods.
The layout has sections defined for the query composer, exposing all the data you have in WordPress, the query editor, and the response output. It also has a docs button to expose further documentation needed within the plugin, a history button that enables you to see your past created queries, and a button for screen enlargement.
The New WPGraphQL IDE
The new WPGraphQL IDE is a great addition for developers using WordPress with the WPGraphQL plugin. Its feature-rich and visually appealing interface significantly enhances the user experience.
Aesthetics 👨🎨
Upon downloading the WPGraphQL IDE plugin, you will notice you have an option at the top of your screen between the old and new versions:

The plugin allows you to choose between the two IDEs with a simple click. This comes in handy when you want to roll back to using the old version without having to do any heavy lifting. In the next version, the WPGraphQL team will move this to the settings section so one is hidden and the other is exposed.
This is what the new version looks like when you click and choose it:

The first feature to notice is the new dark theme, which gets me super stoked!!! Utilizing shades of dark blue and gray, this theme is less straining on the eyes, particularly beneficial in low-light conditions. This makes it an excellent option for those spending extended hours coding. Moreover, dark mode not only reduces eye strain but also provides the interface with a modern and sleek appearance, significantly enhancing the aesthetic user experience.
The new IDE maintains a similar layout but improves visual separation through the use of color contrasts and shaded panels. This helps in distinguishing between different sections of the interface more clearly.
Enhanced typography with better spacing and font choices is implemented, contributing to a more pleasant visual and reading experience.
Features of the WPGraphQL IDE
The new features in the IDE are more stylized with great-looking icons and button designs. Let’s dive into what they do and the capabilities of each.
All Access IDE Drawer 🚀
One convenient feature (And one of my favorites of this) the new WPGraphQL IDE contains is the IDE drawer. You have access to the IDE on every page of the WP admin, the block editor UI, as well as the actual public-facing site. All you need to do is just click on the rocket emoji 🚀 next to the GraphQL IDE option on the toolbar. It is exposed anywhere the WP Admin bar is present. This will get ya’ll stoke to not have to go back into the actual IDE page and just access it anywhere!
Here is a sample of the drawer being accessed on your frontend site:
Open Settings Dialog ⚙️
On the bottom left-hand corner of the IDE, you have a cog icon. When clicked, it will reveal your settings:

The 3 settings you can control from this card are:
Persist headers– This setting allows you to save custom HTTP headers across sessions. Turning it “On” will retain headers like authentication tokens when the IDE is reloaded. It’s recommended to use this feature only if you trust the device you’re working on, as retaining sensitive headers can pose a security risk if accessed by others.
Theme-This provides options to adjust the visual theme of the IDE interface to either match the system theme automatically or explicitly set it to a light or dark theme. This helps customize the look of the IDE according to your preference or environmental conditions (e.g., using dark mode at night to reduce eye strain).
Clear storage– This action removes all locally stored data in the IDE, such as cached responses, saved queries, and headers. It’s useful for starting fresh or troubleshooting issues related to corrupted or outdated local data.
Short Keys 🍏
When you click on the command icon, you will see a card with a cheat sheet for your short keys to shortcuts for certain functions.

Cmd + F: Search in editor—This shortcut opens a search input on the page, allowing you to type what you are looking for in the editor, as the image shows below.

Cmd + K: Search in documentation—This shortcut opens a search input when you are in the Docs pane, allowing you to quickly type and find the specific document you are looking for.

Cmd + Enter: Execute query—This shortcut allows you to execute the query you created in the query pane to get the JSON response.

Ctrl + Shift + P: Prettify editors—This shortcut allows you to automatically format the code written in the query editor to make it more readable and aesthetically pleasing. It ensures that your indentation, spacing, and line breaks are clean and enhances readability. The previous image shows a query that was prettified.
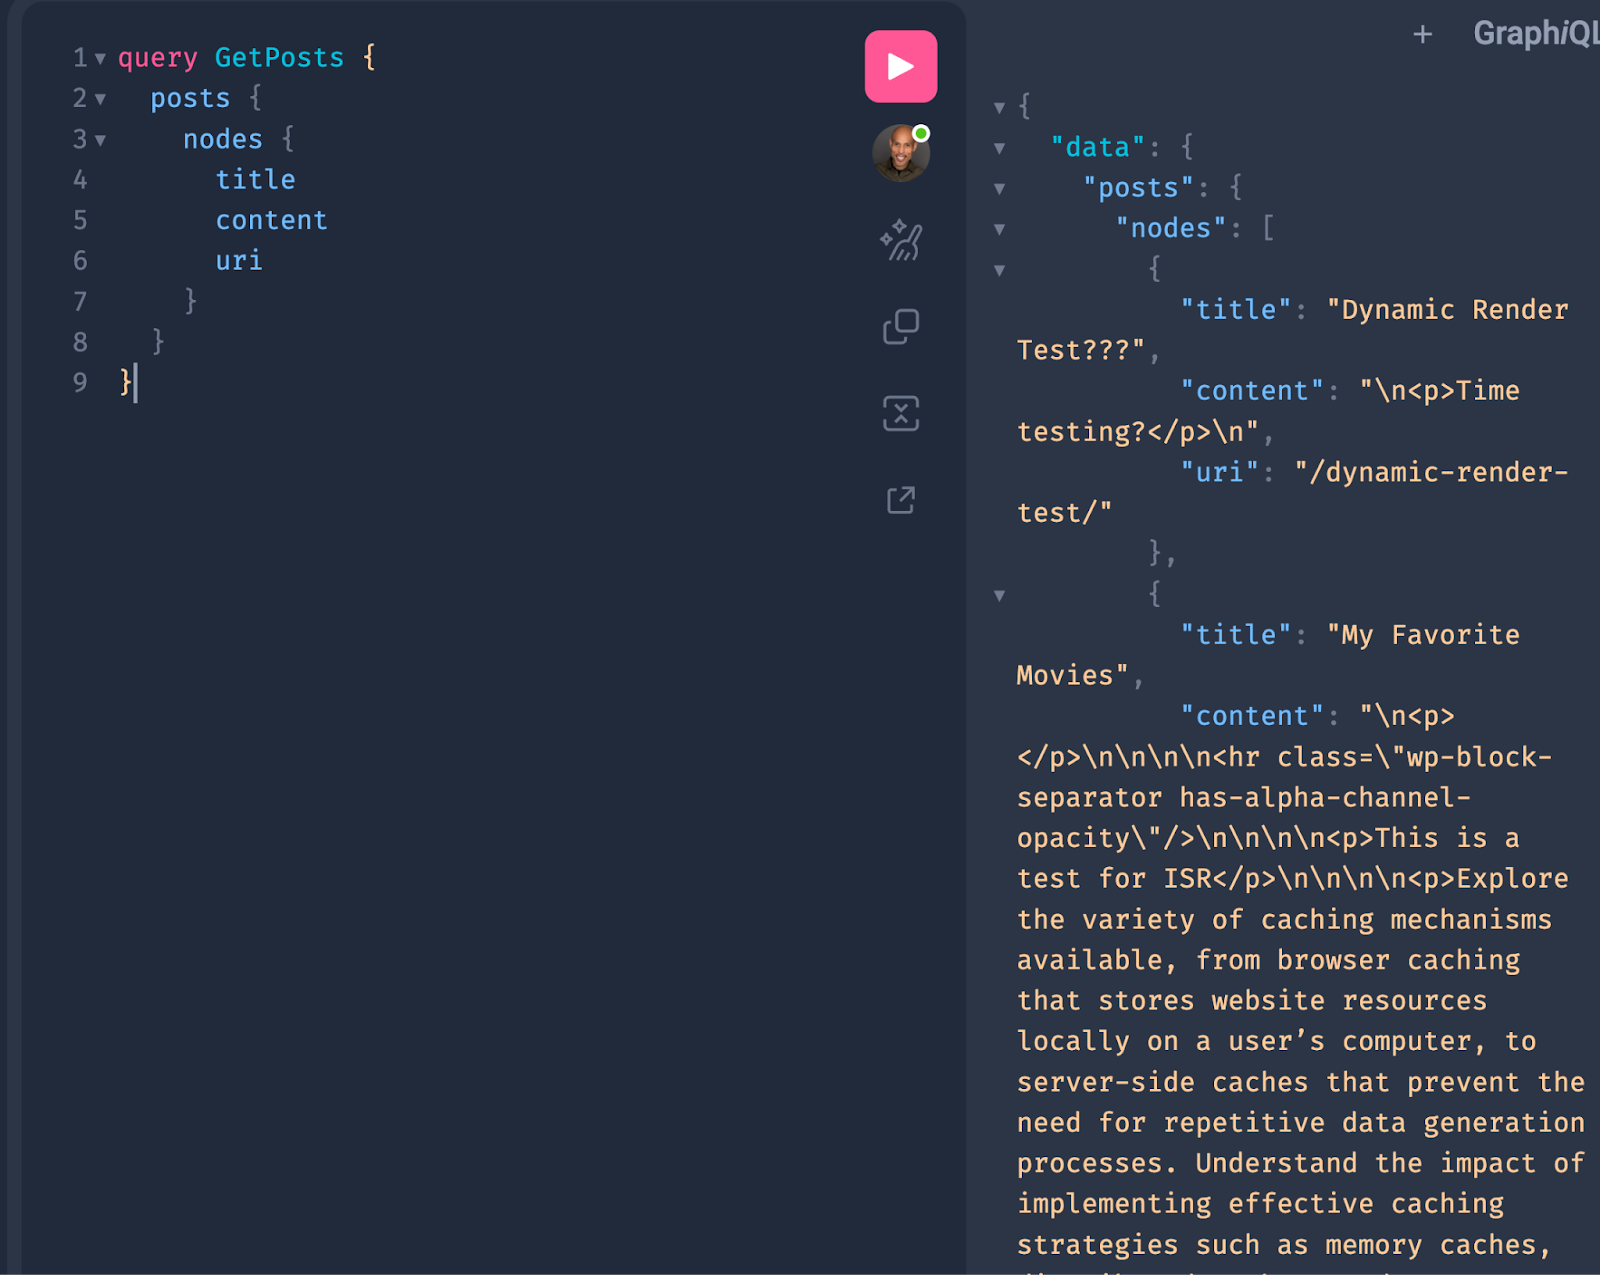
Ctrl + Shift + M: Merge fragment definitions into operation definitions. In GraphQL, fragments are reusable pieces of query logic that can be included in multiple query or mutation operations. They help avoid redundancy in your codebase, making your queries easier to read and maintain.
When you use this shortcut, the WPGraphQL IDE automatically integrates all the fragment definitions you have created into the main operation in which they are used. The merge will identify all fragments and integrate and merge these fragments directly into the operation’s definition, replacing the fragment spread with the actual definitions. This helps in viewing or debugging the operation as a single cohesive unit without the need to look up fragment definitions.
A sample fragment:
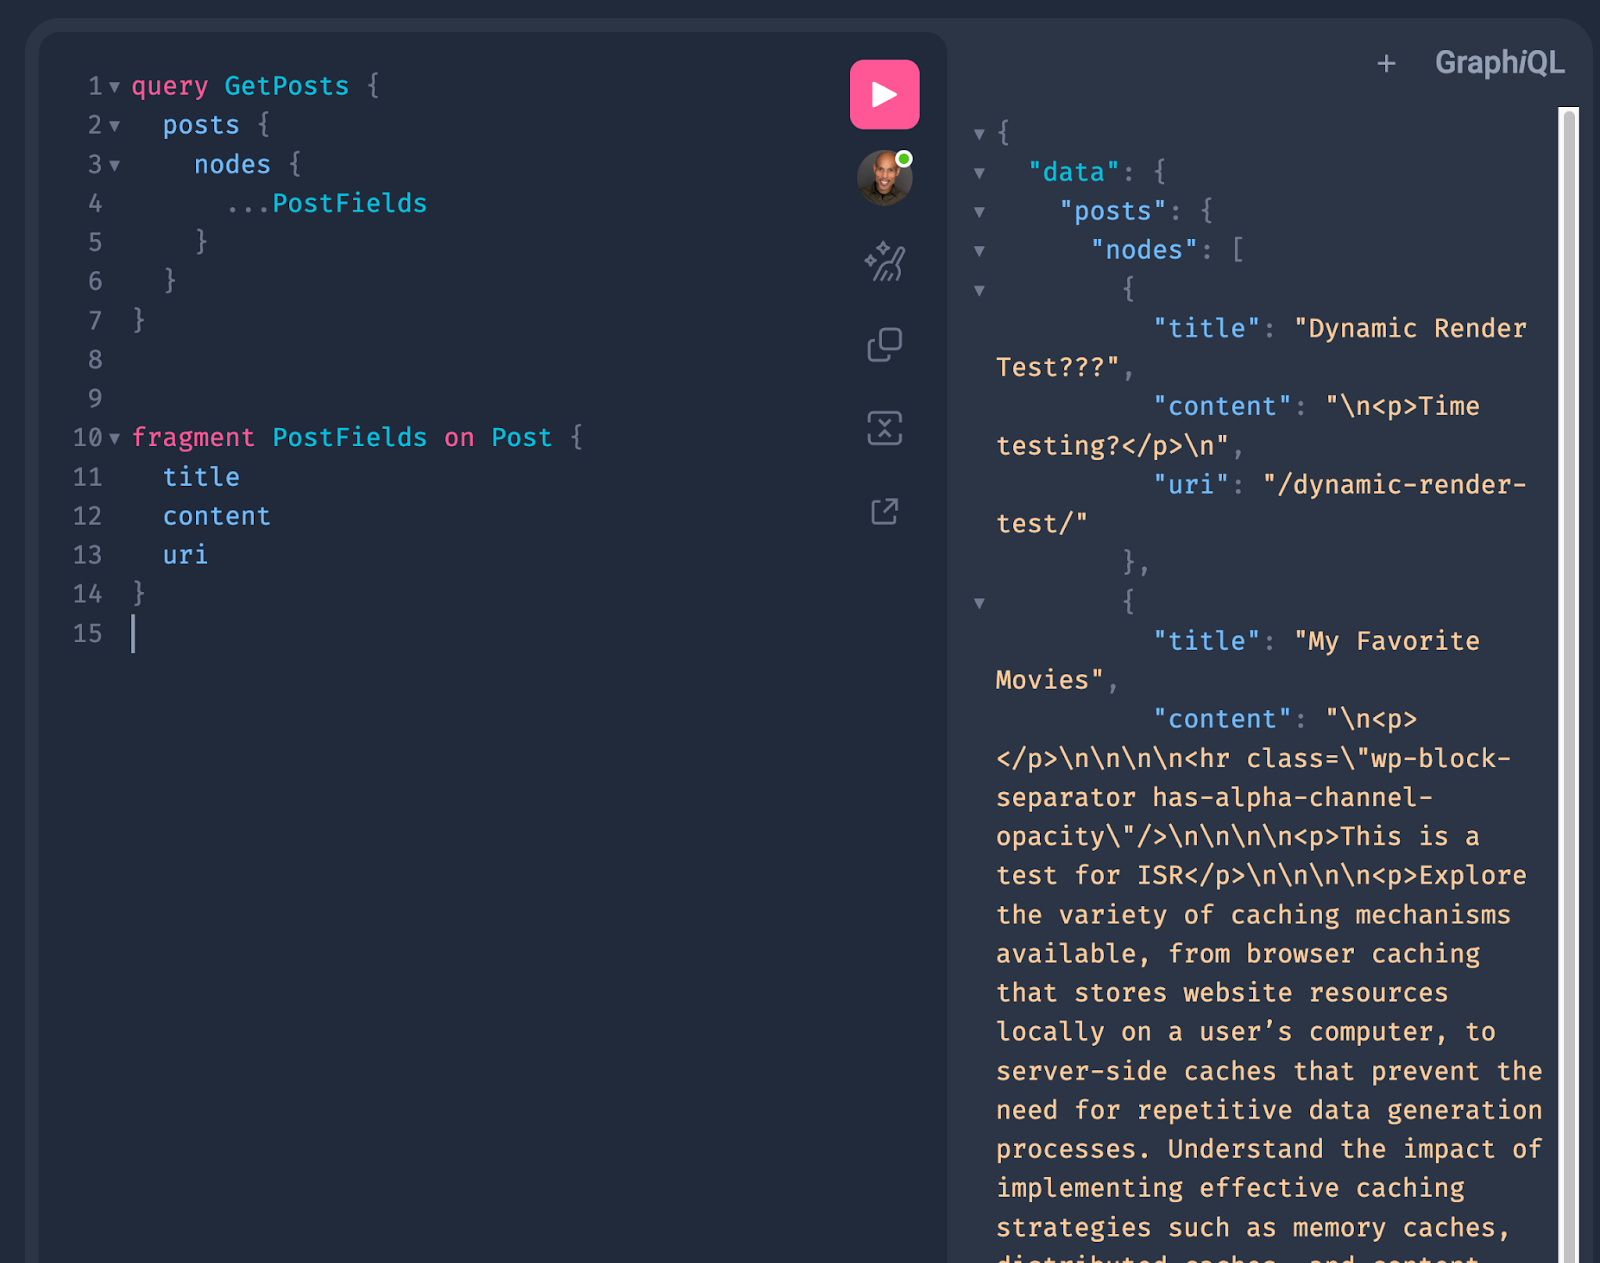
When using the shortcut, it will merge the PostFields fragment directly into your query, replacing the fragment spread with the actual defined fields in the fragment.
Ctrl + Shift + C: Copy query—This is a quick way to copy your query and paste it in your front end or wherever you want to paste it.
Ctrl + Shift + R: Re-fetch schema using introspection — A quick way to re-fetch the GraphQL IDE’s schema and keep it current.
Just a note, the Prettify, Copy, and Merge shortcuts also are available to you in the middle query pane as an icon pointed out in this image:
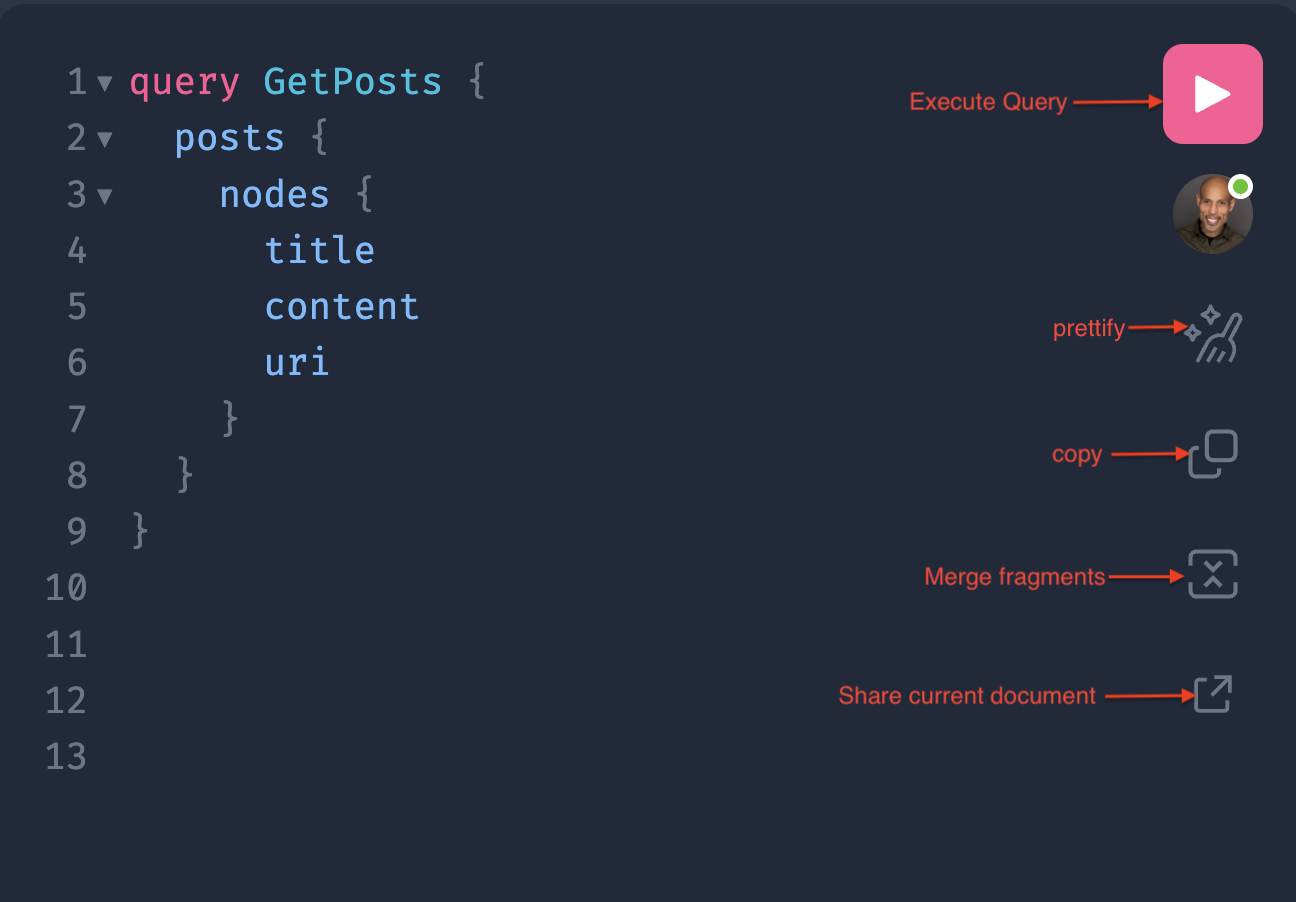
Notice the last icon, which is a link. This feature allows you to share the actual query document page with an authenticated user in your WP Admin. It’s awesome when collaborating with your team.
Re-fetch 🔄

When clicked, the refresh icon ensures that the GraphQL IDE’s schema always reflects the current state of the server schema. This aids accurate query development and troubleshooting by adding up-to-date changes to types, fields, or adjusted relationships.
Help 🆘
No, it’s not the Beatles’ fifth studio album (although it’s a great one!)… When clicked, it reveals a structured and comprehensive help menu designed to assist users at various levels of familiarity with WPGraphQL. From the beginner level all the way to joining the Discord server, it is a fast and convenient way to get the references you need for the level you are looking for.

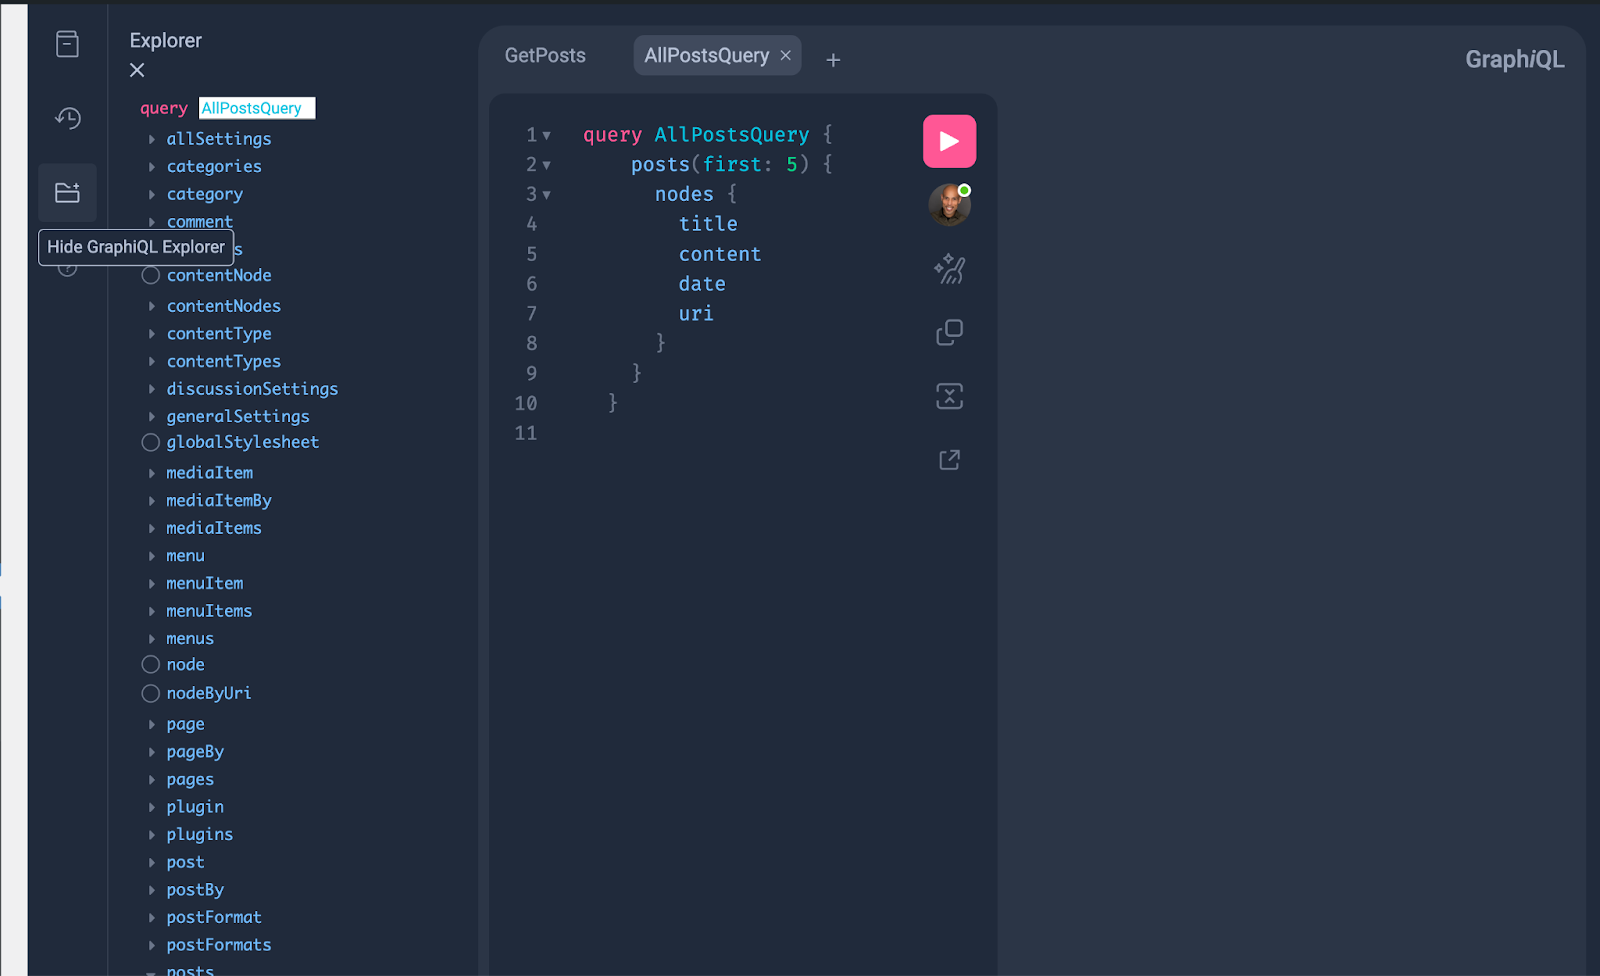
GraphiQL Explorer 🗂️
The file icon, when clicked, reveals your explorer that exposes in a list format the array of WordPress-specific types and fields that can be queried via GraphQL. This gets devs stoked by easily selecting them from this list and building out their queries much easier.

Docs 📘
When clicked, the book icon reveals the docs. This serves as a gateway to the documentation viewer within the IDE. This tool is essential for developers as it provides detailed insights and navigable descriptions of the GraphQL schema used within your WordPress setup.
The documentation provides insights on root types, all schema types, detailed type information, and additional types.

Conclusion
The WPGraphQL IDE plugin is a tool that enhances the developer experience when using and interfacing with its visuals and features. I touched on the plugin’s updated features. I encourage you to download the plugin and get stoked about its new look and capabilities!
There are more changes and updates to come. So as always stay tuned! We also would love to hear your feedback, thoughts, and projects you are doing in headless WordPress so hit us up in our Discord and the new WPGraphQL Discord!