Cookie policies are guidelines and rules that govern how cookies are used on websites to respect user privacy and comply with legal regulations. In the context of headless WordPress, which involves a decoupled architecture where the frontend is separate from the WordPress backend, implementing cookie policies and a popup banner involves a few considerations and steps.
In this article, we will take a look at how to implement cookie policy popups in headless using Next.js 13/14 with two methods. The first one will only use the cookies-next npm package with full customization and WPGraphQL. The second will use a 3rd party service called Cookiebot.
Table of Contents
- Prerequisites
- Legal Compliances and Cookie Usage
- Method 1: WPGraphQL and The Cookies Next NPM Package
- Create the Declaration and Policy Page with WPGraphQL
- Method 2: Client Side Cookie Components with a 3rd Party Service
- Cookiebot
- Cookiebot Scripts in Next.js 14
- Set the Consent Globally in Next.js
- Testing the Cookiebot Consent Banner
- Create the Declaration and Privacy Policy Page
- Conclusion
Prerequisites
To benefit from this article, you will need to have a basic understanding of Next.js 14, headless WordPress, WPGraphQL, Tailwind styles, and 3rd party script services.
If you need a more basic tutorial, please reference my article on the subject matter here.
Before moving forward, we will be looking at the files in this example that I made here in my GitHub repo. If you would rather spin up your own and just copy and paste the code blocks into yours, feel free to do so as well.
Legal Compliances and Cookie Usage
Laws like the EU’s General Data Protection Regulation (GDPR) and the California Consumer Privacy Act (CCPA) have strict rules about cookie usage. They require clear consent from users before any non-essential cookies are stored on their devices.
Websites must inform users about the cookies they use, what data they track, and obtain their consent. This is typically done through a cookie consent banner.
There are essential cookies (necessary for website functionality) and non-essential cookies (like those for analytics and advertising). Only essential cookies can be set without explicit consent.
Let’s take a look at how users can consent with cookies and implement a cookie consent banner on our front-end Next.js 14 application.
Method 1: WPGraphQL and The Cookies Next NPM Package
Let’s take a look at how users can consent with cookies and implement a cookie consent banner on our front-end Next.js 14 application without a 3rd party service.
Client-Side Cookie Components
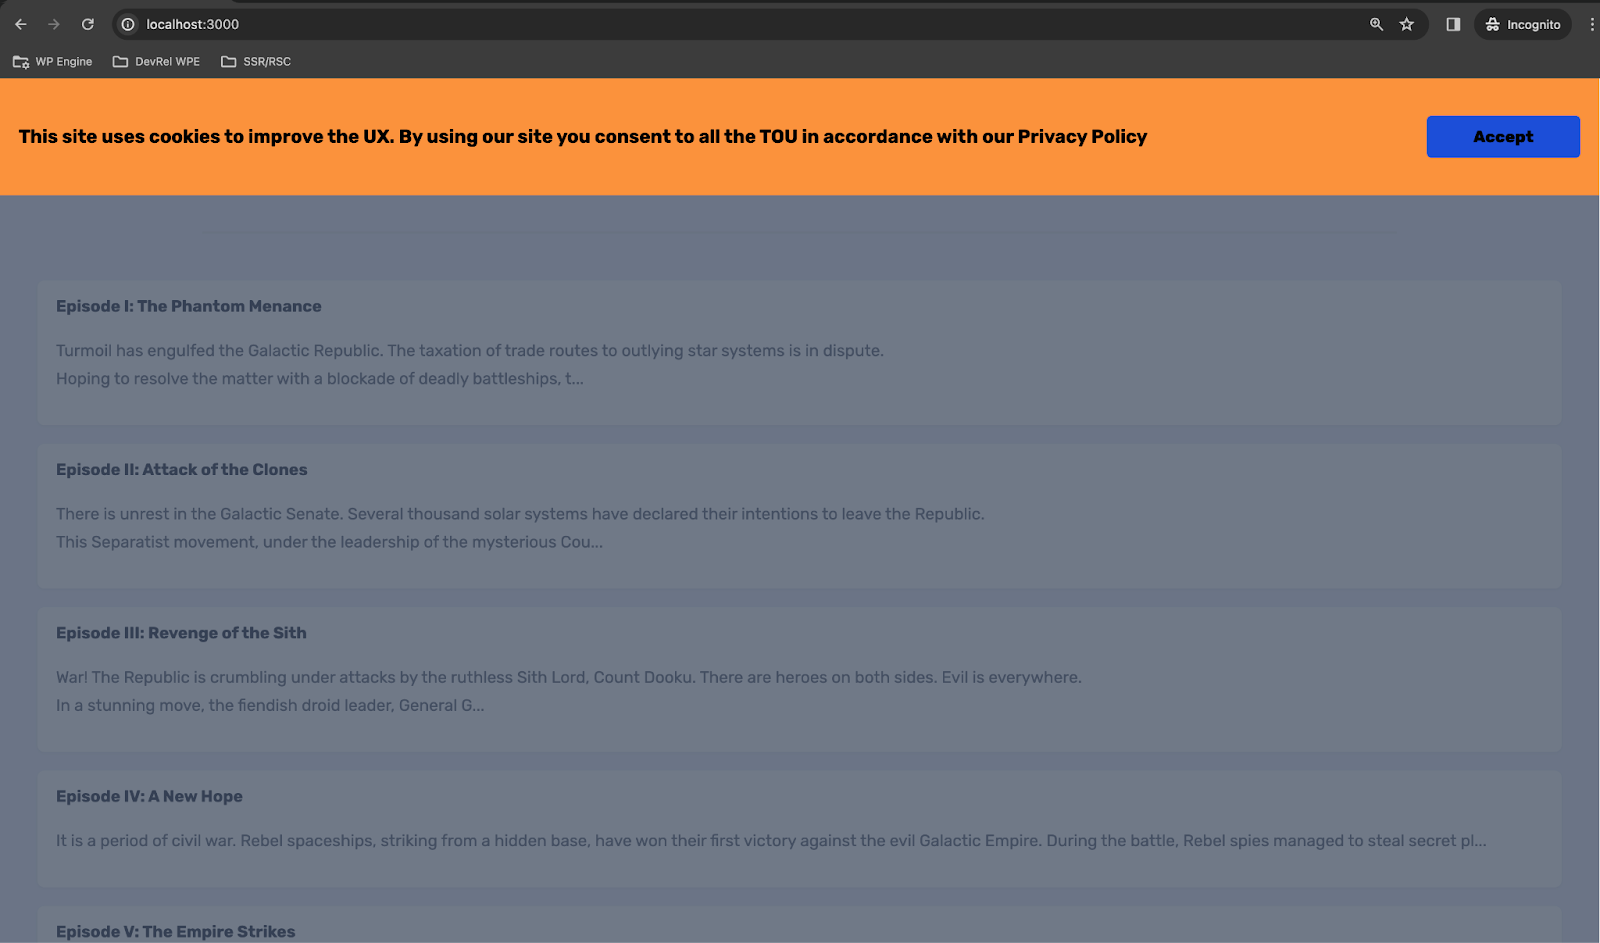
In this section, let’s make a basic cookie consent banner that pops up when a user visits our site for the first time. This banner will block the user from interacting with the site until they accept the terms of usage, privacy policy, etc.
I have a basic headless WordPress site on Next.js 14 already spun up that shows my first 5 blog posts. Let’s take a look at the app/components/CookieConsent.jsx file:
"use client";

import { useState, useEffect } from "react";
import { hasCookie, setCookie } from "cookies-next";
import Link from "next/link";
export default function CookieConsent() {
  const [showConsent, setShowConsent] = useState(true);

  useEffect(() => {
    setShowConsent(hasCookie("localConsent"));
  }, []);

  const acceptCookie = () => {
    setShowConsent(true);
    setCookie("localConsent", "true", {});
  };

  if (showConsent) {
    return null;
  }

  return (
    <div className="fixed inset-0 bg-slate-700 bg-opacity-70 z-[5000]">
      <div className=" fixed-bottom-0 left-0 flex items-center justify-between px-4 py-8 bg-orange-400">
        <span className="text-dark text-base mr-16">
          This site uses cookies to improve the UX. By using our site you
          consent to all the TOU in accordance with our{" "}
          <Link href="/privacy">Privacy Policy</Link>
        </span>
        <button
          className="bg-blue-700 py-2 px-10 rounded "
          onClick={() => acceptCookie()}
        >
          Accept
        </button>
      </div>
    </div>
  );
}

Code language: JavaScript (javascript)
At the top of the file, we declare the “use client” directive since we are going to be doing this on the client side. This is followed by imports that we will use in this file which are the useState and useEffect React hooks to manage state and lifecycle. The hasCookie and setCookie are functions we import from the cookies-next npm package we installed. As well as the Link component for client-side navigation from Next.js.
After the import statements, we define the component and make it the default export of the module. We initialize the state variable showConsent with a default value of true which determines whether the consent banner should be displayed.
Following that, we run the useEffect hook to perform the side effect to check for the presence of a cookie named localConsent when the component mounts. If the cookie is there, it sets showConsent to false which prevents the banner from popping up.
Next, we define a function that will be called when the user clicks the “Accept” button on the banner. It sets showConsent to false to hide the banner and sets a cookie named localConsent to true indicating that consent has been given.
Then, we have an if statement that says if showConsent is true, the component will render nothing and hide the banner.
Lastly, the return statement renders the JSX and the actual banner on the screen with the onClick handler that accepts the cookie when clicked.
To sum this up, the CookieConsent component uses local state and effect hooks to manage the display of a cookie consent banner based on the presence of a consent cookie. It provides a message about cookie usage and allows the user to accept the terms, which should hide the banner and set a cookie to remember the choice.
When you visit localhost:3000 after running the dev server, you should see this banner popup as a new user:
Create the Declaration and Policy Page with WPGraphQL
WPGraphQL
An extendable GraphQL
schema & API for WordPress.
Now, let’s get stoked and take a look at using WPGraphQL to get the Policy Page data from WordPress into Next.js. Go to app/pricvacy-policywp/page.jsx:
import { Suspense } from "react";
import Loading from "../loading";

async function getPage() {
  const query = `
    query GetPrivacyPolicyPage {
      page(id: "/privacy-policy/", idType: URI) {
        title
        content
      }
    }
  `;

  const res = await fetch(
    `${process.env.NEXT_PUBLIC_GRAPHQL_ENDPOINT}?query=${encodeURIComponent(
      query
    )}`,
    {
      method: "GET",
      headers: {
        "Content-Type": "application/json",
      },
      cache: "no-store",
    }
  );

  const responseBody = await res.json();

  if (responseBody && responseBody.data && responseBody.data.page) {
    return responseBody.data.page;
  } else {
    throw new Error("Failed to fetch the privacy policy page");
  }
}

export default async function PrivacyPolicy() {
  const page = await getPage();

  return (
    <main>
      <nav>
        <h1>{page.title}</h1>
      </nav>

      <Suspense fallback={<Loading />}>
        <div className="card">
          <p dangerouslySetInnerHTML={{ __html: page.content }} />
        </div>
      </Suspense>
    </main>
  );
}


Code language: JavaScript (javascript)
We have a server component with our imports Suspense and Loading. Suspense comes from React and allows other components to wait for something before rendering. It handles the loading state of async operations like data fetching. Loading is our custom component that serves as the placeholder to let the user know an operation is in progress.
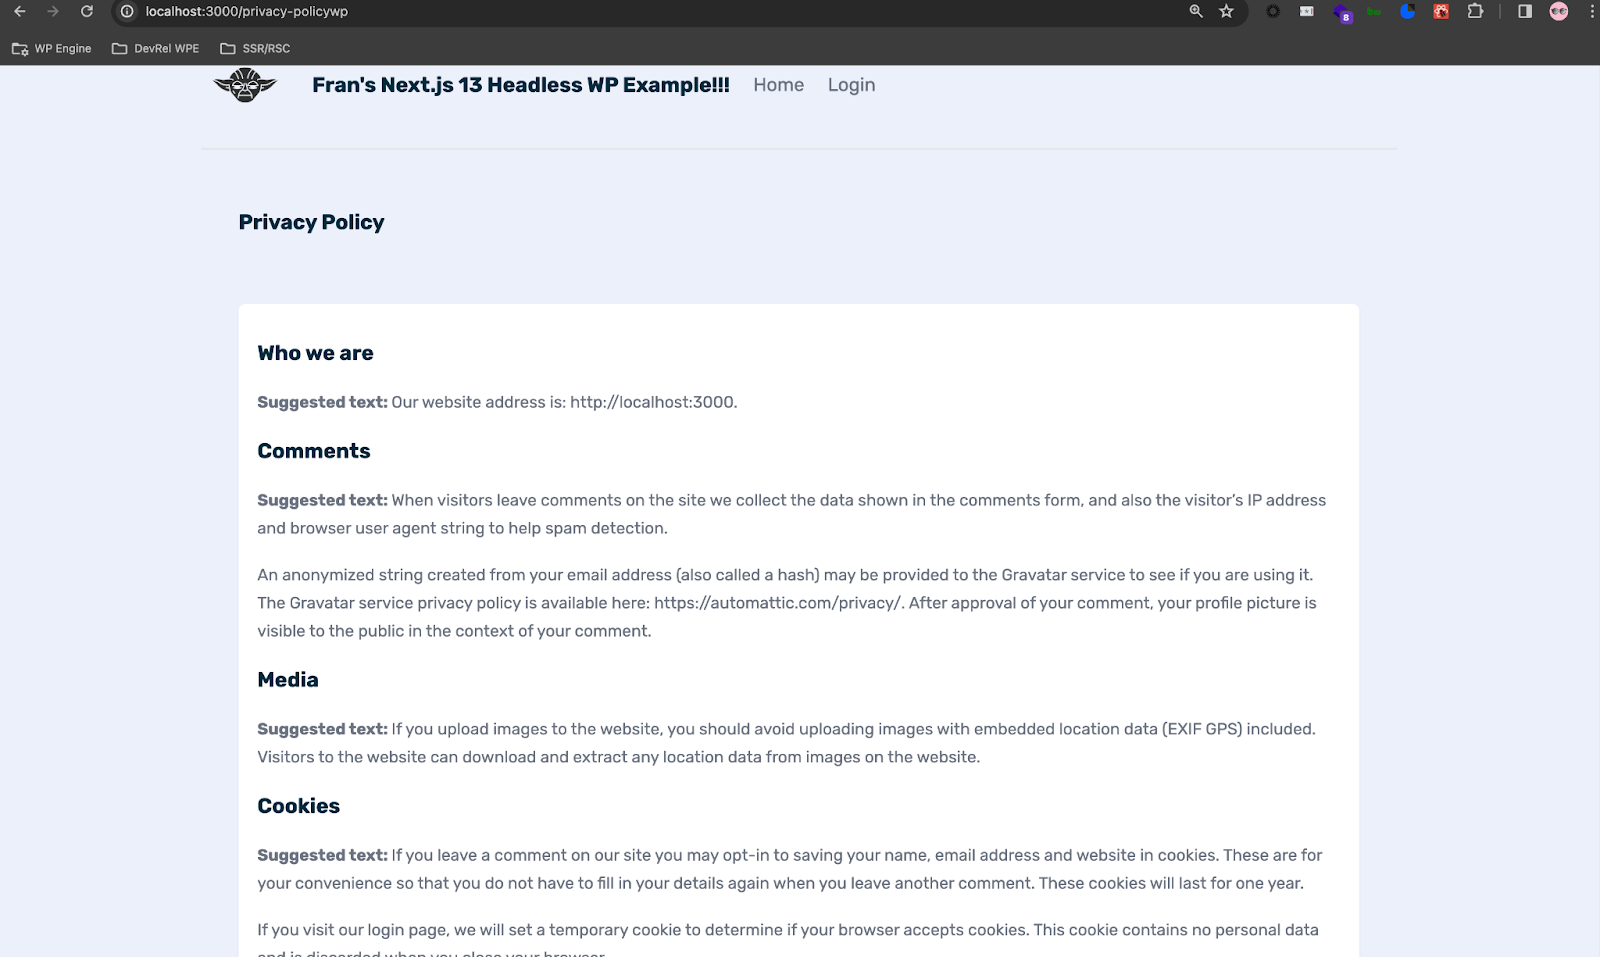
Following that, we have an async function that defines the WPGraphQL query to fetch the title and content of a page with the URI “/privacy-policy/” hard coded since this is the only page we want to route to.
We use the fetch API to make a GET request to the WPGraphQL endpoint in our environment variable. The query is URL encoded to ensure it’s transmitted correctly over HTTP.
After the request, the JSON is parsed and checks if the data is present.
Then we have an async component called getPage that fetches the data by calling getPage when rendered with some basic error handling to throw an error if the data is not present.
Then we return it with the JSX and its format on the page. You should see this when you visit localhost:3000/privacy-policywp after running the dev server:
Things to Consider When Implementing Without a 3rd Party Service
Choosing this method does give you full control and customization on creating your banner and policy page with no cost for a 3rd party service. However, you do have a bit more complexity in keeping up with compliance, testing the functionality, and no auto cookie scanning.
Method 2: Client-Side Cookie Components with a 3rd Party Service
In this section, let’s make a cookie consent banner in our Next.js 14 app and offload it to a 3rd party service called Cookiebot.
Cookiebot
Cookiebot is a 3rd party service that supports website compliance with privacy laws like the GDPR, ePR, and CCPA. It offers an automated platform that can handle user consent, cookie monitoring, and cookie control. Cookiebot enhances websites by providing a consent banner and tracking technology that informs visitors about the use of cookies, secures their consent, and honors their privacy preferences.
By integrating with our headless website, it automatically scans and tracks all cookies and similar tracking technologies in use, providing detailed reports and ensuring that the website’s use of such technologies remains transparent and compliant with legislation.
It also helps in maintaining an updated cookie policy and declaration, automatically reflecting any changes in the use of cookies on the website.
When using this approach, a few factors to consider are the cost of the service, limited customization options, and integration complexity.
Cookiebot Scripts in Next.js 14
Let’s take a look at the files and scripts we will need to make this work in our application. (Just a note, I have already created a free-tier Cookiebot account. If you are following along step-by-step, please do so before moving forward)
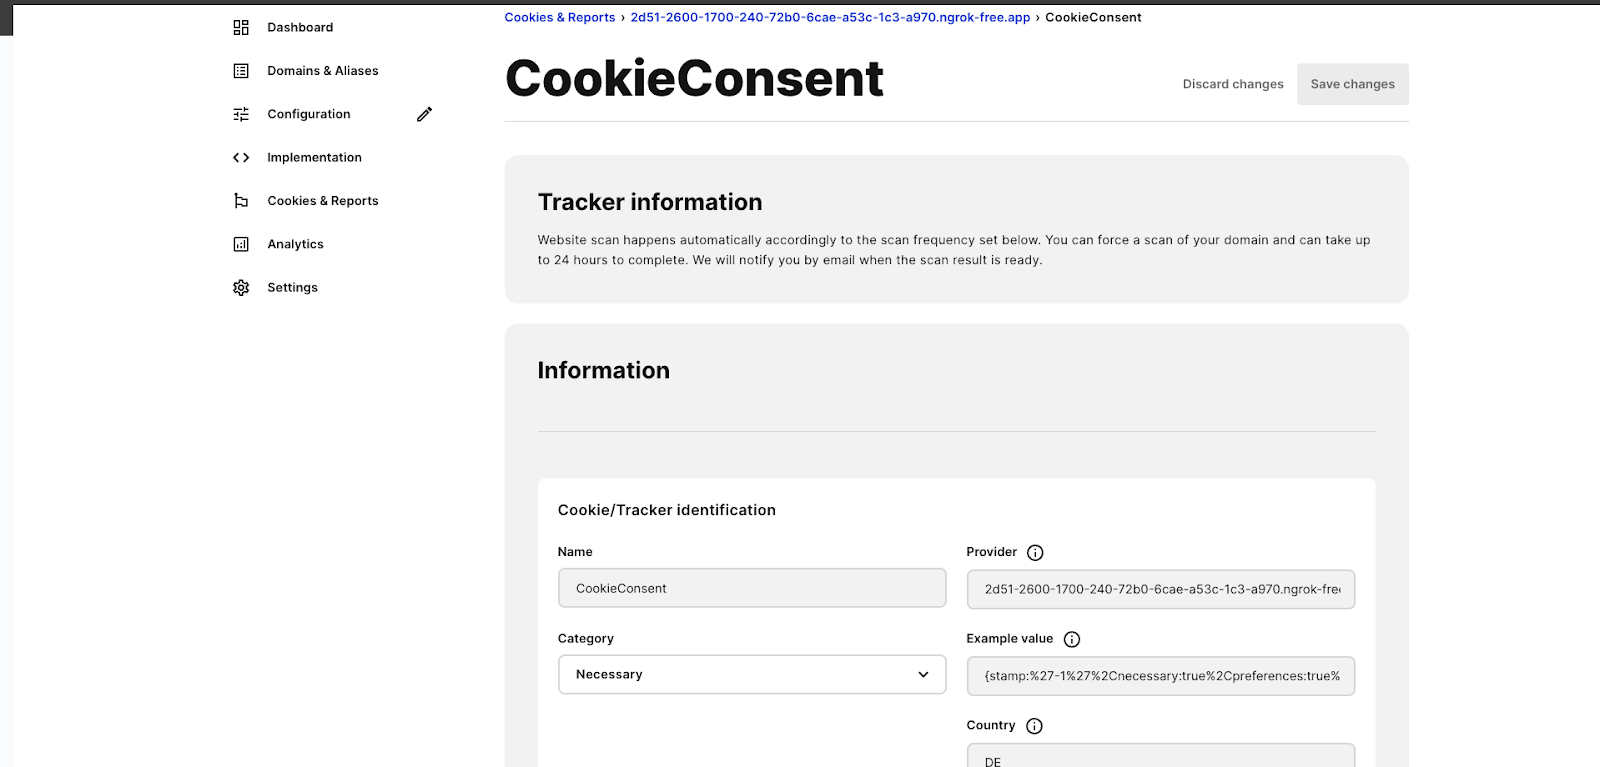
In your Cookiebot Admin UI, go to Dashboard > Configuration and you should see this screen:
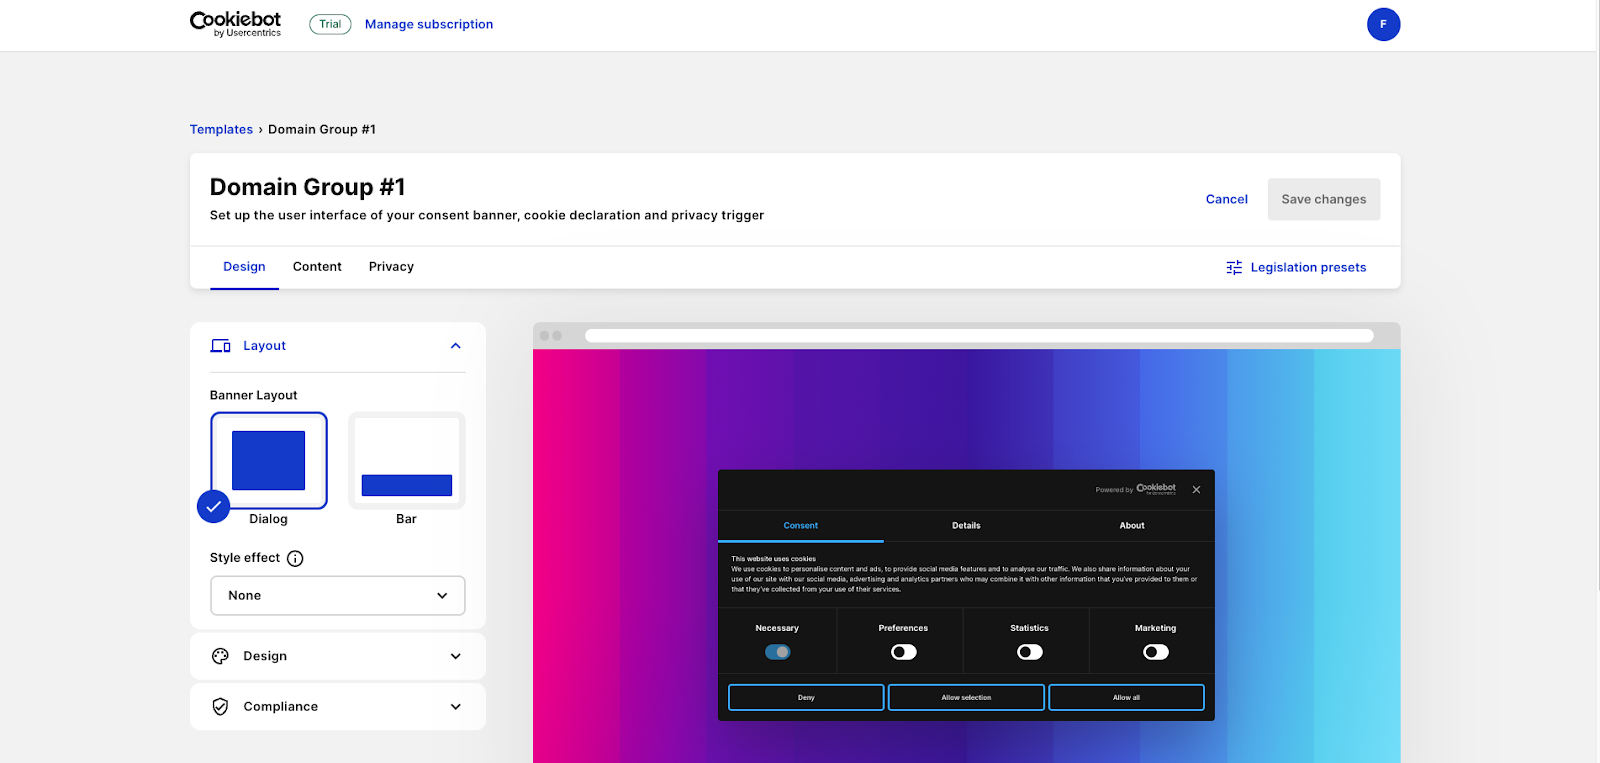
This allows you to set up the UI of the banner. We will use the default setting to show on our Next.js front end in this example.
The next page you will need to navigate to is Dashboard > Script Embeds. You should see this page:
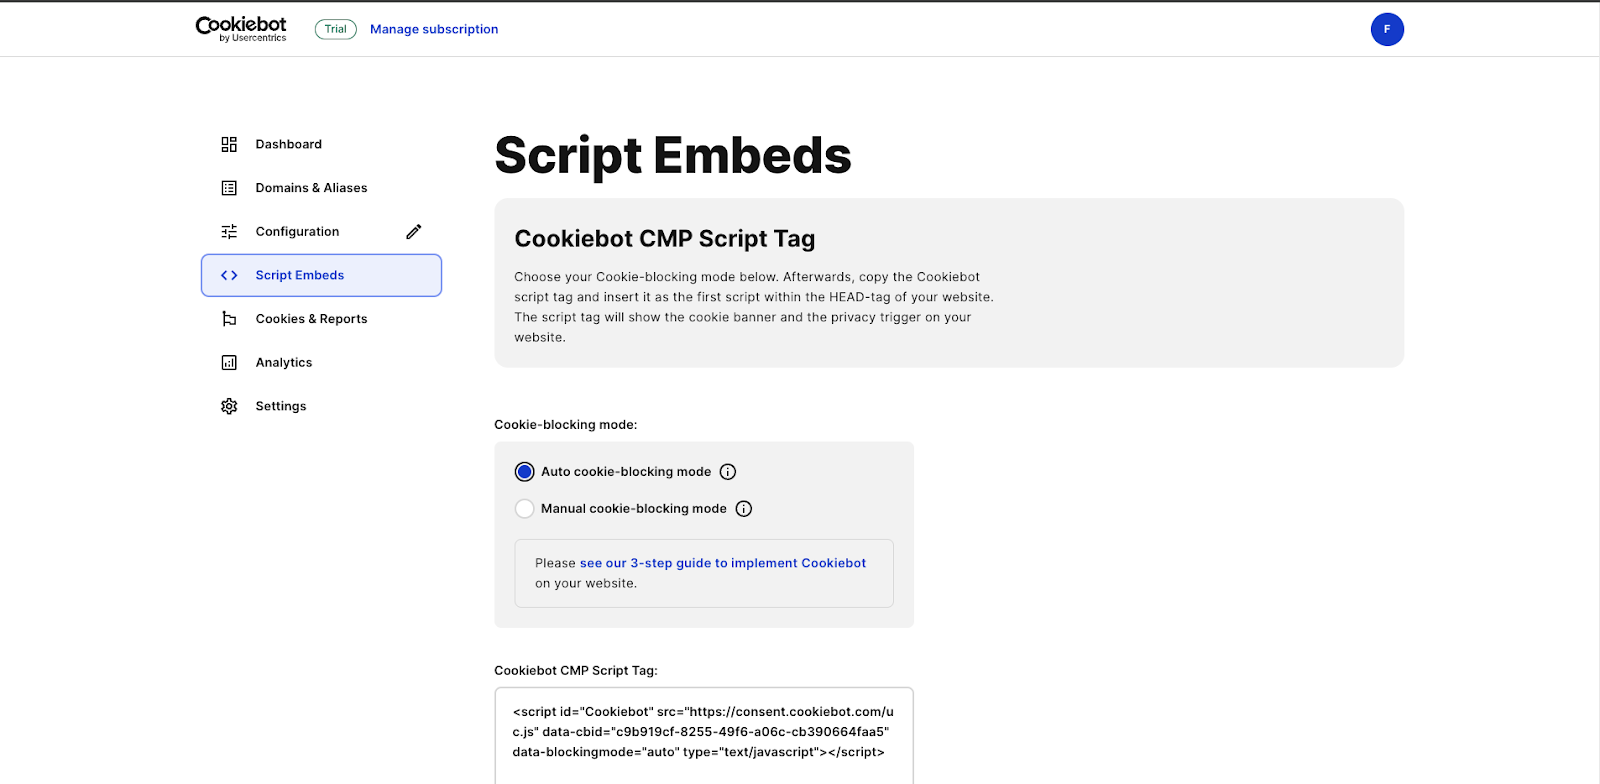
We will need both script tags to embed in our Next.js 14 components.
Now, let’s take a look at our first component that dynamically inserts our Cookiebot script into our site at app/components/CookieBotConsent.jsx:
"use client";

import { useEffect } from "react";

const CookieConsent = () => {
  useEffect(() => {
    const cmpScript = document.createElement("script");
    cmpScript.id = "Cookiebot";
    cmpScript.src = "https://consent.cookiebot.com/uc.js";
    cmpScript.setAttribute("data-cbid", "your-cookiebot-id");
    cmpScript.setAttribute("type", "text/javascript");
    cmpScript.setAttribute("async", "true");
    cmpScript.setAttribute("data-blockingmode", "auto");
    document.head.appendChild(cmpScript);

    return () => {
      document.head.removeChild(cmpScript);
    };
  }, []);

  return null;
};

export default CookieConsent;

Code language: JavaScript (javascript)
This file is very similar to the first section’s component as we are going to use the client-side directive for this as well as the useEffect hook from React.
We use the useEffect hook to execute side effects in the component and the empty dependency array ensures that the effect runs only once after the initial render.
The focus in this component is on the script elements. Inside our useEffect hook, we have a variable that creates a new script element called cmpScript. This is where we load the Cookiebot script.
Then we set all the attributes. I won’t go over every attribute. The main ones I will focus on are:
cmpScript.src = "https://consent.cookiebot.com/uc.js"; – This specifies the source of the script, pointing to the Cookiebot script.
cmpScript.setAttribute("data-cbid", "your-cookiebot-id"); – This sets your specific Cookiebot ID. Replace "your-cookiebot-id" with your actual Cookiebot ID.
cmpScript.setAttribute("data-blockingmode", "auto"); – This sets the blocking mode for scripts to "auto", allowing Cookiebot to manage script blocking based on user consent.
Following the running of those scripts, we append the element to the head of the document which injects the Cookiebot script into the page.
Then we run a cleanup function that removes the script element from the document head when the component unmounts. This will prevent any unintended side effects.
We are not rendering any JSX here as we are using Cookiebot to show a UI, so we return null.
Set the Consent Globally in Next.js
The next step is to add the CookieBotConsent component to our global layout so that it appears on all pages of our site. In order to do this, we go to app/layout.jsx:
import "./globals.css";
import { Rubik } from "next/font/google";
import CookieBotConsent from "./components/CookieBotConsent";
import Navbar from "./components/Navbar";

const rubik = Rubik({ subsets: ["latin"] });

export const metadata = {
  title: "Headless WordPress Example",
  description: "Generated by Franly the Manly",
};

export default function RootLayout({ children }) {
  return (
    <html lang="en">
      <body className={rubik.className}>
        <Navbar />
        {children}
        <CookieBotConsent />
        <footer
          style={{ textAlign: "center", marginTop: "20px", fontSize: "14px" }}
        >
          © 2024 Fran Agulto Dev Stoke
        </footer>
      </body>
    </html>
  );
}


Code language: JavaScript (javascript)
The CookiebotConsent component is added under the Navbar, right before the footer. Now, this will appear on all our pages in the entire application.
Testing the Cookiebot Consent Banner
To effectively test the Cookiebot consent banner, we have a few options. However, a key requirement is a publicly accessible domain, as well as ensuring cross-domain consistency within a live production environment. It’s important to note that using localhost:3000 from the Next.js development server is not a viable option for this testing.
The 3 ways you can test the banner are:
- Get a free Atlas sandbox account or any host, spin up a live site with a URL
- Use the preview link feature off Atlas on a feature branch
- Use a service like ngrok to tunnel a public domain to the localhost:3000 port
(Please refer to the documentation if you choose the ngrok setup)
Headless
Platform
The all-in-one platform for
radically fast headless sites.
Once you have chosen your method, go to your Cookiebot admin UI and navigate to Dashboard > Domains and Aliases. You should see this page and once you click the button to add a domain, you are connected.
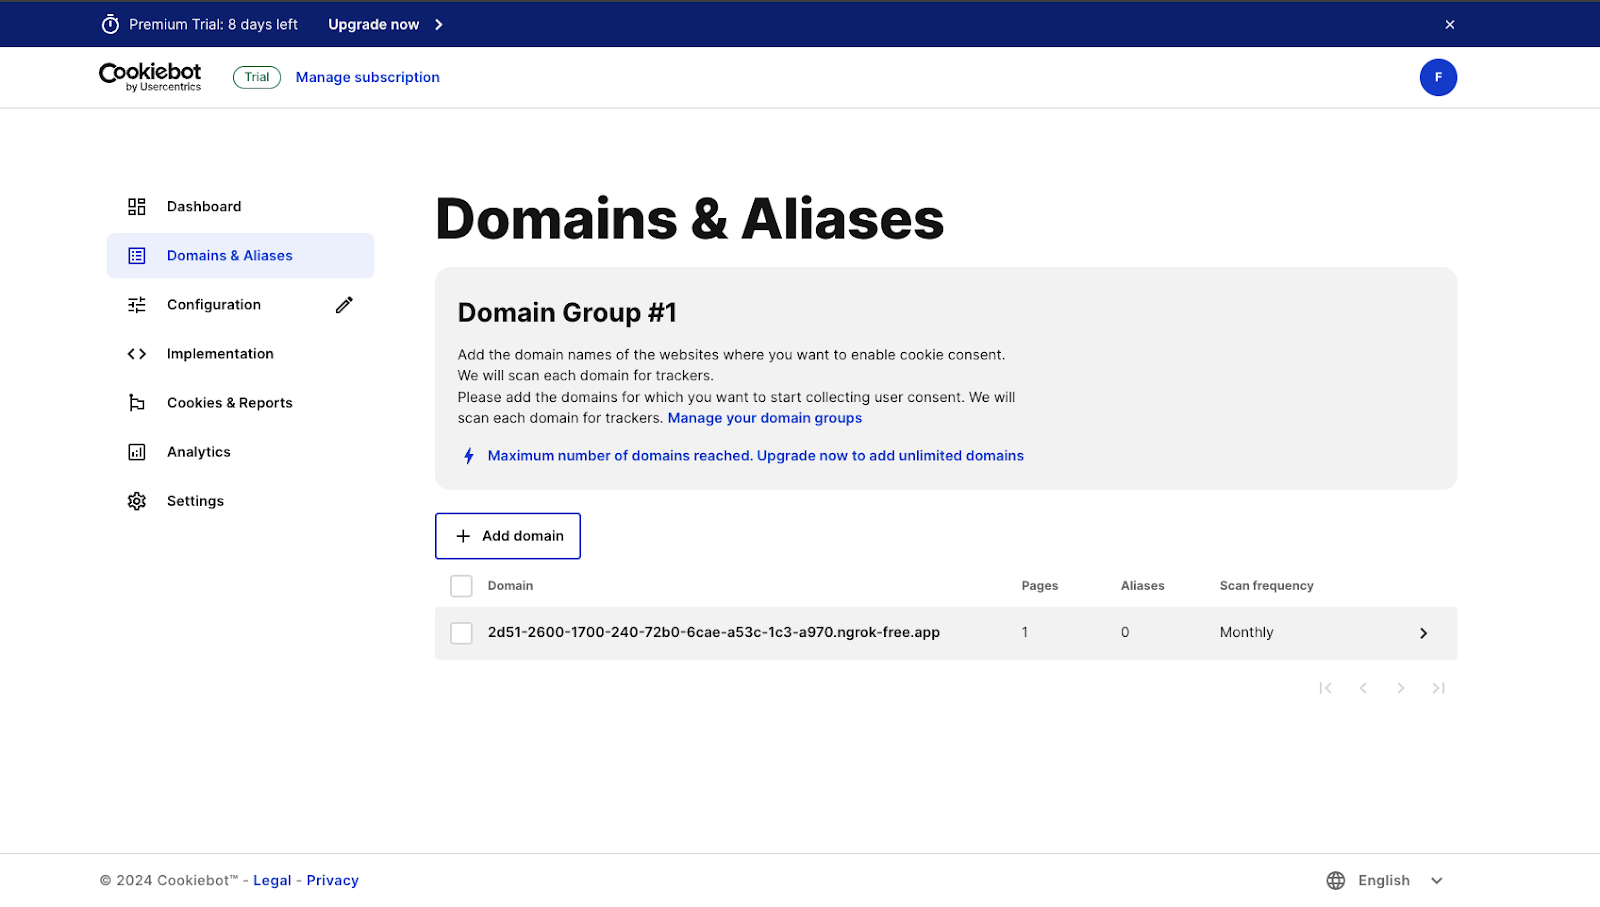
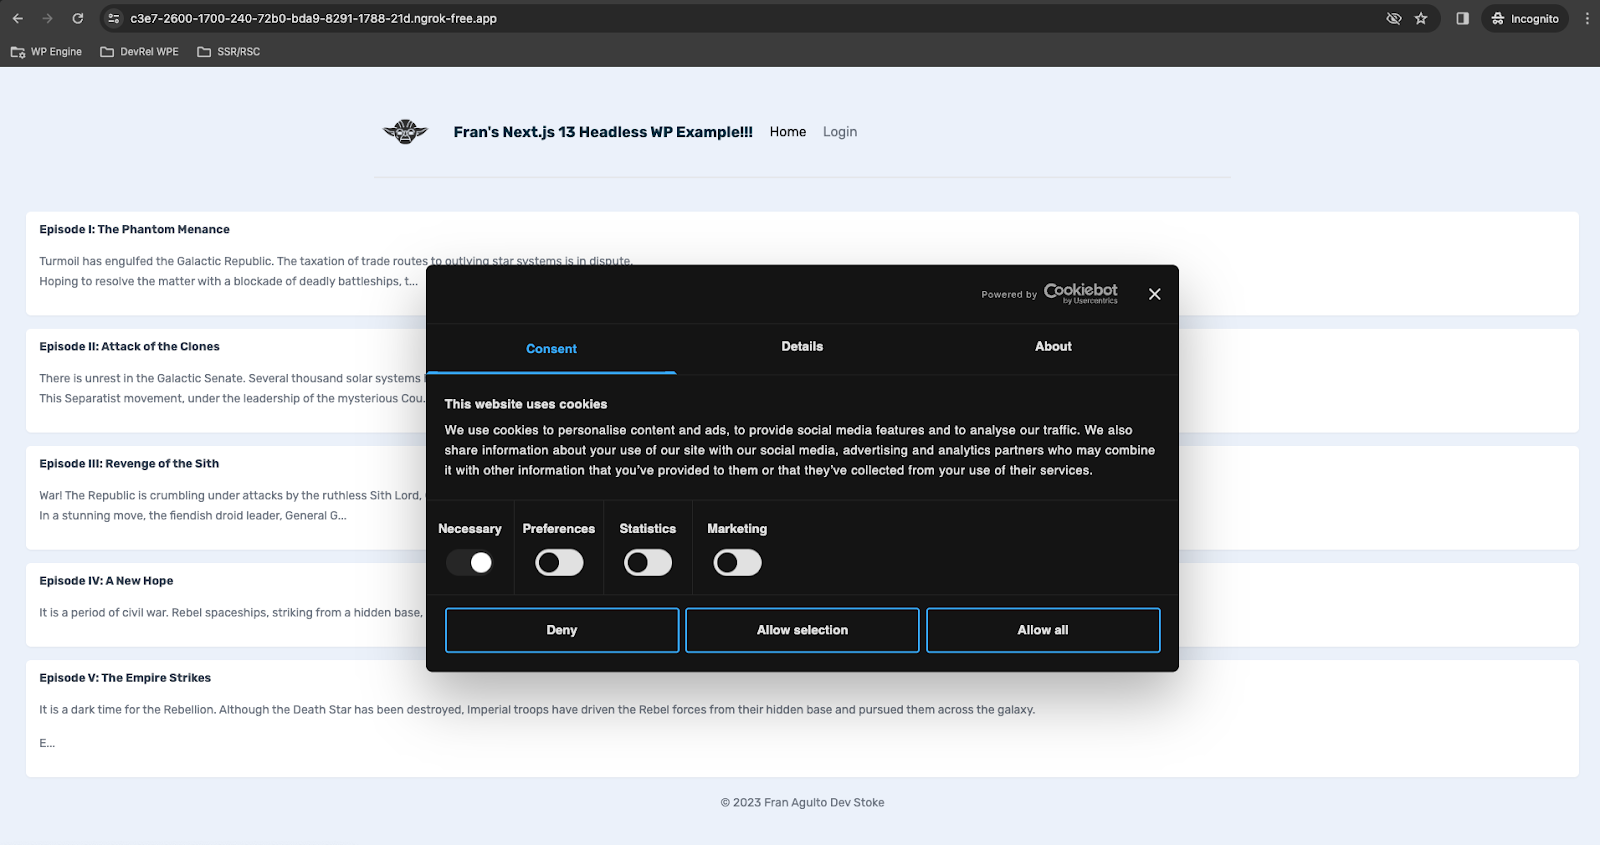
We now have a publicly accessible URL that Cookiebot can track and if I visit the site for the first time, the Cookie Consent banner pops up like so:
Create the Declaration and Privacy Policy Page
The next component we will look at is a page that renders the Privacy Policy from Cookiebot. Navigate to app/components/CookieBotDeclaration.jsx:
"use client";
import { useEffect } from "react";

const CookieDeclaration = () => {
  useEffect(() => {
    const cookieDeclarationScript = document.createElement("script");
    cookieDeclarationScript.id = "CookieDeclaration";
    cookieDeclarationScript.src =
      "https://consent.cookiebot.com/your-cookiebot-id/cd.js";
    cookieDeclarationScript.setAttribute("type", "text/javascript");
    cookieDeclarationScript.setAttribute("async", "true");
    document.body.appendChild(cookieDeclarationScript);

    return () => {
      document.body.removeChild(cookieDeclarationScript);
    };
  }, []);

  return null; // The script itself handles rendering the cookie declaration
};

export default CookieDeclaration;

Code language: JavaScript (javascript)
I am not going to go over the entire code block because this is identical to the component we looked at that ran the CookieBotConsent.jsx file. The difference is that we are just running the script to render the Privacy Policy and Declaration page that comes from it.
Lastly, we need to insert the component into our privacy-policy route segment folder which has the page.jsx file like so:
import CookieBotDeclaration from "../components/CookieBotDeclaration";
import React from "react";
const PrivacyPolicyPage = () => {
return (
<div>
<h1>Privacy Policy</h1>
<CookieBotDeclaration />
</div>
);
};
export default PrivacyPolicyPage;
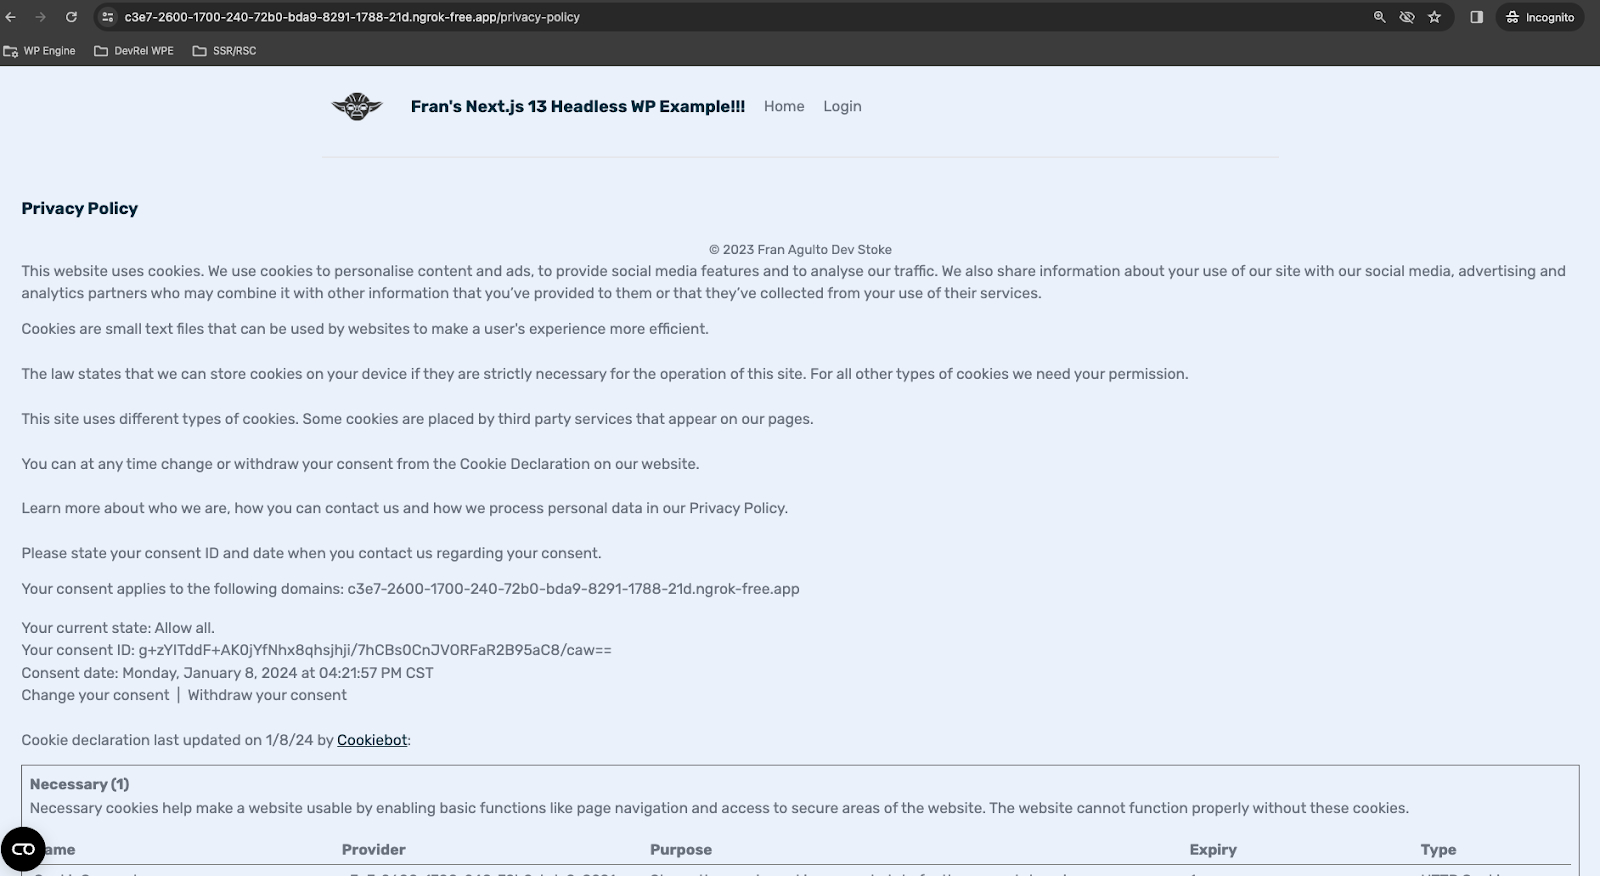
Code language: JavaScript (javascript)You should see this once you visit whatever your URL is /privacy-policy
Conclusion
Cookie Policy Popups are an important part of websites for legal compliance and user transparency/trust. I hope you have a better understanding of how this works in headless WordPress, focusing on the frontend.
As always, stoked to hear your feedback and any questions you might have on headless WordPress! Hit us up in our Discord!