In this short article, you’ll learn how to implement post and content previews in a Nuxt 3 application using the Faust.js WordPress plugin. All of the code for this article is located on the feature/previews branch of the Nuxt WordPress starter I created for a more foundational tutorial on Nuxt 3 and headless WordPress. If you’re new to Nuxt 3 and headless WordPress, I’d recommend starting with that tutorial.
What is Faust.js and What Does It Do?
The Faust.js framework is a JavaScript framework that makes building headless WordPress simple and easy. It’s based on Next.js but contains two parts, a collection of NPM packages that power the JavaScript frontend and a WordPress plugin that provides a number of helpful backend features.
Faust.js
The JavaScript framework
specifically for WordPress.
Even though Faust.js is tightly coupled with React and Next.js, developers can use the plugin and reimplement patterns from Faust.js in other frameworks. That is essentially what we’ll do in this tutorial by copying Faust’s method of content previews in a Nuxt 3 app.
Installing and Configuring the Faust WordPress Plugin
First, you will need to install and activate the Faust.js WordPress plugin from the plugin repository. This creates a menu option in Settings > Faust that gives you access to the Faust settings menu.
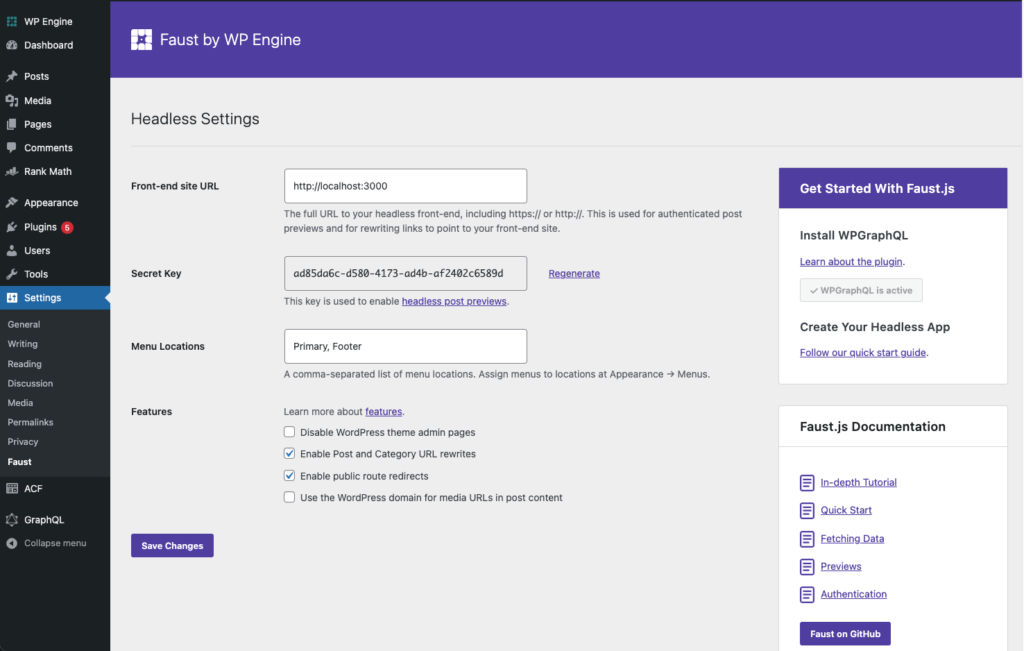
The official documentation outlines what all of these settings do, but for the purposes of this tutorial, you will need to set the Front-end site URL to http://localhost:3000 and take note of the Secret Key field.
The Faust WordPress plugin helps developers with some common tasks relevant to headless CMS usage by providing options for disabling theme settings and redirecting traffic to your front-end URL. But it also rewrites links inside of the WP Admin area to point to your decoupled front end.
Once we have these basic settings configured, you can start implementing the preview features inside of your Nuxt 3 app.
Understanding the Faust.js Auth Flow
Since preview data is privileged in WordPress, meaning public users can’t access this data, we need to implement some mechanism to authenticate our Nuxt.js queries with WordPress to ensure that there is a logged-in user and that the user has permission to access the requested data.
A typical authentication flow in Faust happens in five steps.
TL;DR: Authentication in Faust.js can happen in five main steps:
Faust.js Docs, How to Handle Authentication
- User initiates request to authenticate data.
- Faust.js facilitates the request for an authorization code from the FaustWP plugin. This code is a short-lived token used to request a refresh and access token.
- Faust.js facilitates a refresh and access token request from the FaustWP plugin using the authorization code.
- Faust.js stores the refresh token in a secure, HTTP-only cookie. The token refresh requests a new access token when the current one expires
- Faust.js stores the access token in memory that you can use in subsequent authenticated requests.
If you look at how the Faust.js docs describe the authentication flow, it looks a lot like an OAuth2-type flow. In the following steps, you’ll see how to implement these steps in Nuxt.js to request preview data. For this example, you will implement the Redirect Strategy outlined in the Faust.js docs, but with a few meaningful differences.
Implementing Faust Auth in Nuxt.js
As you get started with the following steps, it’s worth noting that since the Faust.js plugin is really just the provider of an authentication strategy (similar to OAuth), it’s up to you as the developer to figure out how best that strategy fits into your use case. The following steps outline how to authenticate previews initiated from the WP Admin area, but it’s possible to use this same auth strategy in more complex ways.
Storing the Faust Secret Key
The first thing you need to do is provide a copy of the Faust Secret Key to your application. To do this, create an .env file and add an entry for FAUST_SECRET_KEY. The value of this variable should be taken from your Faust plugin screen in WordPress. To make this environment available to Nuxt only on the server, you will need to add a private runtime config variable in your nuxt.config.ts file.
// https://nuxt.com/docs/api/configuration/nuxt-config
export default defineNuxtConfig({
    modules: [
        '@nuxt/devtools',
        '@nuxtjs/tailwindcss'
    ],
    runtimeConfig: {
        public: {
            wordpressUrl: 'https://acfheadless.wpengine.com',
            frontendSiteUrl: 'http://localhost:3000'
        },
        private: {
          FAUST_SECRET_KEY: process.env.FAUST_SECRET_KEY
        }
    }
})
Code language: TypeScript (typescript)
Since the value of FAUST_SECRET_KEY is used to grant a user access to your site’s API, it’s very important that this value remains a secret. Nuxt offers the ability to create private runtime config values that are only exposed on the server, but I also considered creating my own API endpoints that apply the secret key to certain requests. That is actually more in line with how the Faust Next.js application functions by using an API handler.
Respond to Preview Requests in Nuxt
After your application has access to the FAUST_SECRET_KEY variable, you’ll need to configure your Nuxt site to respond to the preview routes that Faust.js generates as preview links.
With your Front-end site URL value set, Faust will rewrite all of the preview links to a path that looks like this:
http://localhost:3000/?p=225&preview=true&previewPathname=%2F%3Fp%3D225&typeName=Post
Code language: JavaScript (javascript)
Basically, you’ll need to listen for this path and react to it, kicking off the authentication flow with the Faust plugin. To do this, you can create a small piece of global middleware to react to the preview=true query param.
All Nuxt middleware needs to be in the middleware directory, and you can create a file called preview.global.ts to run the middleware function globally. Inside that file you can create one short function that looks like this:
export default  defineNuxtRouteMiddleware(async (to, from) => {
    if (to.query.preview === 'true') {
        const config = useRuntimeConfig();
        const previewId = to.query.p;
        return navigateTo(`${config.public.wordpressUrl}/generate?redirect_uri=${config.public.frontendSiteUrl}/preview?preview_id=${previewId}`, {external: true})
    }
  })
Code language: TypeScript (typescript)
This function listens every time you load or change a route, but only runs code if the route contains the preview=true query parameter. Inside the conditional, the function loads the config values and extracts the previewId of the content item in WordPress.
Getting the Authorization Code
Using the navigateTo function, you kick off the first leg of the authentication flow by redirecting to the /generate endpoint that the Faust plugin creates on your WordPress site. This endpoint also requires a redirect_url query param so that Faust can send the user back to the Nuxt application after the flow. In this example, that part looks like this:
redirect_uri=${config.public.frontendSiteUrl}/preview?preview_id=${previewId}
Code language: PHP (php)
This endpoint checks if there is a logged-in user in WordPress and passes you to the WordPress login screen if you’re not logged in. In either case, after successfully authenticating, you should be redirected back to http://localhost:3000/preview with two query parameters in the URL. The code query param contains an authorization code you’ll exchange for an access token in the next step, and previewId contains the database id for the content item that genereated the preview request.
Generating an Access Token
In the next step of this flow, the preview.vue template will do most of the heavy lifting. If your auth flow has been successful, you should wind up at this route with both code and preview_id query parameters in the URL. The entire script block for this route looks like this:
<script setup>
 import {getTokensFromCode, getTokensFromRefreshToken} from '../faust';
 const route = useRoute();
 const config = useRuntimeConfig();
 const {code, preview_id: previewId} = route.query;

 let tokens;

 const cookie = useCookie(`${config.public.frontendSiteUrl}-rt`, {httpOnly: true, maxAge: 300});
 if (cookie.value){
    const refreshToken = cookie.value;
    tokens = await getTokensFromRefreshToken(refreshToken);
    cookie.value = tokens.refreshToken

 } else {
    tokens = await getTokensFromCode(code);
    cookie.value = tokens.refreshToken;
 }

//  use post here so we don't cache any null responses based on invalid credential
 const {data, pending, refresh, error} = await useFetch(`${config.public.wordpressUrl}/graphql`, {
    method: 'post',
    body: JSON.stringify({
        query: `
        query DraftQuery($id: ID!) {
            post(id: $id, idType: DATABASE_ID, asPreview: true) {
                id
                title
                content
                date
            }
        }
        `,
        variables: {
            id: previewId
        }
    }),
    headers: {
        Authorization: `Bearer ${tokens.accessToken}`
    },
    transform(data){
        return data.data.post
    }
 })


 </script>
Code language: TypeScript (typescript)
In the first few lines, you import a few utilities from the faust directory and load runtime config values and the Nuxt router. You can extract the values for code and preview_id from the current route’s query params, and then declare a variable called tokens to store your access and refresh tokens.
The next section of code is where those tokens are actually generated. Using the useCookie composable from Nuxt, you can create a cookie to store the value of refreshToken as a way of extending your authenticated session. If the cookie already has a value, then you can use the value of the refresh token to request a new access token, overwriting the value of the refresh token stored in the cookie with a new value.
If this cookie hasn’t been set yet, then you use the code passed from the previous step to request an access token. Using the newly generated refreshToken value, you can initialize the cookie.
Fetching the Access Token in Detail
Now that you have an understanding of how the preview route handles the exchange of a code or refreshToken for an access token, let’s explode that interaction and examine the getTokenFromCode and getTokenFromRefreshToken utilities.
The code in faust/index.ts looks like this:
type Tokens = {
    accessToken: string;
    refreshToken: string;
    accessTokenExpiration: number;
    refreshTokenExpiration: number;

}

export async function getTokensFromCode(code:string): Promise<Tokens>{

    const config = useRuntimeConfig();
    const apiClientSecret = config.private.FAUST_SECRET_KEY;
    if (!apiClientSecret) {
        throw new Error(
          'The apiClientSecret must be specified to use the auth middleware',
        );
      }

      let response = await fetch(`https://acfheadless.wpengine.com/?rest_route=/faustwp/v1/authorize`, {
        headers: {
          'Content-Type': 'application/json',
          'x-faustwp-secret': apiClientSecret,
        },
        method: 'POST',
        body: JSON.stringify({
          code
        }),
      });
    const tokens: Tokens = await response.json();
    return tokens;
}

export async function getTokensFromRefreshToken(refreshToken:string): Promise<Tokens>{

    const config = useRuntimeConfig();
    const apiClientSecret = config.private.FAUST_SECRET_KEY;
    if (!apiClientSecret) {
        throw new Error(
          'The apiClientSecret must be specified to use the auth middleware',
        );
      }

      let response = await fetch(`https://acfheadless.wpengine.com/?rest_route=/faustwp/v1/authorize`, {
        headers: {
          'Content-Type': 'application/json',
          'x-faustwp-secret': apiClientSecret,
        },
        method: 'POST',
        body: JSON.stringify({
            refreshToken
        }),
      });
    const tokens: Tokens = await response.json();
    return tokens;
}
Code language: TypeScript (typescript)
Both of these functions are almost identical in that they generate POST requests to the /?rest_route=/faustwp/v1/authorize endpoint on your WordPress site that Faust creates. This endpoint is what ultimately grants your application access tokens to request privileged data.
In addition to sending the code or refreshToken in the body of your request, you need to pass the FAUST_SECRET_KEY in a ‘x-faustwp-secret' HTTP header. On the backend, Faust will use both of those values to determine whether the user and application should be granted tokens. The response from this endpoint is shaped like the Tokens type contained at the top of this file.
Requesting Preview Data from WPGraphQL
Now that you have an actual access token, you can use that token to make an authenticated request to WPGraphQL:
//  use post here so we don't cache any null responses based on invalid credential
 const {data, pending, refresh, error} = await useFetch(`${config.public.wordpressUrl}/graphql`, {
    method: 'post',
    body: JSON.stringify({
        query: `
        query DraftQuery($id: ID!) {
            post(id: $id, idType: DATABASE_ID, asPreview: true) {
                id
                title
                content
                date
            }
        }
        `,
        variables: {
            id: previewId
        }
    }),
    headers: {
        Authorization: `Bearer ${tokens.accessToken}`
    },
    transform(data){
        return data.data.post
    }
 })
Code language: TypeScript (typescript)
In the example above, you can see that this query uses the asPreview argument set to true when fetching data for this post using the database ID. However, to authenticate this request, you need to add an Authorization header to your HTTP request using the Bearer authentication scheme: Bearer YourSecureTokenHere. This auth scheme is used primarily with token-based auth mechanisms.
If you send this same request without the Authorization header, the value of post will be nullinstead of throwing an unauthorized error. This is important to note because it is a behavior of GraphQL. Since our query documents can contain multiple queries across resources, some of which may be public and some private, WPGraphQL does not reject queries outright if the endpoint is public. Instead, it will not resolve data for which the current user does not have permission.
In this case, without the Authorization header to vouch for your identity, WPGraphQL treats your query like a public user and doesn’t resolve data for the preview since public users can’t view preview data.
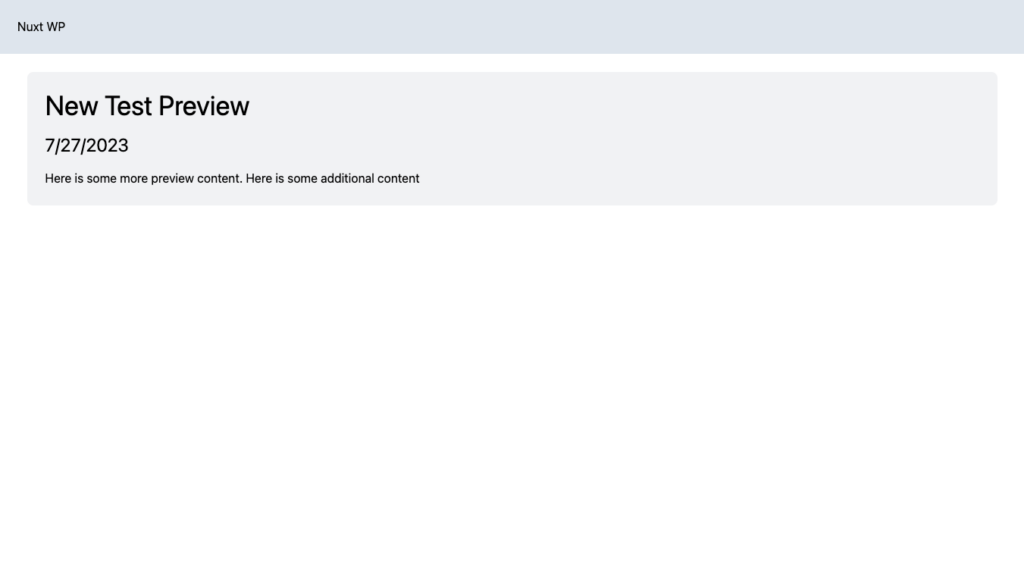
If everything works as it should, your post’s preview data should render inside of the preview.vue template.
Wrapping Up
Although this post dives into the weeds of authentication, it was made to intentionally be as simple as possible. There are many use cases this short tutorial does not address, like previewing different templates or layouts based on content type, but hopefully, you can use this auth strategy to satisfy any more complex needs you have in your own work.
Even if you use other frameworks like Nuxt.js, the Faust Next.js codebase is a great place to learn about patterns that can be applied to other frameworks.
Faust.js
The JavaScript framework
specifically for WordPress.
If you are looking for a place to host your next headless WordPress project, be sure to get a free sandbox account on our Atlas Platform. The platform combines Node.js hosting, WordPress hosting, and a CDN layer into one convenient dashboard to manage your headless sites.
Headless
Platform
The all-in-one platform for
radically fast headless sites.