The Buttons block in the WordPress editor helps prompt visitors to take action. For example, you can use it to link to other pages on your website, an external page, or your social media accounts.
They are great for emphasizing the most important thing you want visitors to do—which, in marketing terms, is known as a definitive call to action.
Adding a button to a page or post on your website is relatively easy. Click on the + Block Inserter icon, search for “Buttons,” and click it. Once you add your first button, you can type what you’d like the button to say.
Below is a sample button added with the block editor:
There might be instances where you wish to center the button. Traditionally, this has not been easy with WordPress as it required the use of HTML and CSS—something that conflicts with the growing “no-code” movement.
How to Center a Button with the WordPress Editor
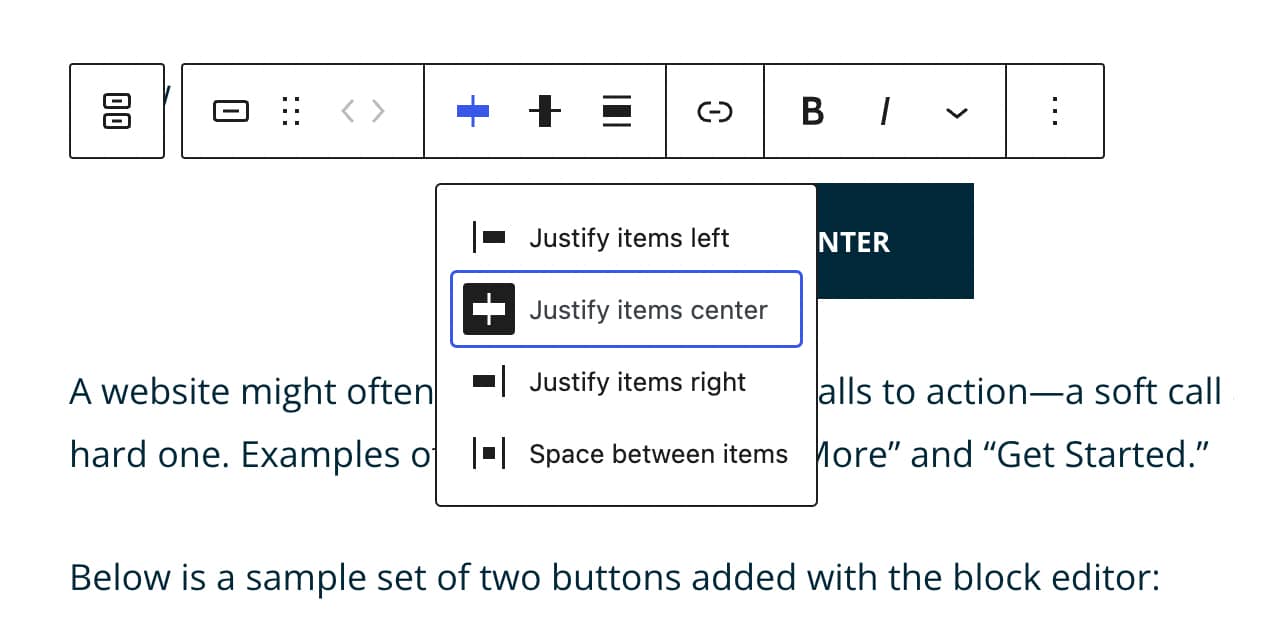
To center a button (or group of buttons) on your page, start by following the steps above. Once you have your button(s) in place, click the Change items justification icon in the toolbar and select Justify items center.
Here is a screenshot that shows the appropriate option selected:

Below is a sample button (aligned center) added with the block editor:
A website might often prefer to display two calls to action—a soft call and a hard one. Examples of this might be “Learn More” and “Get Started.”
Below are two buttons (aligned center) added with the block editor:
You might wish to add a “Let’s Connect” section on your website and display a group of links to your social media profiles.
Below are three buttons (aligned center) added with the block editor:
Lastly, a short video tutorial shows you how to center buttons.
Modern WordPress development is getting easier with each stable release. The Buttons block is powerful and can easily be leveraged to encourage calls to action and build your social media following.

