In this tutorial, you will learn how to create a simple headless WordPress app using Next.js and WPGraphQL. This tutorial assumes a basic understanding of JavaScript, React, and WordPress. Using the prepared GitHub repository will allow us to focus on points specific to Next.js as a framework and Apollo Client for data fetching in WPGraphQL. By the end of this tutorial you will be able to:
- Create static and dynamic routes in Next.js
- Use the GraphiQL IDE to compose GraphQL queries
- Use Apollo Client fetch data in your app
- Choose appropriate Next.js rendering methods based on your content
Prerequisites
To get started, you’ll need to make sure that you have both Node.js and npm installed. If you aren’t sure whether or not you have this software installed, you can run the following commands in your terminal:
node -v
npm -v
The terminal output should either tell you which versions you have installed or that it cannot find the commands node or npm to run them. Using a tool like nvm (Node Version Manager) to install and manage versions of Node.js on your machine can be helpful when working on multiple projects.
Configure Your WordPress Site
Next, let’s set up a local WordPress site that can be used as the data source for our example application. In the next section, we will walk through creating a WordPress site via Local and populating that with some test data. If you already have a WordPress site that you want to use, you can skip ahead to the “Install Plugins and Check Settings” section.
Create a WordPress Site with Local
Local is WP Engine’s local development tool, and it makes it very easy to work with WordPress locally. You can install the app and create a new WordPress site in a few steps.
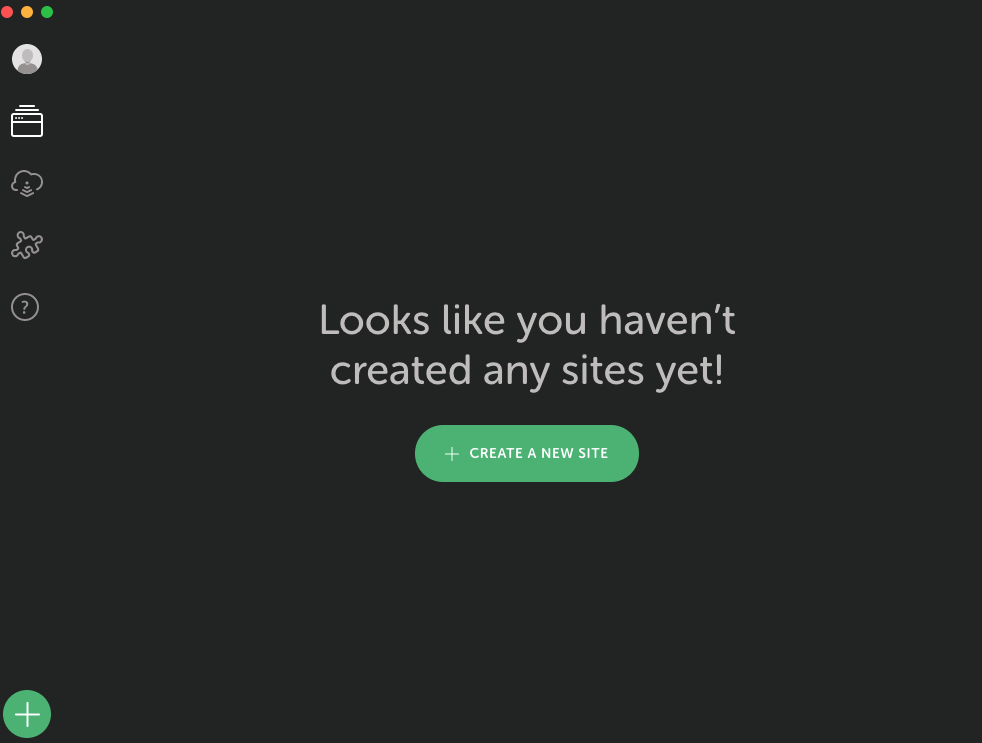
Click Create A New Site on the application home screen to create a new site.
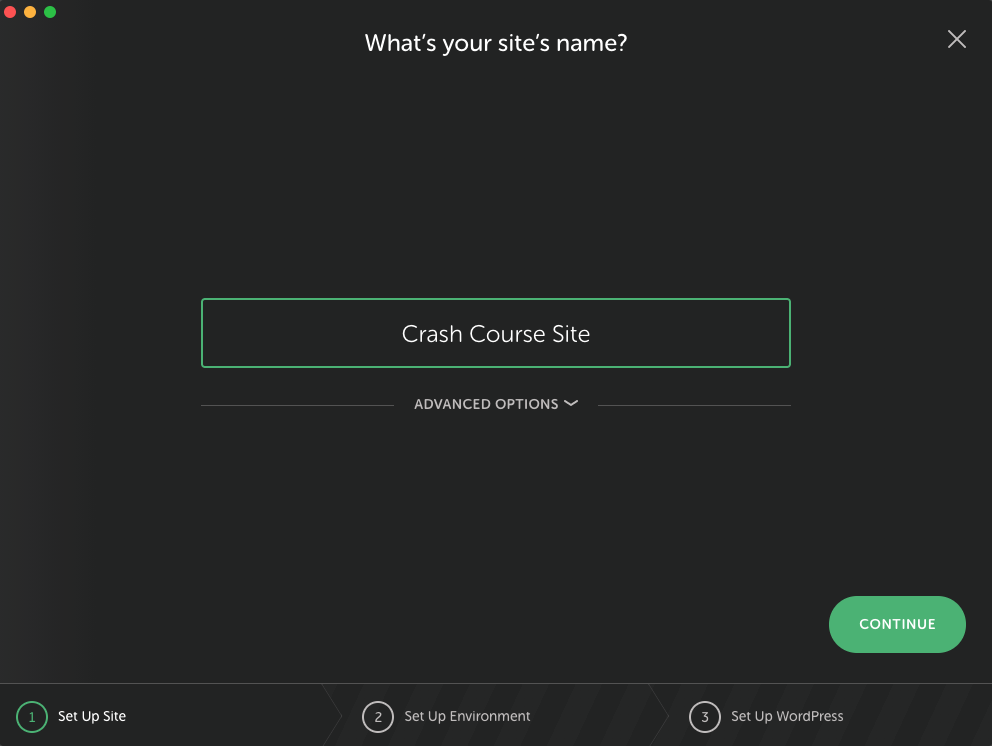
Choose a name for your new site, and then click Continue.
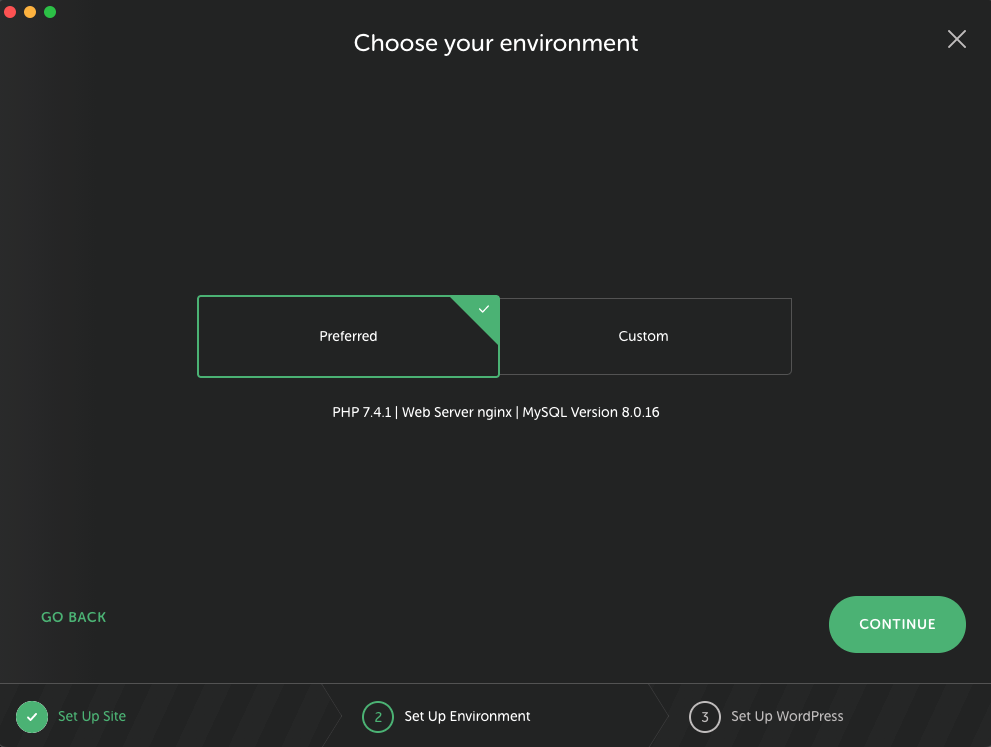
For most users, you can stick with the Preferred installation environment, and then click Continue.
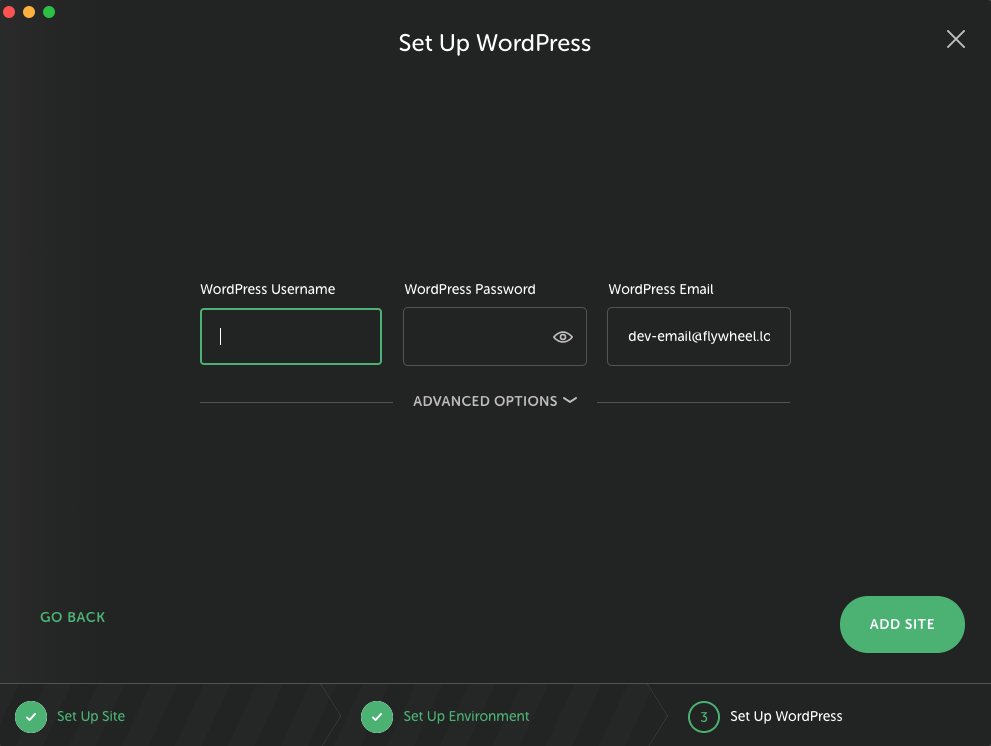
Lastly, specify values for the WordPress Username and WordPress Password, and be sure to remember these values. Once that is complete, click Add Site.
Depending on your permissions, Local may ask for permission to make modifications to your system. After your site has been successfully installed, you will see it in the Local dashboard.
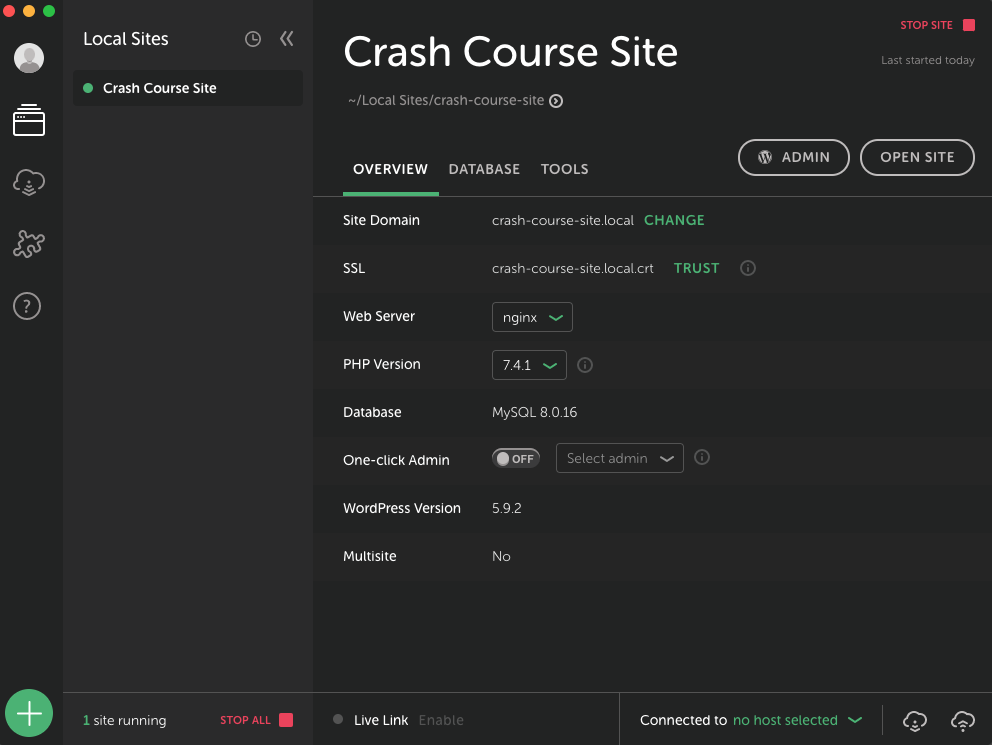
To access the WP Admin panel of your new site, click Admin in the site details pane. You will need to authenticate with the username and password you created in the previous step.
Install Plugins and Check Settings
With a basic WordPress site up and running, there are a few things left to install and some settings to check.
Check Permalink Settings
All of the code in this crash course assumes that you have the Post name option selected for your permalink settings. To check or modify this setting, open the Settings > Permalinks menu in the WP Admin dashboard.
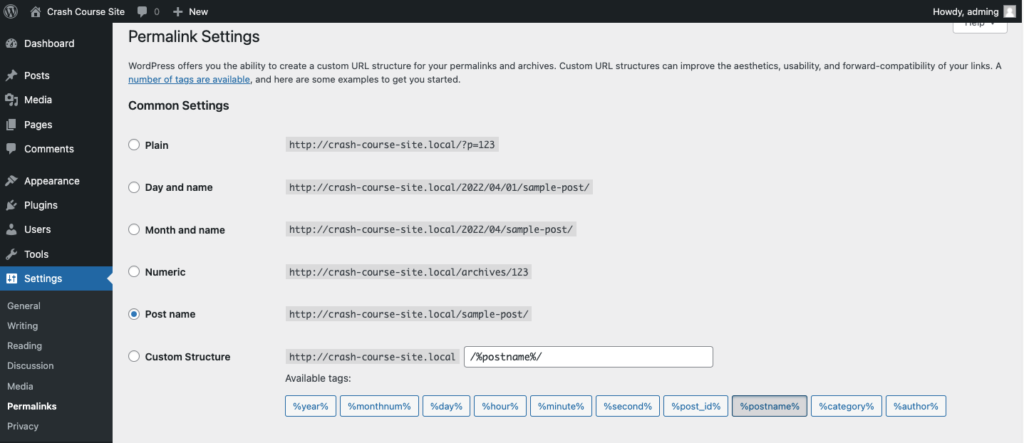
Install WPGraphQL and Enable Debug Mode
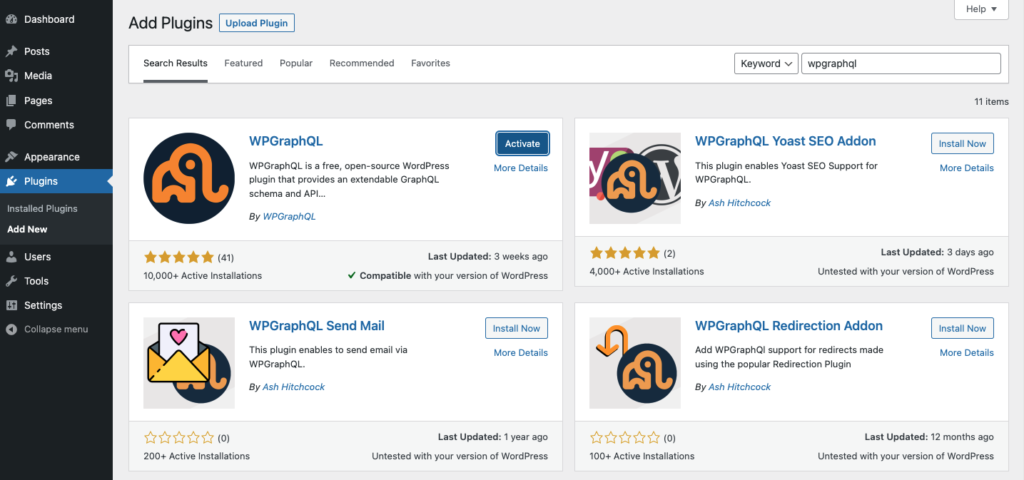
From the Plugins > Add new menu, search for wpgraphql in the WordPress plugin repository. Install and activate the plugin, which will add a GraphQL tab to your WP Admin sidebar.
Activate Debug Mode. Open the GraphQL > Settings menu and check the option labeled Enable GraphQL Debug Mode and then click Save Changes.
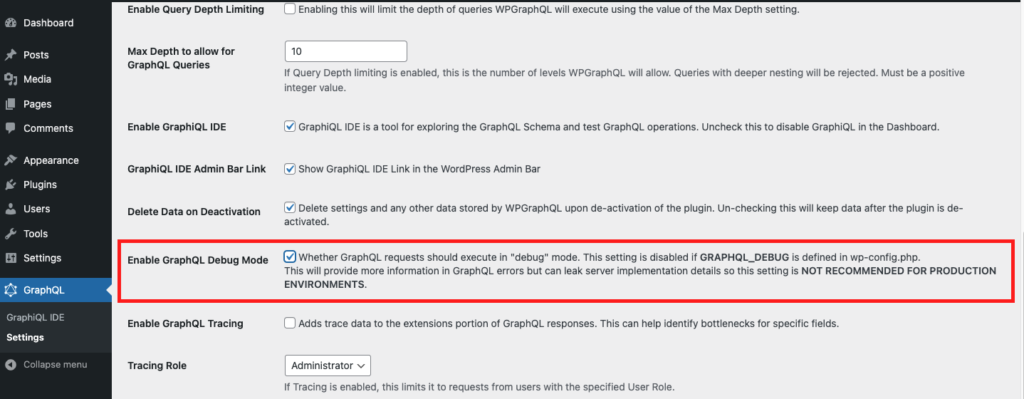
With Debug Mode enabled, you will get more helpful error output as your develop your application. Note that using Debug Mode is not recommended for production sites.
Import Placeholder Content
If you’re working with a newly created WordPress site, you can run the import process on this export file to create some placeholder content for use with this tutorial.
Get Your Next.js App Running Locally
Now that you have a WordPress site with at least some content, whether running locally or on the web, we can get started with Next.js.
The rest of this tutorial is based on the files that can be found in the crash course’s GitHub repository. This repository is heavily based on the default Next.js template created with create-next-app CLI tool, with some additional scaffolding and styles provided by the WP Engine DevRel team.
To clone the repository to you local machine, you can run the following command:
git clone https://github.com/JEverhart383/crash-course-headless-wp-next-wpgraphql.git
Code language: PHP (php)
Once the project finishes cloning, run the following commands to switch into that directory and install all of the project’s dependencies using npm. After the dependencies finish downloading, you can run the project in your browser using npm run dev.
cd crash-course-headless-wp-next-wpgraphql
npm install
npm run dev
With the app running locally, you should be able to view the app at http://localhost:3000 in your browser, and the app will recompile and update as make changes to the files in the project directory.
All of the posts you see on the local site are dummy data sourced from a local JSON file. In the next step, we’ll connect Apollo Client to WordPress and WPGraphQL to display actual post data from your site.
Connect Apollo Client to WordPress
The first step in replacing our mock post data with data from your WordPress site involves configuring Apollo Client to work with your site via WPGraphQL.
While technically, you could POST your queries directly to your GraphQL server using only the Fetch API, using a GraphQL client like Apollo Client has a lot of added benefits that are beyond the scope of this post. Many of the following steps are also contained on the Get Started page of the Apollo Client docs, so be sure to reference that page if you are interested in learning more about the library.
Create a .env File
The first thing we’ll do to start this process is make the URL of our WordPress site available to our application through an environment variable. By default, Next.js will look for a file named .env.local in the root directory of the project to load any environment variables.
Create a file named .env.local in the project’s root directory.
Open the file and paste in the following line, replacing “https://headlesswp.local” with the URL of your WordPress site.
NEXT_PUBLIC_WORDPRESS_API_URL=https://headlesswp.local
Code language: JavaScript (javascript)
By adding this environment variable, you can access its value in your application through the process.env object. It is a good idea to stop and start your local development server when making changes to environment variables as they typically only get loaded as the application boots. You can do this by hitting ctrl + c, then running npm run dev again.
Configure Apollo Client
Now that our Next.js application can access the URL of our WordPress site, we can create the Apollo Client instance that will be used to request data.
In the blank /lib/apollo.js file, add the following code:
import { ApolloClient, InMemoryCache } from "@apollo/client";


export const client = new ApolloClient({
  uri: `${process.env.NEXT_PUBLIC_WORDPRESS_API_URL}/graphql`,
  cache: new InMemoryCache(),
});
Code language: JavaScript (javascript)
The first line of code here imports ApolloClient and InMemoryCache from the @apollo/client package.
Then, below that we create a new instance of ApolloClient and export that as a variable named client. When we create the new client, we pass in a configuration object with uri and cache properties. The uri property should point the GraphQL client to your server’s /graphql endpoint, and the cache property gets assigned to a new InMemoryCache instance. The caching features of Apollo Client help speed up your application by storing query results in memory.
With our client fully configured, the next step is to make our client available across your application using the ApolloProvider component.
Wrap App in ApolloProvider
Even though we have a valid ApolloClient object in /lib/apollo.js we still need to import it somewhere and make it available inside of our React application’s component tree. To do this, we’ll make some changes to the code at the root of our Next.js application, which is contained in the /pages/_app.js file.
Inside of this file, add the following import statements. These pull in the client we created in the previous step and the ApolloProvider component that Apollo Client provides.
import { ApolloProvider } from "@apollo/client/react";
import { client } from "../lib/apollo";
Code language: JavaScript (javascript)
Next, wrap the base page <Component> inside of the ApolloProvider component, passing the configured client as a prop:
function MyApp({ Component, pageProps }) {
  return (
      <ApolloProvider client={client}>
        <Component {...pageProps} />
      </ApolloProvider>
    )
}
Code language: JavaScript (javascript)
Wrapping your app in an ApolloProvider gives you the ability to use the React hooks that Apollo Client provides, such as useQuery(), useLazyQuery(), useMutation() etc. from anywhere in your app. While we won’t be leveraging those hooks in this app, I recommend that if you’re working with Apollo Client in a React project, you wrap your app in an ApolloProvider so that you’re able to do so when needed.
Make the Index Page Dynamic
Now that we have a fully configured data fetching client available in our component tree, we can start making the pages of this tutorial site dynamic. To get started, open up the /pages/index.js file in your editor.
Next.js uses a routing method know as page-based routing, meaning that generally, the routes of your site or application will correspond to the file structure of your /pages folder. In this case, the index.js file at the root of the directory corresponds to the root your your site, which should be available at the / URL. In the next step, we’ll look at creating dynamic route paths, but be sure to read the Next.js docs on routing for more details.
Page Components
When Next.js processes a page-based route, it expects the default export of a given route to be a React component, commonly referred to as a “page component”. Let’s take a look at the default export for our /pages/index.js route:
export default function Home({ posts }) {
  return (
    <div className="container">
      <Head>
        <title>Headless WP Next Starter</title>
        <link rel="icon" href="favicon.ico"></link>
      </Head>

      <main>
        <h1 className="title">
          Headless WordPress Next.js Starter
        </h1>

        <p className="description">
          Get started by editing <code>pages/index.js</code>
        </p>

        <div className="grid">
          {
            posts.map((post) => {
              return (
                <PostCard key={post.id} post={post}></PostCard>
              )
            })
          }
        </div>
      </main>

      <Footer></Footer>
    </div>
  )
}
Code language: JavaScript (javascript)
In this case, we are exporting a component named HomePage by default, and the HomePage component accepts a props object, on which we are expecting a posts property to exist. The return value of this component is a JSX Element, and can contain other nested components, like PostCard and Footer, for example.
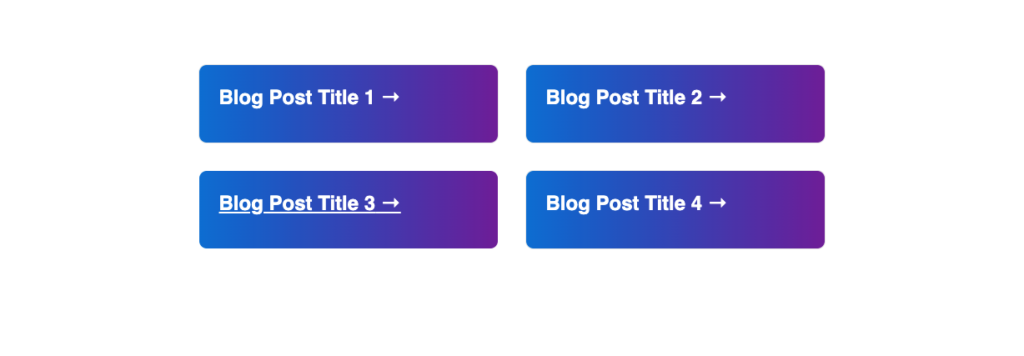
Inside of the HomePage component, we’ve written an expression that iterates over the posts array, passing the data for each post into a PostCard component, and then returning that custom component. The result that gets rendered to the page looks like this, a card for each post in the array:
While this example is pulling in placeholder dummy data, in the next step we’ll work towards populating these components with data fetched from our WordPress site.
Data Fetching
Now that we have a general understanding of how the HomePage component works, let’s take a look at how that component gets its data. First, let’s add two import statements to the top of our /pages/index.js file:
import { client } from '../lib/apollo';
import { gql } from "@apollo/client";
Code language: JavaScript (javascript)
In some styles of React development, particularly styles using client-side rendering, each component can be responsible for sourcing its own data. However, since we are using Next.js to statically generate our pages, all of the data sourcing code for this example will be inside of the getStaticProps() function.
With the placeholder data in use, the getStaticProps() function in the index.js file should look like this:
export async function getStaticProps(){
  const posts = await getAllPosts()
  return {
    props: {
      posts
    }
  }
}
Code language: JavaScript (javascript)
To make this page dynamic, we will replace the call to the getAllPosts function with a GraphQL query that pulls data from a WordPress site.
Constructing a GraphQL Query
The first step in integrating our Next.js app and WordPress site is to construct a GraphQL query that returns the data we’ll need to build out the rest of our features. One of the most common ways to build GraphQL queries is using the built-in GraphiQL IDE that comes with WPGraphQL.
In the WordPress Admin sidebar, head to GraphQL > GraphiQL IDE to get started.
Using the QueryComposer feature of the GraphiQL IDE allows developers to manually select fields from the GraphQL scheme to add to a query and then run that query against the site’s database in real time. This can be extremely useful to you as your application parses responses from GraphQL so that developers know exactly how to traverse the response object and its properties.
Once you compose your query, you can hit the play icon (▶️) to execute it and see the data that gets returned in the right-most pane.

Once you settle on a query that meets all of your requirements, you can copy/paste the query that you composed into your app.
Running the Query
Back in /pages/index.js, replace the code inside of the getStaticProps() function with the code below.
Here, we pass the query we composed to a gql tagged template literal (“gql” followed by two backticks) and assign the return value to a GET_POSTS variable.
export async function getStaticProps(){

  // Paste your GraphQL query inside of a gql tagged template literal
  const GET_POSTS = gql`
    query AllPostsQuery {
      posts {
        nodes {
          title
          content
          date
          uri
        }
      }
    }
  `;
  // Here we make a call with the client and pass in our query string to the
  // configuration objects 'query' property
  const response = await client.query({
    query: GET_POSTS
  });
  // Once we get the response back, we need to traverse it to pull out the
  // data we want to pass into the HomePage
  const posts = response?.data?.posts?.nodes;

  return {
    props: {
      posts
    }
  }
}
Code language: JavaScript (javascript)
This code example is heavily commented with what each line is doing, so walk through each line and make sure you comprehend what is happening before moving on. If you save and refresh your browser window, the index page of our demo site should now look something like this (if you installed placeholder content from the repo):

From here you could experiment with adding additional fields to your GraphQL query and work on surfacing that data on the PostCard component, which can be found in the /components/PostCard.js file.
In the next step, we’ll do something similar to create a post detail page using dynamic routing in Next.js.
Make the Post Page Dynamic
In the last section, we focused on pulling multiple posts into the site home page using Apollo Client and WPGraphQL. This section will build on that example and look at how to create individual pages for each blog post with a customized URL. To do that, we’ll start with a short conceptual overview of dynamic routing.
Dynamic Route Overview
Dynamic routing is a huge concept in web applications and is necessary to build a dynamic site of any real size, and even WordPress core has methods of structuring dynamic routes paths via permalinks. With dynamic routing, we can extract information from a URL structure and use that information to generate a customized response.
Let’s look at the following examples:
/blog/getting-started-with-vue
/blog/react-overview

/blog/[title]
Code language: JavaScript (javascript)
Above we have a pretty typical link structure, with several posts branching off the /blog path. When each of these URLs gets visited, the application receiving the request can access the value of the [title] section of the route and use that value to produce a request, by querying the database for a post with a title that matches the value in the URL.
Next.js accomplishes dynamic routing by requiring a naming convention for our page component files. If you create a file called /pages/[uri].js, you can access the value of the requested route and extract the uri to be used inside of your application. Let’s see how this works in practice in our SlugPage component, which is the default export from the /pages/[uri].js file.
If we look at the code inside of the getStaticProps() function, we can see that this example accepts a params object as an argument:
export async function getStaticProps({ params }){
    const response = await getPostByUri(params.uri)
    const post = response?.data?.post
    return {
      props: {
        post
      }
    }
  }
Code language: JavaScript (javascript)
In this case, the params object contains information about our dynamic URL segments. If we access the params.uri property, we get the value of that URL segment for a particular request that we can pass into our data fetching code. Behind the scenes, the getPostByUri() function filters an array of posts for the one that matches the uri of the request. Understanding how to work with dynamic routes is a core concept for building web applications and in turn working with headless WordPress, so be sure to review the Next.js docs linked above for additional info on this feature.
Pre-rendering Static Paths
When using static generation with getStaticProps(), Next.js will generate a static version of our page when it starts serving our application. For a component like our HomePage, that is easy for Next.js to do since it doesn’t require any input from the user in the form of a dynamic URL segment– the home page is the same for every user and is only available at one URL.
When we create a dynamic route, like we did in /pages/[uri].js, it’s impossible for Next.js to pre-generate those pages without knowing what the value of params.uri will be. To solve this problem, anytime we use getStaticProps() with a dynamic route segment like [uri] we are also required to export a function called getStaticPaths(),which looks like this:
export async function getStaticPaths(){
    const paths = ['/narwal','/kombucha', '/baby-unicorns']
    return {
        paths,
        fallback: 'blocking'
    }
}
Code language: JavaScript (javascript)
One of the properties on the object returned by this function should be an array of any paths that we want to pre-render to static assets. This allows Next.js to process those resources before a user visits those pages. Any dynamic route that hasn’t been pre-rendered using this method will be generated when the first user requests the URL and then made available for all subsequent requests. That means that it’s also valid to return an empty array of paths in this function:
export async function getStaticPaths(){
    const paths = []
    return {
        paths,
        fallback: 'blocking'
    }
}
Code language: JavaScript (javascript)
In this example, all of the pages will be generated on the first user request, which means that first request will typically be much slower than subsequent request because Next.js has to both render and serve the page.
However, this function gives the developer a ton of flexibility in how they optimize their applications. For example, you could hard code an array of your most popular paths to optimize those posts, but it is also possible to create that array programmatically in a variety of ways, like getting the URIs for your ten most recent blog posts.
Add GraphQL Query
To update the data fetching code in our dynamic SlugPage component, we’ll first need to add two import statements to the top of the file:
import { client } from '../lib/apollo';
import { gql } from "@apollo/client";
Code language: JavaScript (javascript)
With these new imports available, we can start constructing our query in the GraphiQL IDE. Open the IDE, create a new query named GetPostByURI and select post from the list of schema objects. If you check the $id and $idType options, GraphiQL will help you begin to parameterize your query so that we can pass in variables in the next step. Add the fields you see below to your query and then copy the code in the query composer window.
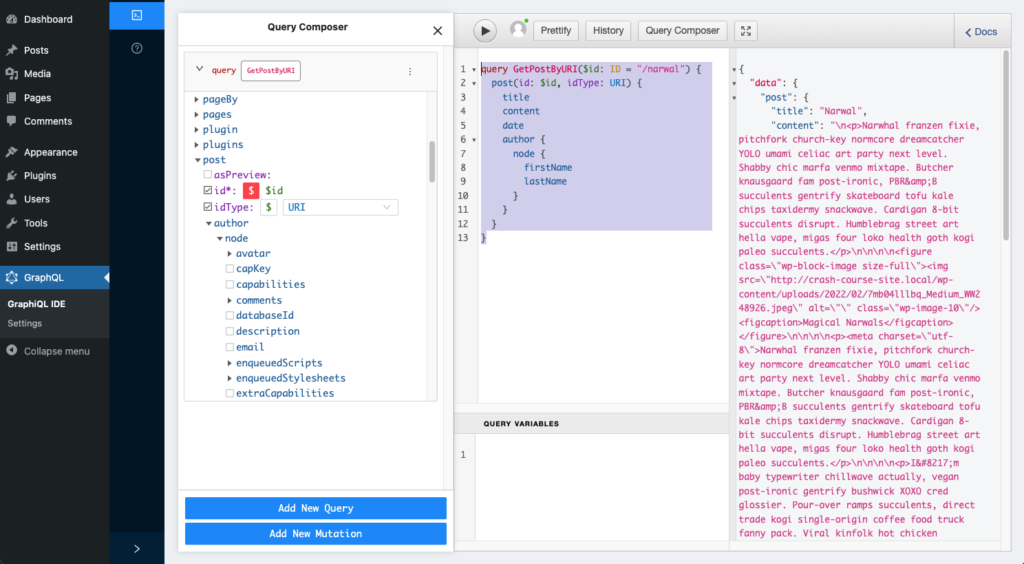
Back in the /pages/[uri].js file, we can now replace the code in the getStaticProps function to use this query:
export async function getStaticProps({ params }){
  const GET_POST = gql`
    query GetPostByURI($id: ID!) {
      post(id: $id, idType: URI) {
        title
        content
        date
        author {
          node {
            firstName
            lastName
          }
        }
      }
    }
  `
  //  the params argument for this function corresponds to the dynamic URL segments
  //  we included in our page-based route. So, in this case, the `params` object will have
  //  a property named `uri` that contains that route segment when a user hits the page
  const response = await client.query({
    query: GET_POST,
    variables: {
      id: params.uri
    }
  })
  const post = response?.data?.post
  return {
    props: {
      post
    }
  }
}
Code language: JavaScript (javascript)
One change you may need to make to your GraphQL query would be to change $id: ID = "/narwal" to $id: ID! so that we can pass that in as a variable to ApolloClient when we actually make the query. To pass those variables, pass client.query a second variables object where each variable is a property that corresponds to the variable in the query. In this case, id: params.uri will replace the $id in our GraphQL query.
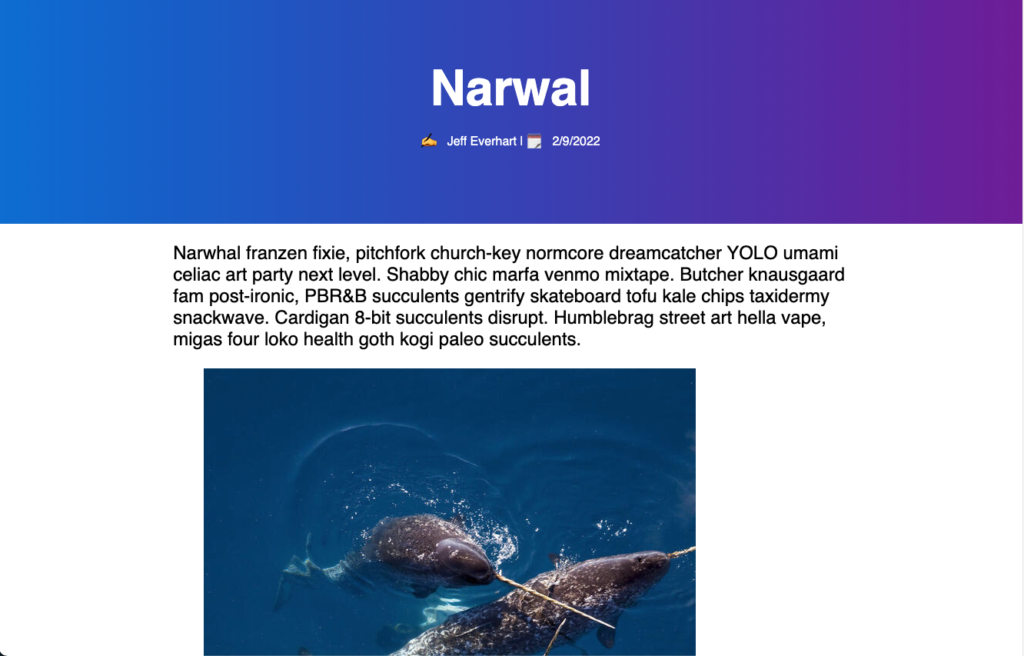
With our data fetching code in place, refresh your browser and visit the page for one of your posts. If you used the XML export file in earlier steps, you should see something like this if you visit the /narwal path in your browser.
Done! 🎉
Congratulations on creating a headless WordPress site! We covered a lot of ground in this crash course. Hopefully you now have a good understanding of how you can leverage tools like Next.js and WPGraphQL to build headless WordPress sites.
If for any reason you weren’t able to follow along with the steps outlined in this post, you can access the finished state of our example app on this GitHub branch.
Looking for a place to host your headless WordPress project? Check out WP Engine’s Atlas platform.
