
A splash page introduces a website or product with a graphical element. It directs the user to explore the site further or take immediate action, such as signing up for an email list or connecting on social media.
Perhaps your website is not fully developed, or the content is a work in progress. In this case, a splash page is a perfect way to build momentum and establish an audience—and you can do it in just a few steps.
This guide will help you create a split-screen splash page using the Frost WordPress theme. Use it as a temporary solution or as a landing page.
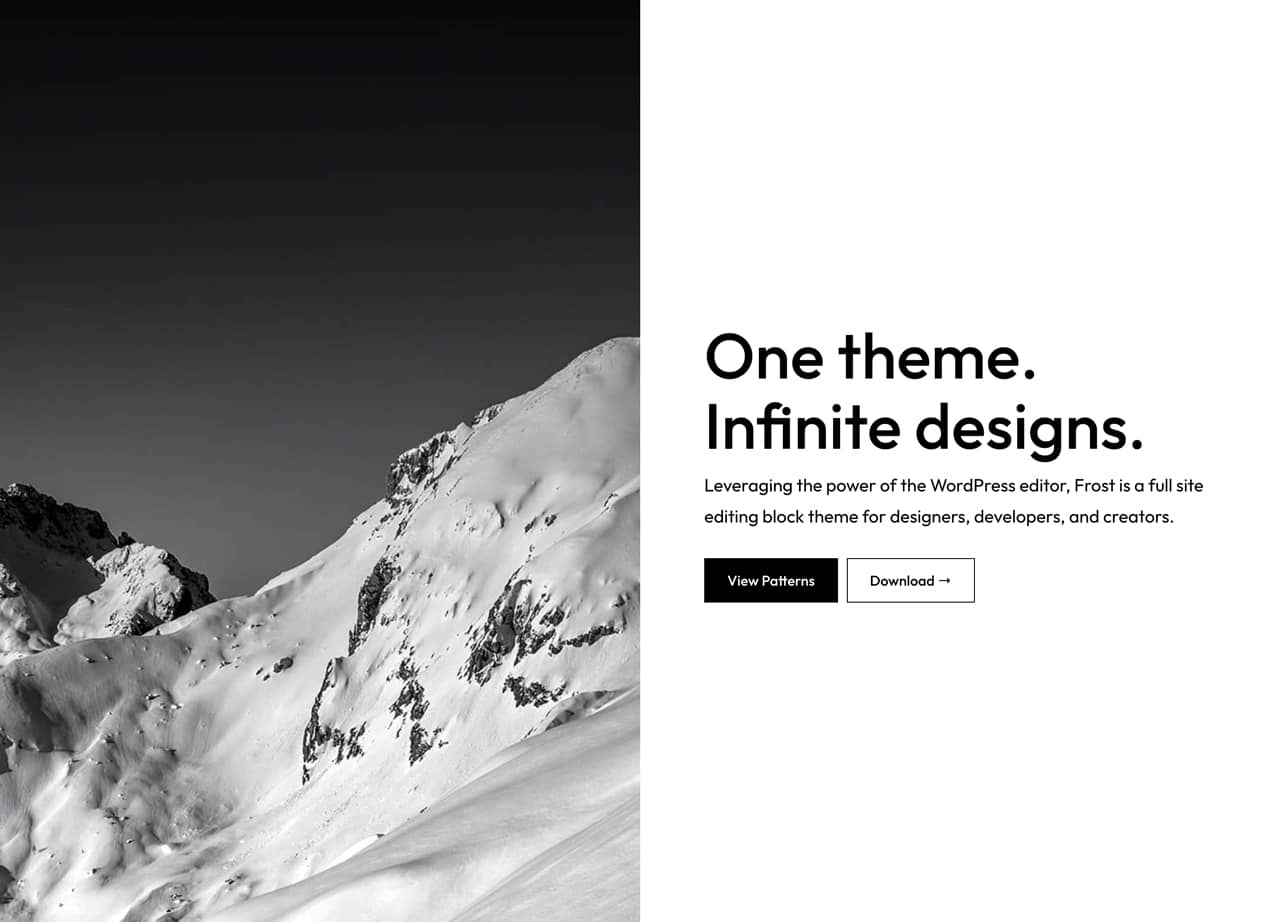
Split-Screen Splash Page Example
Here is an example of split-screen splash pages created with Frost:
How to Create a Split-Screen Splash Page
Creating a split-screen splash page with Frost is simple. Here are the steps:
- In your WordPress dashboard, go to Pages > Add New.
- On the right side of your screen, go to Page > Page Attributes and select the Blank page template.
- In the Block editor, click
+to add a Columns block. Choose the 50/50 variation and be sure to change the block alignment to Full width. - In the left column, click
+to add a Cover block. Upload image and set the Minimum height of cover to 100vh. - In the right column, click
+to add a Heading block, a Paragraph block, and a Buttons block. - Select the Heading, Paragraph, and Buttons blocks and group them. Apply 10% padding to the Group block for proper spacing.
- Publish your splash page and share it with everyone.
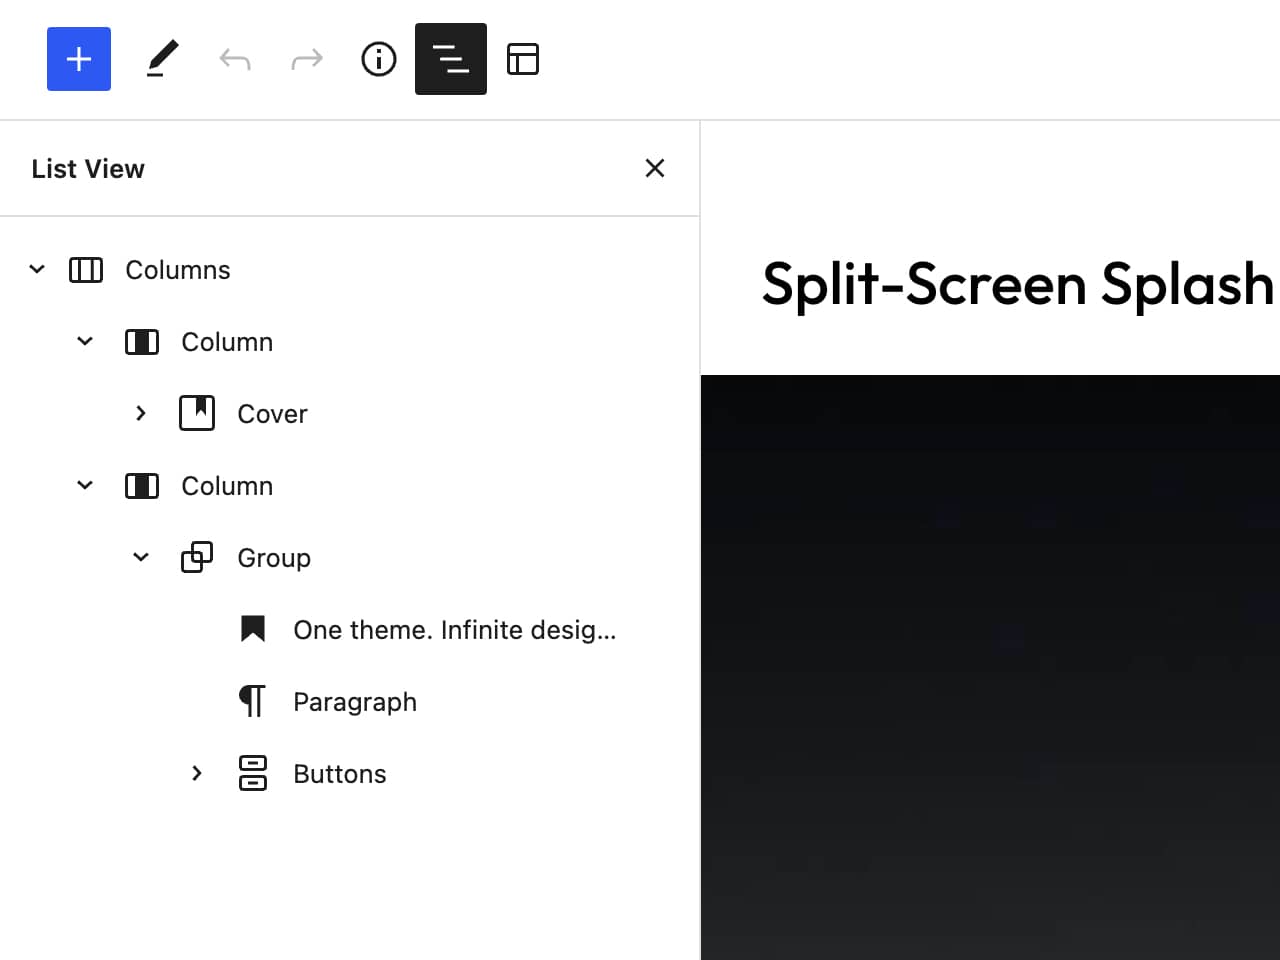
In List View, your splash page content hierarchy should look like this:
—
I’d love to see what you create. If you are create a splash page by following these steps, tag me on Twitter @bgardner so I can have a look.