Local is a leading local development tool specifically tailored for WordPress. It simplifies setting up, managing, and exporting WordPress sites from your computer, making it an indispensable developer asset.
WordPress Multisite is a feature-rich solution that allows users to manage multiple websites from a single WordPress installation and database. This system permits these sites to share plugins and themes, making organizing and updating them more accessible from one central location.
A significant advantage is its suitability for projects that need a central or umbrella site. For example, a commercial WordPress theme developer can host all demos in a single location for streamlined maintenance.
The #1 local WordPress
development tool
Feel free to watch the video version of this article or continue reading.
Table of Contents
Types of WordPress Multisite
There are primarily two kinds of WordPress Multisite:
- Sub-Directory (or Path) Setup:
URL Structure: example.com/site1, example.com/site2
- Sub-Domain Setup:
URL Structure: site1.example.com, site2.example.com
Limitations When Using Local with Multisite
While using Local for a Multisite setup is a breeze, there are certain constraints to be aware of:
- Local Connect Incompatibility: Local Connect doesn’t support Multisite installations.
- No Domain Mapping: Local doesn’t provide domain mapping. The official docs on WordPress Multisite Domain Mapping are an excellent resource if you want a deeper understanding of this feature.

Install WordPress Multisite With Local
Installing a Multisite using Local is straightforward, but there are a few key steps to ensure everything runs smoothly:
Router Mode Configuration:
First and foremost, ensure that the Local’s Router Mode is set to “Site Domains”. If it’s set to localhost, Multisite won’t function correctly. If you’re unfamiliar with adjusting the Router Mode, refer to the official docs.
Creating Your Multisite:
- Launch the Local app and click the plus symbol in the bottom corner.
- Name your site and proceed by clicking “Continue.”
- Choose your preferred environment type, then click “Continue.”
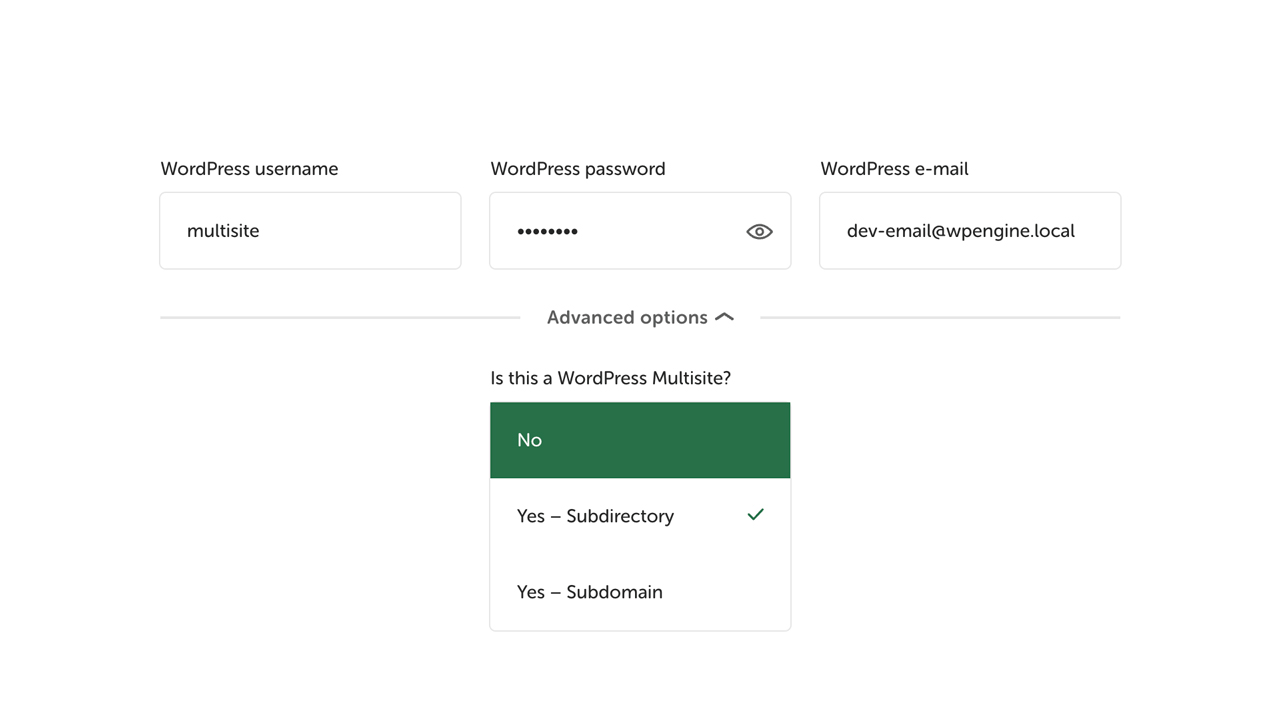
- Fill in the desired username, password, and associated email address.
- Delve into the “Advanced Options” and pick the Multisite you wish to set up (either Sub-Directory or Sub-Domain).
- Finalize by clicking “Add Site.” Local will then handle the rest.
Testing Your Installation
Once the site is ready, confirming everything’s in order is wise. You can do this by adding a new subsite:
- Access the WordPress admin area.
- Head to “My Sites > Network Admin > Sites.”
- Click on the “Add New” option to create your new subsite.
Conclusion
Local stands as a paramount local development tool for WordPress developers. Combined with WordPress Multisite’s capabilities, it offers unparalleled efficiency in streamlining the setup, management, and export of multiple WordPress sites. Download Local for free today.

