The Smart Search AI MCP Server is a powerful new feature in WP Engine’s AI Toolkit that transforms your WordPress site into a dynamic, real-time knowledge base for any external Large Language Model (LLM) you connect to it. When enabled, this server responds to requests from AI tools formatted using the Model Context Protocol (MCP) standard. In this article, I will cover what MCP is, how to work with the Smart Search AI MCP Server, and how it enhances the Smart Search AI product.
Table of Contents
What is MCP and How Does It Work?
Model Context Protocol (MCP) is a standardized communication protocol that connects AI models to live, external data sources and tools. While large language models like ChatGPT are incredibly intelligent, their knowledge is limited to their training data and is frozen in time, meaning they can’t access real-time or specific niche data.
By itself, it likely does not know about your company’s latest product specifications, the current stock price, or the content of a blog post you published this morning. MCP is the bridge that closes this gap between the AI’s static knowledge and the dynamic, real-time world.
To understand its role, think of MCP as the USB (Universal Serial Bus) for artificial intelligence. Before USB, connecting a printer, mouse, or keyboard to a computer required a confusing array of different ports and custom drivers. MCP addresses a similar problem in the AI ecosystem. Without a standard, connecting an AI to every single website, database, or internal API would require writing custom, one-off integrations—a complex and inefficient process.
MCP provides that universal standard. It defines a set of simple, predictable rules and commands, allowing any AI model to seamlessly “plug into” any MCP-compliant data source. The AI doesn’t need to know the complex inner workings of your website’s database; it just needs to know how to “speak MCP.”
Through this protocol, the AI can effectively issue standardized requests like “Search your knowledge base for this term” or “Fetch the contents of this specific page”. In essence, MCP transforms a static, encyclopedic AI into a dynamic, context-aware agent capable of accessing and reasoning about your current content.
Smart Search AI MCP Server
The Smart Search AI MCP Server, which is disabled by default and requires user opt-in, exposes “fetch” and “search” tools that allow external AI models to interact with a website’s public, published content.
Why Should You Use MCP?
The primary benefit of using MCP is that it allows developers to connect external AI agents, like ChatGPT or Claude, directly to their website’s live content. This empowers them to build advanced AI applications, such as custom chatbots or assistants, that are grounded in real-time, accurate information from their own site instead of the generic, often outdated data the models were trained on.
How It Works with WP Engine’s AI Toolkit
The Smart Search AI MCP Server is a feature of the Smart Search AI service. When you enable it, this server listens for requests that are formatted using the MCP standard. Here’s a typical workflow:
- A question is asked: A user interacts with an AI application, like a custom chatbot built with Claude or ChatGPT.
- The AI needs more info: The AI model realizes it needs current information to answer the question accurately. It sees that it has access to an MCP server that offers tools for accessing your website’s data.
- The AI model sends a network request to your website’s unique MCP server address. For example, it might ask your server to search for “information about AI Toolkit.”
- The MCP server receives this request, uses the Smart Search AI vector database to find the most relevant content on your website, and then sends that information back to the AI model.
- The AI model now has the fresh, accurate content from your site. It uses this information to formulate a relevant, up-to-date answer for the user.
In short, the MCP server allows AI applications to be powered by the real-time, accurate information from your website’s semantic search and vector database, rather than the stale or scraped data that an LLM would otherwise be limited to. This turns your website into a live, dynamic knowledge base for any AI agent you connect to it.
Testing the Smart Search AI MCP
Once you have an MCP server running, the next step is to connect to it and test its capabilities. This is where a client inspector becomes useful. Tools like the MCP Inspector or a versatile API client such as Postman (using its WebSocket request feature) allow you to interact with your server just as an AI model would. This process is important for debugging and ensuring your server provides the correct data.
In this article, I am stoked about using Postman because it is a bit easier to work with, I think.
Step 1: Establishing a Connection
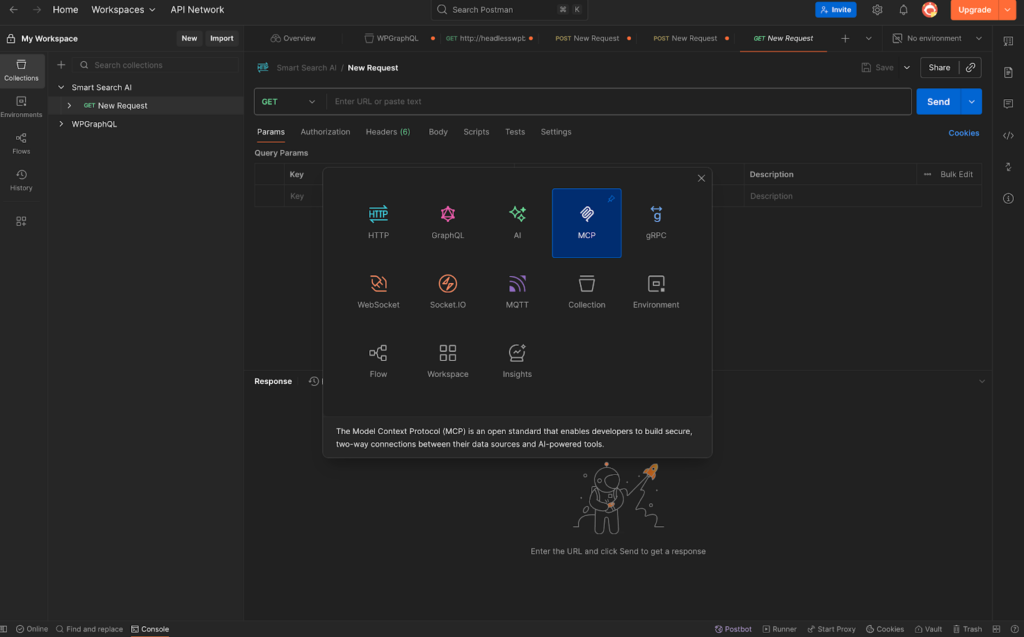
First, you need the unique URL for your Smart Search AI MCP Server (refer to the instructions on how to obtain it here). In Postman, you would click on the “New” button at the top of your Workspaces item page. This will show a card menu. Click on “MCP” to create the interface page to interact with your server. It looks like this:
It will take you to the MCP interface page. This is where you can paste your URL in the address bar then click “Connect”:

A successful connection is indicated by a status message. You will see the green “Connected” notification at the bottom of the Postman window. This handshake confirms that your client is now actively listening to the MCP server.
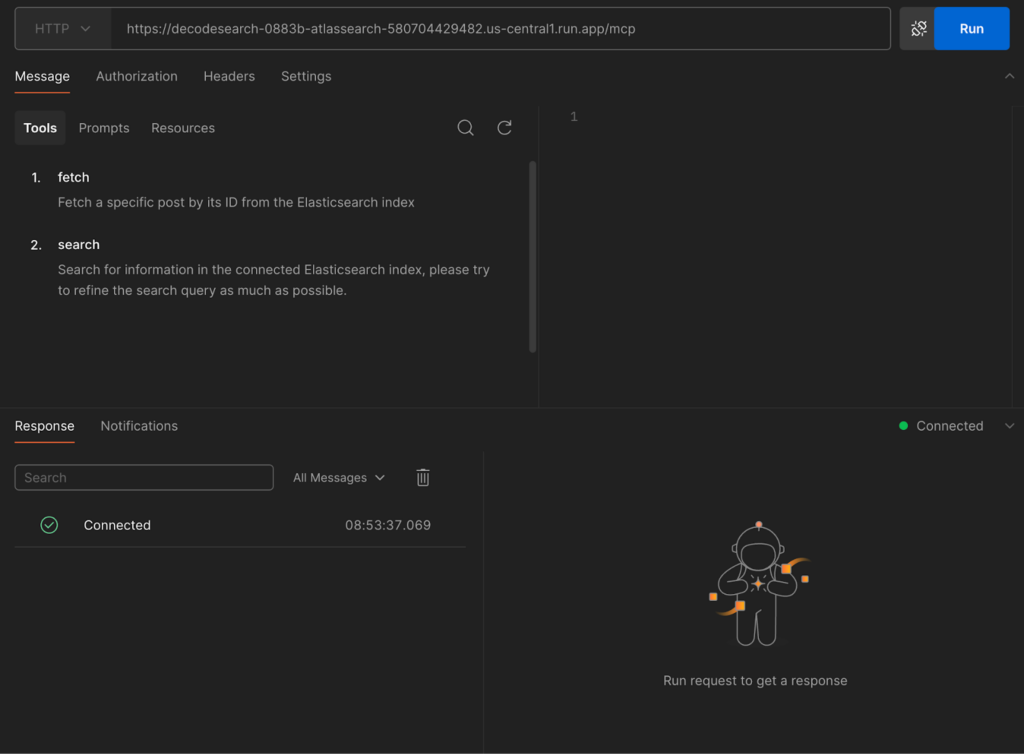
Step 2: Discovering the Available Tools
This is where the navigation begins. Once connected, the MCP server immediately advertises the tools it makes available. These tools are the specific functions or actions the AI is allowed to perform. Think of them as API endpoints, but for an AI.
In the screenshot, we can see the server has presented two distinct tools:
- fetch: The description says, “Fetch a specific post by its ID from the Elasticsearch index.” This is a highly specific tool that requires a unique identifier to retrieve a single piece of content.
- search: The description is, “Search for information in the connected Elasticsearch index, please try to refine the search query as much as possible.” This is a more flexible tool designed for querying the data source with natural language or keywords.
This discovery phase is fundamental to MCP. The client (and by extension, the AI) doesn’t need prior knowledge of what the server can do; the server announces its own capabilities.
Step 3: Making a Request (Interacting with a Tool)
Now that we know what tools are available, we can send a message to use one of them. MCP messages are typically formatted in JSON, specifying the tool_name to use and the arguments it requires.
Let’s test the search tool. For this example, I will just use the filter: string input, which accepts freeform text. I typed “webinar” in the input box because my WordPress content contains a webinar post. On the side JSON pane, it looks like this:

This JSON object explicitly tells the MCP server: “Use your search tool and give it a query with the value “webinar“.
Step 4: Understanding the Response
After you send the request, the MCP server will execute the tool with the arguments you provided and send a response back. This response is the raw data that the AI would receive to formulate its answer.
This is the successful response we get back:
{
  "content": [
    {
      "type": "text",
      "text": {
        "results": [
          {
            "id": "doc-1",
            "title": "Webinar – WP Engine MCP",
            "text": "This is WP Engine's Webinar Show about nerd stuff",
            "url": "https://demo.example.com/webinar/getting-started"
          }
        ]
      }
    }
  ]
}

Code language: JSON / JSON with Comments (json)
The shape that comes back is a stringified JSON blob with a results array. I parsed it and put it in a code block to make it more readable for this article.
The Smart Search AI MCP response is an object with a single content array, where each element represents one piece of output.
In this example, a content item has type: "text" and a text payload that is an object containing a results array. Each entry in results is a document with four core fields: id , title, text and url .
This envelope makes it easy to stream or combine multiple output parts, while the inner results objects can be extended (e.g., add score, site, or published_at) without changing the outer shape.
Connect Smart Search AI MCP Directly Into Your AI Model
You can expose Smart Search AI to any AI assistant by running it as an MCP server and plugging it in through a connector.
I will show Claude in this example. We need to register the same endpoint using their MCP client configuration.
Once connected, the model can discover Smart Search AI’s declared tools via MCP’s tool-listing protocol and call them with structured arguments—no bespoke SDK required.
Functionally, wiring Smart Search AI through MCP upgrades your assistant from “best-effort guessing” to retrieval-augmented answers that are precise, auditable, and policy-aware.
If you use Claude, the add a custom connector page looks like this:


Once connected, your AI model will know the abilities and tooling it can call on from your site. It will be exposed in the dropdown selector:

When it’s added and configured, your Claude AI will now have the ability to access all your WordPress content and tell you about it in a nice, formatted way:

Conclusion: Your WP Engine Website, Reimagined
The journey from a static webpage to an interactive, intelligent resource is the next great leap in digital experiences. We’ve seen how the MCP acts as a connector, bridging the gap between AI and the real-time, valuable content on your website. When this protocol is combined with the semantic power of WP Engine’s Smart Search AI, your WordPress site is no longer just a destination for users; it becomes a dynamic data source that any AI agent can consult.
By providing the tools to integrate your content with the world’s most advanced AI models, WP Engine is putting you at the forefront of this new AI age. Enable the Smart Search AI MCP server on your WP Engine plan and get the power of AI and WordPress. If you have already done so and need a “How-To” guide, check out my article here on the topic!