Get Started

Key Takeaways
Mega menus enhance user experience for content-rich websites. Mega menus are effective for showcasing numerous product categories with images, improving navigation and engagement.
Max Mega Menu plugin simplifies mega menu creation in WordPress. Easy installation and customization options enable seamless integration of mega menus even in free themes.
Customizing mega menu styles enhances brand consistency. Adjusting colors, layouts, and themes ensures the mega menu aligns with the overall website design, enhancing brand identity.
Export and import settings for easy replication across websites. Tools tab allows effortless transfer of mega menu configurations, streamlining menu setup on multiple sites.
If you have a website with a large amount of content and want to show more items in the menu, consider using a mega menu. Mega menus are especially effective for eCommerce sites with lots of product categories, as you can show a product image alongside different categories, like eBay does.
By default, you can create dropdown menus in WordPress with multi-level options, but you can’t create a mega menu. Some premium themes like Avada or Divi have mega menu options built in, but what if you want to have one in your free theme? In this article, we’ll show you how to use a plugin to add a mega menu on a WordPress site.

Adding a Mega Menu in WordPress
To add a mega menu, first you need to install the Max Mega Menu plugin from the WordPress Plugin Directory. It’s one of the best free plugins available in the library. Once installed and activated, you’ll see a new menu item labeled Mega Menu in the dashboard.
To enable the max mega menu, go to Appearance > Menus
In the menu page, click on the Enable checkbox in the Max Mega Menu Settings section and then click Save.
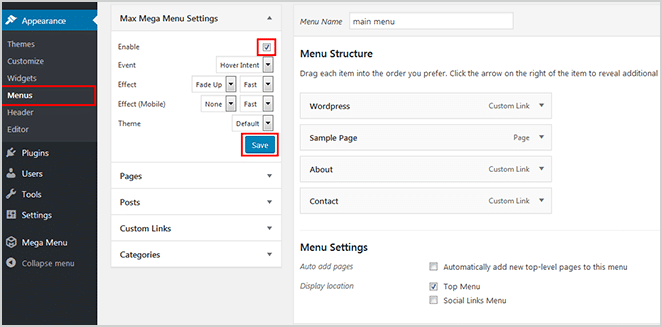
You don’t need to do anything with the other remaining options, but you can play around to see the effects.
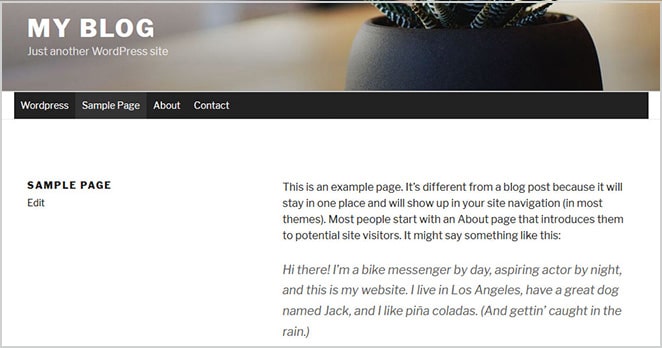
With that, you’ll see the plugin taking over the default menu on the front-end.
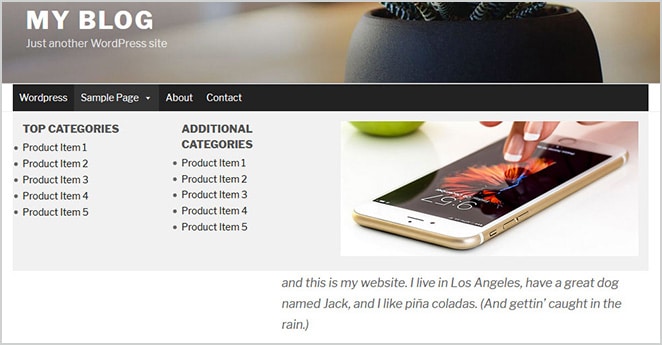
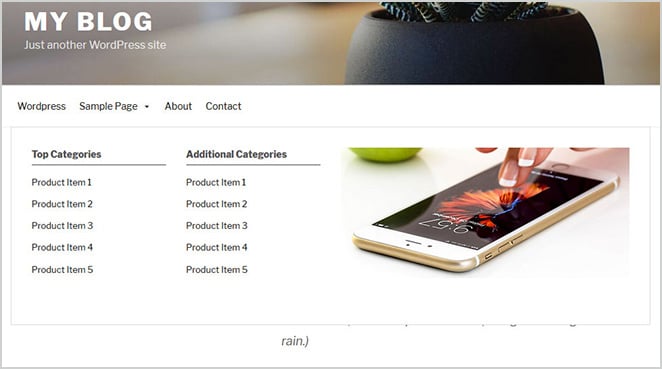
Now let’s explore some of the settings through a real-life example. We’ll try to recreate something similar to eBay’s mega menu.
Here’s what the menu looks like.
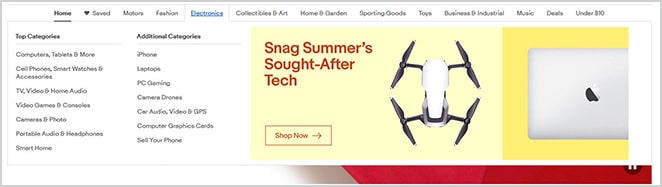
As you can see, the mega menu has list items in two columns and an image in another column.
First, let’s create the menu structure. There are two ways you can create the menu here.
One is the default WordPress drag-and-drop menu editor. You can stack the menu items one after another as you would normally create any dropdown menu, but the design we’re going after here can become a little messy and hard to maintain with this method.
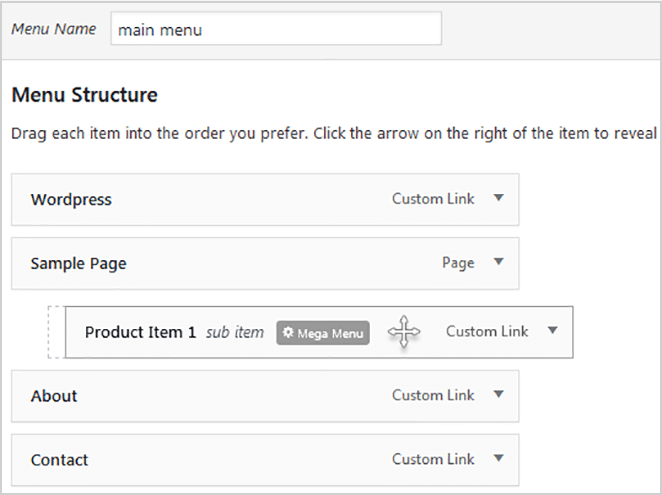
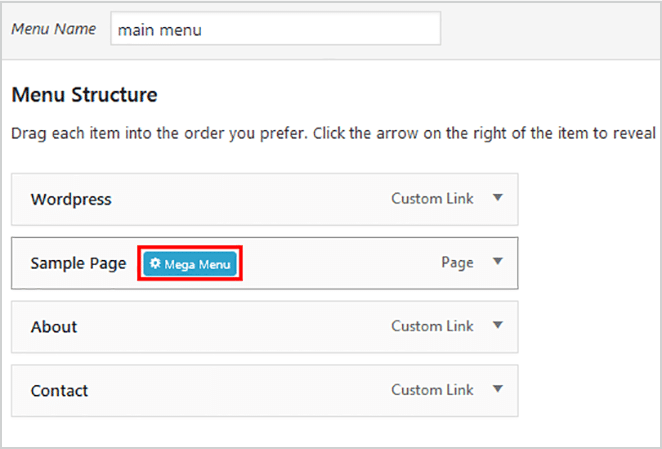
The second option is to use widgets within the mega menu. Hover over the item you want to have the mega menu and click on the Mega Menu button.
It’ll open a pop-up. Then select Mega Menu – Grid Layout from the Sub menu display mode dropdown in the Mega Menu tab.
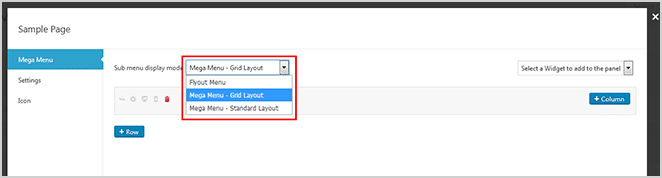
This is the best option for creating custom mega menu layouts. The other options are not very flexible, but you can always play around to know more.
Click on the + Column button to add more columns.
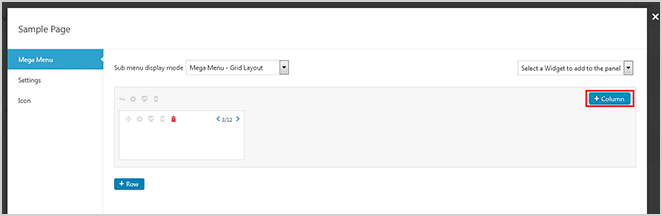
To create a mega menu like eBay’s, we need two 3/12 columns and one 6/12 column. (This will make the third column twice as large as the first two, plenty of space for a nice big image!) You can adjust the column width by clicking the left or right arrow.
To add a widget, click the Select a Widget to add to the panel dropdown at the top right corner and choose a widget.
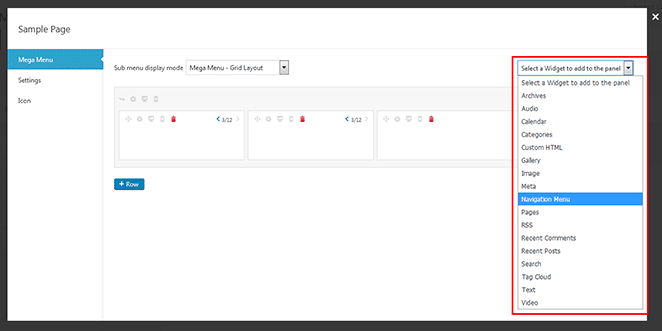
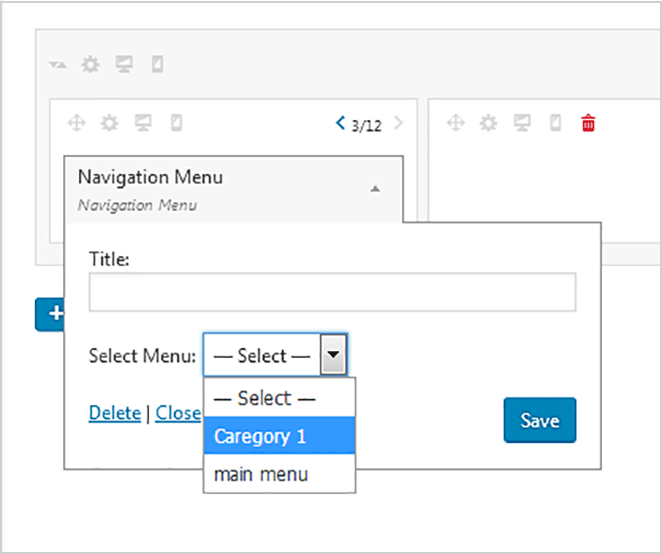
For this design, we’ve already created a dummy menu. We’ll add that to the first two columns through the Navigation Menu widget.
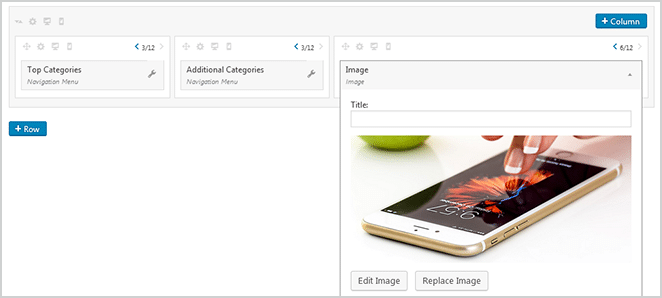
For the third column, we can add an image through the Image widget.
You can easily drag and drop columns and widgets to rearrange them, and you can even hide columns for different devices by clicking on the small icons located at the top of each column.
Now if you look at the menu design on the site, the mega menu structure is complete. Now we just need to adjust the style to match the theme!
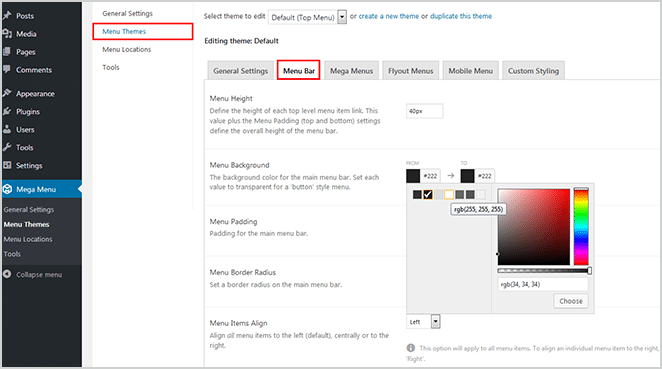
For style adjustments, go to Mega Menu > Menu Themes > Menu Bar. We’ll change the menu bar color and other settings to match the theme.
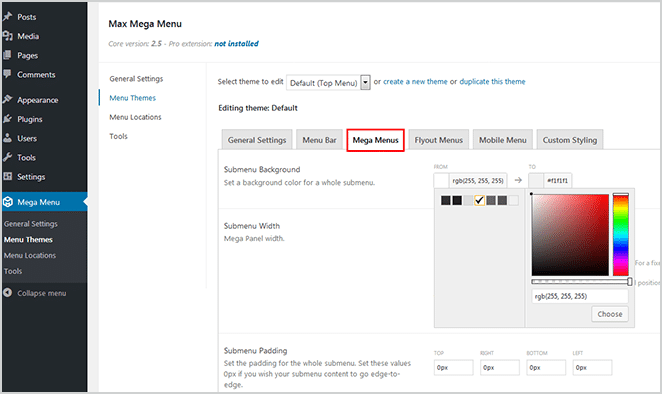
From the Mega Menus tab, you can adjust the dropdown style. Once adjustments are done, click on Save Changes at the bottom.
The Flyout Menus tab is for a flyout menu style adjustment, and from the Mobile Menu tab, you can set the mobile breakpoint and styling.
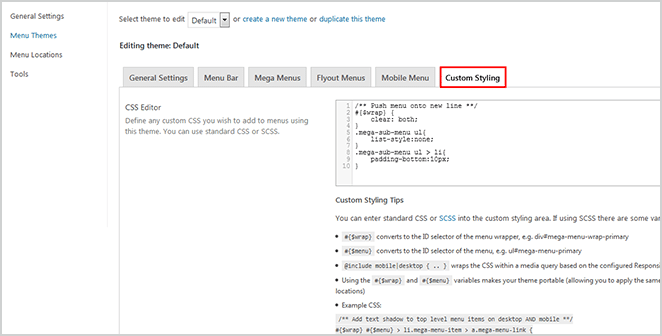
You can also write your own custom CSS in the Custom Styling tab like I’ve done here.
With these style adjustments, our mega menu is now ready!
If you’re wondering about the General Settings tab, the default settings are good enough for most cases, but feel free to explore the possibilities.
Creating a Full-Width Mega Menu
If you want to create a full-width mega menu, unfortunately, there are no easy settings within the plugin, but you can still do it.
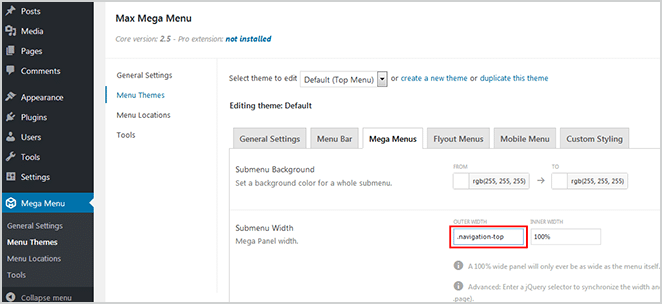
First, you need to find a full-width container. In this instance, it’s .navigation-top class.
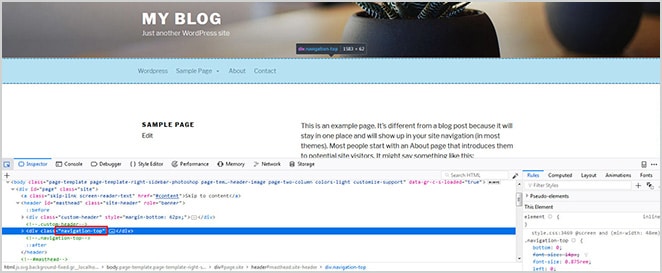
Copy the class name and paste it in the Outer Width box of Submenu Width, then save the changes.
Now if you check the menu in the front-end, it’ll show a full-width mega menu.
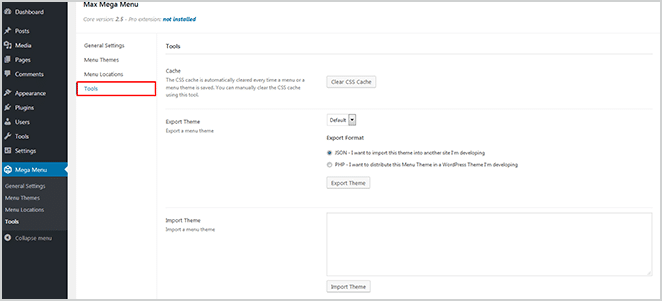
Last, if you want to copy the same menu settings on another website, you can easily export and import the settings from the Tools tab.
Conclusion
So, you’ve just learned how to create a mega menu in WordPress, even if your theme doesn’t have an option for it. If you’re running a website that has a lot of content, mega menus can really help you organize your items in an effective way to enhance the user experience.
To ensure every aspect of that mega menu is fast and functional, turn to WP Engine to host your WordPress site!