Get Started


Key Takeaways
Social logins enhance user experience and increase registrations. Providing social login options like Facebook and Twitter can streamline registration processes and eliminate the need for users to create new accounts, leading to higher registration rates and improved user engagement.
Implementing social logins in WordPress and WooCommerce is straightforward. By using plugins like Super Socializer, businesses can easily add social login buttons to their websites, enhancing user convenience and potentially boosting conversions.
Enabling social commenting and sharing can amplify user engagement. Features like social commenting and sharing through plugins like Super Socializer can encourage user interaction and content sharing, fostering a sense of community and expanding reach.
Customizing social login options can align with specific business needs. Tailoring social login choices beyond Facebook to platforms like Twitter, LinkedIn, or Instagram can cater to diverse user preferences and align with strategic marketing goals.
You’ll often want users to register new accounts for your WordPress website or WooCommerce store, in order to access certain functionality. However, your visitors may find it challenging to remember their login credentials for each of the different sites they use every day.
One way to improve the User Experience (UX) for your visitors is to provide social login buttons for sites they probably already have accounts on, such as Twitter and Facebook. This can enable faster registrations and sign-ins, and eliminate tapping issues that mobile users may have when filling out forms.
In this article, we’ll discuss why you might consider adding social logins to WordPress. We’ll also look at how to add them to both WordPress and WooCommerce. Let’s get to it!
Why Add Social Logins to WordPress?
Social logins let visitors use authentication credentials from providers, such as Facebook or LinkedIn, to sign in to your site. Having a set of login details that work everywhere is appealing, as this saves users from needing to create accounts for multiple websites. All they need to do is select a social media button on your login page.
Adding social logins to your site can increase registrations, since the extra hassle of creating a new account is eliminated. You’ll also be more likely to obtain real email addresses. Additionally, since social network providers can enable you to access information such as locations and user interests, you can offer personalized content (leading to a better overall UX).
How to Add Social Logins to Your WordPress Site (In 3 Steps)
There are a variety of social login options that you can add to your website. We’ll illustrate the process using Facebook and a WordPress social login plugin.
Step 1: Install the Super Socializer Plugin
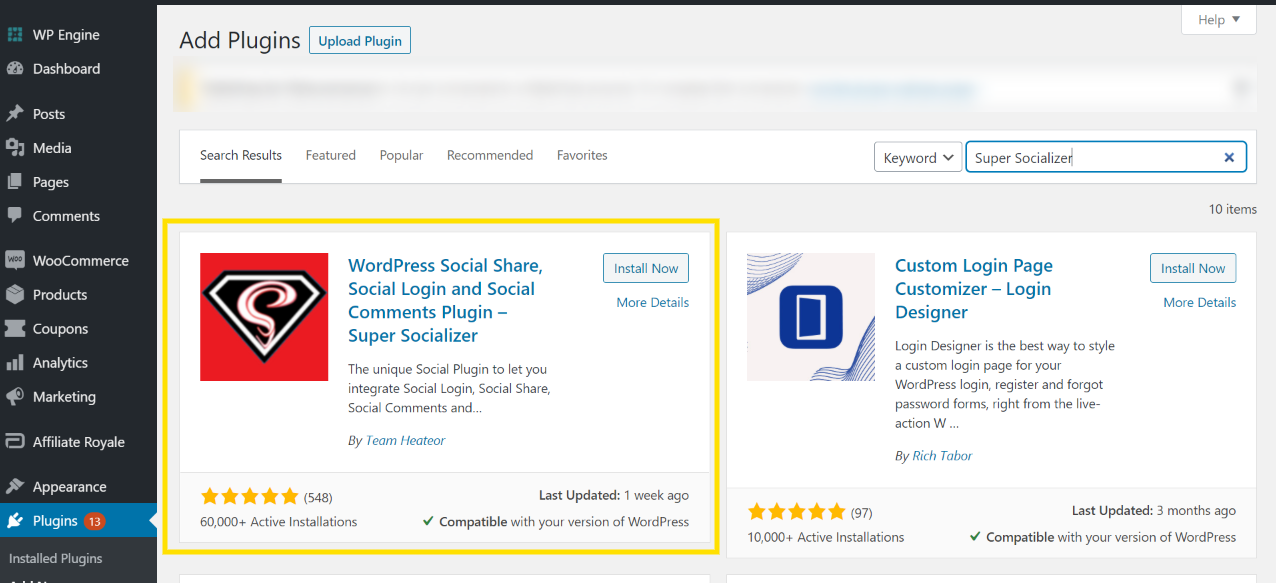
To get started, you’ll need to log in to your WordPress dashboard. Then navigate to Plugins > Add New. Search for “Super Socializer” on the Plugins screen:
Next, click on the Install Now button. Once the plugin is installed, the button text should change to Activate, and you’ll want to select it again.
Step 2: Configure the Plugin
Once Super Socializer is installed and activated, the next step is to configure it. Start by navigating to Super Socializer > Social Login. To continue, you’ll need to select the checkbox for “Enable Social Login”:

You should now see a list of the various social networks that your users can register with. These include Facebook, Twitter, LinkedIn, and more.
Step 3: Enable Social Login
At this point, you’ll want to tick the checkbox for “Facebook”:

To fill out the Facebook App ID and Facebook App Secret form fields, you’ll need to visit the Facebook developer portal and create a new app:
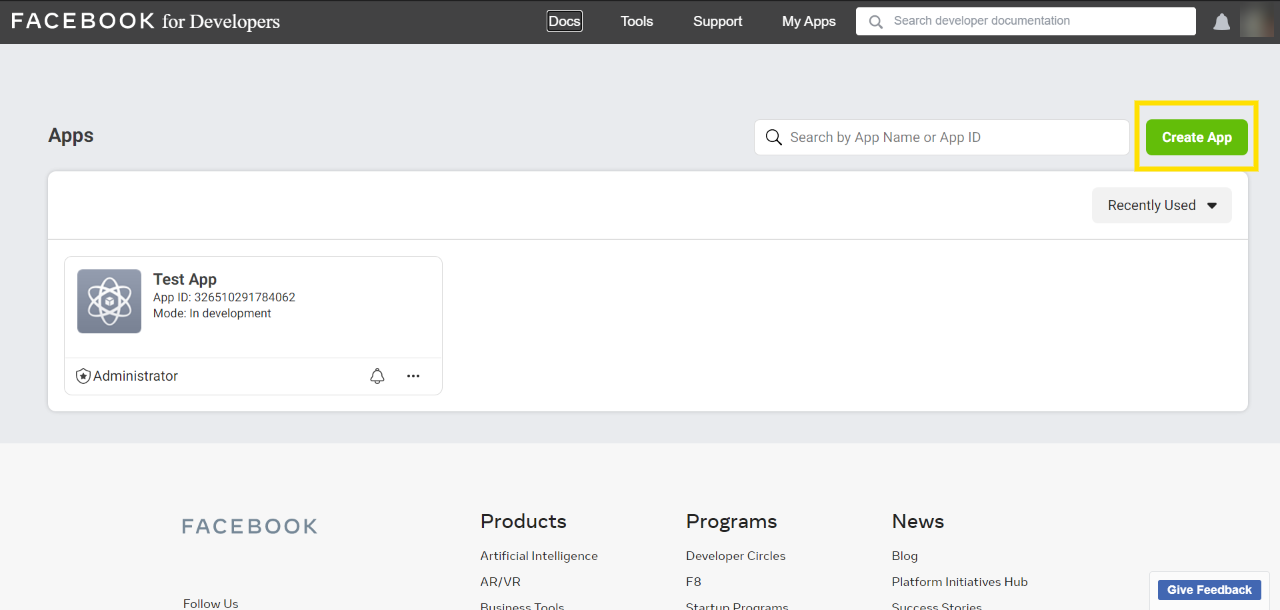
Note that if it’s your first time using the portal, you won’t be taken straight to the Apps page. In that case, click on Get Started on the home page to continue. After that, you’ll need to enter some basic details before your app ID can be created.
Select For Everything Else in answer to “How are you using your app?”:

Next, enter a display name for your app, a contact email, and (optionally) select a Business Manager account:

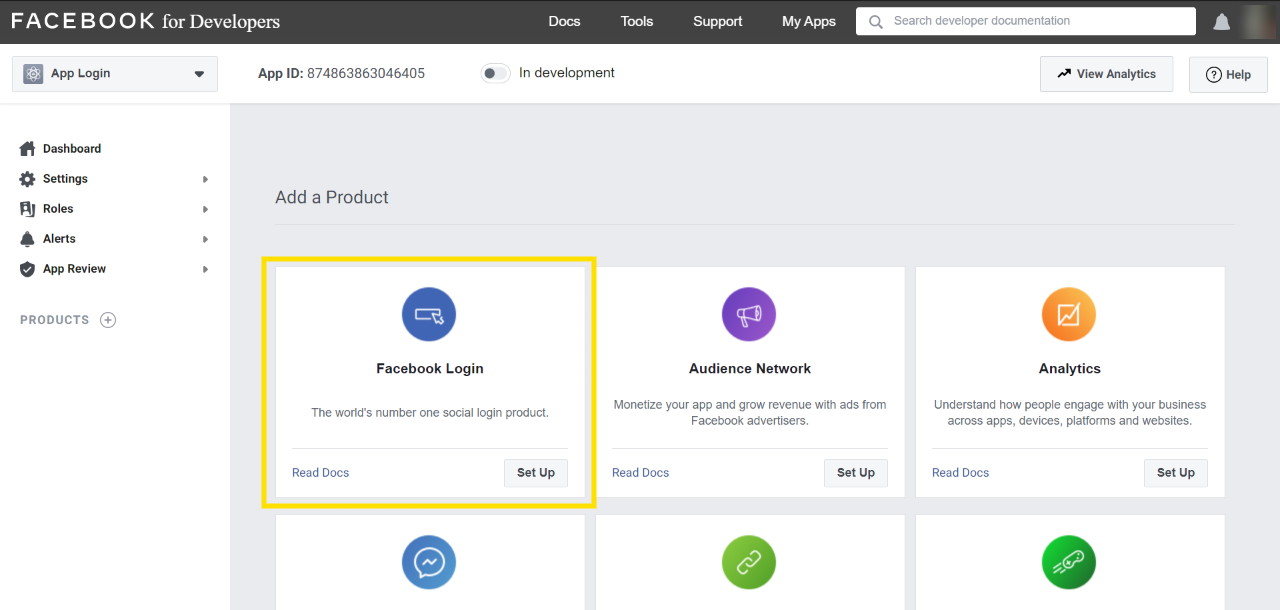
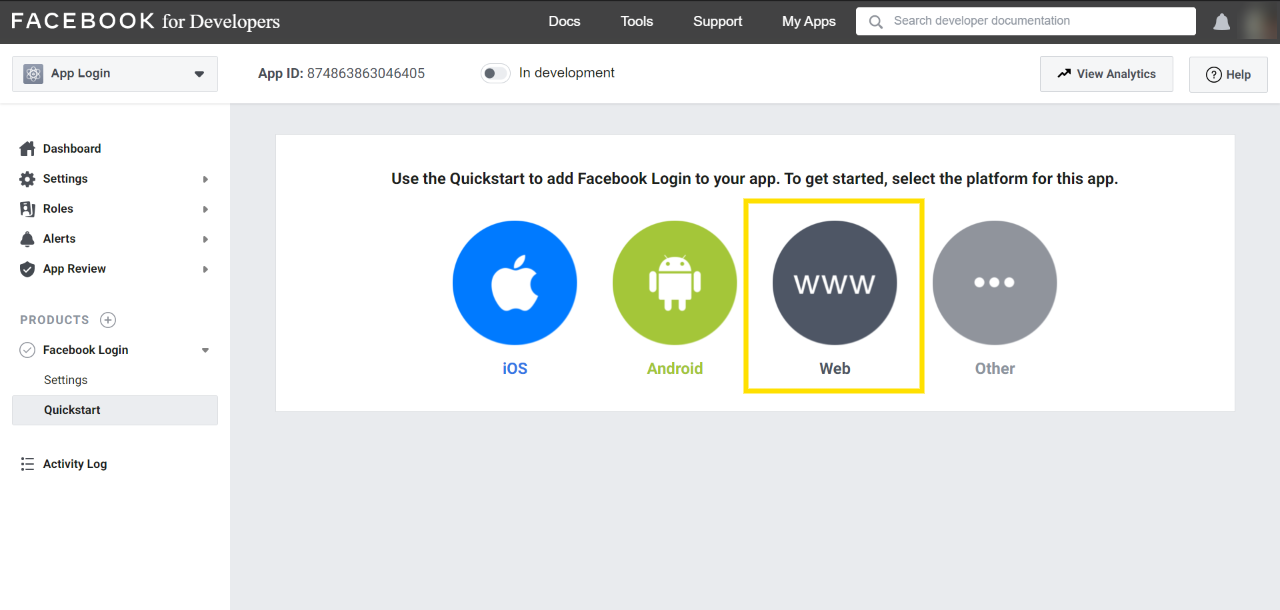
Once your app is created, it’s time to set up the integration. Choose the Facebook Login product:
On the next screen, you’ll want to select Web as your platform:
Then enter your site’s URL and save it:

Now, you can view your App ID and Secret. To do that, you’ll want to navigate to Settings > Basic:

Here, you can copy your App ID and Secret, and paste them back in your WordPress website. Don’t forget to save your settings once you’re done.
You should now see a message at the top of the screen prompting you to add the displayed URL in your Facebook app settings:

Head back to the Facebook developer portal, and navigate to Facebook Login > Settings. Here, you can paste the URL shown above into the Valid OAuth Redirect URIs field. Make sure to save your changes:

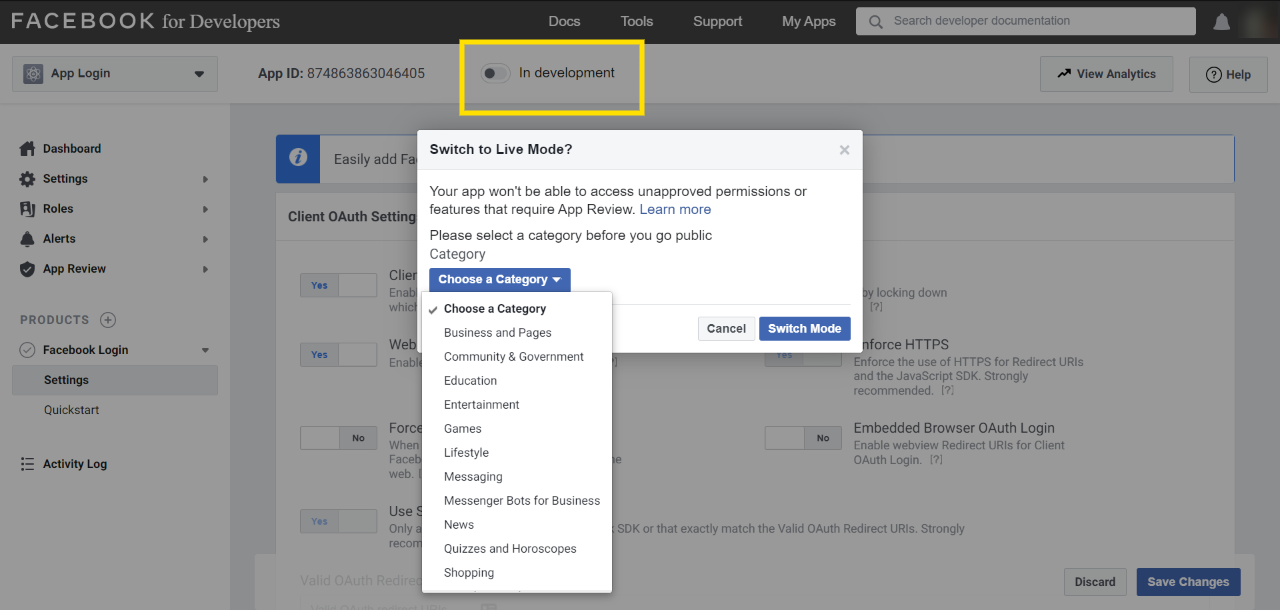
To activate the Facebook login integration on your live site, toggle the switch at the top of the screen labelled In development. You’ll need to choose a category for your app, and then click on Switch Mode:
You can now log out of your WordPress site to test your changes:

You should see a Facebook login button displayed below the usual form fields. Your visitors can start using this button to log in right away.
Adding Social Logins to WooCommerce (In 4 Steps)
WooCommerce offers the ability to use social logins. However, this is only available as a paid feature. Fortunately, Super Socializer can also be used to add login buttons to your registration and login forms, as well as to your checkout pages. Let’s walk through how to do this.
Step 1: Enable Social Commenting
After you’ve installed and activated Super Socializer (following Step 1 in the previous section), you’ll want to navigate to Super Socializer > Social Commenting. Here, you can enable your visitors to make comments using multiple social media services.
Tick the checkbox labelled Enable Social Commenting if this is an option you want to give your users:

You can enable commenting on pages and posts, as well as on attachments and products. You can also set labels for the available commenting tabs. Further down the page, you can enable Facebook and Disqus commenting, and customize some styling and other options:

Don’t forget to save your changes when you’re done here.
Step 2: Set Up Social Sharing
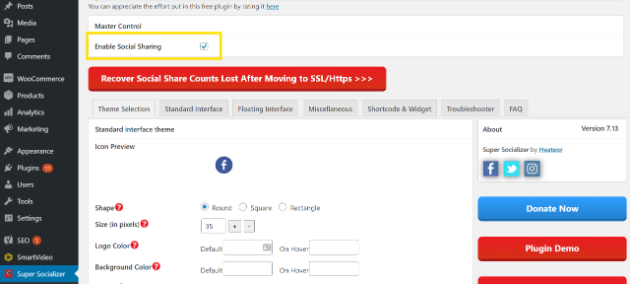
If you’d like to set up social sharing, navigate to Super Socializer > Social Sharing. Next, ensure that the checkbox labelled Enable Social Sharing is ticked:
The Theme Selection tab provides styling options for icon shape, pixel size, background color, and more. Clicking over to the Standard Interface tab provides you with additional options:

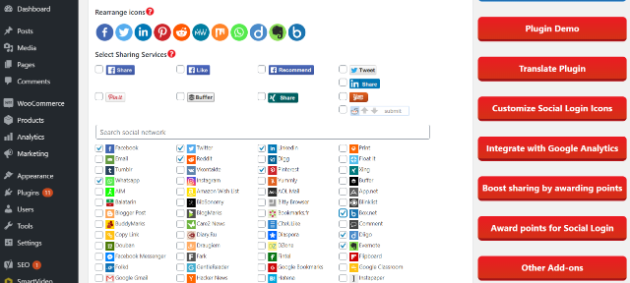
You can select from multiple sharing services and social networks, and rearrange their icons:
You can also choose whether or not to show the total share count for each platform.
Step 3: Enable Like Buttons
To enable users like your content using their social media accounts, you can add ‘like’ buttons via Super Socializer. You’ll want to head over to Super Socializer > Like Buttons, and tick the checkboxes for Enable Like Buttons and Enable standard interface:
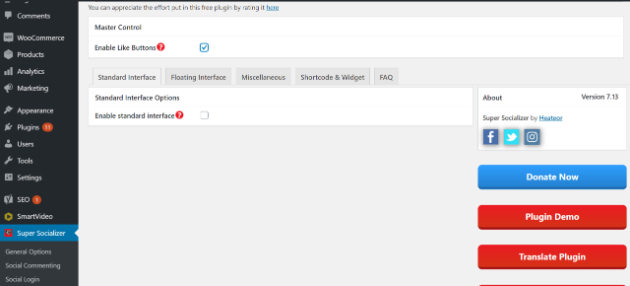
You should now see several different options that you can tweak according to your needs in a Standard Interface tab:

For example, you can customize the target URL for your like buttons. By default, this is set to the home page where the icons are located. However, you can set it to your home page or something else entirely. You can also create a title to display above your like buttons, and select one or more providers. These include Facebook Share, Twitter Tweet, Reddit, and so on.
Next, you can set your buttons’ alignment and positioning. For example, they can be placed at the top or bottom of your content. Finally, you can enable the pages where you want the like buttons displayed. These can be Posts, Pages, Category Archives, and more:
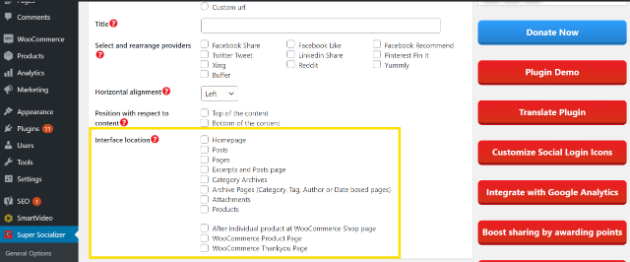
There are also WooCommerce-specific options for enabling like buttons on individual products in your shop, on ‘thank you’ pages, and more.
Step 4: Set Up Social Login
To set up a social login option for Facebook, you can follow the same steps we demonstrated in the previous section. However, if you’d like to enable other options, such as Twitter, LinkedIn, or Instagram, you’ll want to click on the question mark symbol displayed near the relevant platform.
Then you can follow the instructions that are displayed, which will vary for each option. Here’s what that looks like for Twitter:

Don’t forget to save your changes once you’re done here.
Stay Connected With WP Engine
Adding social logins to your WordPress site or WooCommerce shop can greatly improve the UX for your visitors or customers, and increase the number of registrations. Plus, you can access richer user profiles from social network providers such as Facebook, in order to personalize your content more effectively.
It can be challenging to consistently create excellent user experiences for your customers, but the right WordPress hosting service can help. WP Engine makes it easier to maintain quality service!