Get Started

Key Takeaways
Combining shapes in Illustrator is simplified with the Pathfinder Panel. The 10 modes offer various ways to merge shapes, providing designers with more creative solutions.
Pathfinder Panel modes like Unite and Minus Front streamline shape creation. Unite combines shapes into one object, while Minus Front deletes overlapping areas, enhancing design efficiency.
Divide and Trim options in the Pathfinder Panel allow for precise control over object pieces. Separating shapes into smaller parts offers more detailed editing capabilities.
Understanding the Pathfinder Panel in Illustrator unlocks new design possibilities and efficiencies. Exploring the 10 different modes can lead to unique and innovative object creations.
If you’ve used Adobe Illustrator before, you’re no stranger to the five available shapes you can use to create artwork. And you’re also probably familiar with the situation where you start stacking different shapes on top of each other to create a custom shape. Sometimes that works out just fine. But other times, for instance,…
If you’ve used Adobe Illustrator before, you’re no stranger to the five available shapes you can use to create artwork. And you’re also probably familiar with the situation where you start stacking different shapes on top of each other to create a custom shape.
Sometimes that works out just fine. But other times, for instance, when you’re trying to add an outline to your object, having multiple shapes stacked on top of one another causes problems.
Guess what? There’s actually a way to combine your shapes into one object, giving you a much cleaner and simplified solution. The secret: the Pathfinder Panel. Not only can you combine shapes, but you have 10 different options for combining them.
To view the Pathfinder Panel, go to Window > Pathfinder. You’ll see the nice little gray box in the image below.

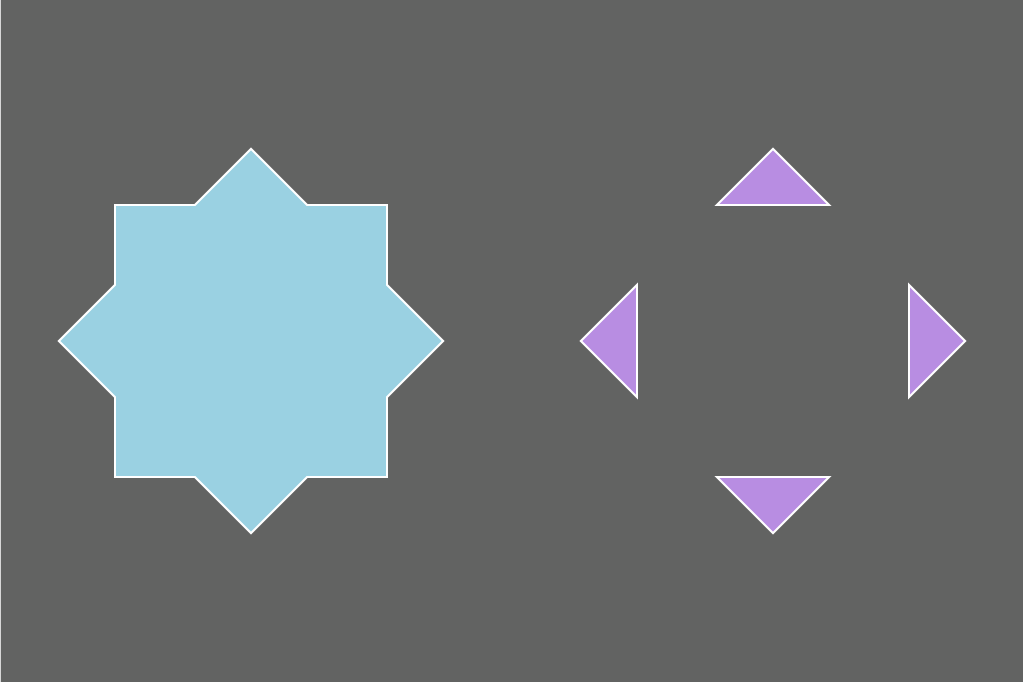
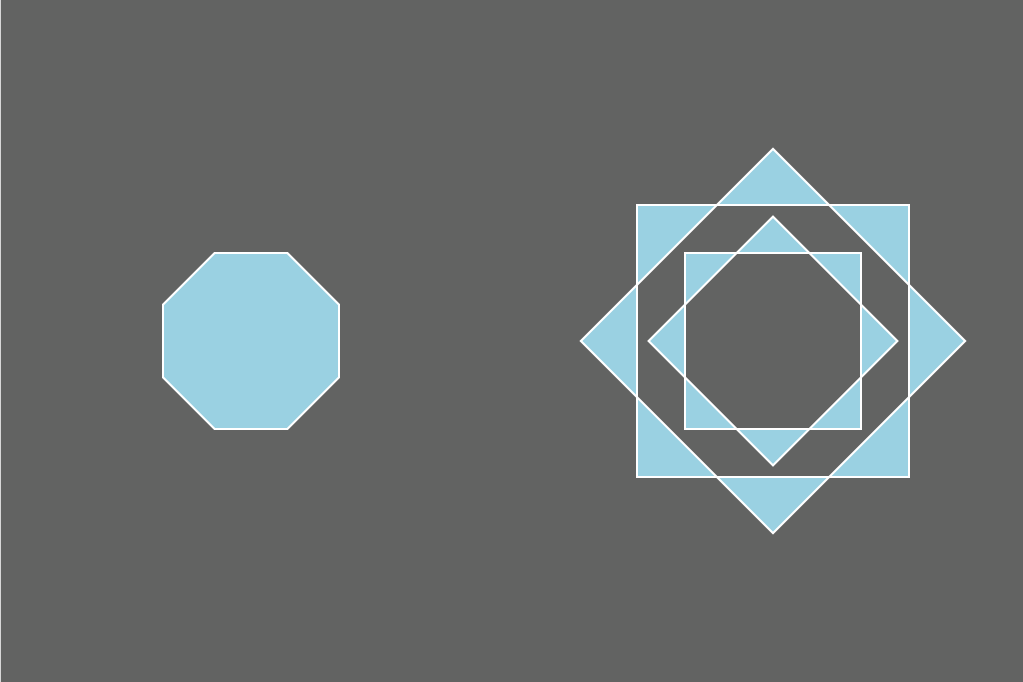
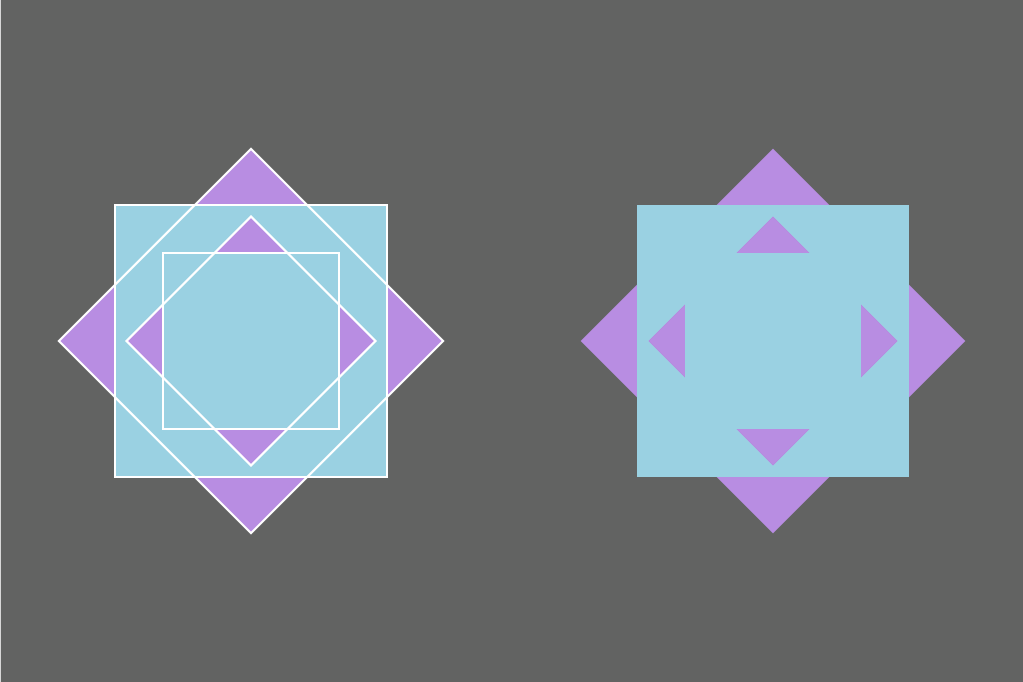
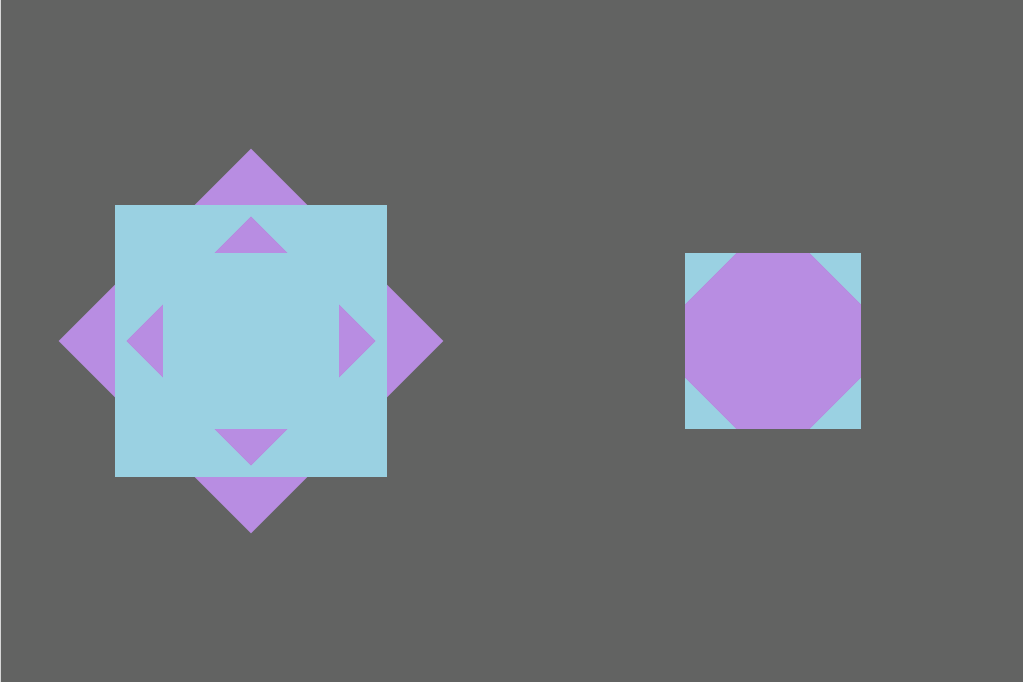
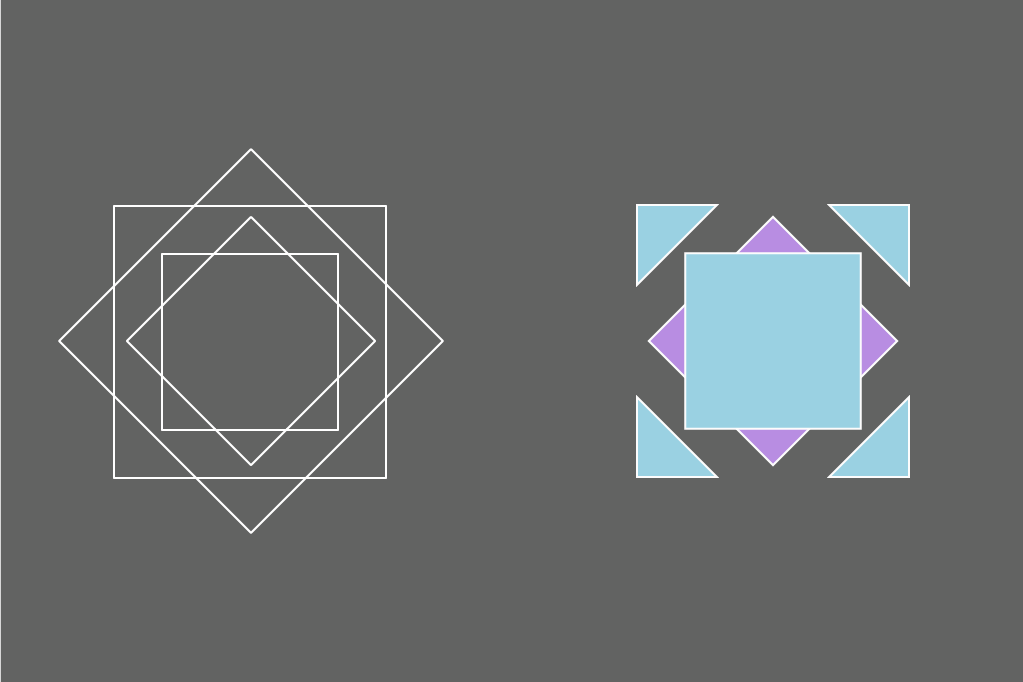
To show you how each of the 10 modes work, I’ve made these nice little abstract objects that consist of two squares and two diamonds (all with white outlines) stacked on top of each other. We’ll go through each of the Pathfinder Panel’s modes (left to right, top to bottom) so you can see the difference each mode makes.
Unite and Minus Front
On the left, I used the Unite option. Just as it sounds, the will unite your shapes into one single object, using the outermost edges. Notice how it selects just one color — it automatically selects the color from the frontmost shape. But now that it’s just one object, you can easily change that.
The shape on the right was created with the Minus Front mode. Basically any space where two or more shapes overlap will be deleted, leaving only parts of the back shape. This maintains the same color as the last shape in your original stack.
Intersect and Exclude
The Intersect option will leave you with only the section where all shapes in your stack overlap. Again, this will automatically select the front-most color.
The Exclude option is kind of a mix between the Unite, Minus Front, and Intersect options. Like Unite, Exclude will combine your shapes using the outermost edges. But every other layer, where the shapes intersect, that portion will be deleted. It’s complex, but can create some very interesting objects.
Divide and Trim
The Divide option actually separates each little piece of the object. Notice how many more outlines there are — those are the “pieces” that can now be accessed individually. The Divide mode will automatically group everything, so it’s one single object, but if you ungroup it, then you can access those individual pieces. This gives you a lot more control over each small section of your object.
The Trim tool is similar in that it separates your shapes into smaller pieces, but it’s a more simplified version. And notice how the outlines have disappeared completely. It still automatically groups the object, but you can ungroup it to access certain parts of the shape.
Merge and Crop
Before you accuse me of making a mistake here, yes, the shape on the left is the Merge Tool, and it is different than the Trim tool. Not by much, but technically it is different. Here, shapes with the same color that are touching are merged together. So in this example, the two blue squares are now one shape. Otherwise, it’s basically the same as the Trim Tool.
The next tool, Crop, takes the overall shape of the frontmost shape in your stack. Colors beneath that, however, will show through. Here, you’ll also be able to ungroup the final object, to select the pieces inside.
Outline and Minus Back
The Outline tool will leave just the outlines of your shapes. While you could achieve this same appearance by giving your objects no fill color, using the Outline tool will allow you to select individual paths (you guessed it, by ungrouping).
The final option for combining your shapes is the Minus Back option. Unlike the other options, I could only select two layers (instead of all four) to make this work. I selected the back two shapes, and you can see that the back shape, and anywhere they overlapped, was deleted.
If you enjoy creating your own shapes in Illustrator, understanding the Pathfinder Panel will open up so many new roads for you as a designer. As you can see, these 10 options will give you many more ways to create objects and will help you to achieve some really unique and creative solutions.
Keep Learning With WP Engine
WP Engine provides more than just lightning-fast WordPress hosting—we’re also committed to facilitating continued learning for developers and designers through our library of helpful resources and support articles, so check back here next time you’re looking for a quick tutorial.