Get Started

Key Takeaways
Adding a calendar to your WordPress site can boost user engagement and SEO. By providing a dedicated space for events, you enhance user experience and increase search visibility.
Consider calendar plugins with SEO optimization and fast loading speeds. Prioritize plugins that enhance SEO and offer fast loading times to improve user experience.
Customize your calendar for a branded experience and better user engagement. Tailoring your calendar to match your website design can enhance user engagement and brand consistency.
Evaluate your current workflow to identify gaps in event promotion strategies. Leaders should assess their current workflow to pinpoint areas for improvement in event promotion and user engagement.
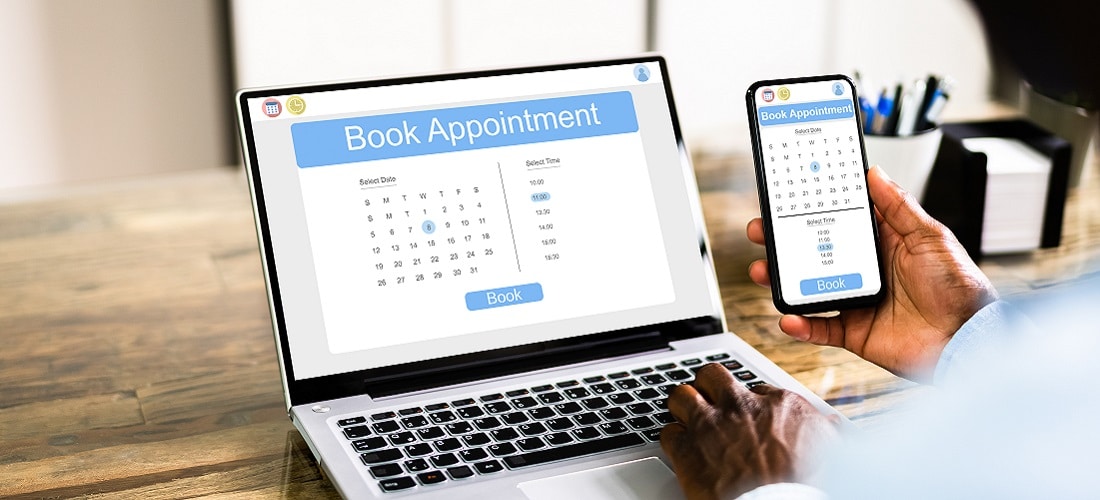
Do you want more people to attend your events? Whether it’s a class, a workshop, or even a meet-up, creating events is only half of the battle. If you don’t promote them effectively enough, it can be challenging to get people to sign up. Fortunately, you can add a calendar to your WordPress website to…
Do you want more people to attend your events? Whether it’s a class, a workshop, or even a meet-up, creating events is only half of the battle. If you don’t promote them effectively enough, it can be challenging to get people to sign up.
Fortunately, you can add a calendar to your WordPress website to help attract more visitors. With a calendar plugin, you’re able to display to your visitors what events are coming up. Plus, a calendar can help you improve customer relations and boost your search rankings.
In this post, we’ll explore some of the benefits of using a calendar on your website. We’ll also teach you how to add a calendar to your WordPress site with a plugin. Finally, we’ll share some additional tools to help you grow your online business. Let’s get started!
The Benefits of Adding a Calendar to Your Website
An online calendar provides a dedicated space for you to organize your events clearly. You might create a landing page to display this information in one neat, convenient place. This way, users won’t need to spend time wading through other areas of your site to find what they’re looking for. In turn, this can vastly improve the User Experience (UX).
Also, some advanced calendar plugins facilitate the sign-up or ticket purchasing process for you. Many can integrate with various payment gateways, enabling you to accept payments for your events. When the entire process is managed within one space, it’s easy for your visitors to book and pay for a spot.
Therefore, by creating a page for your calendar, you can provide more value to your visitors. You might include specific details about your events, so that users understand more about it. Plus, you can make your page more engaging with images and videos:
Your calendar page can also be ideal for directing traffic to other areas of your site. For example, you might increase links to other types of content like blog posts, which can help boost your search rankings and increase conversions.
Additionally, you can even grow your email list by including a calendar on your website. For instance, you could feature a form on your calendar page, so that visitors can subscribe to your newsletter easily. This way, audience members can also stay up to date with your future events.
Features to Consider in a Calendar Plugin
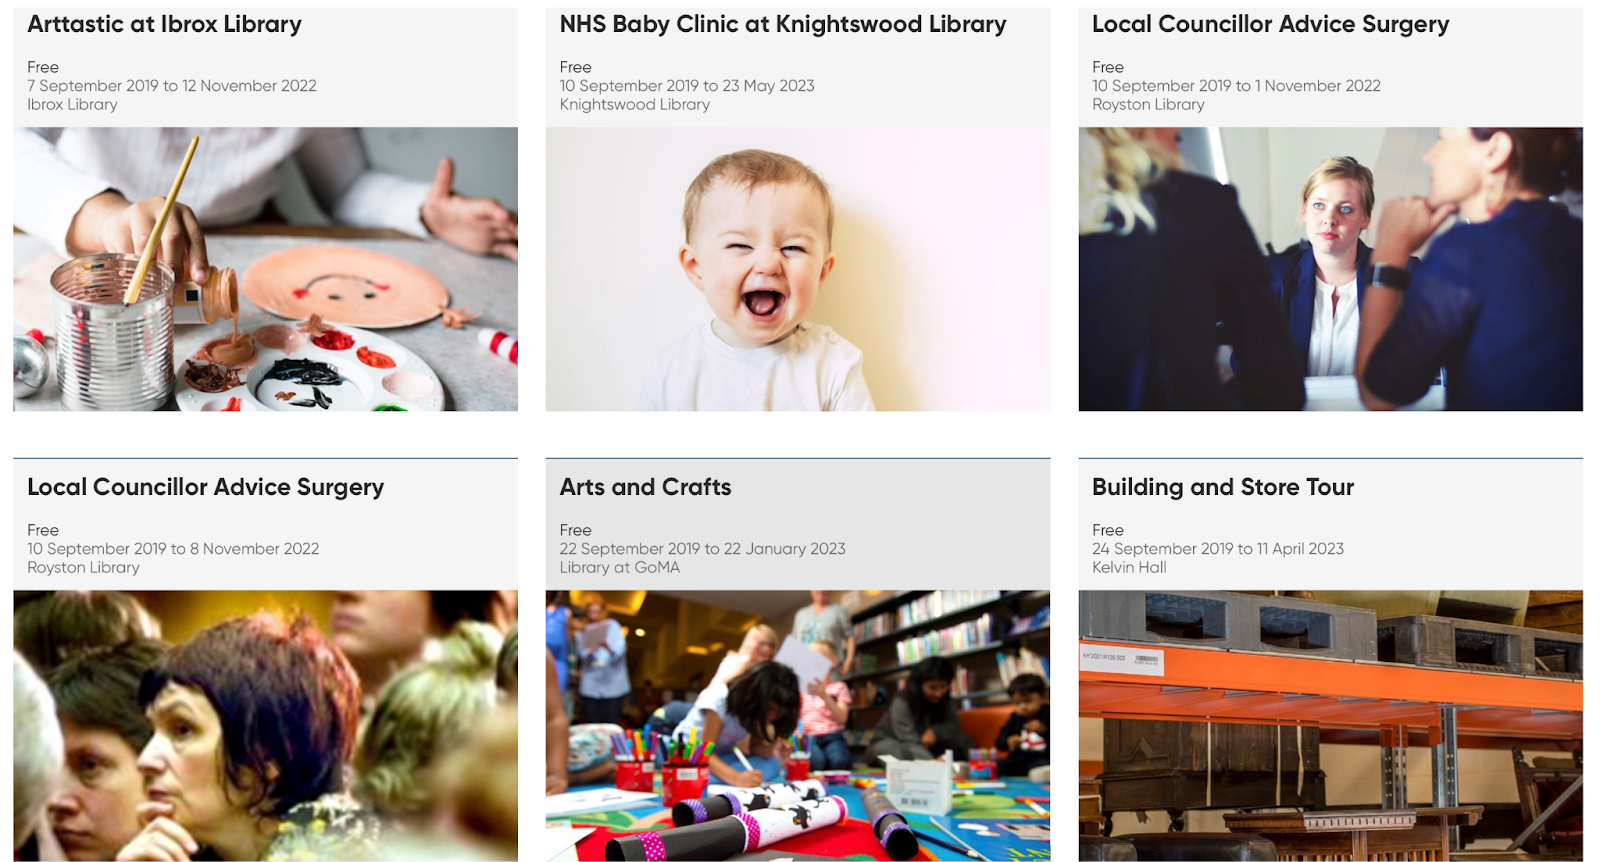
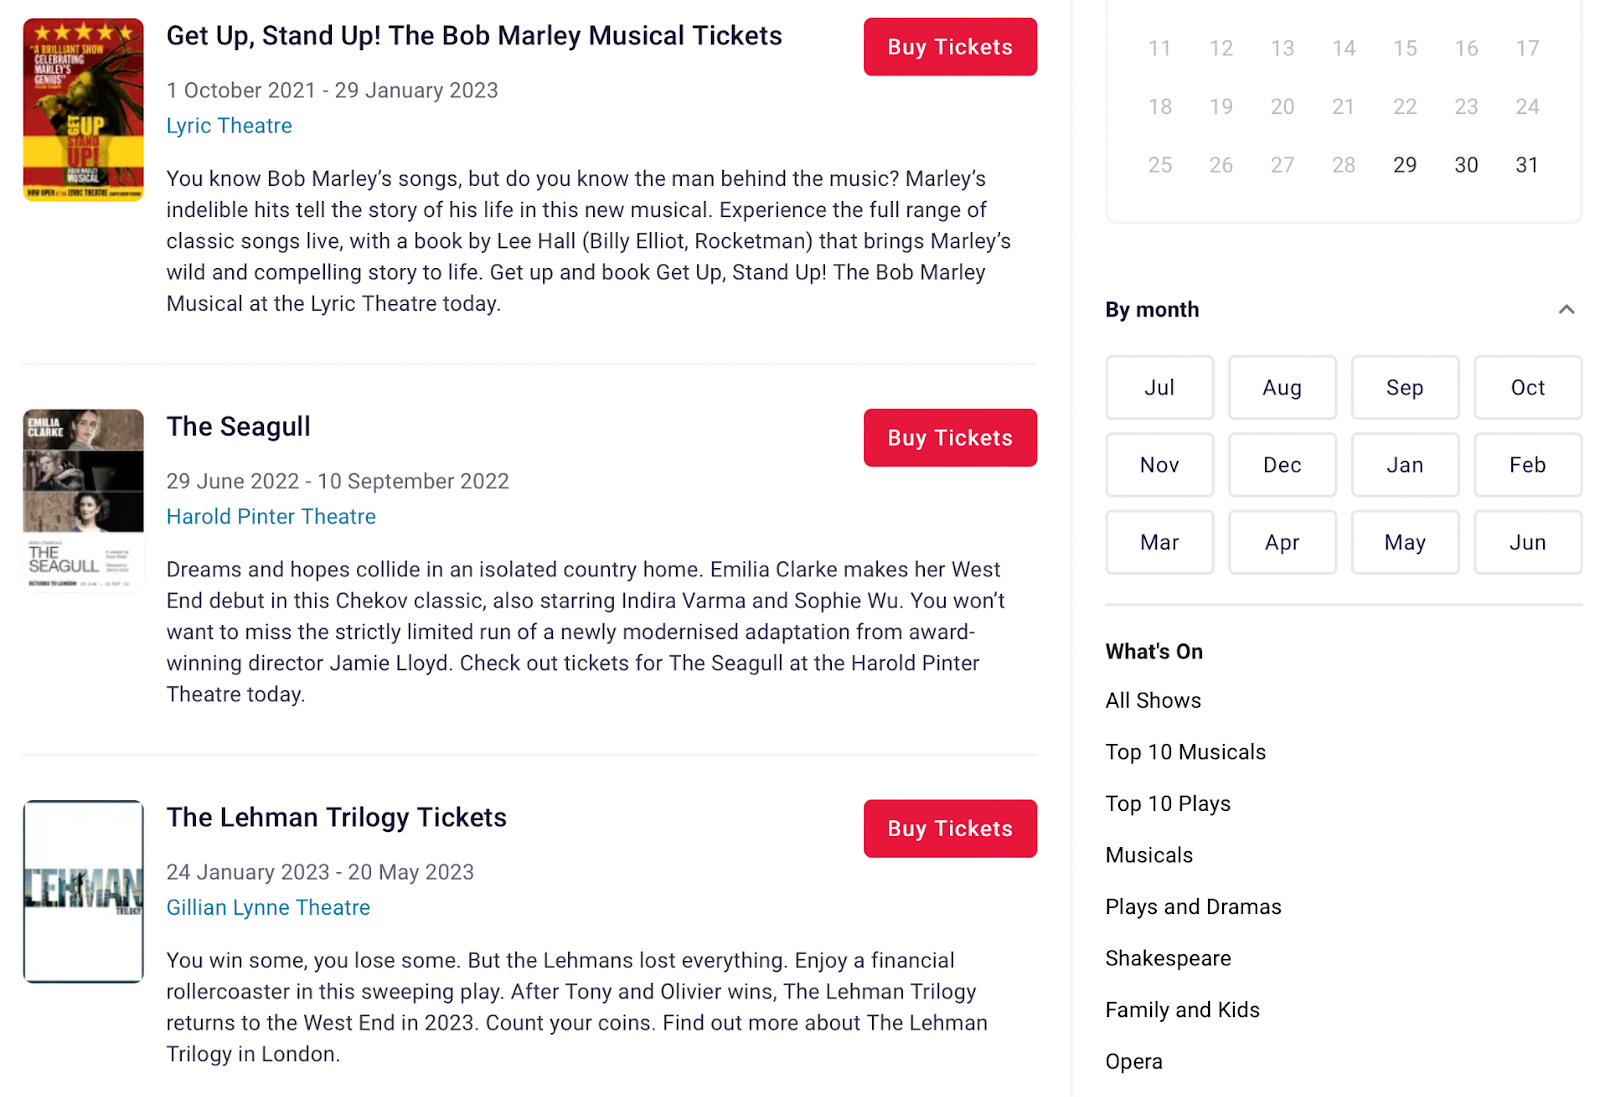
There are different types of calendars you can use on your website. A comprehensive booking calendar will allow visitors to sign-up, buy tickets, or reserve a space at your event. You’ll often find this type of calendar on websites for venues or ticket service providers:
However, we’re going to show you how to create a simple events calendar which informs users about your events. You’ll often find these on web pages titled “What’s On” or “Upcoming Events”.
Here are some of the key features to consider when choosing an events calendar plugin for this purpose:
- Search engine optimization (SEO). You might want a plugin that factors SEO into the mix so that users will be able to find your content more easily using search engines. Look out for customizable options to improve SEO or whether the plugin can integrate with third-party platforms that you already use.
- Speed. If you have lots of events to display on your calendar, you may need a plugin with fast speeds. Users may get frustrated if they have to spend lots of time waiting for your events to load. Good site speed can improve UX and help reduce your bounce rate.
- Regularly updated. It’s important to make sure the plugin is updated regularly so that it’s always compatible with the latest version of WordPress. Otherwise, this could lead to unwanted downtime.
- User Experience. It can be useful to consider features like event filtering so that users can easily search for specific events. Plus, it’s important to make sure the plugin supports responsive design. This means it allows you to create content that can be accessed on any device.
- Calendar views. Some plugins allow you to display your calendar in a variety of ways. For example, you could opt for a full-month view, display your events in a list, or use a photo view which provides helpful visuals for visitors to scan through. Some plugins offer multiple views.
- Customization options. If you want to deliver a seamless, branded experience to visitors, you’ll likely need to customize your calendar to match your overall website design. This can also boost your UX by making your site more attractive. If this is important to you, keep an eye out for custom CSS options.
There’s no doubt that an eye-catching events calendar can make an impact on your visitors. However, since various plugins provide drastically different services, it’s important to find one that best suits your needs.
How to Add a Calendar to a WordPress Site (In 3 Steps)
Now that you know what to look for in an events calendar plugin, let’s take a look at how you can add a calendar to your WordPress site in three steps.
Step 1: Install and Activate The Events Calendar Plugin
Once you’ve selected the right plugin for your needs, the first step is to install and activate it. We’re going to use The Events Calendar plugin for this tutorial.
This plugin enables you to create events and display them clearly in a calendar on your website. It’s very easy to use, so you may even be able to get your calendar up and running in minutes.
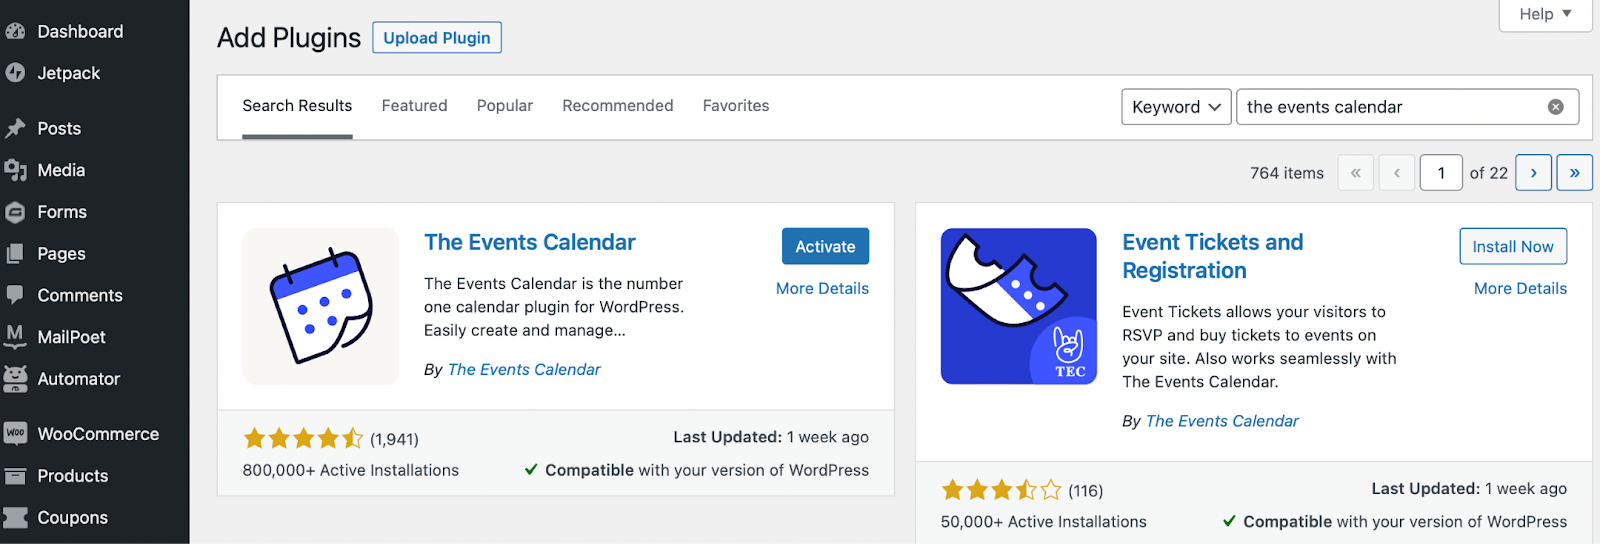
The Events Calendar plugin is free, so you can install it directly from your WordPress dashboard. To do this, go to Plugins > Add New:
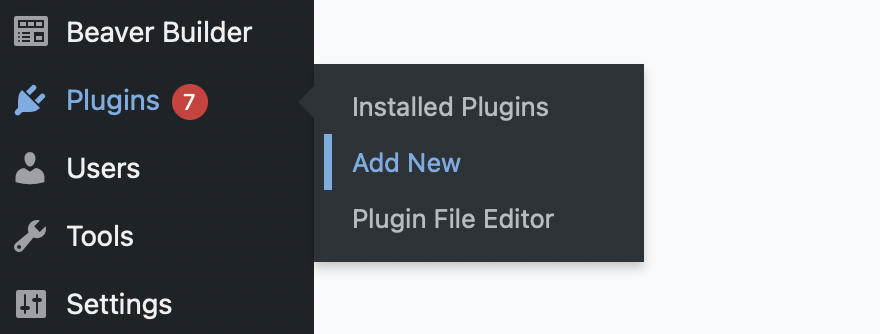
Next, find the plugin using the search bar. Once it has popped up in the results, click on Install Now. This will only take a few seconds. Then, select Activate:
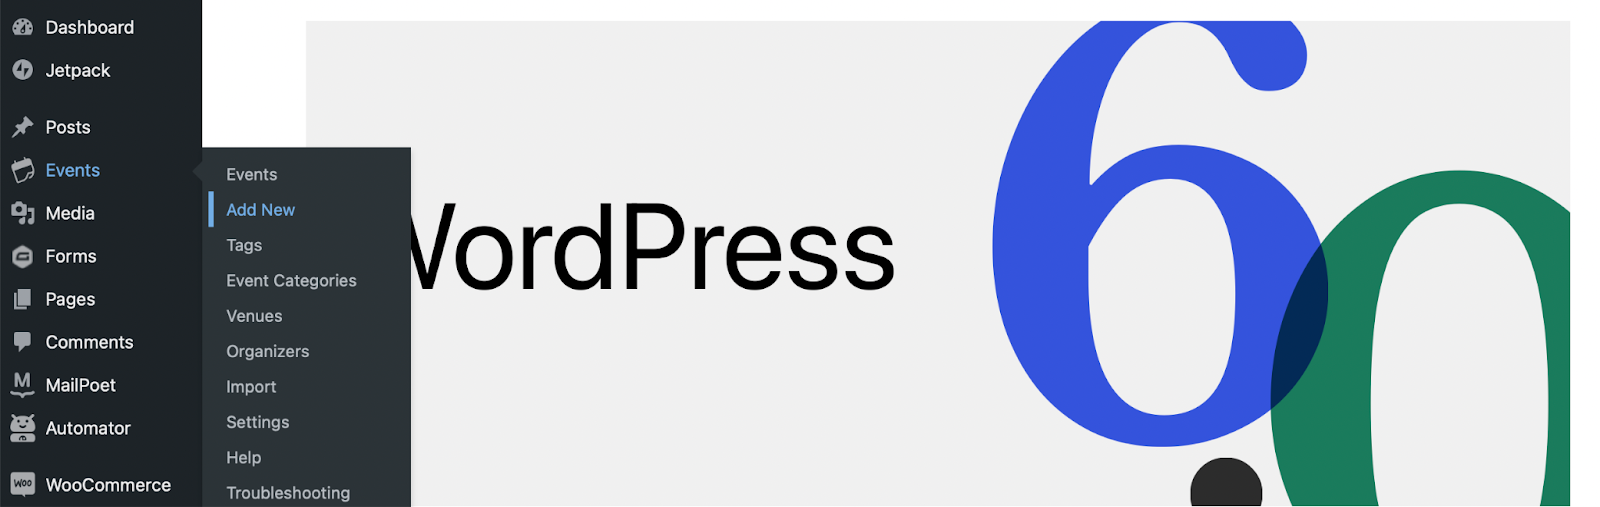
If you’ve followed the steps successfully, you’ll now see Events appear in your left-hand menu.
Step 2: Add Events to Your Calendar
To start adding events to your calendar, navigate to Events > Add New:
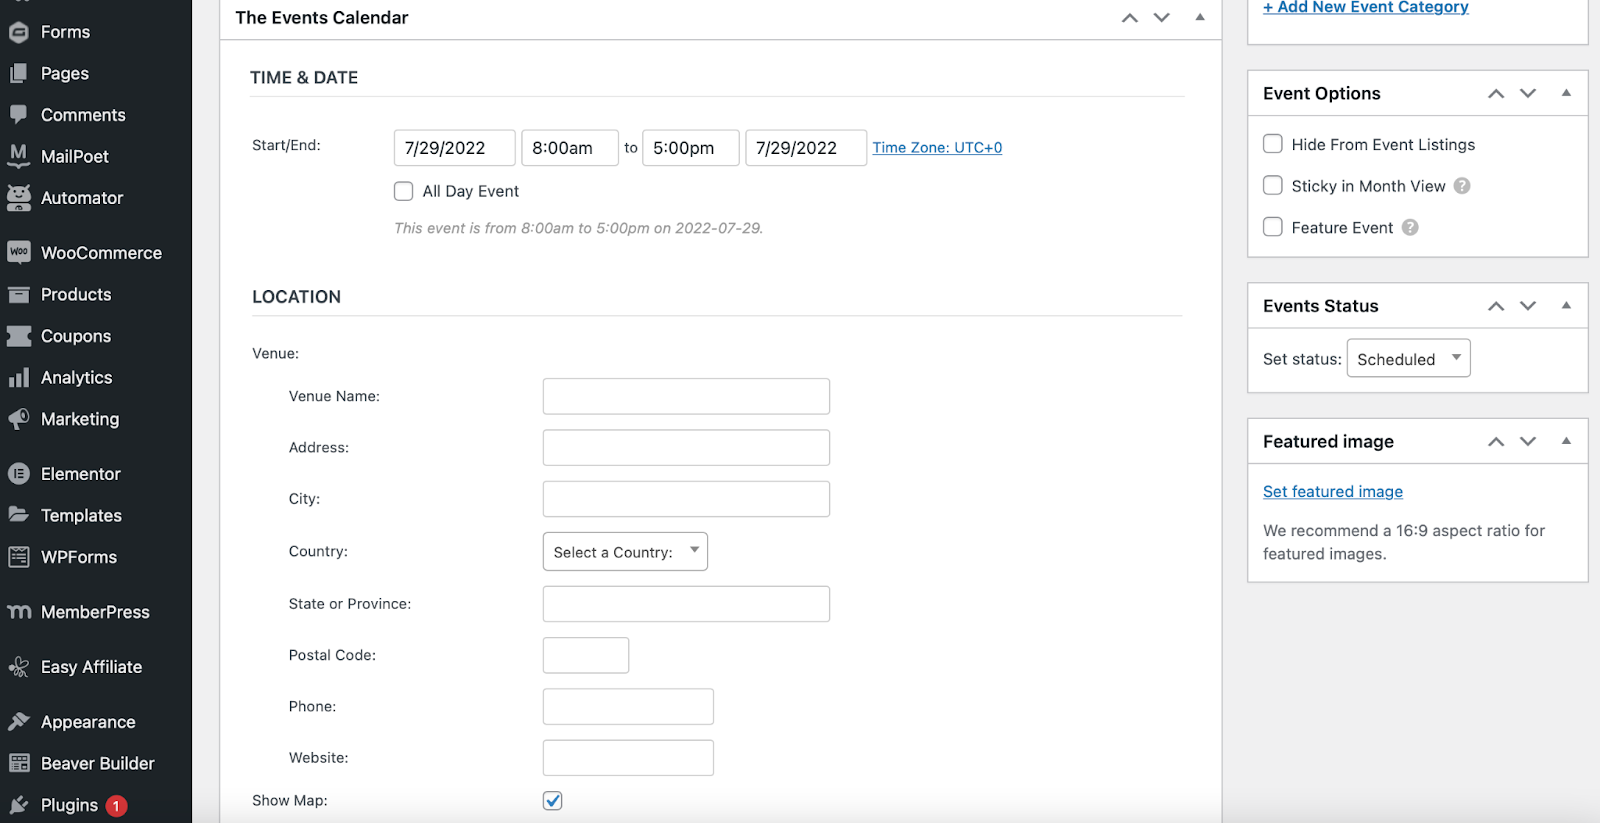
Give your event a title and add a description. Then, scroll down to The Events Calendar panel. Here, you can enter details for your event such as a time, date, and location:
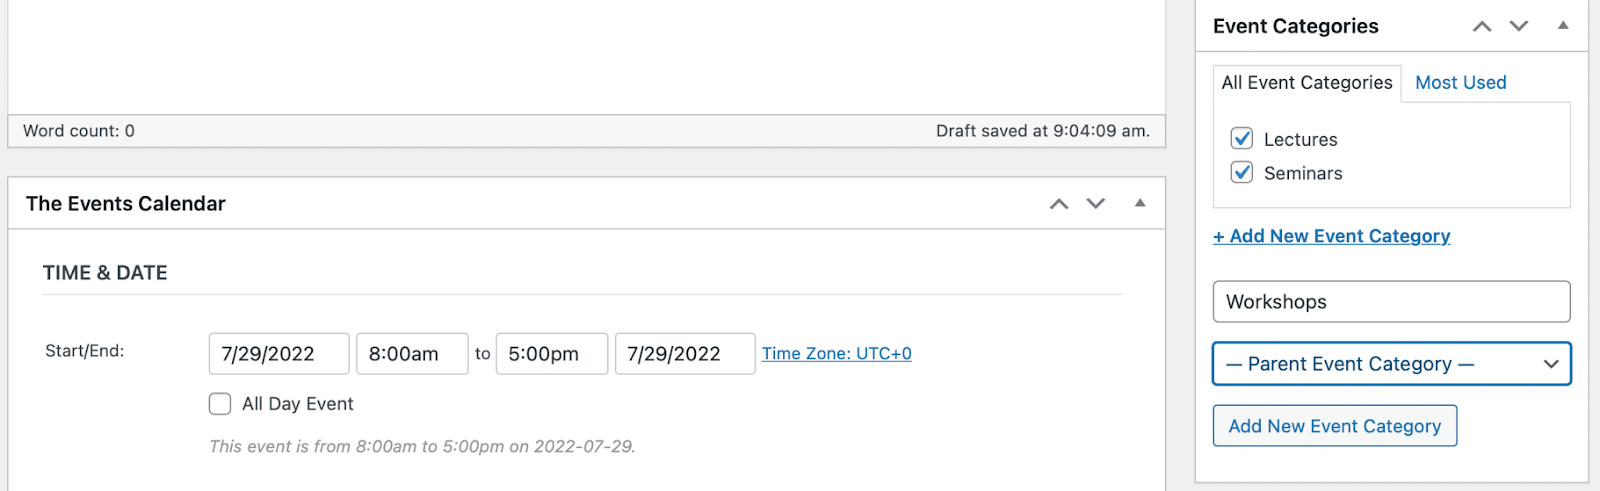
Scrolling down, you can include information about the organizers and set a cost for the event. Other customization options enable you to categorize your events into themed groups.
For example, if you host lots of events, you might sort them according to an event type, such as ‘workshops’ or ‘seminars’. Alternatively, you might categorize your events by subjects like ‘technology’ and ‘sports’.
You can create unique labels for your entries in the Event Categories panel on the right of your screen:
You can also add a feature image to your event, and spotlight it by ticking the Feature Event box under Event Options:
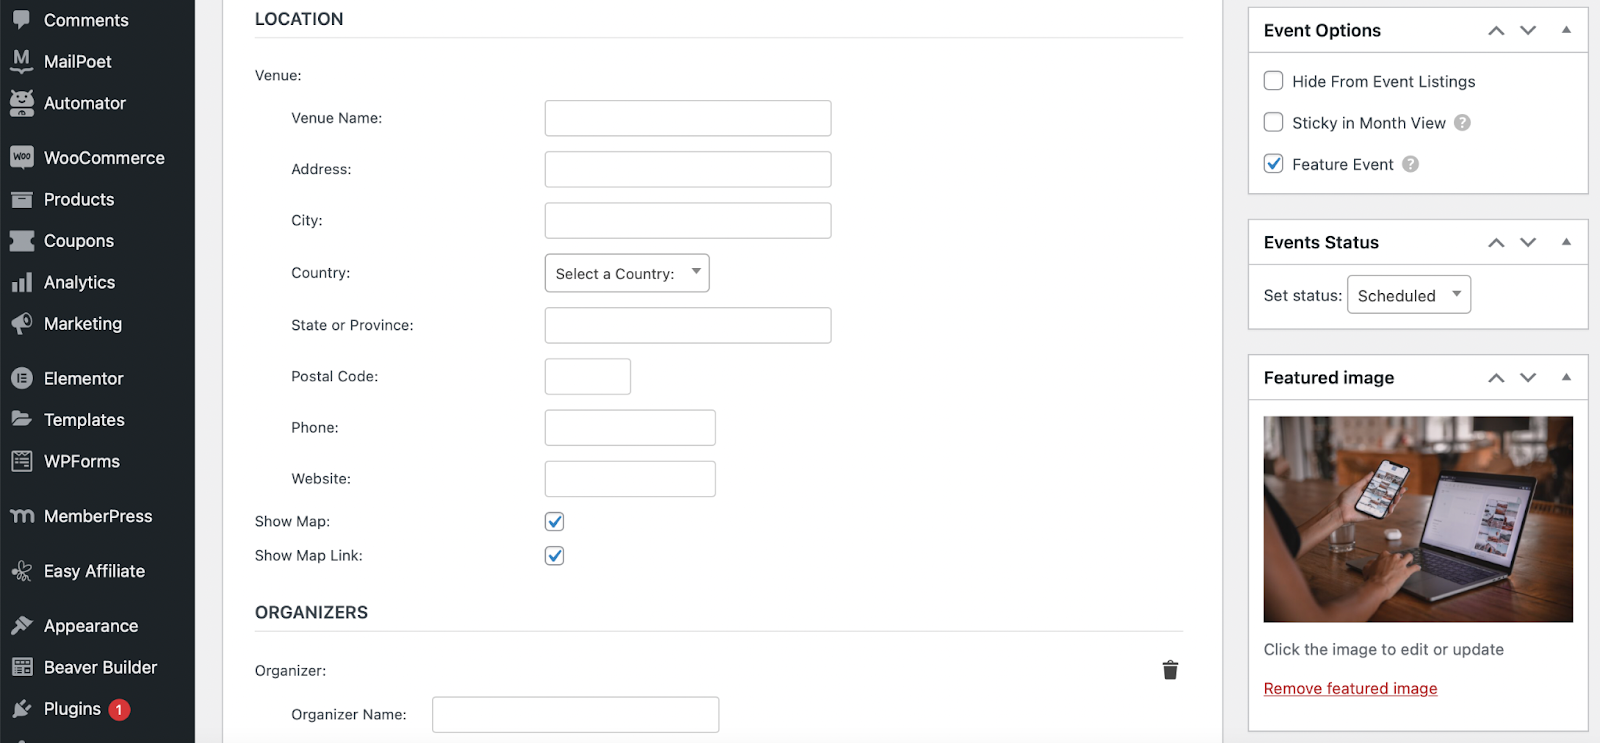
Plus, if your event is private or you’re simply not ready to announce it yet, you can hide it from the listings by ticking the Hide from Event Listings checkbox.
Once you’re happy with your changes, click on the Publish button at the top of the screen. Then, simply repeat the process to add multiple events to your calendar.
Step 3: Configure Your Calendar Settings
To see how your calendar will look on the front end of your website, go to Events > Events. Simply find your event in the list and then click on View:

On our calendar, you can clearly see the time and date of the event, as well as a venue name and a description. It’s also tagged as a featured event and is accompanied by an image. Keep in mind that here, you can either search for events or view them in a list, month, or daily calendar.
If you decide you’d like to make some additional changes at this stage, return to your WordPress dashboard and go to Events > Settings. Under General, you can further modify elements such as event URLs, the number of events displayed per page, and comment permissions:
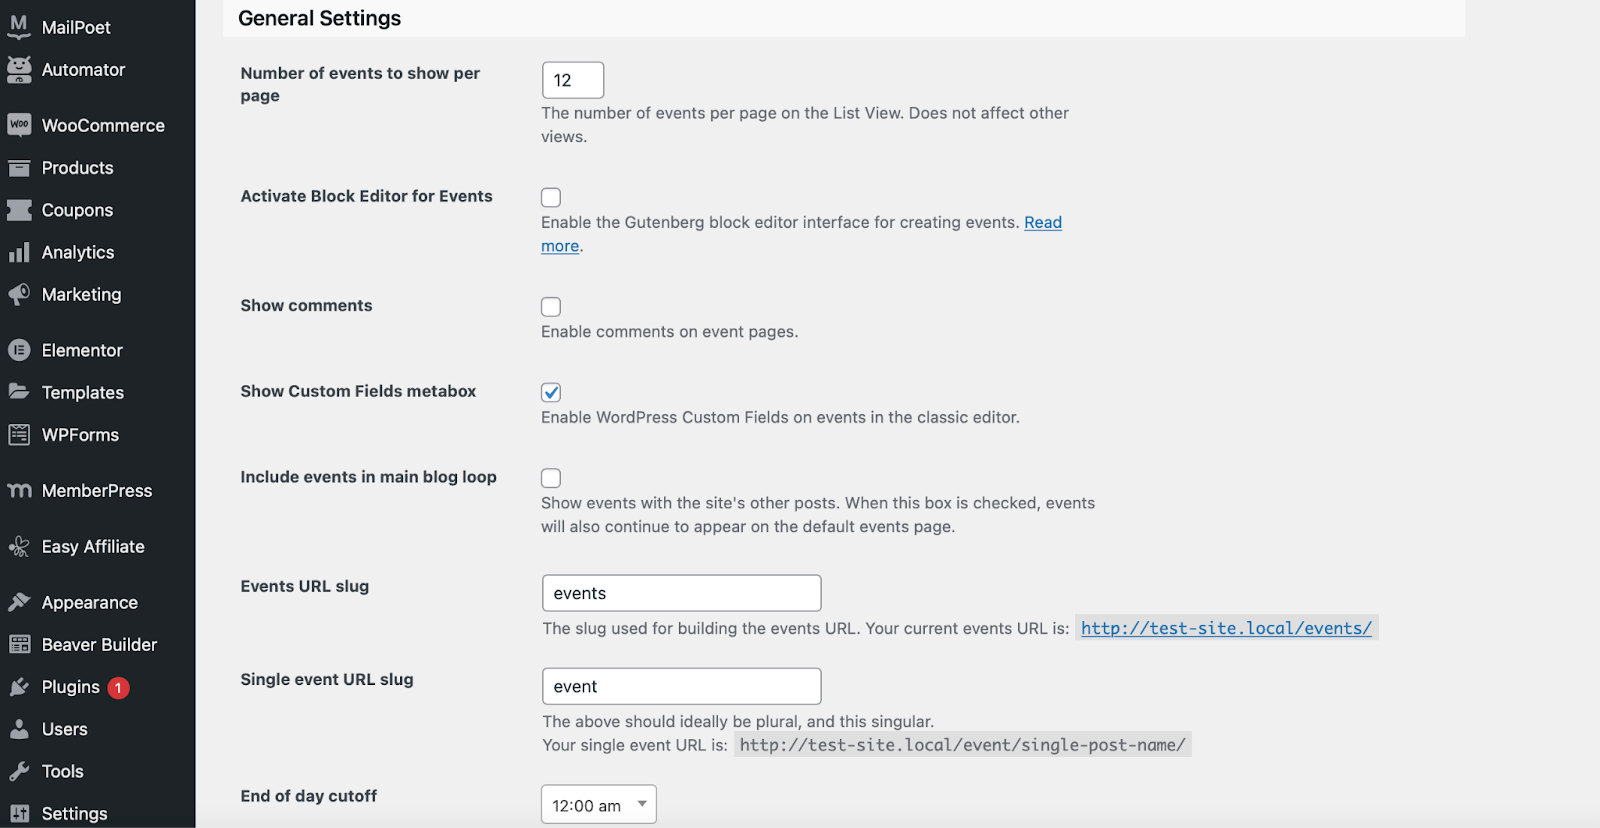
If you continue to scroll down, you will find that you can also decide to set a currency (if you’re including prices for your events) and implement Google Maps to display specific addresses. When you’re satisfied with your selections, remember to save your changes.
Next, to change how your calendar is displayed, click on the Display tab. Here, you can replace the events template, adjust the date format, and change the default view:
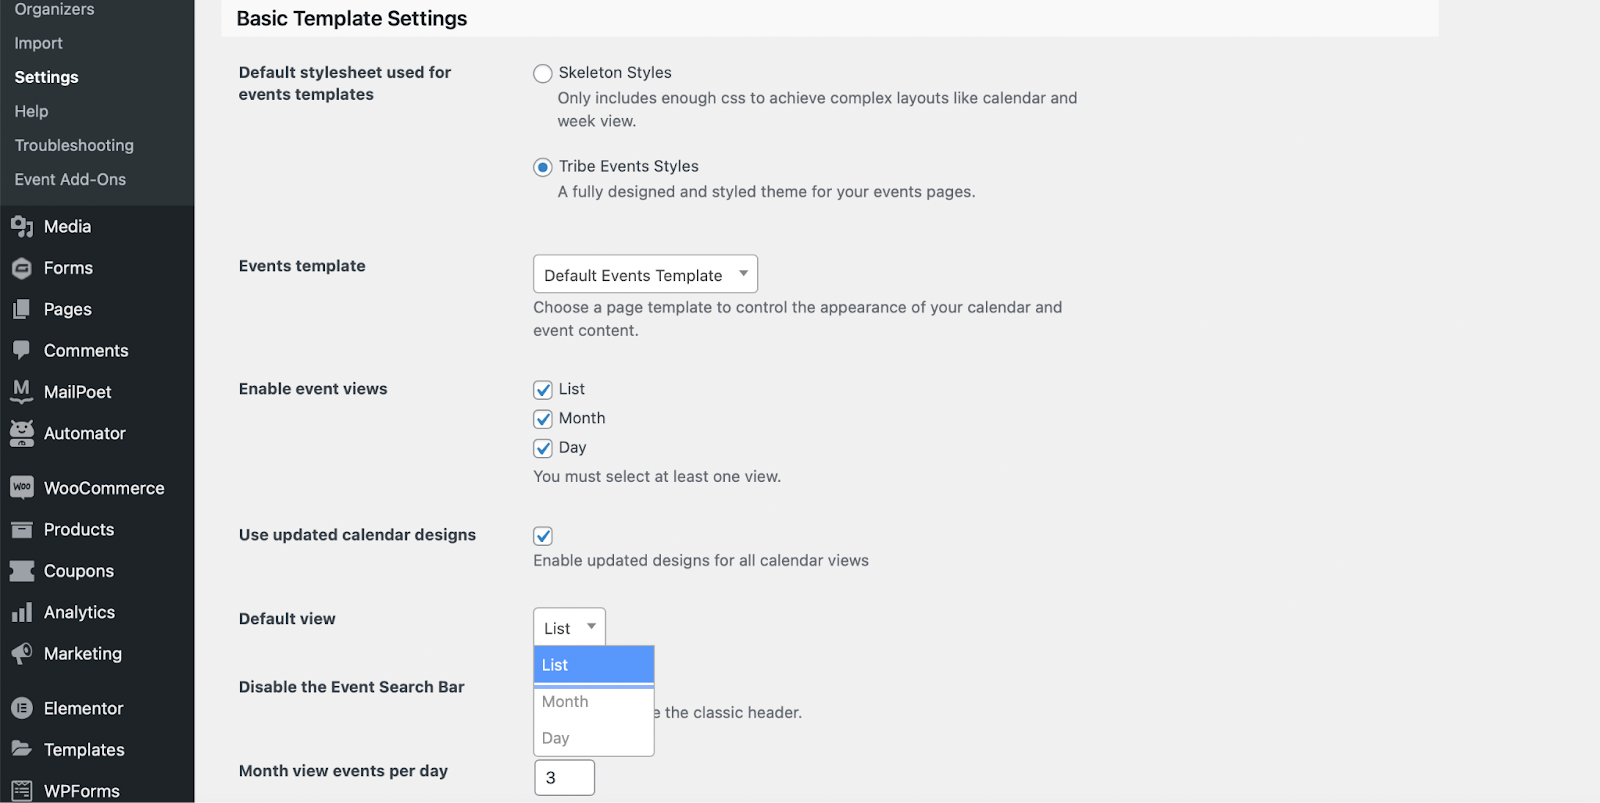
You may want to explore the different options in each dropdown menu. Click on Save Changes when you’re done.
If you have multiple events to add to your calendar, you can save venues so that you can easily select them from a dropdown menu as you create more events. To do this, navigate to Events > Venues. Then, click on Add New:
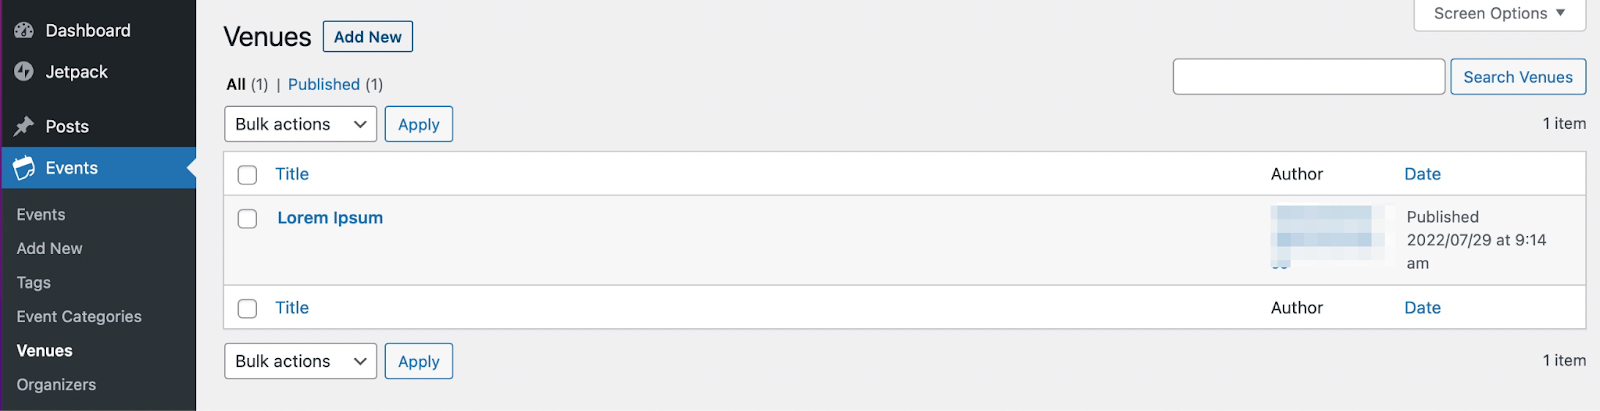
Choose a name and type a description for your venue. Then, fill out the location information, link to a venue website, and choose to display a map (or not):
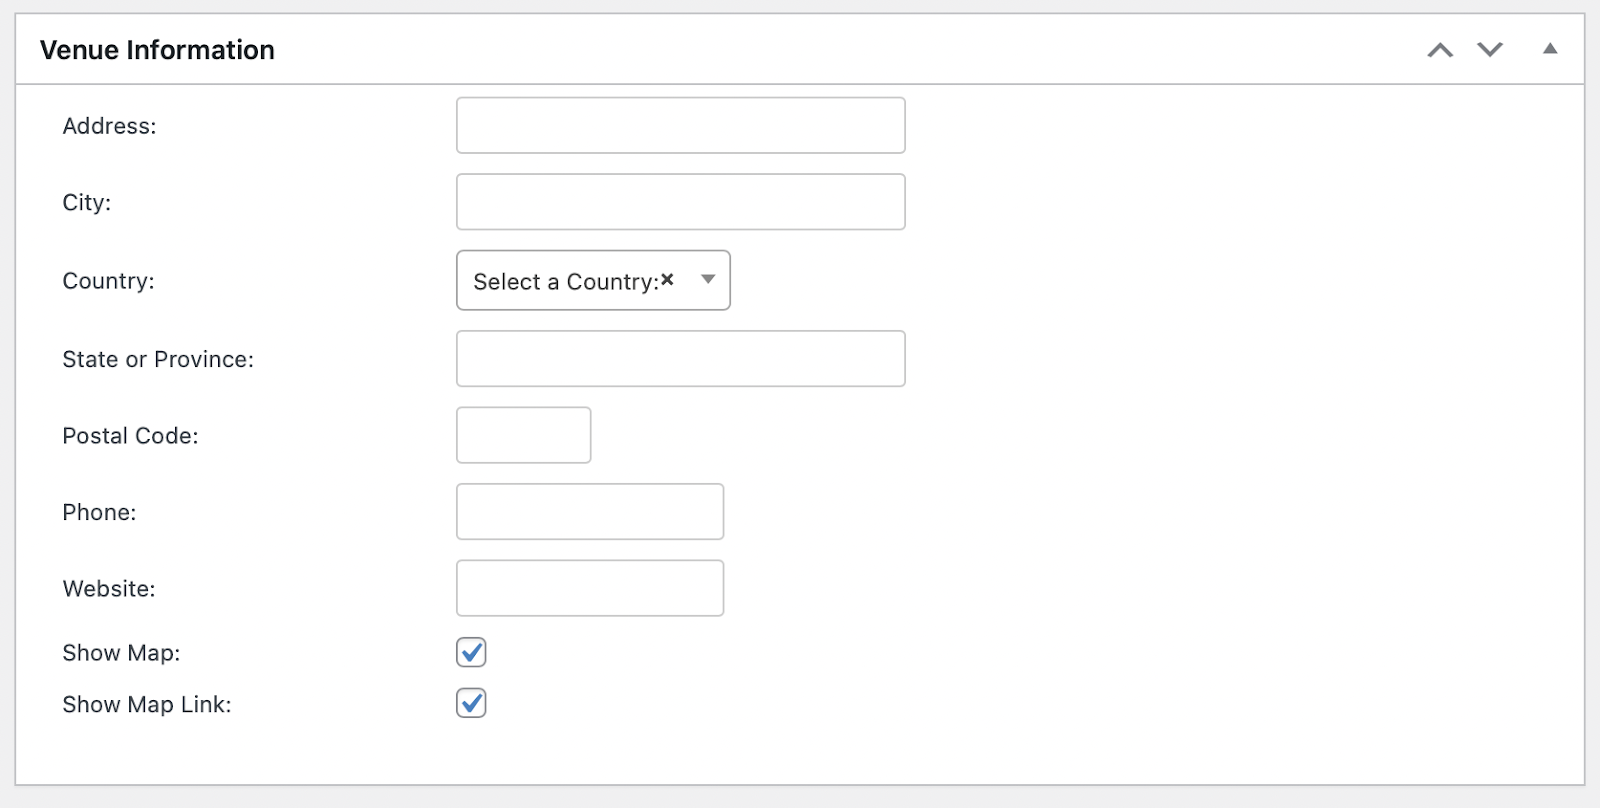
To finalize your changes, click on the Publish button at the top of the screen.
As you can see, it’s simple to add a calendar to your site using the free Events Calendar tool. Still, you may want to check out its Pro plans to see if the premium features may benefit you:
One advanced option allows for additional views, so you can display your calendar by photo grid or on a map. Additionally, you can speed up your workflow with the recurring events feature and access extra widgets. These can allow your visitors to view a mini calendar grid or see your featured events on any page of your website.
Other Tools to Help Grow Your Online Business
A calendar is an excellent way to provide more value to visitors. As we discussed, it can help boost your UX, build your email list, and improve your search rankings. However, there are additional tools you can use to grow your online business.
Here are some resources and optimization ideas you may want to think about:
- Switch to a quality hosting service. Your website will need to run smoothly in order to scale and accommodate larger numbers of visitors. Hosting providers such as WP Engine provide fast and secure hosting services specifically for WordPress websites. With our managed hosting plans, all the technical aspects of running a site are taken care of for you.
- Integrate your site with social media. Connecting your website with your social platforms can drive more traffic to your site, build brand awareness, and increase engagement with your posts. So, consider utilizing social button widgets on your web pages.
- Email marketing. We discussed how a calendar can help you grow your subscriber list. After that, you can set up automated (and personalized) emails to convert leads into customers by integrating your site with an email marketing platform.
- Contact forms. You may want to use contact forms on your website. These can help with lead generation and enable you to expand your audience.
By utilizing some of these tools and strategies, you can take your business to the next level. You build brand awareness and land your web pages in the top spots in search results.
Conclusion
Although it’s important to invest time and effort into producing your events, marketing them effectively is just as important. Otherwise, it can be difficult to attract enough attendees. Fortunately, you can add a calendar to your WordPress site so that visitors can quickly find what they’re looking for.
To recap, here’s how to add a calendar to a WordPress site in three simple steps:
- Install and activate The Events Calendar plugin.
- Add events to your calendar.
- Configure your calendar settings.
Are you looking for dependable, fast WordPress hosting and support to help you grow your online business? Visit WP Engine to view our full list of features and find your perfect plan!