Get Started

Key Takeaways
Creating a high-quality gif in Photoshop is easier than expected. Follow a simplified process using necessary images and Photoshop, even with minimal experience.
Utilize Photoshop’s Timeline window for editing and animating gifs. Open the Timeline window, create frame animations, and make frames from layers to customize your gif.
Preview and test your gif before exporting. Ensure frame order, time duration, and looping options are set correctly for a seamless gif.
Save and export your gif in Photoshop to celebrate your creation. Follow the steps to save your masterpiece and export it as a gif.
Have you been in a situation where you need to create a gif, but you’re not sure where to even start? Believe it or not, creating a high quality gif is much easier than you think—all you’ll need are the necessary images and Photoshop. We even simplified the process so this guide should be easy…
Have you been in a situation where you need to create a gif, but you’re not sure where to even start? Believe it or not, creating a high quality gif is much easier than you think—all you’ll need are the necessary images and Photoshop.
We even simplified the process so this guide should be easy to follow even if you have minimal Photoshop experience!
How to create a gif in Photoshop:
- Upload images to Photoshop
- Open the Timeline window
- Create frame animations
- Create a new layer for each frame
- Make frames from layers
- Select frame duration and looping option
- Preview and test your gif
- Save in Photoshop and export
- Celebrate
Step 1: Upload images to Photoshop
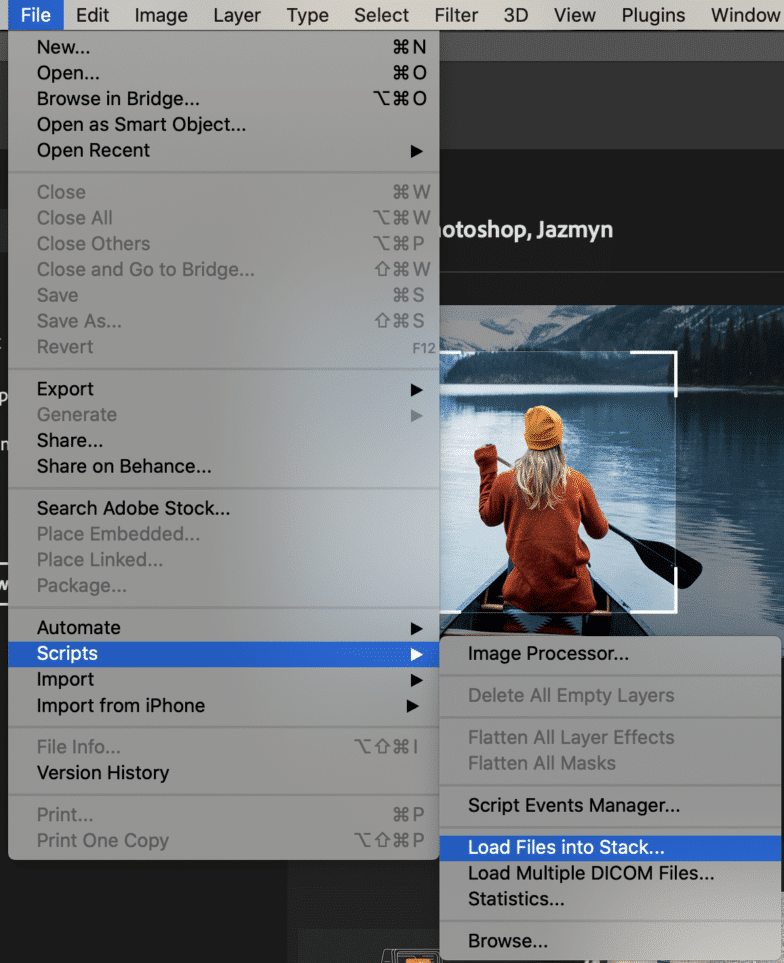
To start, create a new document and input what size you’d like your canvas to be—this should be the size you want your final gif to be when you export. Then, you’ll need to upload the files you want to work with in Photoshop. Go to File > Scripts > Load Files Into Stack.
Choose either Files or Folders to upload, select Browse, and select each file you want to use. After you click OK, Photoshop will automatically create a layer for each image.
You’ll want to create a name for each layer so later when you’re editing, you don’t get confused. Consider a numerical or other naming format that’s easy to remember.
Step 2: Open the Timeline window
You’ll do all your editing in the Timeline window so we’ll need to open that by going to Window > Timeline and select the option to get started. Now, you should see the timeline window at the bottom of the screen like this:
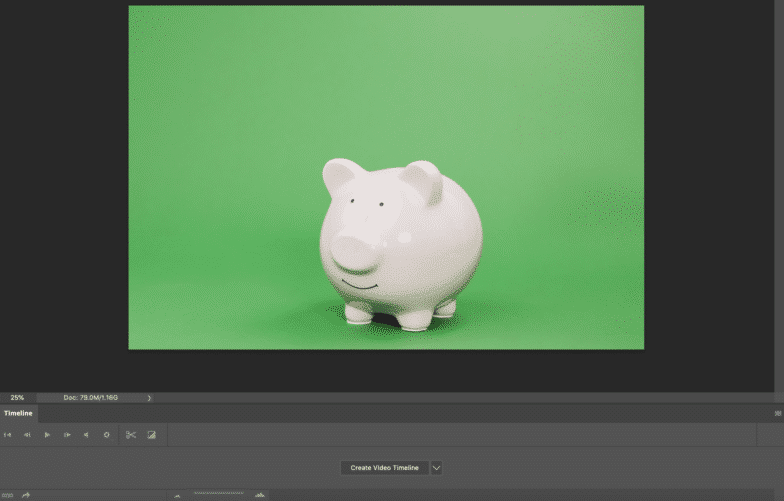
Above the layers section of the Timeline, you’ll see controls for playing your animation, the sound, and resolution settings. The scissors icon in that toolbar will split a layer wherever the playhead (that vertical red line) is. The final icon (the square with the triangle inside in the toolbar) enables options for fading a layer in or out.
Step 3: Create Frame Animations
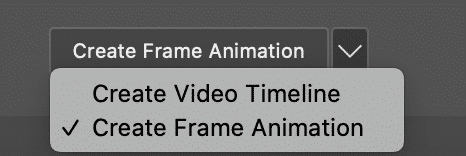
Before you can begin to animate anything, you’re going to need the ability to create frame animations. To do this, find the dropdown arrow next to Create Video Timeline and select Create Frame Animation.
Once you’ve done so, you can take a minute or two to play around with the settings outlined in step two to get familiar with what they do and how they affect your soon-to-be gif.
Step 4: Create a New Layer for Each Frame
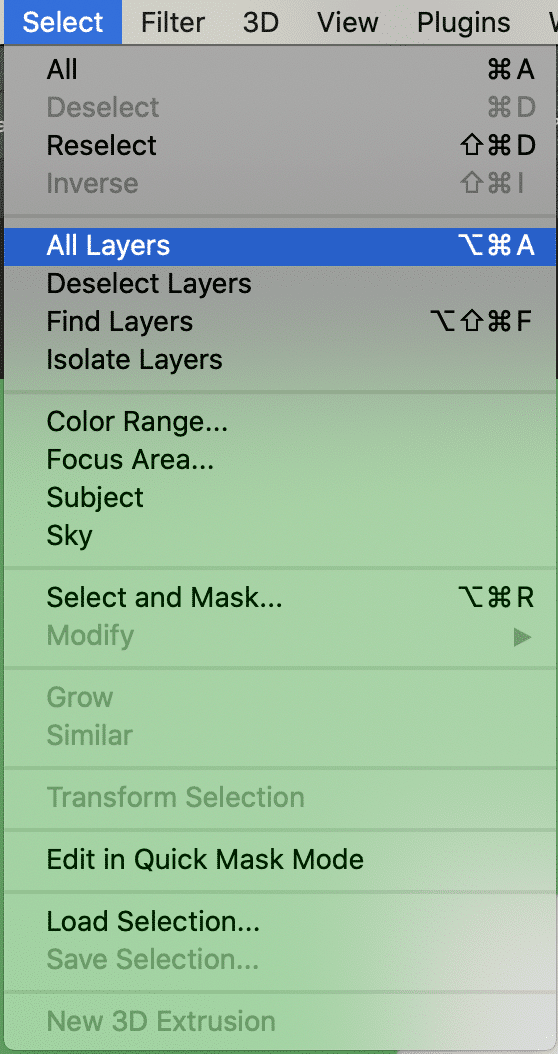
In the top menu, click Select and then “All Layers.” You should see all layers highlighted and selected now.
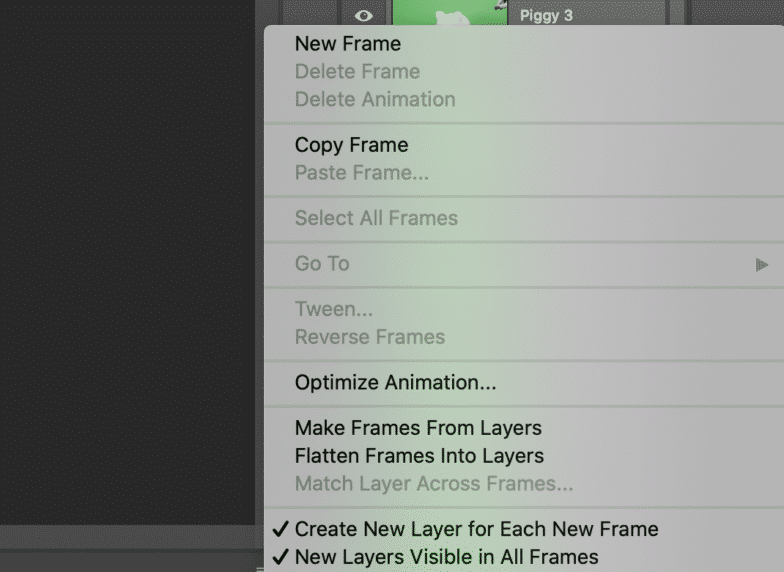
From there, click the Menu button in the Timeline window (the three horizontal lines on the right-hand side) and select Create New Layer for Each New Frame.
Step 5: Make Frames From Layers
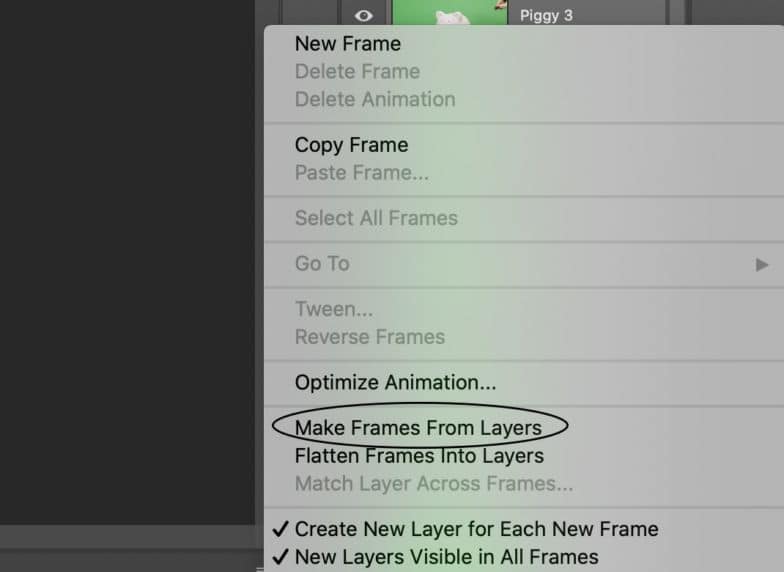
In the same menu in the Timeline window, select “Make Frames From Layers.” This will turn each layer you’ve created into a frame.
Once you do this, you can select individual frames and edit them as needed. The simpler the animation, the less frames you’ll need. For this example, there are 15 individual frames:

If the frames aren’t in the correct order, now’s the time to rearrange and reorder them by dragging them where they should be. You’ll want this as perfect as possible before moving on to the next step.
Step 6: Select Frame Duration and Looping Option
Now that the frames are in the correct order, it’s time to figure out how long each frame plays.
To do this, select the frame you want to edit, click the arrow below the frame, and select the time from the dropdown. Your options for these are .1 seconds, .2, .5, 1.0 and so on. Select one that makes sense for this animation and how fast that specific frame should play. If none of the options seem quite right, you can customize the time duration by selecting Other.
For this piggy bank gif, each frame was originally set to play for one second.

Under your frames, you’ll see an option on the left that says “Forever.” By default, your gif will loop forever. If you want that, leave it be and go to the next step! If you don’t, click the dropdown next to Forever and choose whether your want your gif to loop once or three times. There’s also the option to customize the number of loops if you wish.
Step 7: Preview and Test Your Gif
This is arguably the easiest step. To preview your animated GIF, simply press the Play button in the Timeline window.
If you play it through and something looks off, that’s okay. Go back to step 5 and keep tweaking your frame order, time duration, etc. In this case, one second was a bit too long for each frame. After changing the frame time to .2 seconds per frame, the gif looks perfect!
Step 8: Save in Photoshop and Export
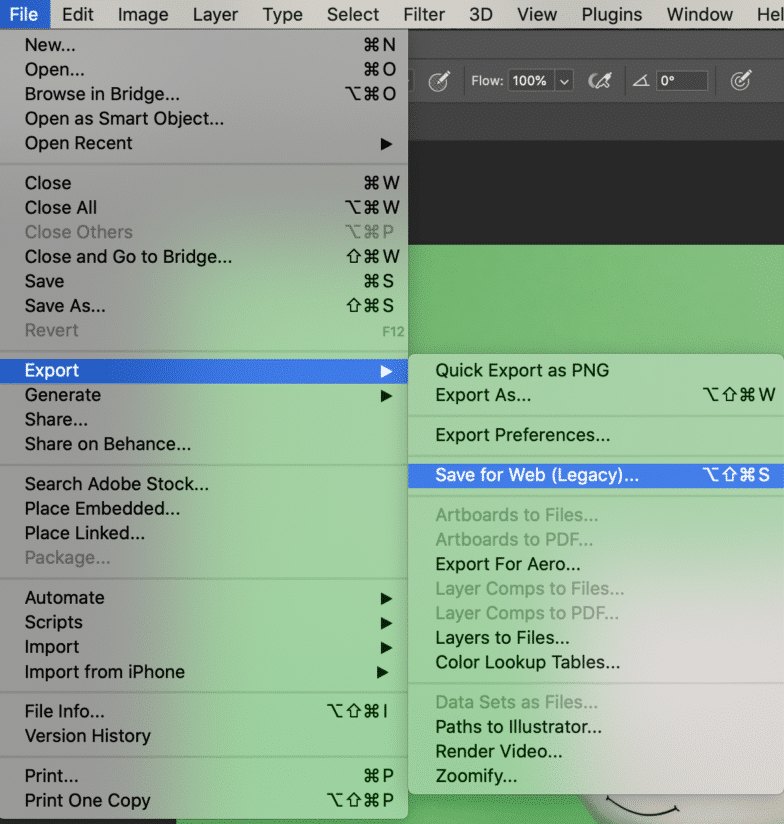
Once you’re happy with your gif, save your masterpiece by going to File > Export > Save for Web.
Once you click that a new box will pop up:
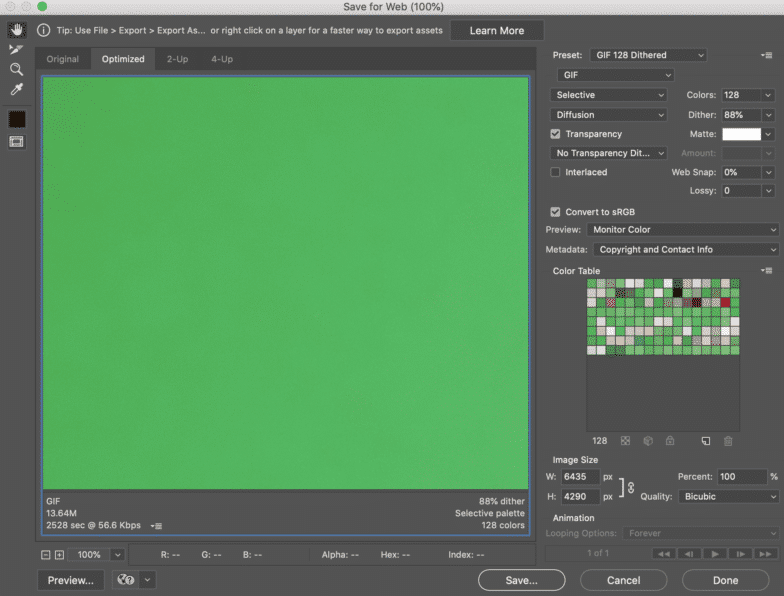
In this window, you’ll want to do a few things:
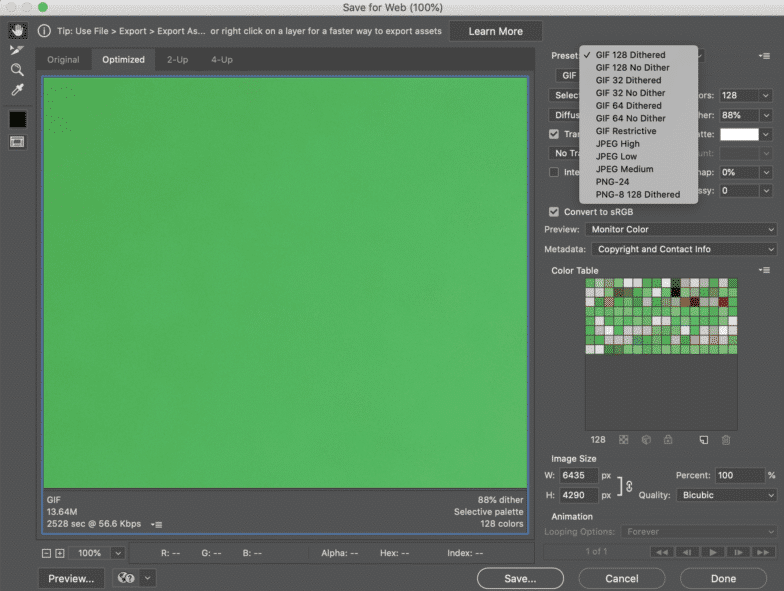
- Under Preset in the right-hand corner, choose the type of gif file you want to save it as. The number next to the gif file determines how large the gif colors will be compared to the original files. A higher dithering percentage translates to the appearance of more colors and detail but it will increase the file size. Since this gif is a solid color and we want it to be high res, we’ve selected the Gif 128 no dither option. You’ll also want to make sure the image size at the bottom is what you want it to be!
- In the bottom right-hand corner, ensure the loop option you selected earlier is still the one you want.
- Hit save.
To export your gif, go up to File > Export > Export As. In the top right corner where it says “Format,” select Gif and hit Export.
Step 8: Celebrate
Congratulations—you created a gif in Photoshop from scratch! Grab a bottle of champagne to celebrate and happy Photoshopping!
If you’re ready to spend more time in Photoshop and less time tinkering with your hosting preferences, look to WP Engine for some of the best hosting for WordPress sites on the market!