Get Started


Key Takeaways
Image optimization is crucial for website performance. Optimizing images reduces load times, enhancing user experience and potentially increasing sales.
Choosing the right image file type is key. JPEGs are best for photos, PNGs for flat illustrations, and GIFs for animations, each with specific use cases.
Resizing and compressing images are essential steps. Preparing images with appropriate dimensions and compressing them without quality loss improves site speed.
Benchmarking site speed is the first step in optimization. Running speed tests provides insights into current performance levels and areas for improvement.
There’s no doubt that images are an invaluable part of the web.
From visualizing data to breaking up paragraphs of text to showing off your portfolio of work, photos and graphics play an important role in most website designs and help users enjoy better online experiences.
Having great visuals, however, can take a toll on your website. Higher resolutions mean larger file sizes, which also means slower loading times. This is why images are often the cause of poor site performance. And remember, the whole point of adding images to your website is to create a better experience for your users (or maybe even to increase sales and conversions!), which is hard to do with a slow site.
So, how do you balance site performance with visual design?
By optimizing your images.
There are a lot of little things you can do throughout the image creation process to optimize file sizes, specifically with your website in mind.
What is image optimization?
Generally speaking, image optimization is the act of decreasing file size without losing quality. You can optimize your images in the creation phase (by using the right “Export” options in Photoshop) or directly on your website (by using lazy load to display media on your site).
The goal is to reduce the amount of data users have to download, so they can get the content they’re looking for faster without sacrificing quality.
Why optimize images for the web?
People have short attention spans when it comes to the web, which is why it’s important to make your website load in two seconds or less.
One of the most common factors slowing down your site is your images. Even if your website is running on the best servers, like you’ll get with managed hosting for WordPress, images can be the downfall of performance.
By taking advantage of image optimization best practices, you’ll keep your file size small and your load time fast, creating a better experience for your site visitors.
There’s another reason image optimization is important, however, which is directly tied to your business’s bottom line. Beyond slowing down your website, images take up disk space on the server powering your site. Most hosting providers enforce a bandwidth limit per plan, meaning you don’t have unlimited resources—and your images will quickly take up that space.
While exceeding that limit isn’t the end of the world, you may be charged an overage fee, or worse, have your website shut down if overages continue to occur.
By optimizing your images, you’ll be able to get the most out of your site storage and avoid that bandwidth limit.
Now that you know how important image optimization is, let’s talk about how to do it! This step-by-step guide will cover everything from Photoshop tips to development practices.
How to optimize images for the web
This step-by-step guide will cover everything you can do to optimize images, starting in Photoshop and ending on your site.
Follow these steps to optimize your images for better site performance:
- Benchmark your current site speed.
- Know how to choose the best image file type.
- Resize your images before exporting.
- Compress images to reduce file size.
- Automate image optimization with a WordPress plugin.
- Use the “blur up” technique to load a Lower Quality Image first.
- Use lazy loading.
1. Benchmark your current site speed
Before you do all this work to optimize your images, start by running a speed test on your site! By the end, you’ll be able to see the impact you’ve made (plus you can share that with your team or boss, for extra kudos). Some popular speed testing tools are:
These browser-based tools work similarlyr: Open the link, enter your URL, and submit it for a quick report about your site’s speed and performance.
WP Engine’s Website Tester is specifically designed to analyze the performance of WordPress sites, providing accurate information about your site’s current performance as well as actionable insights for improving it.
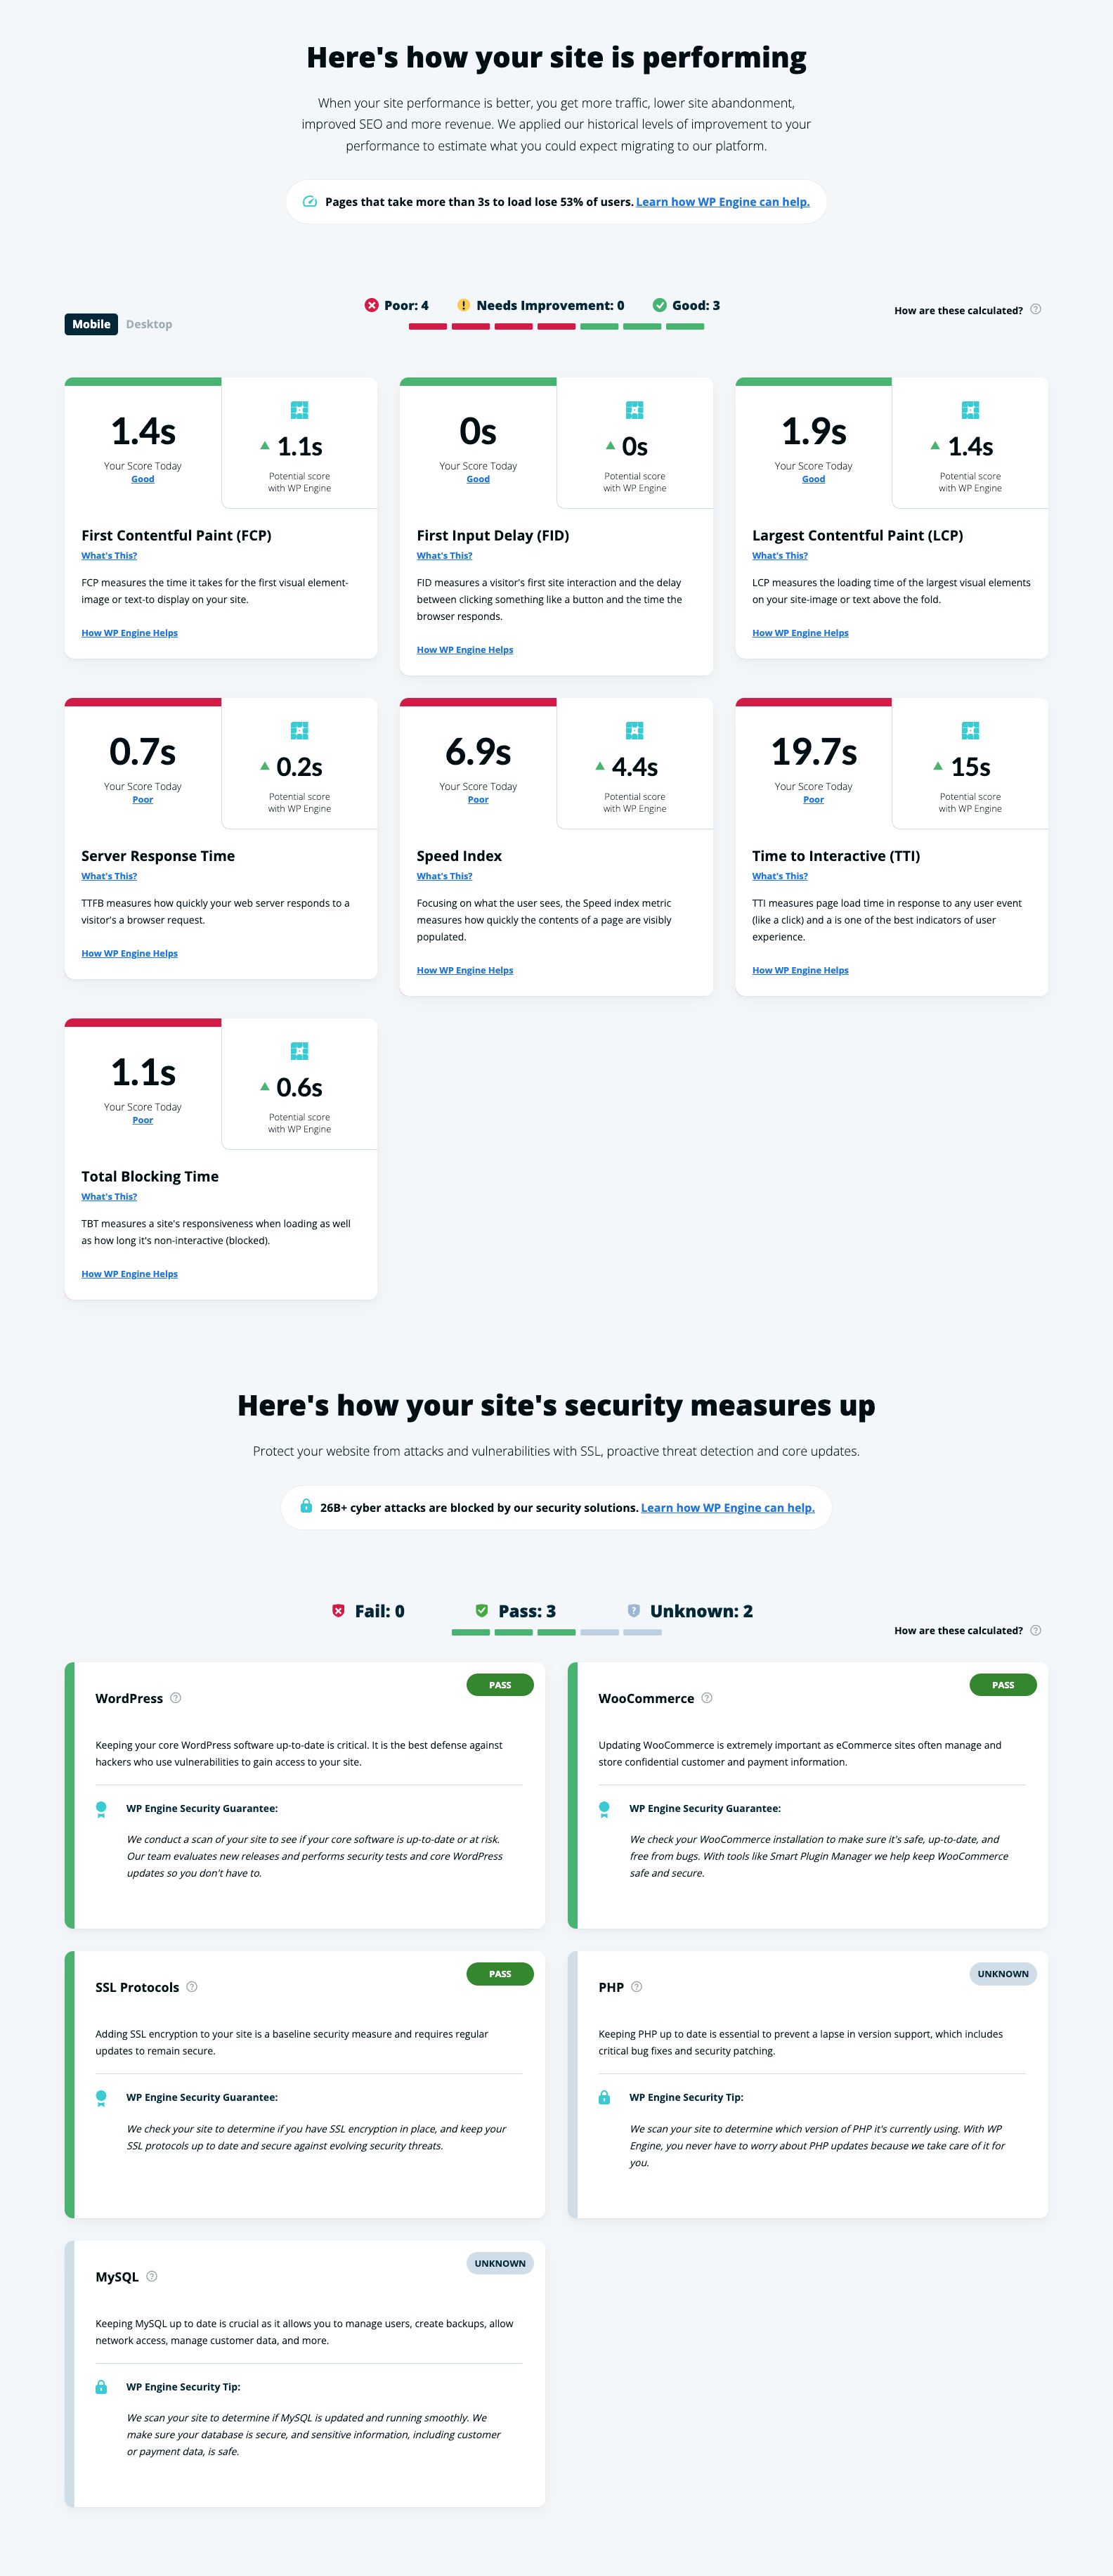
When you enter your site URL and email address into the Website Tester, it will produce a breakdown of your site performance in about a minute. In the screenshot above, for example, there is clearly room for improvement from a page speed and loading accuracy perspective.
From there, you can click the “Learn how WP Engine can help” button to see the specific ways our managed hosting for WordPress sites can help you improve performance (including built-in image compression!).

2. Know how to choose the best image file type
When you’re done creating images (either saving from your camera or exporting from a tool like Photoshop), you’ll have the option to specify the file type. The most common file types for use on the web are JPEGs, PNGs, and GIFs. And as I’m sure you can guess, they all have their own pros, cons, and best practices when being placed on your website.
JPEGs
JPEG images work best for showing off complex color photographs on your site, as they allow for a higher-quality image with a smaller file size. This file type will probably work for the majority of images you want to use on your site, with one major exception: images with a transparent background. (For those, see the next section about PNGs!)
When using a JPEG image for your website, consider exporting it as “Progressive.” This allows the browser to instantly load a simple version of the image before fully loading the full resolution onto the site.
If you’re working in Photoshop, you’ll find this setting when you export as “Save for Web.”
PNGs
If you don’t have a ton of color in your image (like flat illustrations, logos, or icons), or want it to have a transparent background, I recommend exporting as a PNG. Make sure you have the right image dimensions, and look for the option to save as PNG-24 (or 8, if there’s no quality loss).
GIFs
GIFs are the third most common image format for the web. However, they only support 256 colors, so you’ll have to be selective with this file type.
To optimize GIFs for your website, think critically about how long they last, if they need to loop, and how many you really need on a given page or site.
3. Resize your images before you upload
One of the easiest ways to optimize images for the web is to resize them before you upload them to your site. Especially if you’re working with raw images from a DSLR camera, the dimensions are often much larger than you actually need.
For example, let’s say you’re adding images to a blog article on your site. If your WordPress theme displays images at 500 x 500 but you’re uploading images with a resolution of 1024 x 1024, all those extra pixels just increase the file size and decrease site speed without providing a real benefit.
By cropping or resizing your images before uploading, you’ll decrease the file size, which will help your site load just a little bit faster and save your disk space for even more images.
To resize your image, just open up the image-editing software of your choice. Photoshop works well, or you can also use simpler tools like Preview (for Macs), Paint (for Windows), or Canva (a browser tool).
4. Compress images to reduce file size
Once you have your final image, saved in the right format and cropped to an appropriate size, there’s one more step you can take to optimize it before uploading to your site: compressing it.
This process will help you make the file size smaller without losing noticeable image quality. There are two main types of compression: lossy and lossless.
Lossless compression will maintain the same level of quality before and after the compression. Lossy compression will discard some elements of the photo, but typically in a way that the human eye won’t notice. To learn more about these compression types, I recommend this guide from Imagify.
If you see a specific image on your site load and slowly come into view, that may be a sign that it needs compression, resizing, or both.
To compress your images, all you need is an image compression tool. My favorites include:
- Image Optimizer: A free Add-on for Local.
- TinyPNG: A free browser-based tool for compressing PNG and JPEG images.
- ImageOptim: A free open-source app for compressing images.
- JPEGmini: A photo recompressing app for Mac and Windows.
Image Optimizer, a free Add-on for Local

If you’re using Local as your local development environment, you can use the Image Optimizer Add-on to automatically compress images offline. It scans your site for all image files, saving you the time of individually compressing them and speeding up your site in the process.
This browser-based tool optimizes images using smart lossy compression, reducing your file size by decreasing the number of colors used. (But don’t worry, you won’t even notice!) It’s free and quick to use for PNGs and JPEGs.
This is a free Mac app that compresses images by removing unnecessary bloat while preserving as much image quality as possible.
JPEGmini is a powerful paid option that helps you reduce file size while retaining both quality and format. It does have a free trial, so you can give it a test run before you purchase.
5. Automate image optimization with a WordPress plugin
At this point, you might be starting to think that image optimization is a lot of work—and it can be! But there’s also an easy way to streamline a few of these steps, and that’s by installing an image optimization plugin on your WordPress site.
I have a few recommendations, and they each have unique features. But generally, an image optimization plugin will compress and resize your images when you upload to your WordPress site. This means you can skip those steps instead of doing them manually—a big time saver.
This method is also nice if you’re building sites for clients. It’s a lot of pressure for the end-user and content creators to try remembering every step of the image optimization process. By installing a plugin that’ll do most of the work for them, you’ll help ensure the speed and performance of the site you’ve built once you hand it off.
To optimize images on a WordPress site, I recommend these plugins:
This WordPress plugin will automatically optimize your images when you upload them to your site, or optimize images that you’ve uploaded in the past. This makes it incredibly beneficial if you’re working with an existing site with unoptimized images.
This WordPress plugin by the TinyPNG team can optimize JPEG and PNG images on upload. If you’re a fan of the browser-based tool, streamline the process with their free plugin!
The Kracken.io plugin can optimize both new and existing images on your WordPress site. It also supports both lossless and lossy compression modes, giving you lots of control over the end result.
This WordPress plugin will help optimize your images without losing quality. It’s also compatible with WooCommerce and NextGen Gallery, if you’re using those plugins.
Note: Before choosing a plugin, be sure to look at how they operate. Some use server-taxing operations that can cause issues on your site, while others use FTP options to lessen the load on your web server.
6. Use the “blur up” technique to load a Lower Quality Image first
Even after all the previous optimization steps, there are cases where you still might be working with large file sizes or lots of images on a page, slowing down your site speed. In those cases, sometimes it’s helpful to not only optimize images, but to optimize the load experience so site visitors think your media files are loading faster than they really are.
That’s what these next two steps are all about—giving the appearance of faster loading images, so users aren’t just staring at a blank page while your files load.
One way to do this is to load a Lower Quality Image (LQI) first. By loading a smaller version of the image before loading the full size, it gives the user something to look at while they wait for all the details. This gives the perception of a faster load time even if, technically, everything is loading at the same rate.
A popular way to do this is the “blur up” technique, which you can learn how to implement with this tutorial on CSS-Tricks.
7. Lazy load your site images
Similar to the “blur up” technique, there’s one more trick that will help you give the appearance of faster loading images: Lazy loading.
When someone lands on your site, they start at the top of the page. It’s probably going to take them a moment to scroll the entire page, especially if they’re engaged. Instead of trying to load all the images at once, lazy loading acts under the assumption that users care most about the content they can see. So, the images within their browser view fully load first, while the other images load a placeholder first, until the user scrolls to that section of the page.
Lazy loading is a great technique on its own, and even more powerful when paired with the rest of these image optimization tips! And, it’s very easy to do on a WordPress site, thanks to the Smush plugin.
This concludes our step-by-step guide for better site performance by optimizing images! To see the impact this has made on your site, run another speed test. How’d you do?
With the right image optimization tools, you’ll be able to see better site speed and performance in no time! For more help optimizing your site, check out WP Engine’s industry-leading hosting for WordPress websites or speak to a representative today!