Get Started


Key Takeaways
Creating a WordPress plugin can be simpler than perceived. Understanding the basics of plugin development and the folder structure can streamline the process, even for those new to coding.
Meta information is crucial for plugin functionality. Providing essential details like plugin name and description enhances user experience and management.
Custom post types offer tailored content organization. Developing custom post types, such as ‘Recipes,’ allows for specialized content structures beyond standard pages and posts.
Enhancing plugins with advanced features requires detailed customization. Utilizing functions like register_post_type() and add_filter() enables developers to create more sophisticated plugins with specific functionalities.
If you're looking to get involved in the WordPress development try developing your own plugin.
It may seem like a huge undertaking to create a WordPress plugin. In some cases this is true—some plugins can be incredibly complex. But depending on the functionality you’re looking to add, many are actually fairly simple to build. Creating a plugin can be done quickly with some basic understanding of how it all works.
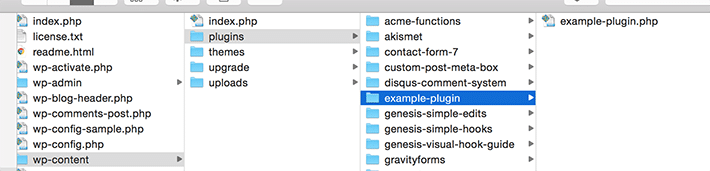
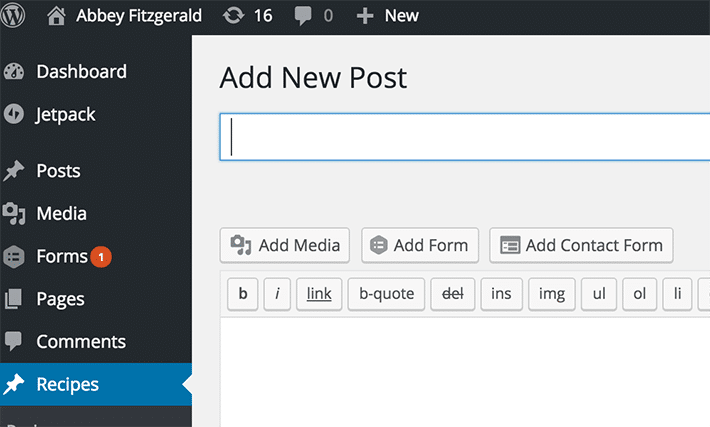
Where Do Plugins Go?
WordPress folder structure
Before development begins, it’s good to know where plugins belong. Let’s take a look into the WordPress folder structure at the basic app directories. Inside the wp-content folder, you’ll see a plugins directory. This is where all of your individual plugins will live.
Plugins in this folder can be single files or in subdirectories. Smaller plugins typically only require a single .php file. Complex plugins may have multiple file types (HTML, CSS, and JavaScript are all possibilities). Creating a subdirectory is helpful to house the various files along with the .php functions of the plugin.
Actions and Filters
Before the plugin building begins, it’s good to know some basics to get you started. When you start coding your own plugins, a good place to start is learning how actions and filters work. Knowing the basics will be helpful and as you have more questions about it, the WordPress Codex is a great resource.
Before Plugin Development
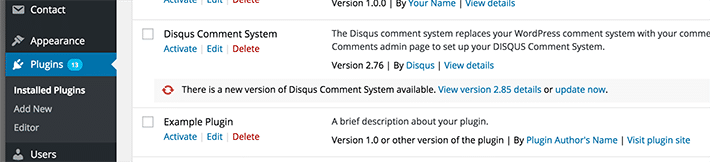
Meta information is incredibly important and it’s also the information that tells WordPress details about the plugin. Plugins have options to be installed, deleted, activated, and inactivated. Technically, all you need is the plugin name for WordPress to establish your file as a plugin. However, it is good practice to provide the other information as it will be helpful to you and your users.
<?php

/**

* Plugin Name: Example Plugin

* Plugin URI: http://mysite.com/

* Description: A brief description about your plugin.

* Version: 1.0 (or whatever current version your plugin is on)

* Author: Plugin Author's Name

* Author URI: Author's website

* License: A "Slug" license name e.g. GPL12

*/
A Very Simple Plugin
Starting small is a good way to ease into plugin building. Let’s create a very simple example. Actions and filters make things happen, so let’s add a line of text after all of the posts to test things out.
It’s always good to work in a development environment, and this is especially important as you experiment with plugins.
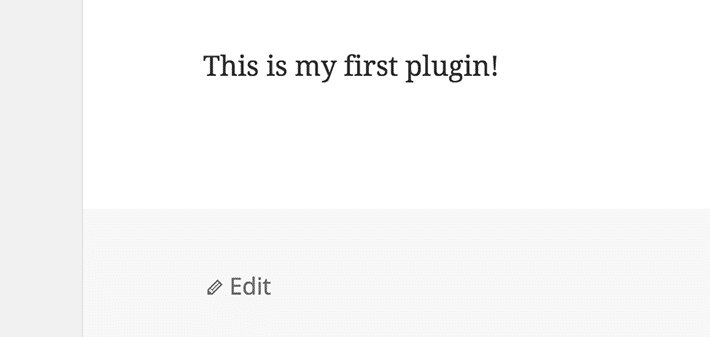
First, create a new file and make sure it is in the correct place. Copy and paste this code into your main plugin file and save it. This gets pasted after the meta information.
add_action( 'the_content', 'test_example_text' );

function test_example_text ( $content ) {
return $content .= '<p>This is my first plugin!</p>';
}
This is an example of a hook hard at work. By hooking into the_content action, this works when WordPress renders the post content. WordPress calls the test_example_text function that is defined below the add_action call.
Seeing the plugin in action
You’ve probably done this before, but when logged into the WordPress admin, you will see the plugin option on the left. Our plugin shows up, and it now it needs to be activated. Once it is activated, it appears at the end of the post.
A More Complex Plugin
So this example demonstrates the basics of how plugins work, but what if you want to do something a little more useful? Custom post types are used quite frequently in custom site design, so let’s start with that. There are existing plugins that you can use, but creating one from scratch is a good way to ease into plugin development.
What is custom post type in WordPress?
Pages and posts are the most popular content types in WordPress, but what if you want something more specific? Pages and Posts may be too general in some circumstances, which is why a custom post type becomes handy. A good example is a custom post type of portfolio. The idea is to create a regular post with a different post type value attached to it.
You can call your custom post types whatever you want. For example, if you run a food site, you could create a handy recipe post type. This post type can have different custom fields with its own custom category structure.
Creating custom post types
The first thing you need to do is actually create the custom post type. Using the same file structure from above, let’s add our folder and .php file. Assuming the meta information has been created, we will be adding our functionality after the meta block.
We are going to create a plugin for a custom post type called “Recipes” to demonstrate the basics of creating a more complex plugin.
The basic version
If you take a look at the snippet below, it is pretty simple at the start. We will see a custom post type in the left menu to make sure this works. The register_post_type() is used in a function, which hooks into the init action. There are two arguments which are the custom post type and an arguments array.
function recipe_custom_post_type() {
register_post_type( 'recipe', array( 'public' => true, 'label' => 'Recipes' ) );
}
add_action( 'init', 'recipe_custom_post_type' );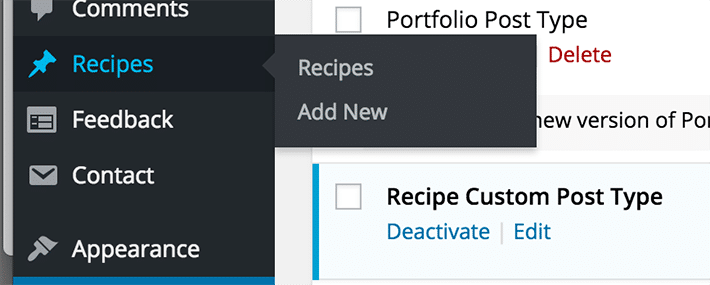
The advanced version
This basic version of the plugin will actually work, however, more functionality is needed to really make it wonderful. For example, labels are still reading “Add new post.” We want to this to be more recipe-specific; afterall, this is why we aren’t using just a plain post. Customizations can be made using the labels property.
Now, let’s scratch what we just did and use this instead:
add_action( 'init', 'recipe_custom_post_type' );
add_filter( 'post_updated_messages', 'recipes_messages' );
function recipe_custom_post_type() {
$labels = array(
'name' => 'Recipes',
'singular_name' => 'Recipe',
'menu_name' => 'Recipe',
'name_admin_bar' => 'Recipe',
'add_new' => 'Add New',
'add_new_item' => 'Add New Recipe',
'new_item' => 'New Recipe',
'edit_item' => 'Edit Recipe',
'view_item' => 'View Recipe',
'all_items' => 'All Recipes',
'search_items' => 'Search Recipes',
'parent_item_colon' => 'Parent Recipes:',
'not_found' => 'No recipes found.',
'not_found_in_trash' => 'No recipes found in Trash.'
);
$args = array(
'public' => true,
'labels' => $labels,
'rewrite' => array( 'slug' => 'recipe' ),
'has_archive' => true,
'menu_position' => 20,
'menu_icon' => 'dashicons-carrot',
'taxonomies' => array( 'post_tag', 'category' ),
'supports' => array( 'title', 'editor', 'author', 'thumbnail', 'excerpt', 'custom-fields', 'comments' )
);
register_post_type( 'recipe', $args );
}
function recipes_messages( $messages ) {
$post = get_post();
$messages['recipe'] = array(
0 => '',
1 => 'Recipe updated.',
2 => 'Custom field updated.',
3 => 'Custom field deleted.',
4 => 'Recipe updated.',
5 => isset( $_GET['revision'] ) ? sprintf( 'Recipe restored to revision from %s',wp_post_revision_title( (int) $_GET['revision'], false ) ) : false,
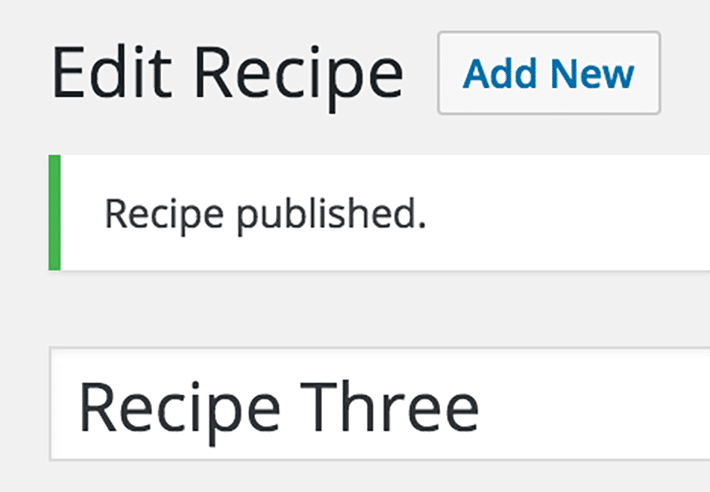
6 => 'Recipe published.',
7 => 'Recipe saved.',
8 => 'Recipe submitted.',
9 => sprintf(
'Recipe scheduled for: <strong>%1$s</strong>.',
date_i18n( 'M j, Y @ G:i', strtotime( $post->post_date ) )
),
10 => 'Recipe draft updated.'
);
return $messages;
}
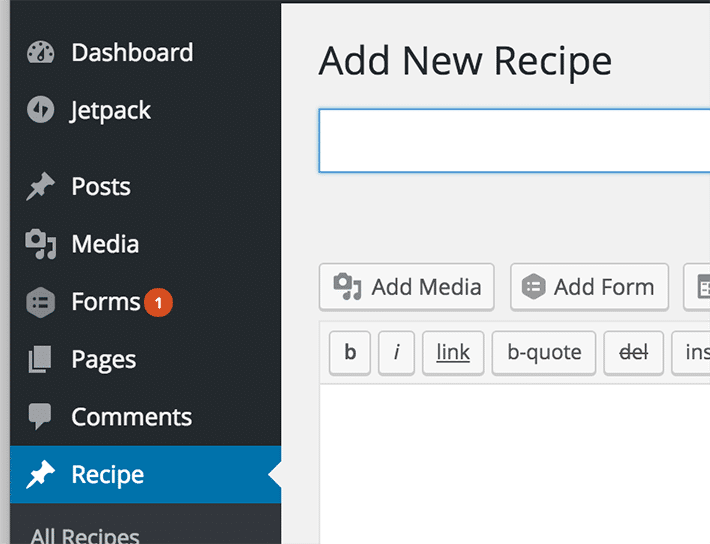
See how the text at the top now reads “Add New Recipe”? We made that happen by customizing the “add new item” with the desired text.
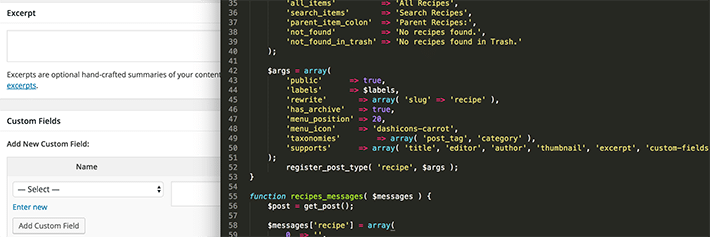
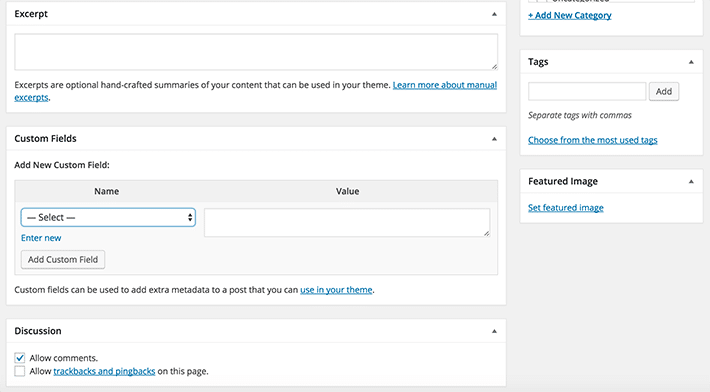
There’s a lot going on here and things get pretty detailed when working with arguments. One that is visually obvious is the supports property. Here we have declared that a title, editor, author, thumbnail, excerpt, custom fields, and comments be included. These are shown in the admin user interface and on some parts of the front end as well. The taxonomies property allows you to assign custom taxonomies to the custom post type.
Post type interaction messages
Whenever you save, delete, search, etc., you receive a default message. In our recipes_messages function, there is a listing of these messages. Defining the array for the custom post type with the appropriate messages will ensure things read the way you like for the custom post type. Things look very recipe-specific with the wording, so this goes along well with the custom post type.
Once you’ve completed your plugin, you can publish it in the WordPress Plugin Directory so others can download it, too. If this is the case, including a readme.txt is helpful for those who are searching for a plugin like yours. Basically, this file will include your name and what the plugin does, but you could also include details about each revision and specifics about the updates.
As you can see, plugins can be very simple or complex. Creating a plugin is not as tricky as it may first seem and is a good habit to get into when developing WordPress sites. They allow for easy organization and the ability to reuse on multiple sites, making your WordPress development more efficient.
You can spend more time building plugins and designing outstanding sites when you choose WP Engine for your WordPress hosting!