Get Started

Key Takeaways
WordPress pages default to public access. To make a page private, options include changing visibility, using passwords, or restricting access based on user level.
Limitations of internal tools for private pages. Only editors or admins can view content set to ‘Private’ visibility, restricting access options.
Child themes or plugins for user-based access. Modifying a child theme or using plugins allows restricting content to logged-in users or specific membership levels.
Consider plugins for advanced content restriction. Plugins offer more capabilities beyond basic user-level restrictions, allowing control over content access based on specific needs.
In WordPress, both pages and posts default to being accessible to the general public. This is usually fine, but there are often situations where you’ll want to restrict access. There are various ways to make a WordPress page private, including with the internal tools in WordPress, by editing your theme, and with a plugin. The…
In WordPress, both pages and posts default to being accessible to the general public. This is usually fine, but there are often situations where you’ll want to restrict access. There are various ways to make a WordPress page private, including with the internal tools in WordPress, by editing your theme, and with a plugin.
The best method depends on exactly what you’re trying to achieve. The tools in WordPress work very well if you want to make a private page that can only be viewed by site editors and administrators, or restrict access based on a password.
Unfortunately, internal tools have their limits. You’ll need to use another method if your goal is to restrict content to users who have logged in or to certain paid or unpaid membership levels.
What is a Private Page?
A WordPress private page is just that: private. Most of the content on your site is accessible to the public, but a private page can only be accessed by certain people. A private post is essentially the same thing, but a post instead of a page. The methods outlined below work for both content types.
There are at least three different ways to make your WordPress content private:
- Changing the visibility.
- Protecting it with a password.
- Restricting access based on user level.
The exact method you use depends on what you’re trying to achieve. You can use the built-in tools in WordPress to change any post or page on your site from public to private and back again with the flick of a single toggle. Password-protected WordPress posts and pages are just as easy to set up and ensure only users with the password can view the content. Unfortunately, both of these methods are limited in scope.
In the case of WordPress private pages and posts, only users with editor or admin access can view a post or page set to “Private” visibility. There’s no way to give access to other user levels, short of making it public or putting a password on it.
Password protecting each and every single piece of content you want to make private is possible, but it comes at the cost of a poor user experience.
Creating a Private Page or Post
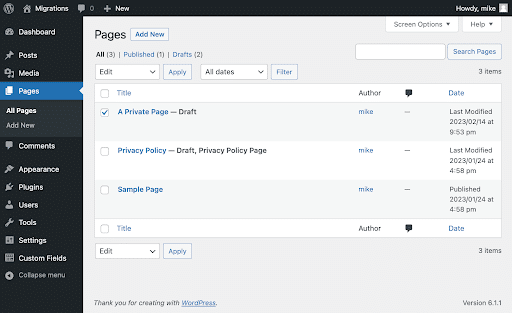
The first step is to create a new page by selecting “Pages” in your WordPress admin menu and clicking “Add New.” You can also change the privacy of an existing page by selecting it and then following the rest of this process.
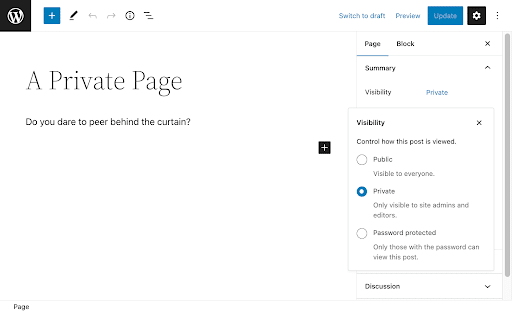
Next, find the “Summary” section on the right side of your editing window and click “Visibility.” This opens a modal that lets you select from three options:
- Public: The default setting for all pages and posts.
- Private: This will restrict visibility to site admins and editors.
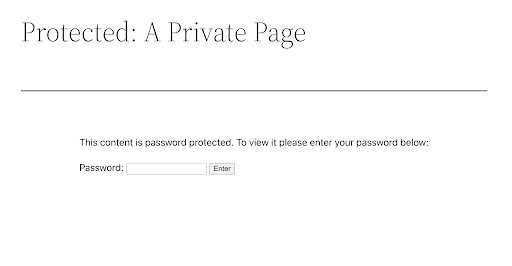
- Password protected: This setting limits visibility to visitors who enter the correct password.
In general, you’re better off using another technique to manage user access to content, but there are situations where password protection gets the job done. It also has the dual advantages of being free and very easy to set up. Just click “Password protected”, enter your password, and you’re done.
The major drawback is that the passwords are only secure as your user base. The built-in tools let you set one password for the page or post. There’s no way to randomly generate them on a per-user basis and no way to prevent users from sharing them. You can change them frequently, but that’s more work on your end and will only make the user experience worse.
“Gated” content is one of the most popular reasons to make parts of your WordPress site private. Typically this means restricting those posts, pages, and downloads to registered users, something the internal tools will not do.
In the next section, we’ll discuss how to restrict access to content with a child theme, as well as take a look at some of the available plugins for making private pages and posts based on user access.
Restricting Access Based on Users
The WordPress internal tools have their uses, but they don’t give you a way to ensure only logged-in users can access a post or page. For that, we recommend either modifying a child theme’s functions.php file or using a plugin.
Make Content Private With a Child Theme
It’s possible to restrict user access by making modifications to the functions.php file in your theme. The file itself is located in wp-content/themes/name_of_theme.
The first step in using this technique is to create a child theme. We don’t recommend making changes directly to your parent theme, as a single mistake can have wide-reaching impacts on your site’s presentation. In addition, at some point that theme will likely receive an update. Any modifications you’ve made to your parent theme would be wiped out by the update.
Once you have your child theme created, the next step is to add some custom code to its functions.php file.
This solution will allow logged in users to access the post or page, while taking users who are not logged in to a login page.
The code below is constructed of the following elements:
- The
template_redirecthook: This executes just before WordPress selects the template to load. - A
get_queried_object_id()function: This reads the ID of the user’s current page. - An array of page IDs: This will tell the function which pages to restrict to logged in users.
The example below uses an array named private_pages, set to restrict page IDs 2, 15, and 17. You will need to insert your own page IDs here for the code to work. You will also need to replace “LINK_TO_LOGIN_PAGE” with a link to your login or registration page.
if( !function_exists('private_logged_in_users') ):

    add_action( 'template_redirect', 'private_logged_in_users' );

    function private_logged_in_users(){

        /* Reads the current page ID */
        $page_id = get_queried_object_id();

        /* List of IDs restricted to logged-in users */
        $private_pages = [ 2,15,17, ];


        if( ( !empty($private_pages) && in_array($page_id, $private_pages) ) && !is_user_logged_in() ):


            wp_die('To view this content, please <a href="LINK_TO_LOGIN_PAGE" target="_blank">log in or register.</a>');
            return;
            exit;

        endif;
    }

endif;
One of the disadvantages of this technique is that the posts and pages you want to make private probably aren’t static. Every time you add a new piece of gated content, you will have to update the page IDs in your array.
In addition, this doesn’t allow you to restrict access based on membership levels, paid memberships, etc. As long as a user is logged in, they will see the content.
Making WordPress Pages Private With a Plugin
There are advantages to managing private pages and posts with a plugin. They usually offer capabilities beyond simply making a post inaccessible based on user level, allowing you to restrict content based on your needs.
This membership plugin by Stellaris promises “full control over who can and cannot view content on your WordPress site.” The free version allows you to create multiple membership levels and restrict access to posts, pages, media, custom post types, and API requests. A free Stripe add on is available that allows you to collect debit and credit card payments.
Once you’ve installed and activated the plugin, you can restrict any piece of content via a dropdown menu in the content editing window.
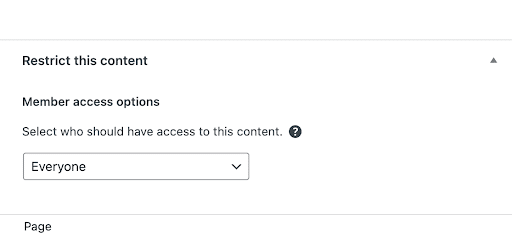
There are a lot of options available to restrict access to your content, including limiting it to members of any access level, members of any paid level, and members of a specific level.

This plugin offers a simple way to restrict content to authorized users. After installation and activation, Anonymous Restricted Content adds “Restricted Content” to the Settings menu in your WordPress dashboard. From there, you simply fill in a few details regarding the page you want users redirected to and the message you want shown on your login page.
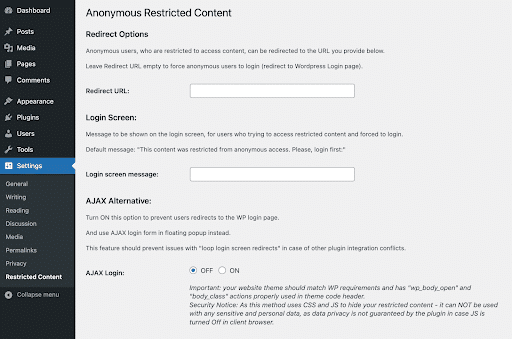
Anonymous Restricted Content lets you restrict content as a bulk action. Simply go to the Posts or Pages section of your WordPress site, check the content items you want to restrict, and select “Restrict for Anonymous” from the bulk actions dropdown menu.

This plugin allows you to restrict access to pages and posts to logged-in users, by specific user roles, and to logged-out users. Content Control gives you the ability to restrict certain parts of your content with shortcodes. In addition, you can use the plugin to control the visibility of sidebar and footer widgets by user and access level.
After installation and activation, the plugin adds “Content Control” to your Settings menu. From there, clicking “Add a Restriction” will open the Restriction Editor, allowing you to tailor your restricted content to suit your needs.
Conclusion
WordPress offers different routes to making private posts and pages. The best method to use depends on your goals. The WordPress internal tools are very easy to use and work flawlessly, but they’re limited to password protection or only letting admins and editors view the content.
The method we’ve outlined for creating private posts and pages with a child theme also has limits. It requires manually updating the page ID array in your functions.php file every time you add a new piece of private content, and it only restricts non-logged in users from viewing the content, with no way to restrict the content based on access level. There are ways around these limitations, but they require more advanced coding skills.
The right plugin can help you to mark pages, posts, and other pieces of content as private, but also restrict access based on more stringent requirements than simply being logged in: access level, paid memberships, and so on. Depending on exactly what your goals are, a plugin may be the best and easiest way to make certain WordPress pages private and restrict access to your content.
Managed hosting with WP Engine gives you even greater control over exactly who can access your site. Using the Web Rules Engine, you can prevent direct access to private files, restrict access from specific countries or regions, redirect pages, and much more.
Find out more about industry-leading WordPress hosting, including award-winning 24/7/365 support at WP Engine.