Get Started


Key Takeaways
WordPress custom fields allow for adding metadata to posts and pages, enhancing content with additional information in a key/value format.
Displaying custom fields efficiently through template modifications ensures easy site-wide updates and enhances user experience.
Advanced Custom Fields (ACF) plugin offers a flexible solution with over 30 field types, reducing manual coding for custom fields.
Custom field styling can be enhanced with CSS modifications for better integration with site design.
Editor’s note: This article was written by Abbey Fitzgerald, a UX software engineer and web designer who loves the art of crafting code.
WordPress custom fields are a great way to expand upon the typical post or page content on your site. They are pieces of metadata that are attached to a post or page on your WordPress site, which means that by using this method, you are able to add additional information of any kind to your content.
Organized in a key/value format, custom fields are used for adding data across multiple posts or pages. The key is a name that provides consistency and identifies the specific field, such as “Item.” This is always the same. A value is the information that will be displayed in the field. The value will be different across posts, depending on what information is entered.
In this guide, we’ll cover all the most important information you need to know about adding custom fields to your WordPress site. Let’s dive in!
Adding Custom Fields to WordPress Posts and Pages
The following steps will show you how to use custom fields in your posts. If you would rather use them on pages, the same ideas will apply but will have to be implemented in template files that are responsible for building pages rather than posts.
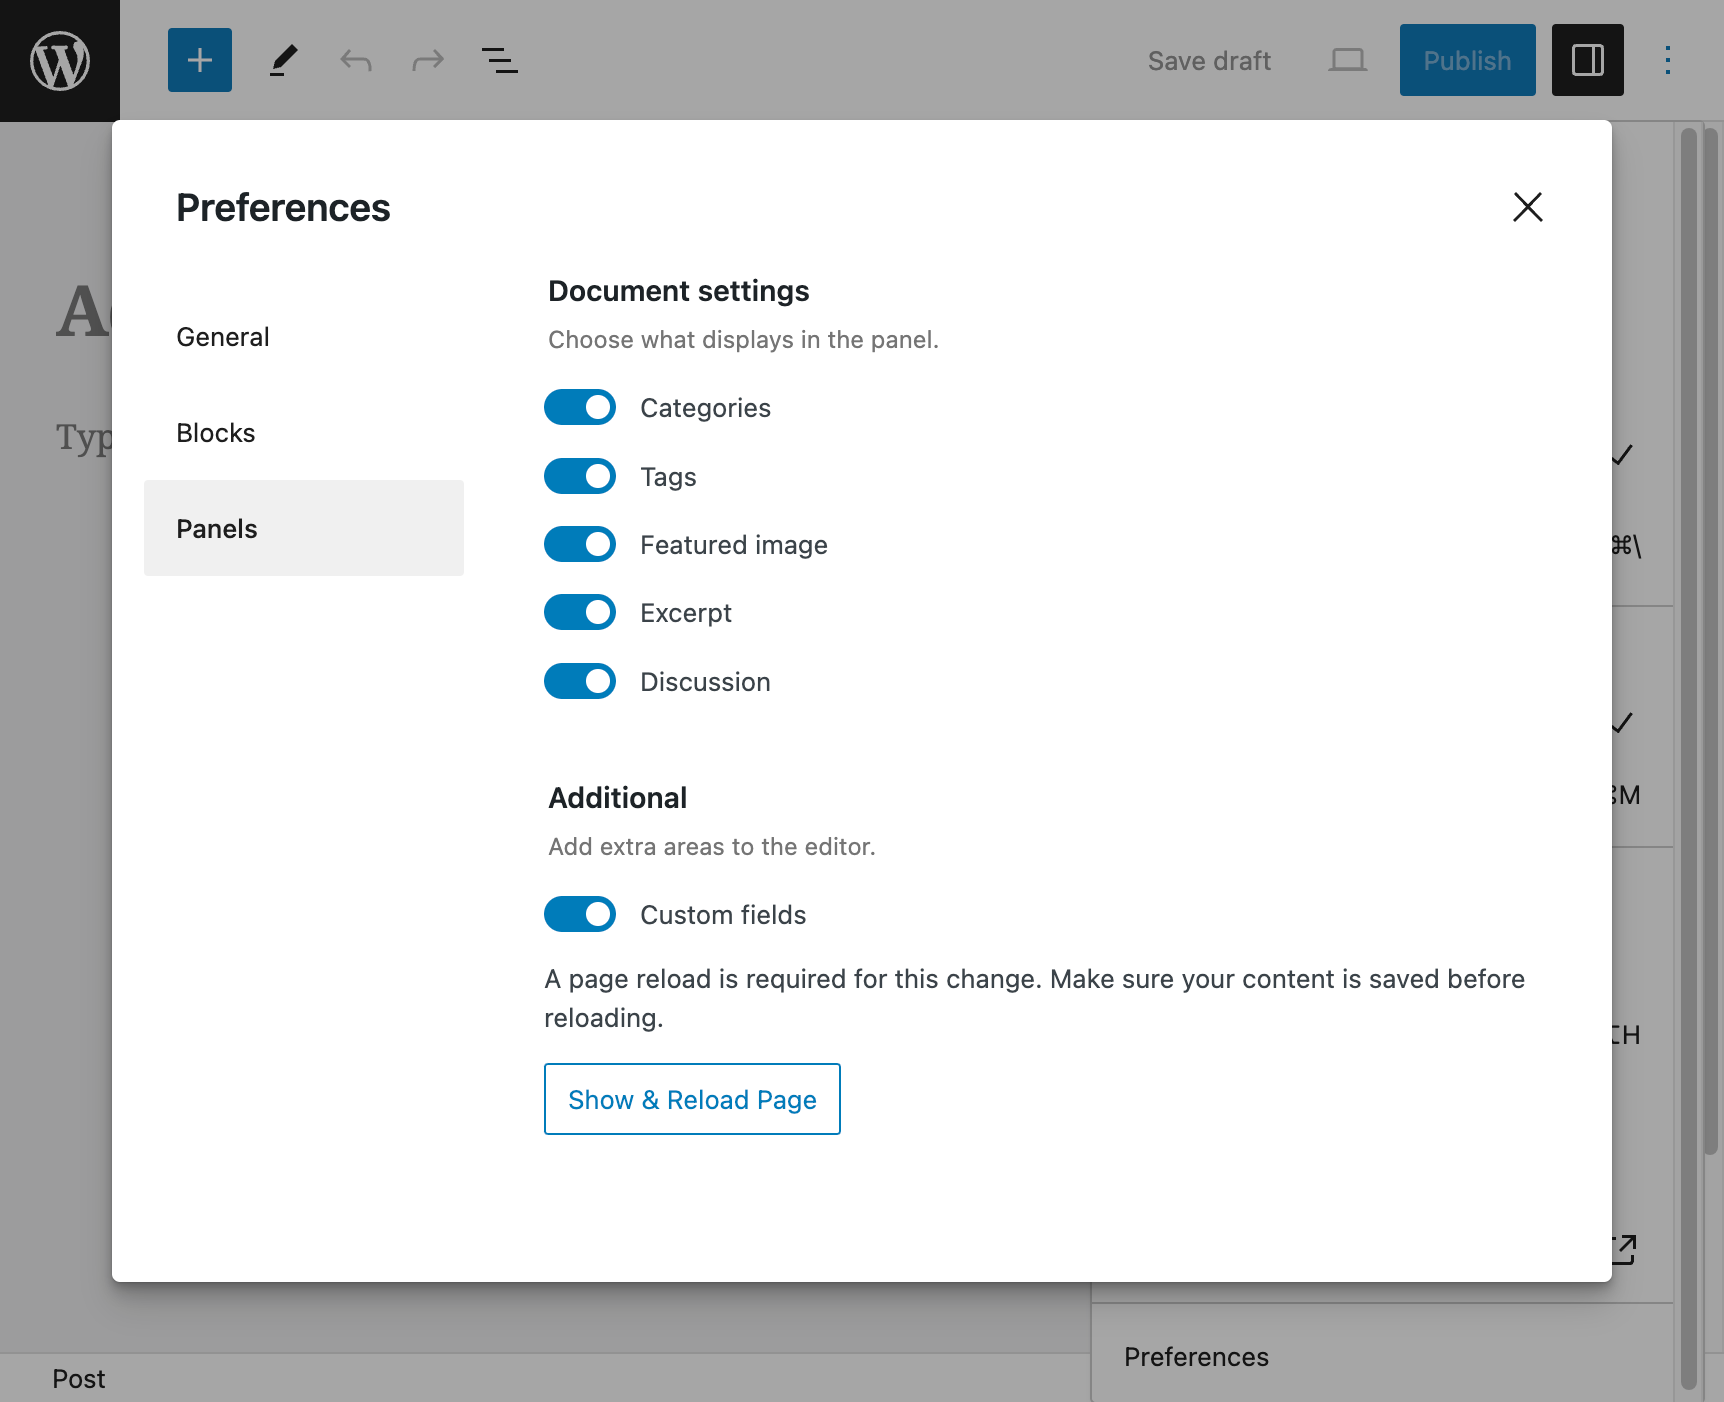
1. First, click the three dots in the upper right corner of the post editor, and then click Preferences from the menu that appears. Next, click Panels, and then toggle on the Custom fields selector. Finally, click Show & Reload Page to proceed.
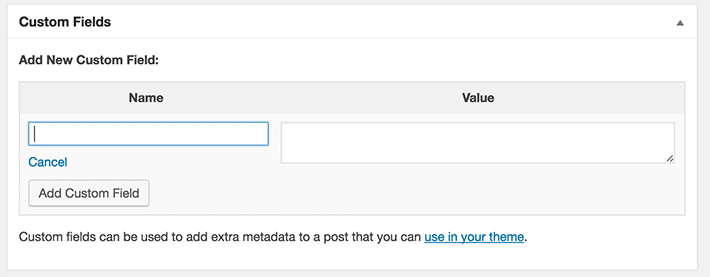
2. A Custom Fields section will now be shown in the post editor when you are editing posts.
Now let’s take a look at a very basic example of WordPress custom fields in action. Things will shape up with this example for a fitness blog. We’ll use the custom fields to track and list various types of physical activity on posts.
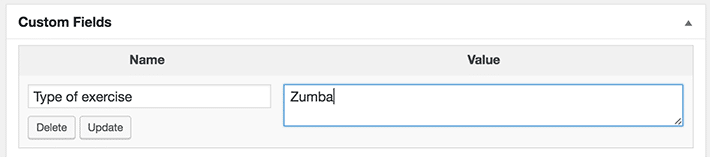
3. Add the key, which in this case is “Type of exercise.” We will use this box to add specific details to the post.
4. Add the value. Let’s go with Zumba for this one. Keep in mind, this is only going to show up on this specific post. On a different post, you can enter a different value, something like “Elliptical” or another type of exercise.
5. Save the post.
At this moment, you won’t actually see much. You still need to add some formatting to display the information. So far, this additional information is stored in the database, so it can be called upon to be displayed. For this tutorial, I’ve opted to display these custom fields on posts (instead of pages), so I’ll go through the most basic way to format everything.
Displaying the Custom Fields on the Post
Using template modifications to add the custom fields as recurring site data is an efficient way of going about things. Let’s say that you start by displaying the custom fields at the beginning of your post, but later decide that it would look better at the bottom.
By using template modifications, that change is easy to do because changing the template will update the entire site. If you didn’t use this method, and instead saved the information individually inside each post, you’d have to edit every single post to make the change, making changes much more difficult.
For this example, the custom field will be shown before the post so the reader can see the exercise type right away before reading the entire post. To display it this way, the data will be called before the WordPress loop.
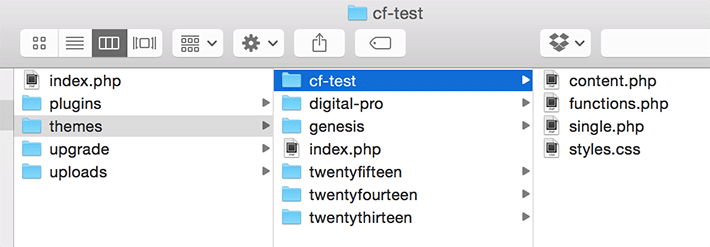
Note: These customizations should be done in a child theme of course, and we’ll be using the single.php file. As always, customizations like these are best tested in a development environment.
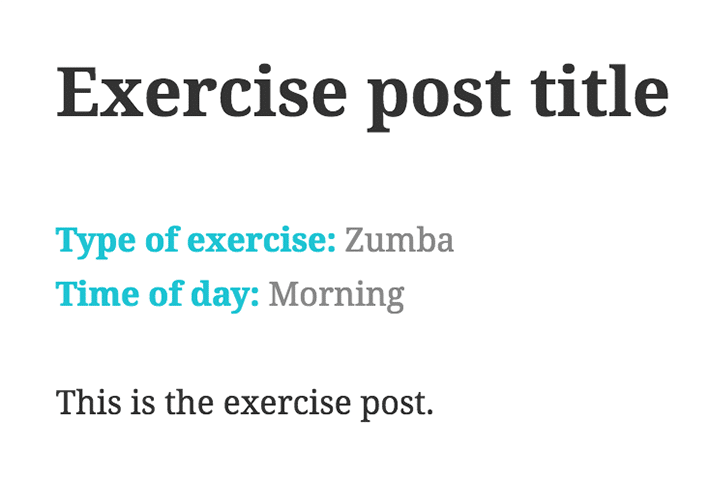
1. Open the single.php file and add this code after the header and before the WordPress loop:
<?php the_meta(); ?>It will display something like this:

If you’d rather have this displayed somewhere else on the page, try placing that snippet in the loop or after the loop. For example, by placing the function inside the <main> tag, the custom field information will be shown as part of the main content.
<div id="primary" class="content-area">
     <main id="main" class="site-main" role="main">
This approach will also work to show other custom fields you have created.
One thing to mention about this example: The child theme was created from the WordPress Twenty Fifteen parent theme. If you’re experimenting with where to display the custom fields, there may be other templates you need in your child theme besides the single.php file. To show the information in the post, a content.php was added to the child theme. The snippet above was placed within the content of the page so it appeared as part of the post.
2. Style the fields. If you go to the inspector, you’ll see some new classes added to the page.
Here’s what the example looks like with the two different custom fields:
- Zumba
- Morning
It’s pretty simple to work with as a list. With some styling, it will look more integrated with the style of the site. With just a couple of simple CSS modifications, we can adjust the text color and list styling.
ul.post-meta li {
     color: #898989;
     list-style-type: none;
     }

ul.post-meta li span.post-meta-key {
     color: #1fc3d2;
     font-weight: bold;
     }
More Custom Fields Customizations
The styling in the previous example will work just fine, but there is more that we do. The following examples will show you how custom fields can be adjusted with additional display options for specific use cases. Making the custom field read as part of the post and setting the context with a helpful heading will be a great addition to the post. If you are following along step by step, be sure to comment out the <?php the_meta(); ?> that you added in the previous example.
For this example, things have been slightly modified. The key has been simplified to “exercises” so it can be added to the template easier, and the code snippet was added in the content.php file of the child theme so it will appear in the post content, instead of before or after it.
<?php $exercises = get_post_meta($post->ID, 'exercises', false); ?>
<h3>Today’s exercise:</h3>
<ul>
<?php foreach($exercises as $exercise) {
echo '<li>'.$exercise.'</li>';
} ?>
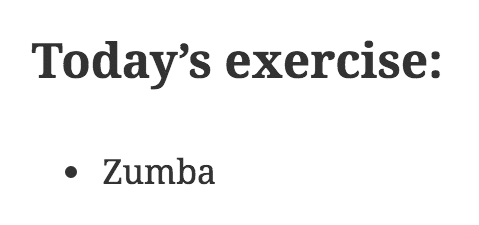
</ul>The custom field is now shown below the heading that reads “Today’s exercise:” in a list format. This has been set as an <h3> but can be easily adjusted to be another heading or paragraph style. If you do not want it in list format, that can also be structured however you’d like.
Conditional Custom
Fields
There might be times where the custom field is not included. Say, for example, there’s a post without an exercise value. This will allow you to display fallback information, so it’s not just left blank.
<?php $exercises = get_post_meta($post->ID, 'exercises', true); ?>

<h3>Today’s exercise:</h3>
<ul>
<?php if ($exercises) { ?>

<?php echo '<li>' .$exercises. '</li>'; ?>

<?php } //if there is nothing for exercises then display

else { ?>

<li>Today was a rest day.</li>
}
The Advanced Custom Fields Plugin
By following that tutorial, you can get custom fields up and running, but you have to do a lot of manual coding to make the editing of custom fields anything more than a text input for the field value. The fields we built in the tutorial are relatively simple. More complex fields naturally require even more coding. If you’d rather use a plugin to add custom fields, however, there are options available.
Advanced Custom Fields (ACF) is a very popular and flexible option, with more than 30 field types to choose from.
Field Groups
The field group editor is the heart of the Advanced Custom Fields plugin. Field groups are closely related to the above tutorial, as we essentially created a very basic version of a mini field group.
ACF field groups contain custom fields, location rules, and display options, as well as built-in controls for field validation, presentation, and conditional logic.
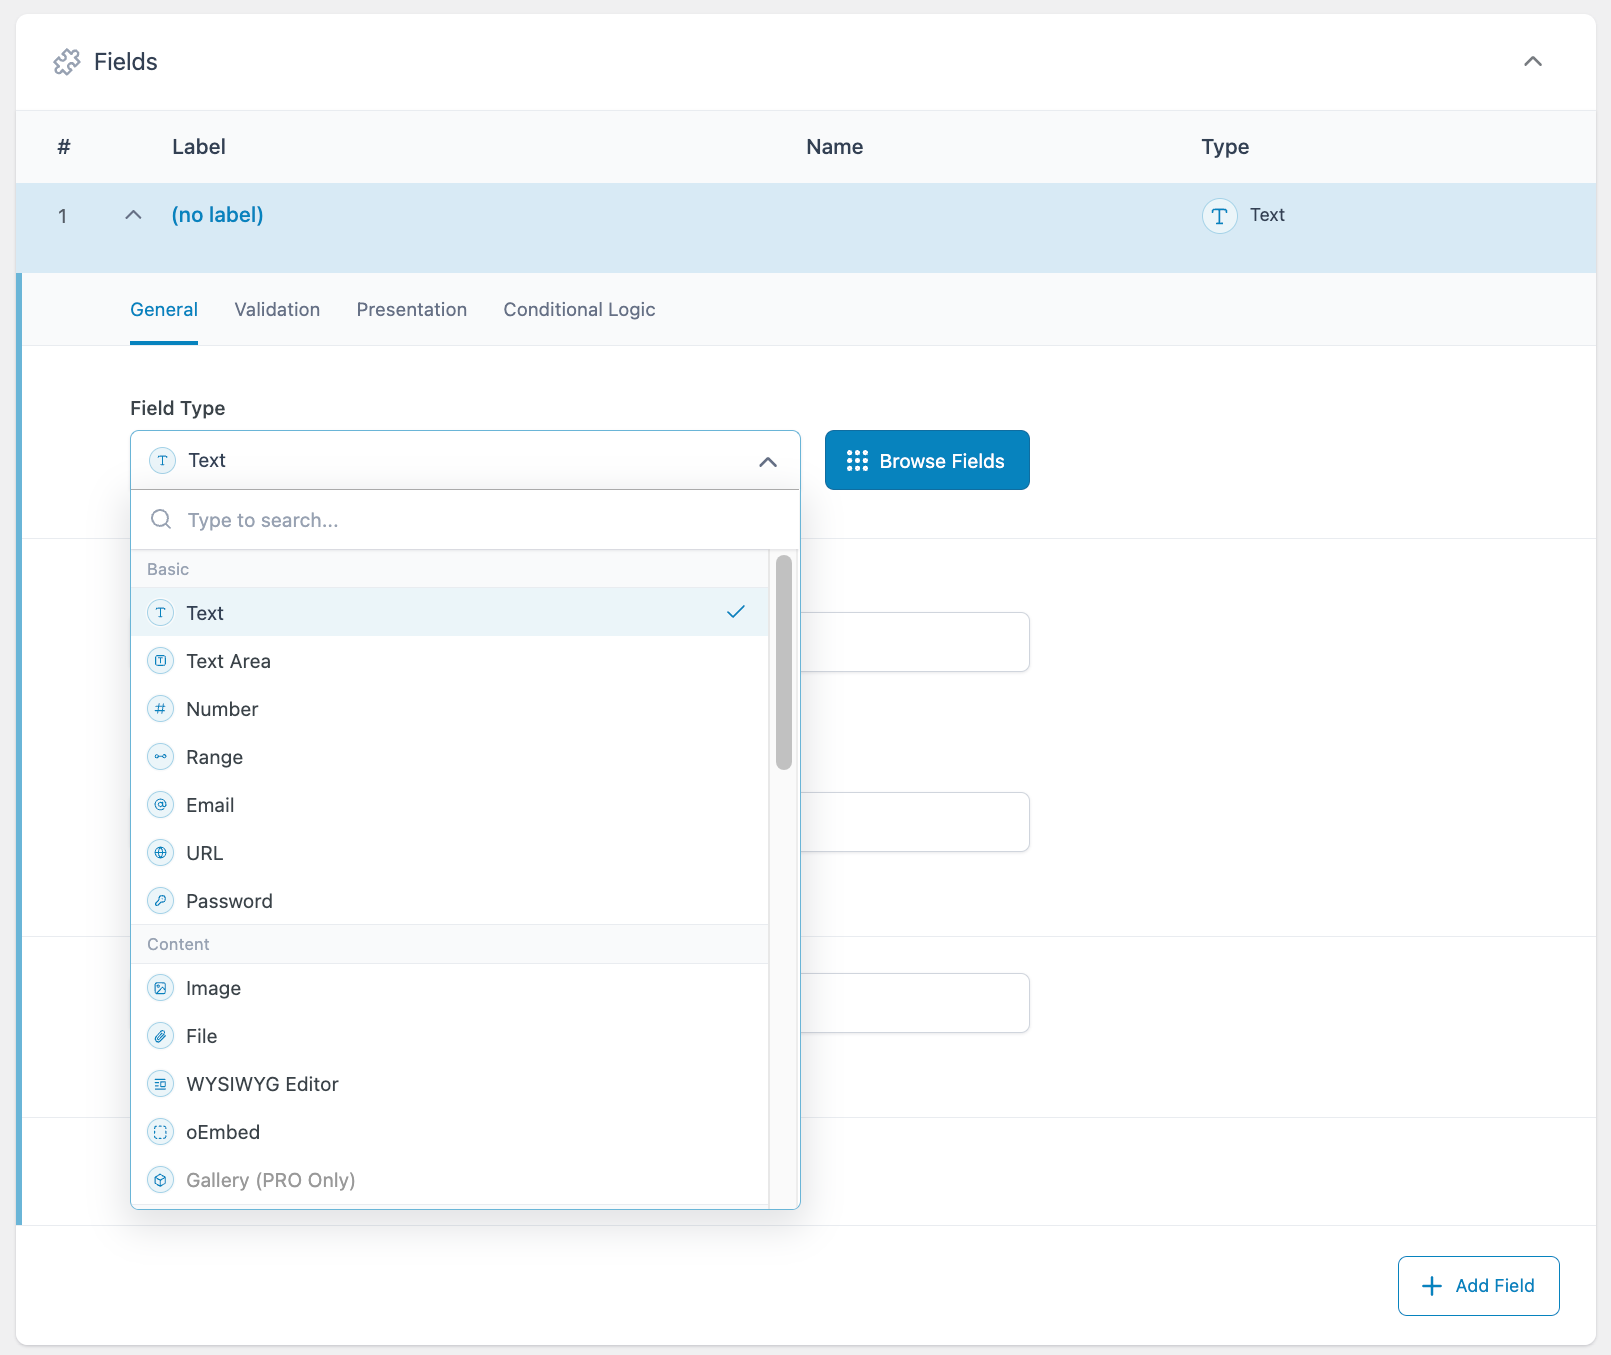
Including fields in your field group is as simple as selecting them from the dropdown menu. The fields are sorted by category, and clicking Browse Fields opens a modal with descriptions of each field and links to documentation.
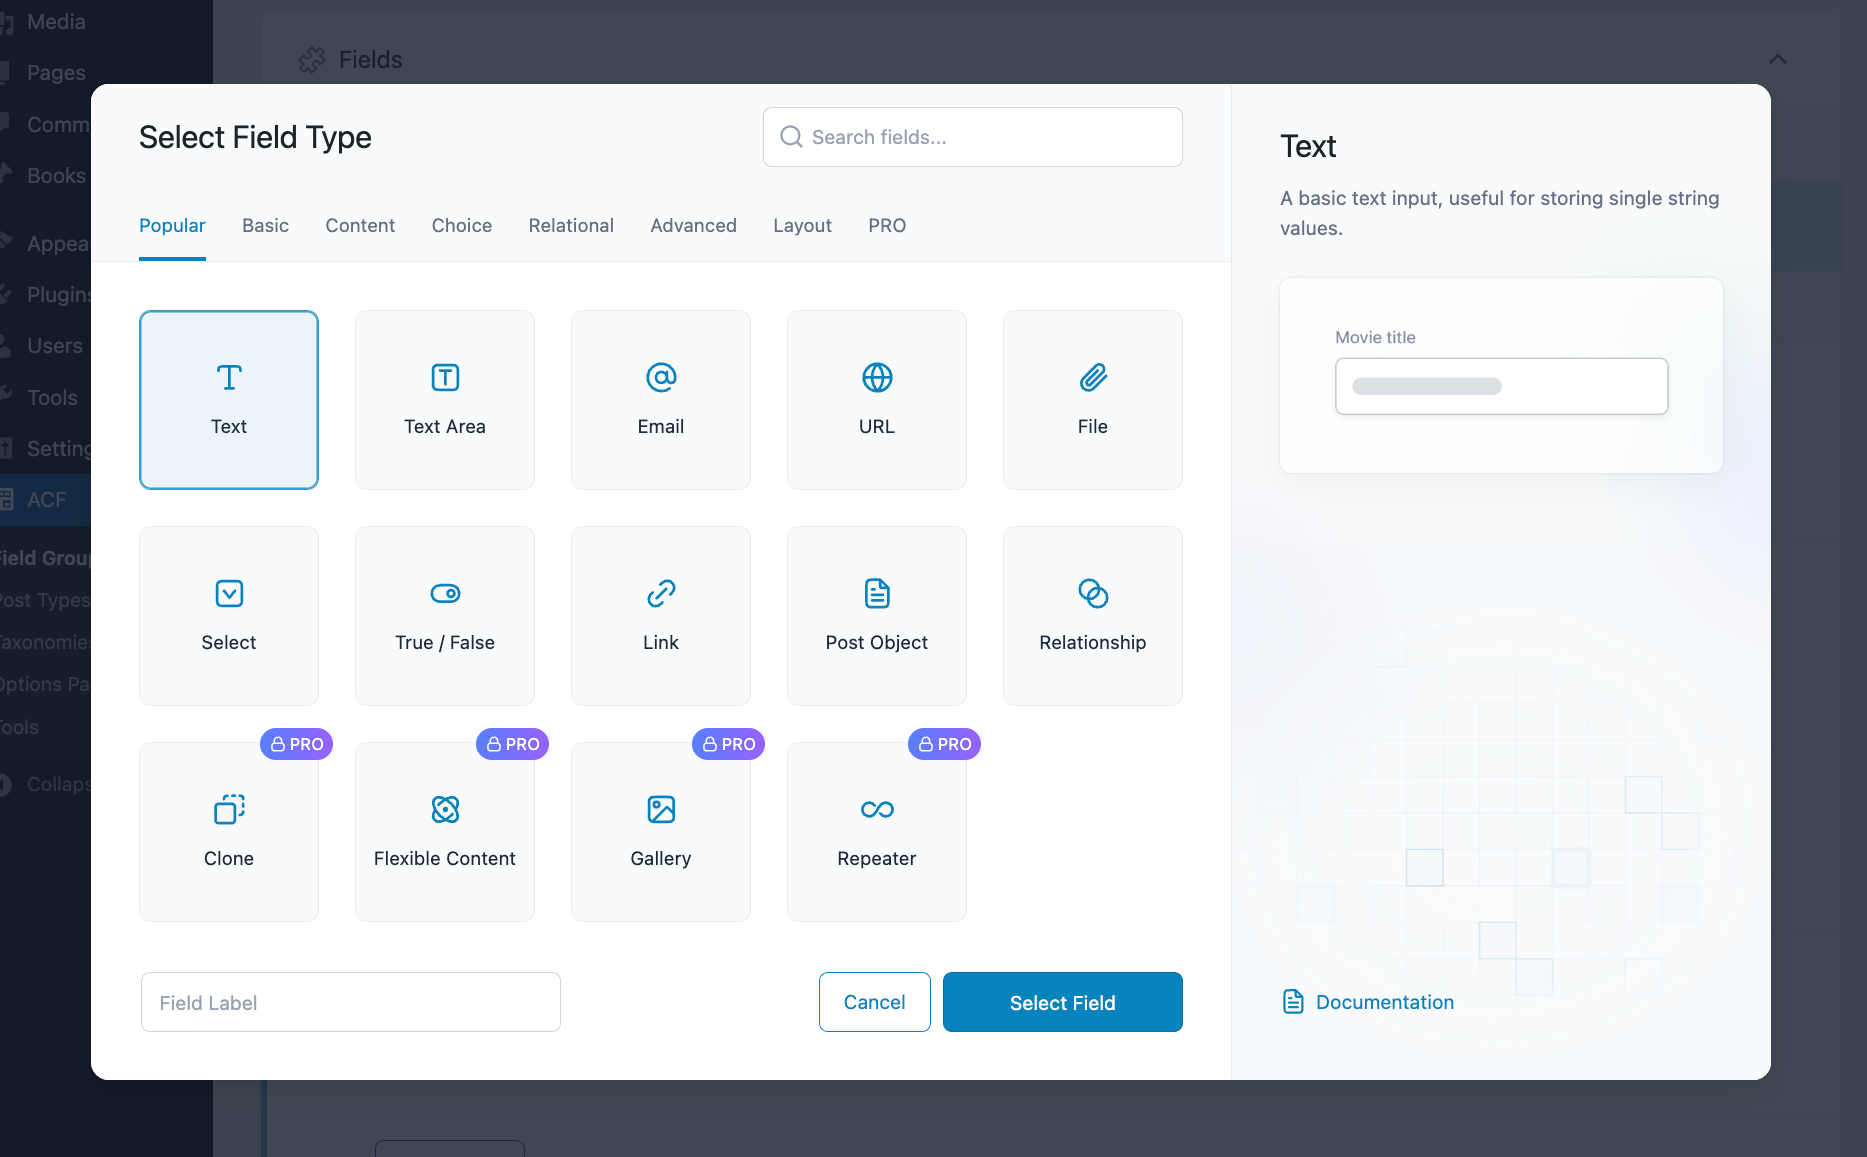
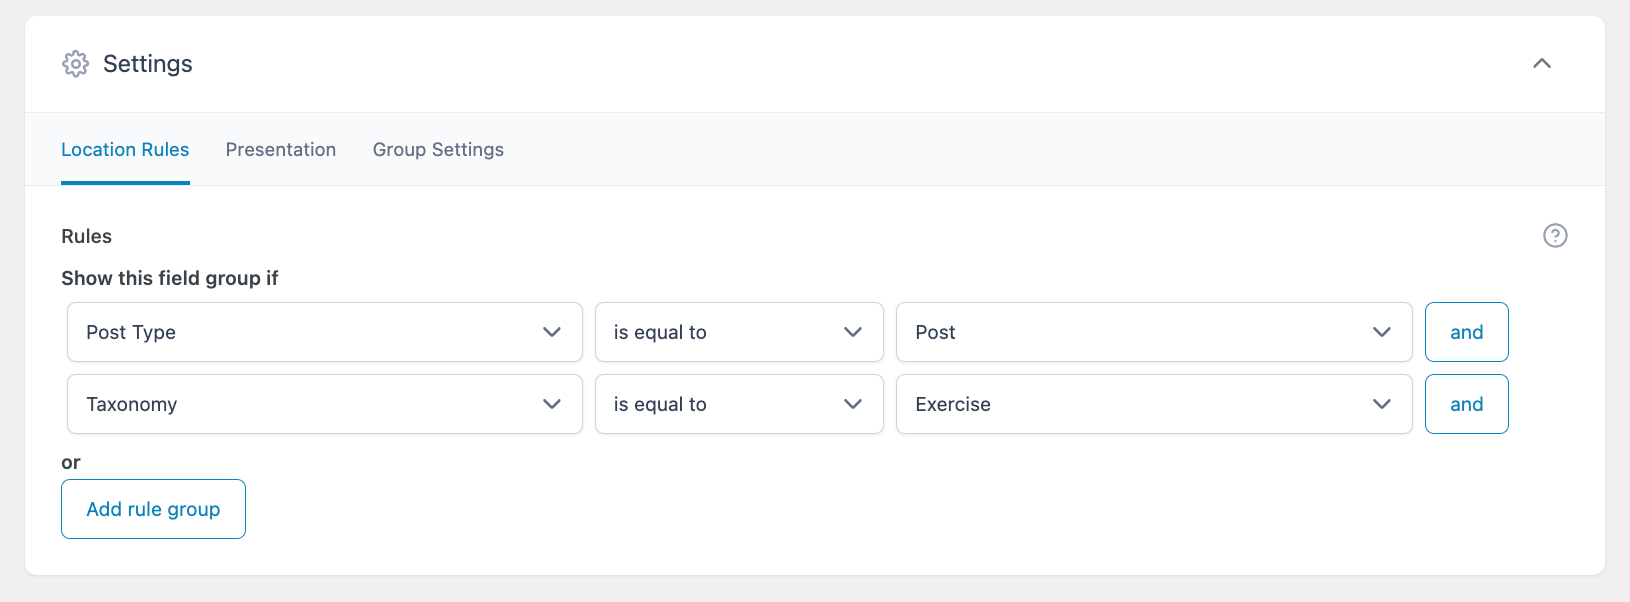
Each field group uses location rules to display the fields when needed, exactly where you choose. Like the manual way of doing things, these display options allow you to customize your posts and pages however you’d like, but all within the WordPress admin. ACF makes it simple to set even very complicated location rules with just a few clicks.
The free version of the ACF plugin gives you total control of how your WordPress site models content. All the basic field types you might expect: Text, URL, Image, etc.–are present in ACF, along with numerous “Choice” fields such as Select and Checkbox, jQuery fields like Color Picker, Date Time Picker, and Google Map, and many more.
Add in bidirectional relationships, easy-to-apply conditional logic, and WP REST API integration, and we’ve still barely scratched the surface of what you can do when you get started with the free version of this plugin.
Upgrading to ACF PRO gives you even greater capabilities. Build entire layouts in a theme or create your own page builder with the Flexible Content field, use the Clone field to build reusable data structure components, display images perfectly in sliders, carousels, and more with the Gallery field, use the Repeater field to wrap a theoretically unlimited number of subfields, and give your content editors access to sitewide options and settings with the Options Page UI.
ACF PRO also includes ACF Blocks, a powerful PHP framework for creating fully customized and compatible WordPress blocks.
Advanced Custom Fields with WP Engine
WP Engine is proud of our world-class hosting for WordPress and the many developer tools and products we manage, including ACF! If you’re looking for a hosting solution for your WordPress website, look no further than WP Engine.