Get Started
Configure Gmail for WordPress
Tags:
Key Takeaways
Web hosts may limit email usage; use specialized email servers for robust features. GSuite offers tools like Gmail API for efficient email management in WordPress.
Configuring Gmail for WordPress involves signing up for GSuite and setting up DNS records. This ensures seamless email delivery through Gmail API.
Post SMTP plugin simplifies Gmail API integration for WordPress email functionality. Follow the setup wizard to connect your Gmail account securely.
Leaders should evaluate their current email server setup and consider transitioning to GSuite for enhanced email capabilities.
Web hosts typically do not optimize their servers for both mail and web services. Due to this many hosts, including WP Engine, limit your website’s email usage. To ensure your emails can be sent you will want to use a specialized email server. Using a specialized email server allows you to access to more robust logging, spam management and helps ensure deliverability.
GSuite, from Google, has become a popular way for businesses of all sizes to manage several business tools, including email. Configuring your WordPress® website to send emails over GSuite’s Gmail API requires a few setup steps.1
Sign Up for GSuite
The first step to configure Gmail for WordPress is to sign up for GSuite. GSuite offers a free 14 day trial, so it’s a great option to try, even if you aren’t quite committed yet.
You’ll be prompted to add your domain, or purchase a domain if your website does not have one yet. Remember, any current email functionality attached to your domain won’t be impacted until you update DNS records in Step 3.
Activate Gmail
Once you’re logged in to GSuite’s dashboard, click Activate Gmail, next to your domain.
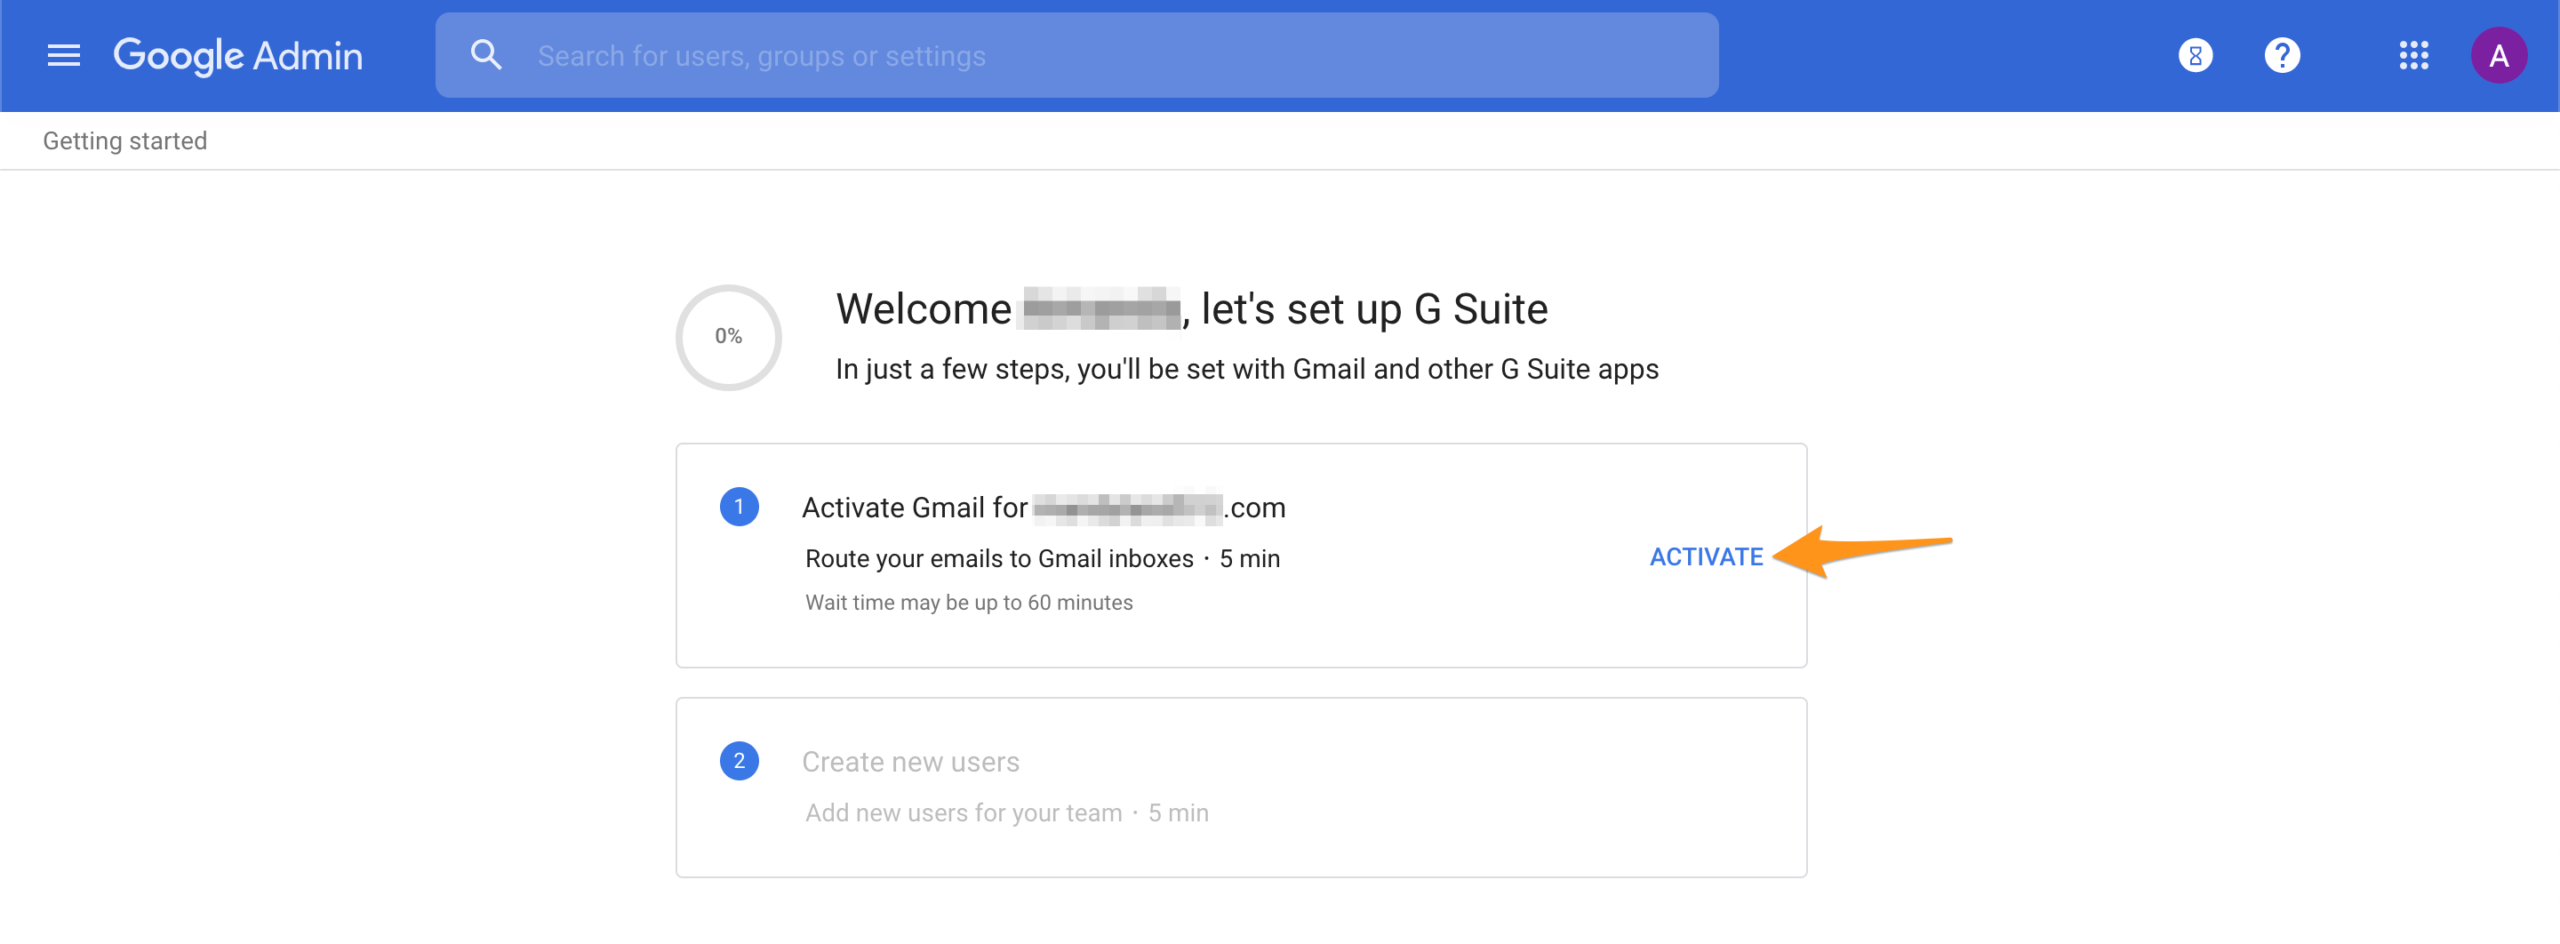
GSuite will automatically detect your DNS host and prompt you to log in to that DNS host from a new browser tab.
Leave your browser tab with GSuite open, you’ll need this page in the next step.
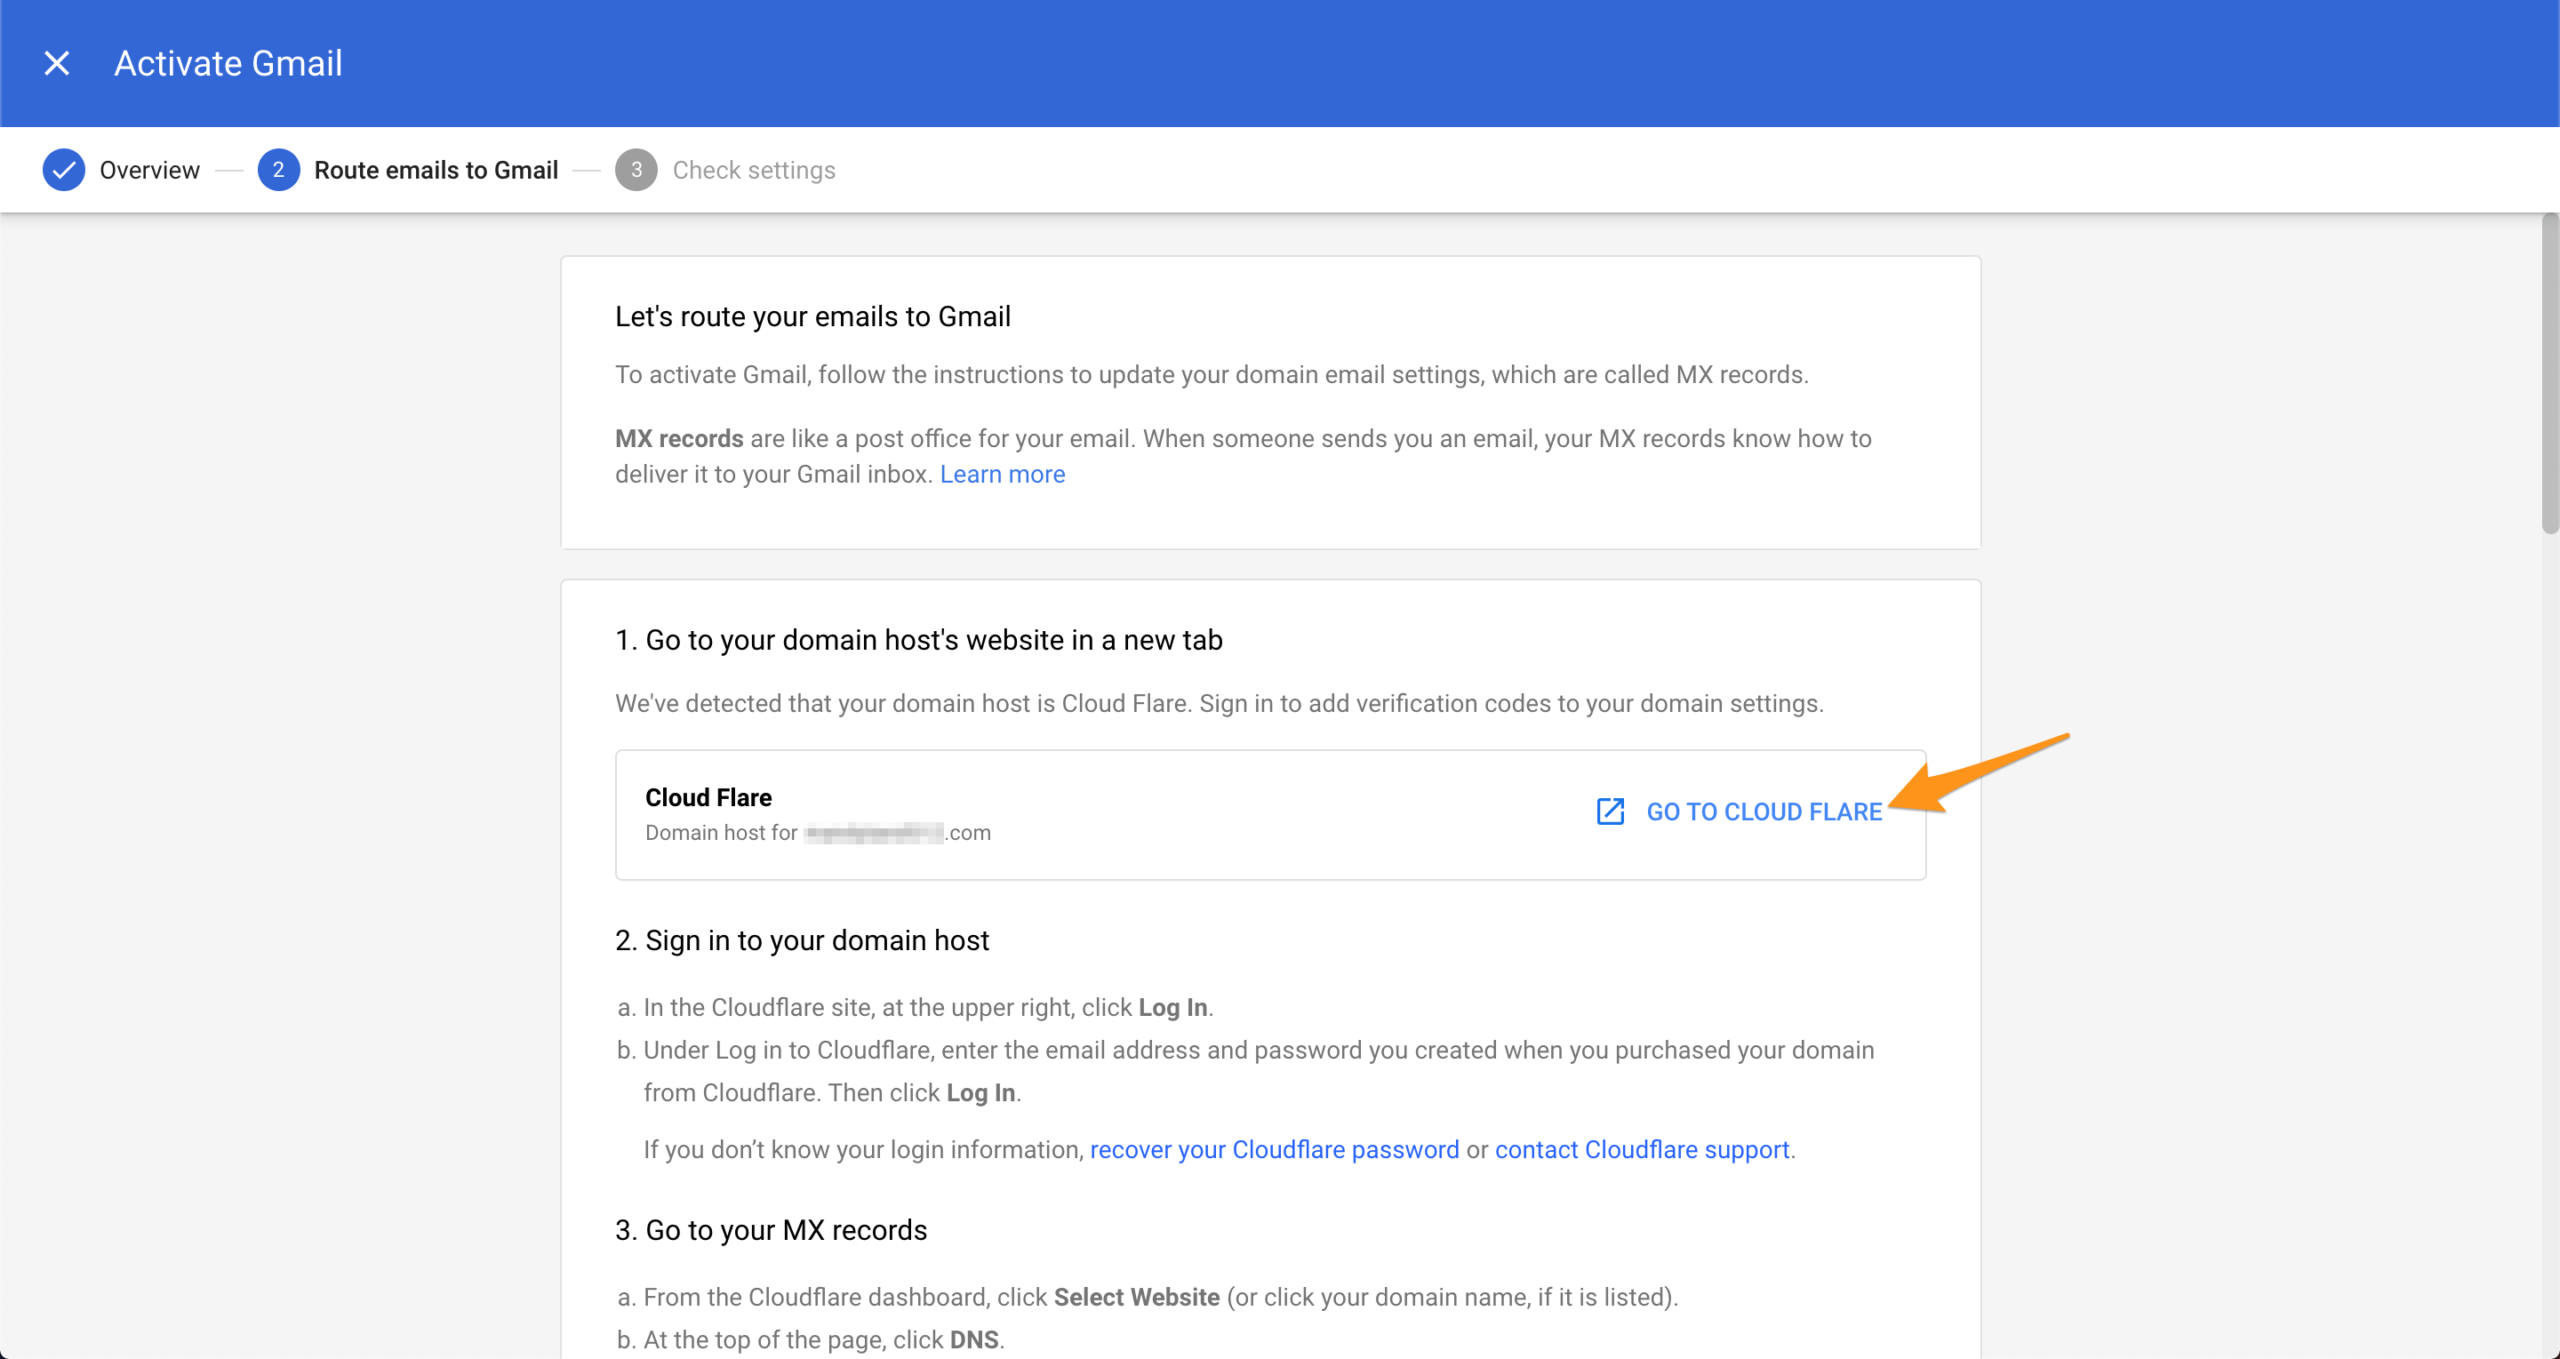
Add and Verify DNS Records
Locate the area to manage DNS records in your DNS host. Add a record:
- Set to the record type to:
MX - Enter the server value:
ASPMX.L.GOOGLE.COM - Set the Priority:
1 - Click Add
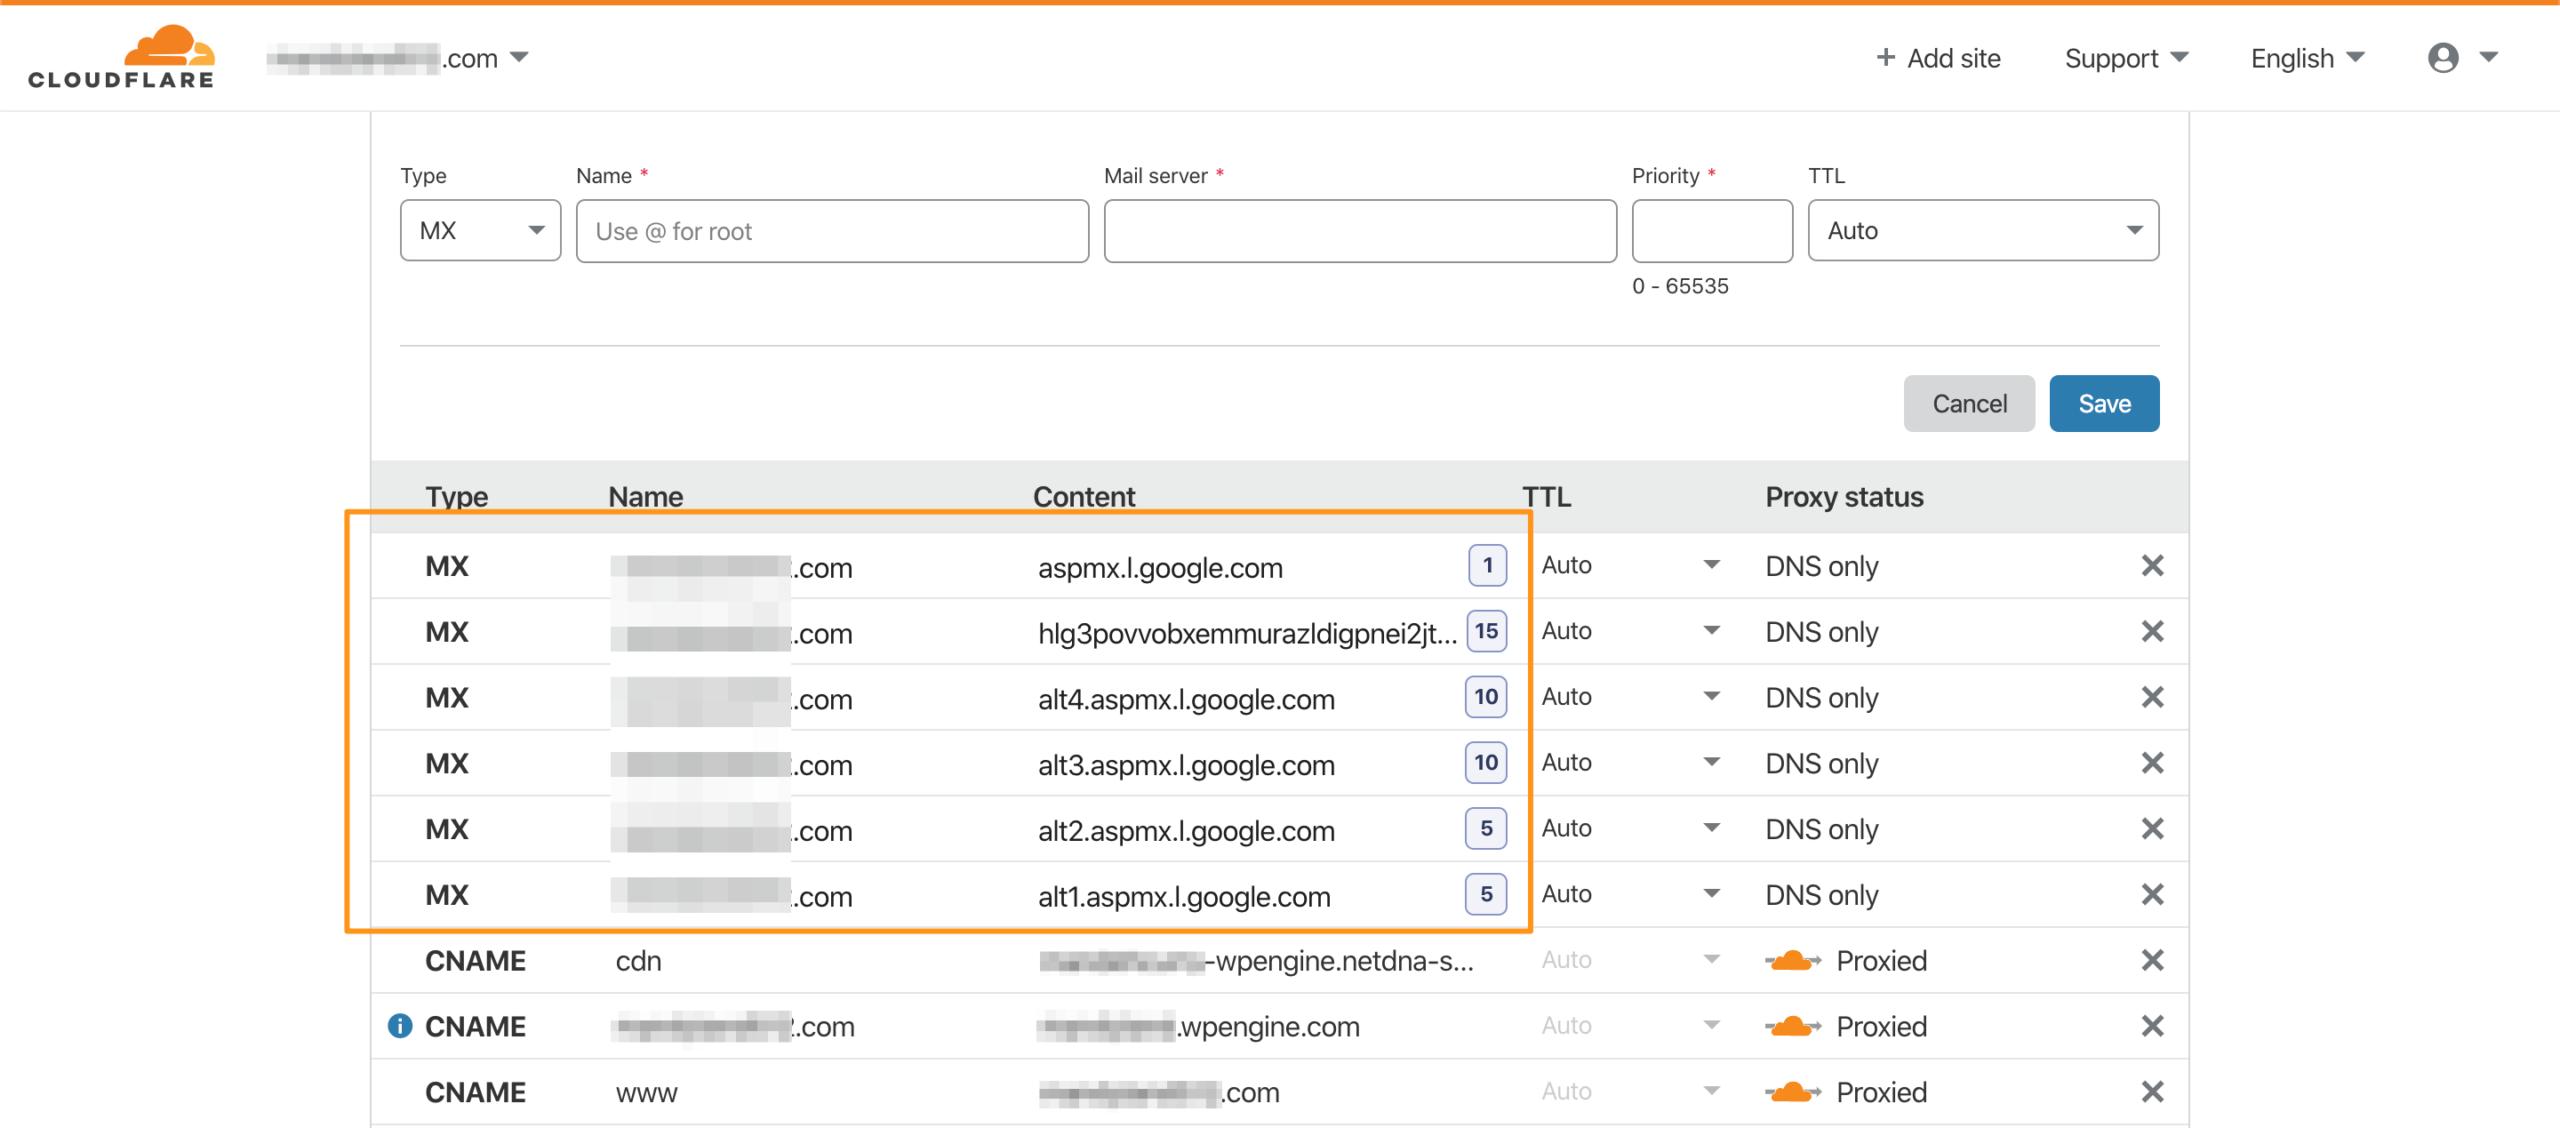
Back in GSuite, scroll down and locate the MX Server Address list. There should be 4 email relay servers listed with various Priority values.

Copy the records listed in GSuite’s configuration page into your DNS provider’s dashboard and add all of the records in the same way as before.
I manage this domain through Cloudflare, so this is where I added the mail records as shown in GSuite.
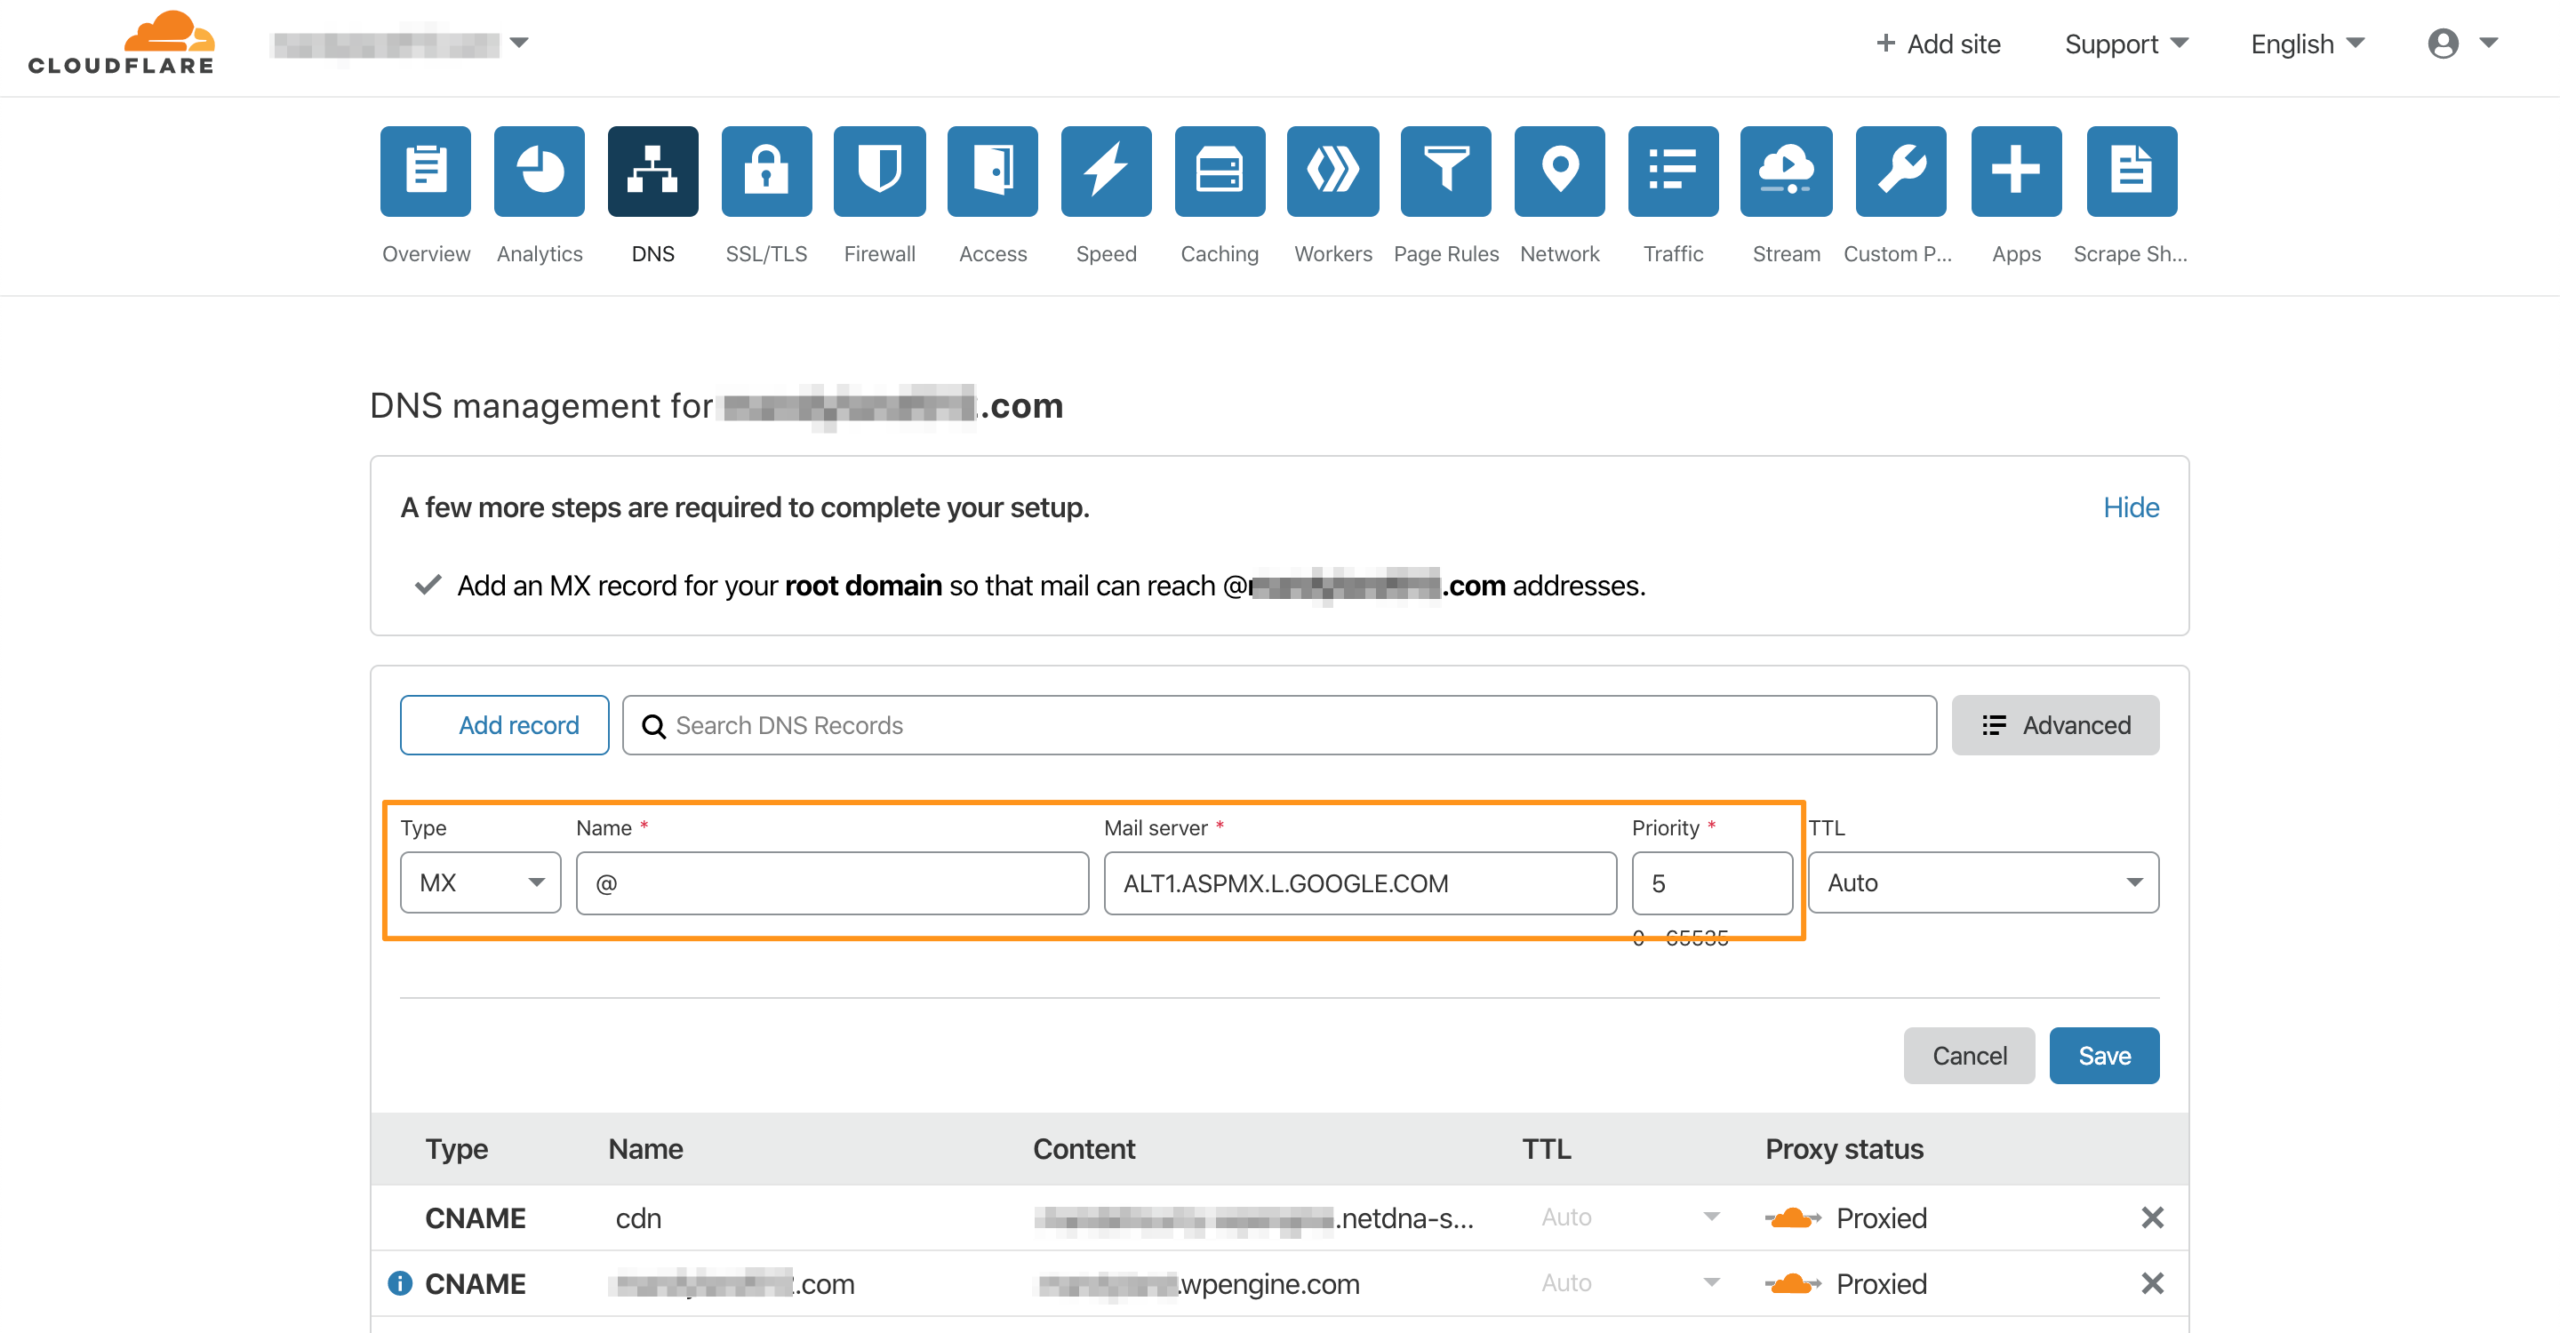
Be sure to set the record type to MX and copy all 4 records and priorities exactly as displayed in GSuite.
Once your records have been added, Gmail requires a custom verification record. Back in GSuite, scroll down further and locate the Verification Code.
In your DNS host, add another MX record, using your Verification Code as the server value.
Set the Priority to 15.
You will end up with 6 MX records, similar to the following:
Verify your records have been successfully configured back in GSuite by clicking Activate Gmail.

GSuite will verify your records have all been added to your DNS host. This process may take several minutes.
If any records are missing, they will be marked in red. Be sure to add the records as shown before clicking Retry Activation.
Once the records have all been successfully verified, the page will be redirected to a success message:
Gmail is activated for domain.com
Install and Activate Post SMTP
You will need to login to your WordPress Admin Dashboard for the following steps. Login to your website at the /wp-admin path to access the WordPress Admin Dashboard.
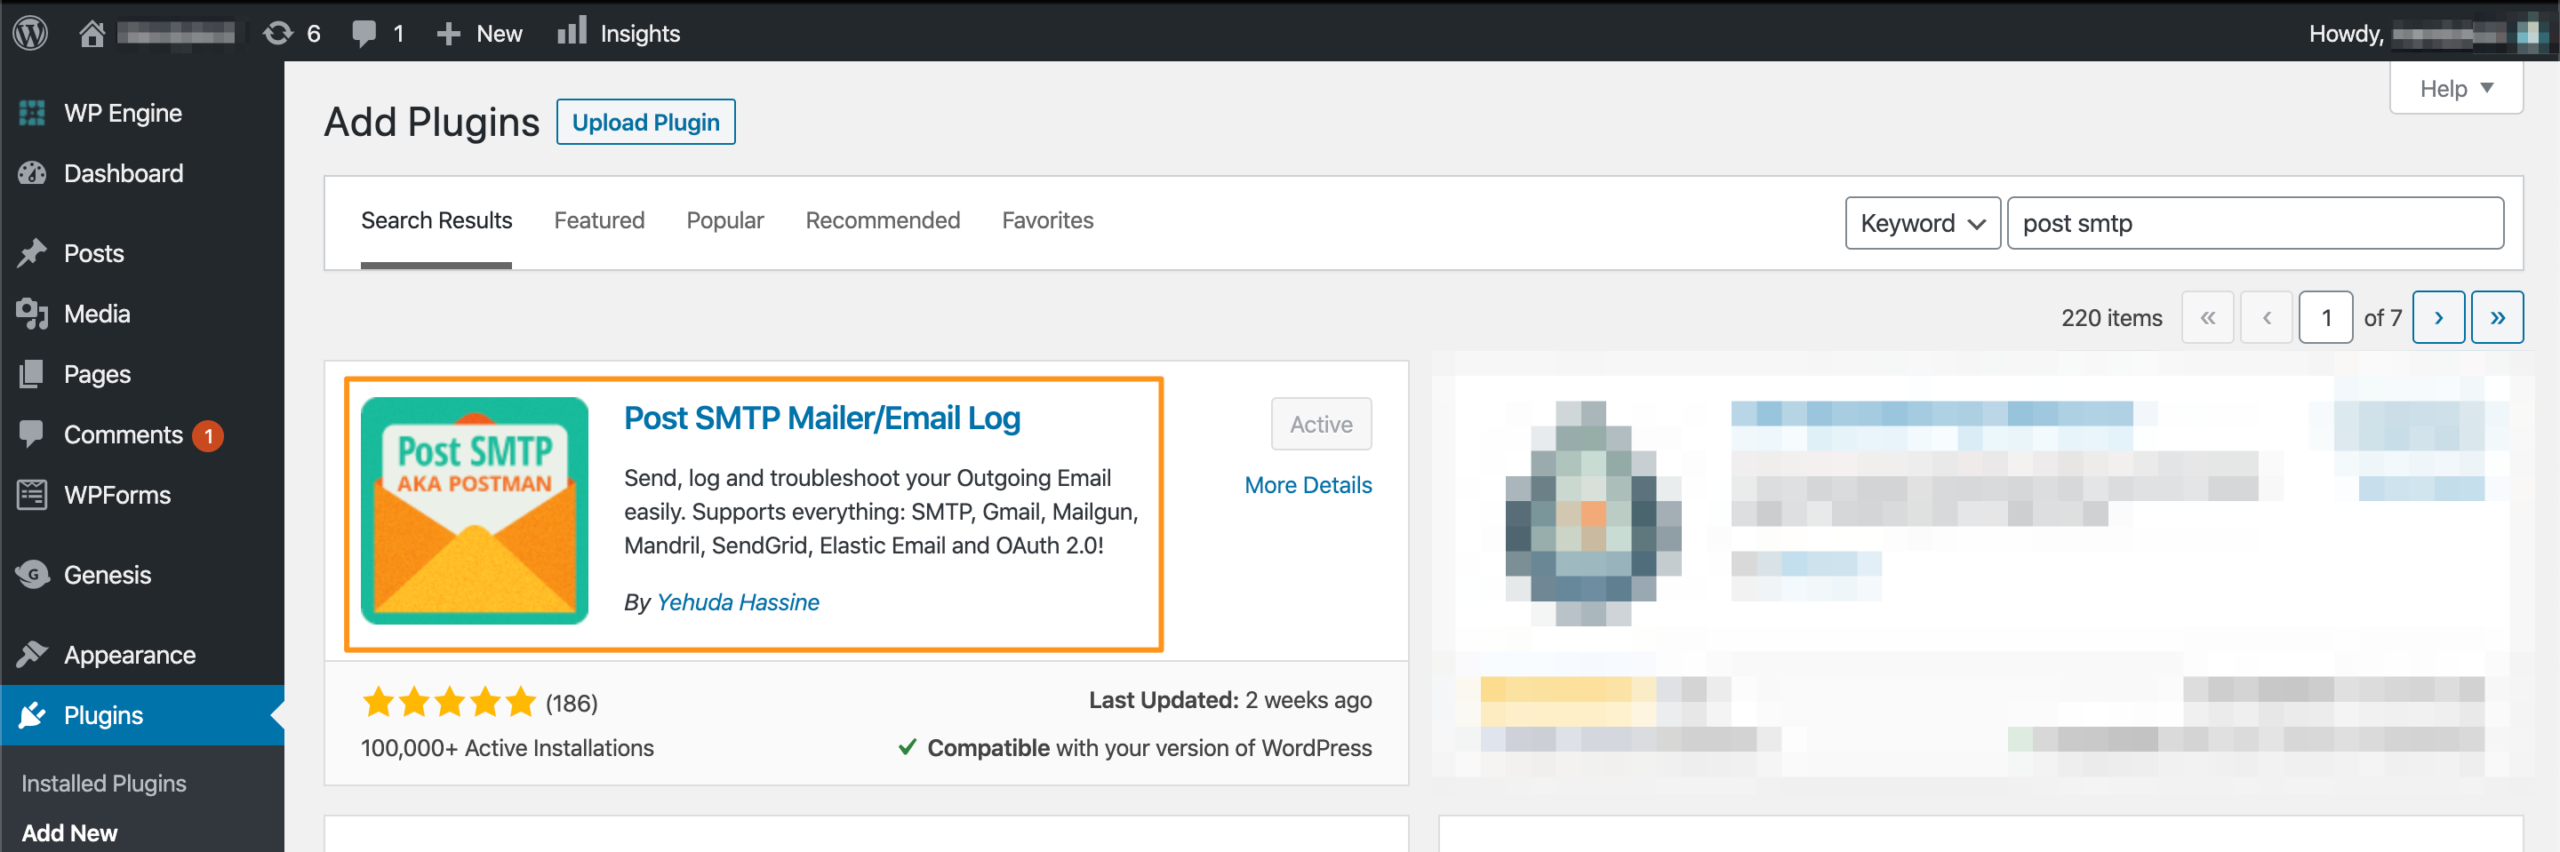
Navigate to Plugins > Add New and type “Post SMTP” to locate the Post SMTP Mailer/Email Log for WordPress plugin.
Once it is installed, Activate the plugin on the same screen.
Next, you can configure Mailgun from its Post SMTP left menu tab.
Configure Post SMTP
Once you have arrived to the Post SMTP plugin Settings page (located towards the bottom of the main left menu) click Start Wizard.
Enter the Email address and a name you’d like mail to come from. You set the email address up with GSuite in Step 1. Click Next.
Post SMTP will automatically detect the Outgoing Mail Server Hostname as smtp.gmail.com. If not, enter it. Click Next.
Post SMTP will then run a Connectivity Test to detect the recommended port and authentication. While SMTP is an option over ports 443, 465 and 587, we recommend using the Gmail API instead.
Select Gmail API and OAuth 2.0. Click Next.
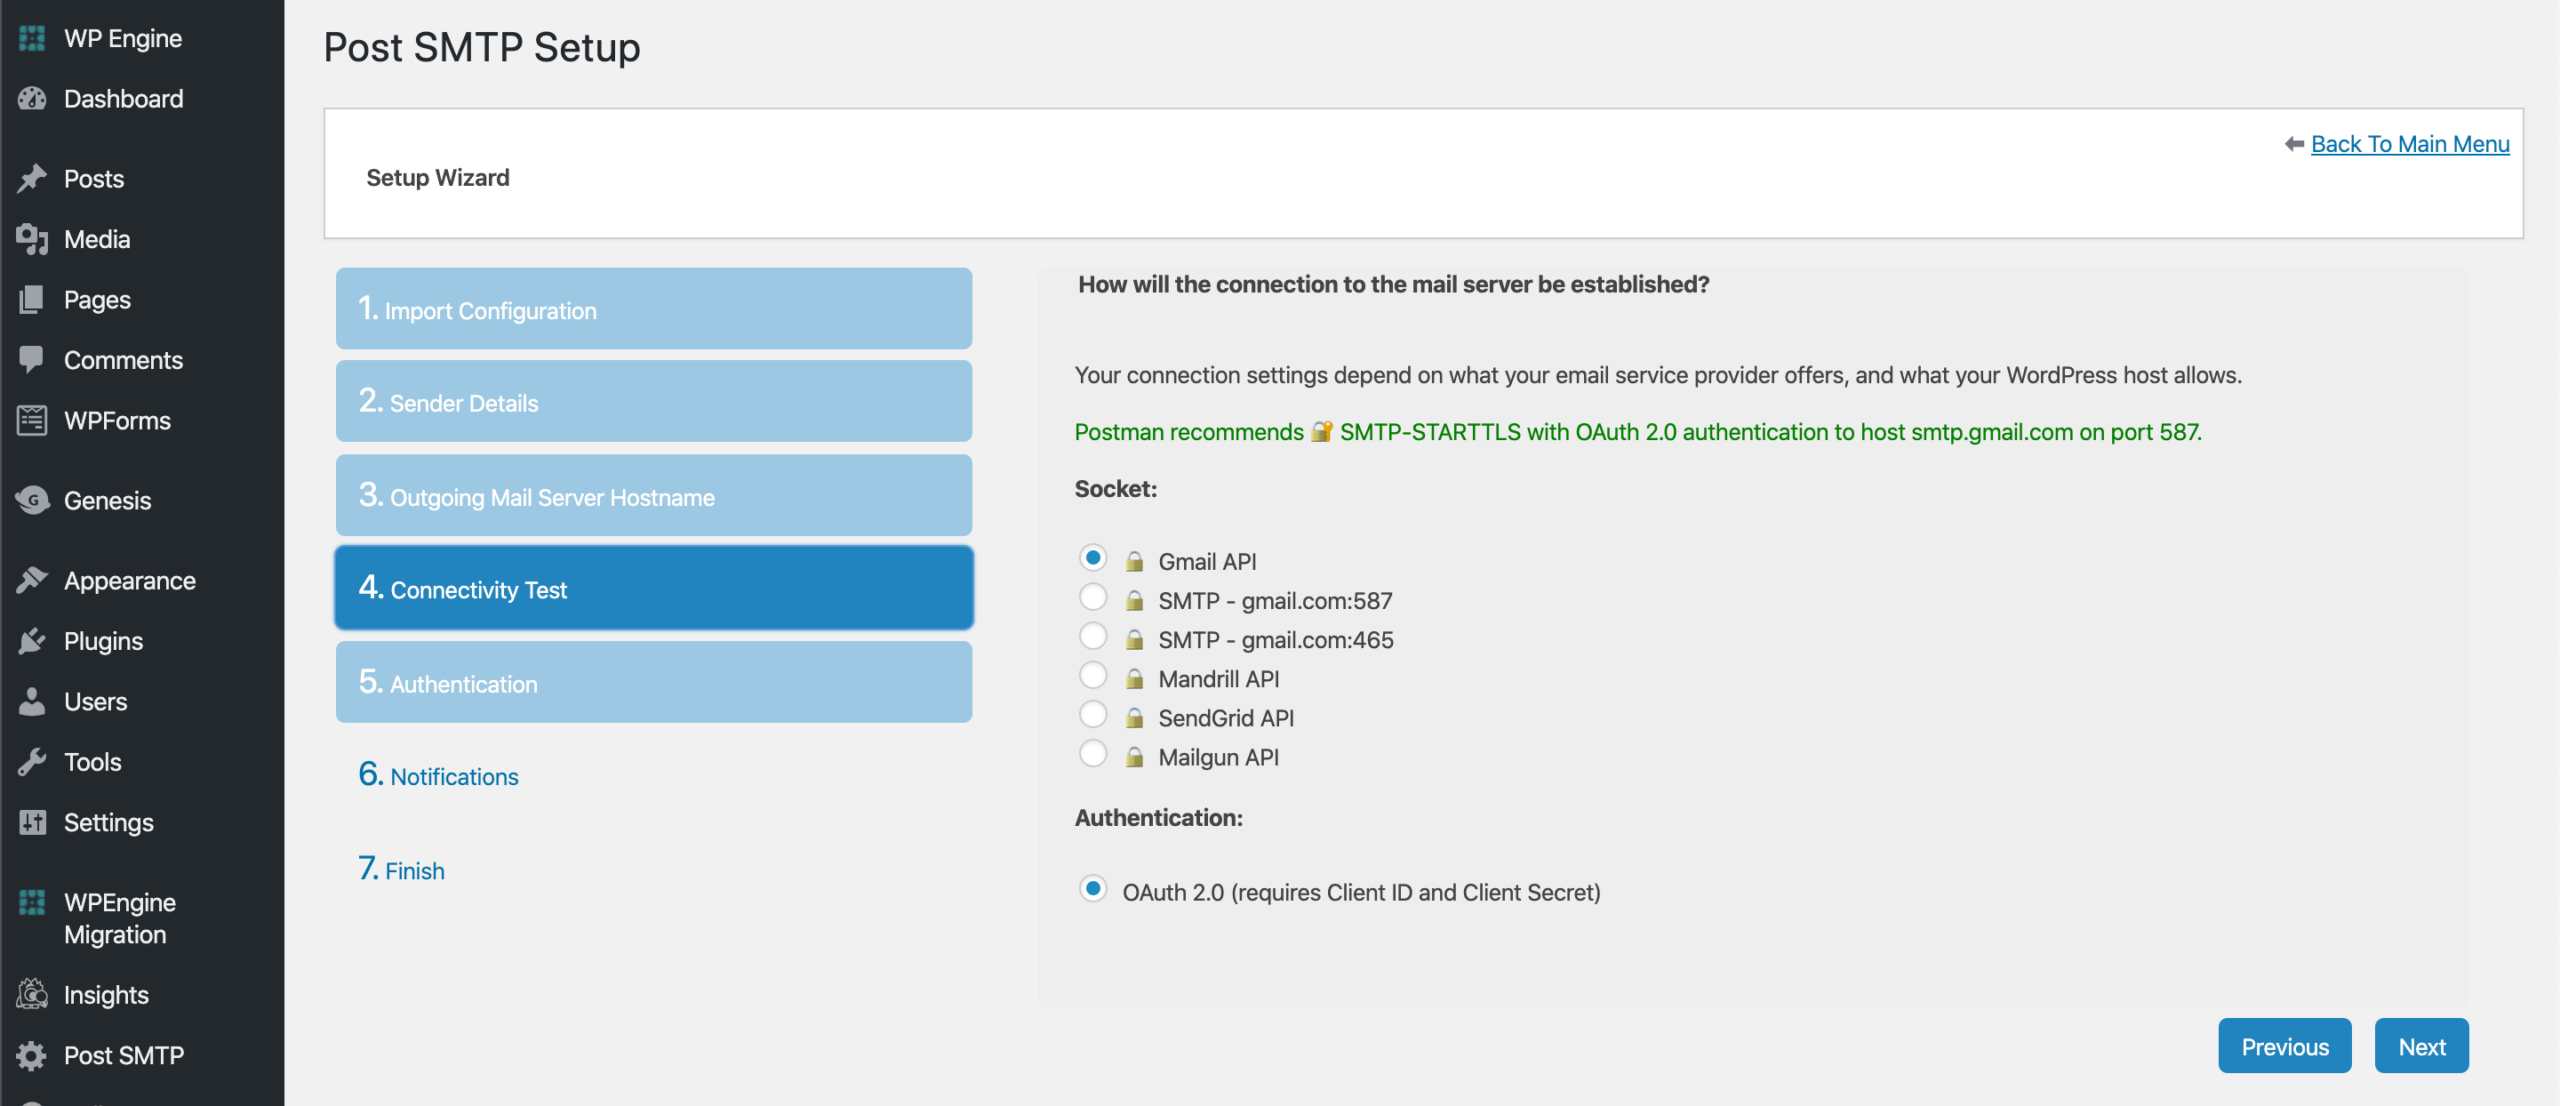
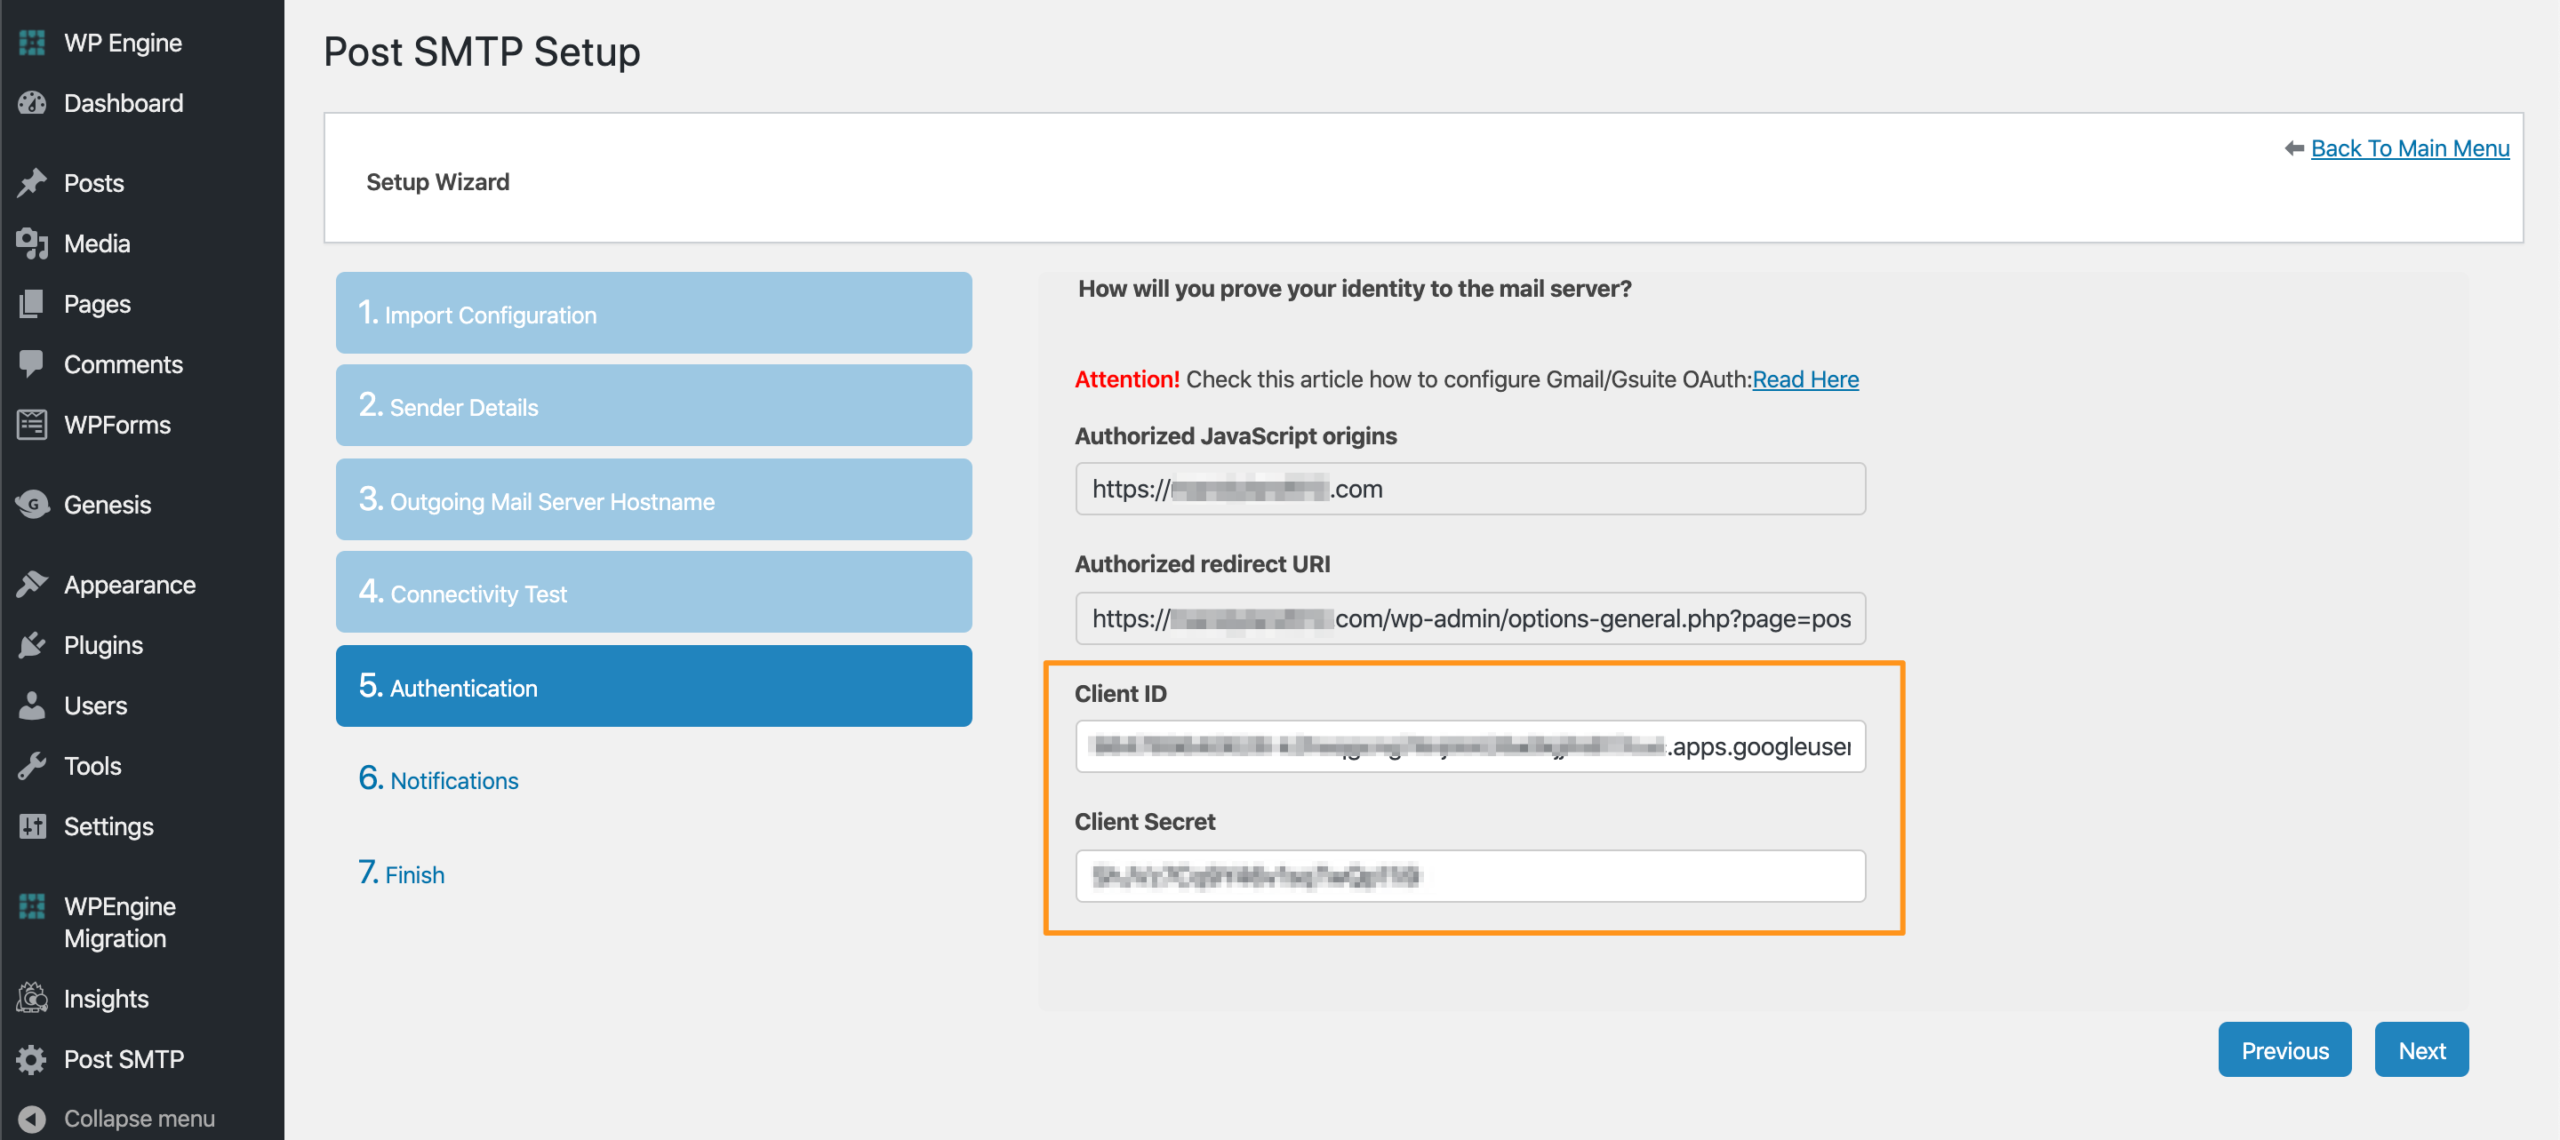
You will be prompted to enter Client ID and Client Secret. This information will come from your Google account, so leave this page open for the next step.
Connect Google API to Post SMTP
To generate your credentials, log into the Google API Console at the following URL:
https://console.developers.google.com/start/api?id=gmailIf your browser is logged into multiple Google accounts, be sure you have the correct account selected at the top right.
Select Create Project from the dropdown. Click Agree and Continue.

You will see a success message:
The API is enabled
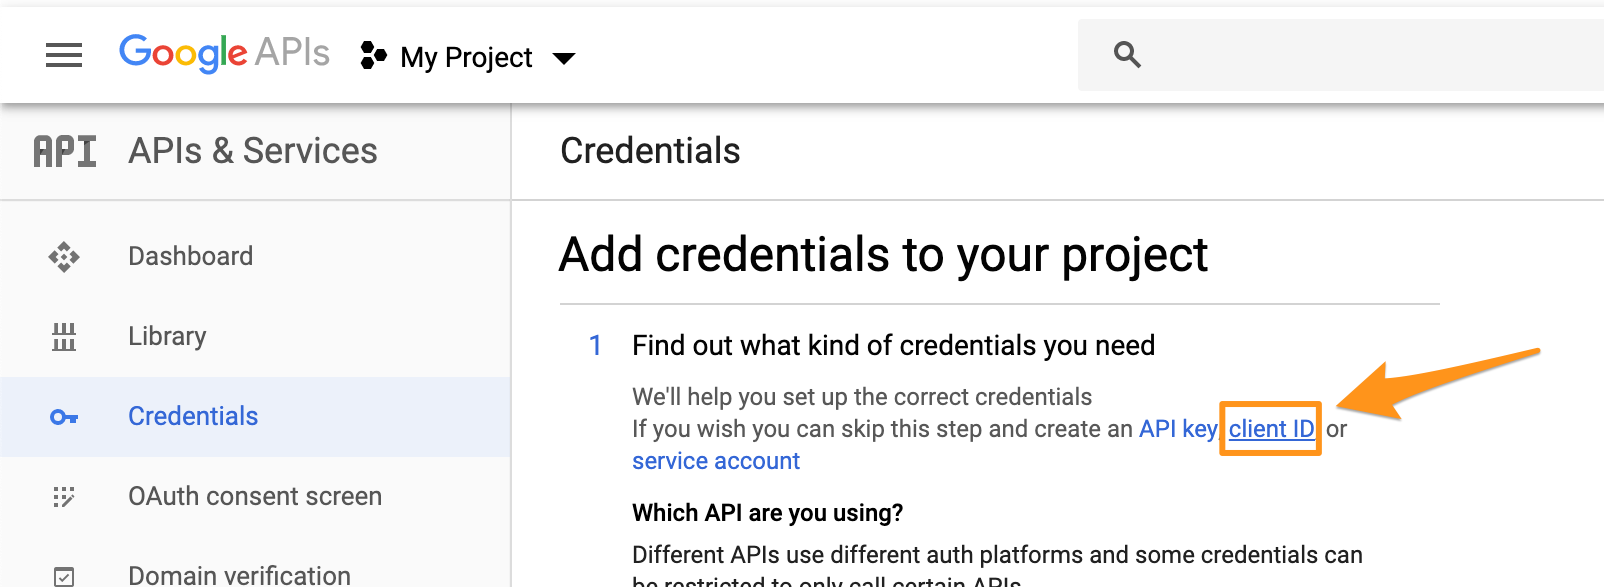
Click Go to credentials.
On the next page, skip generating credentials by clicking the link for Client ID.
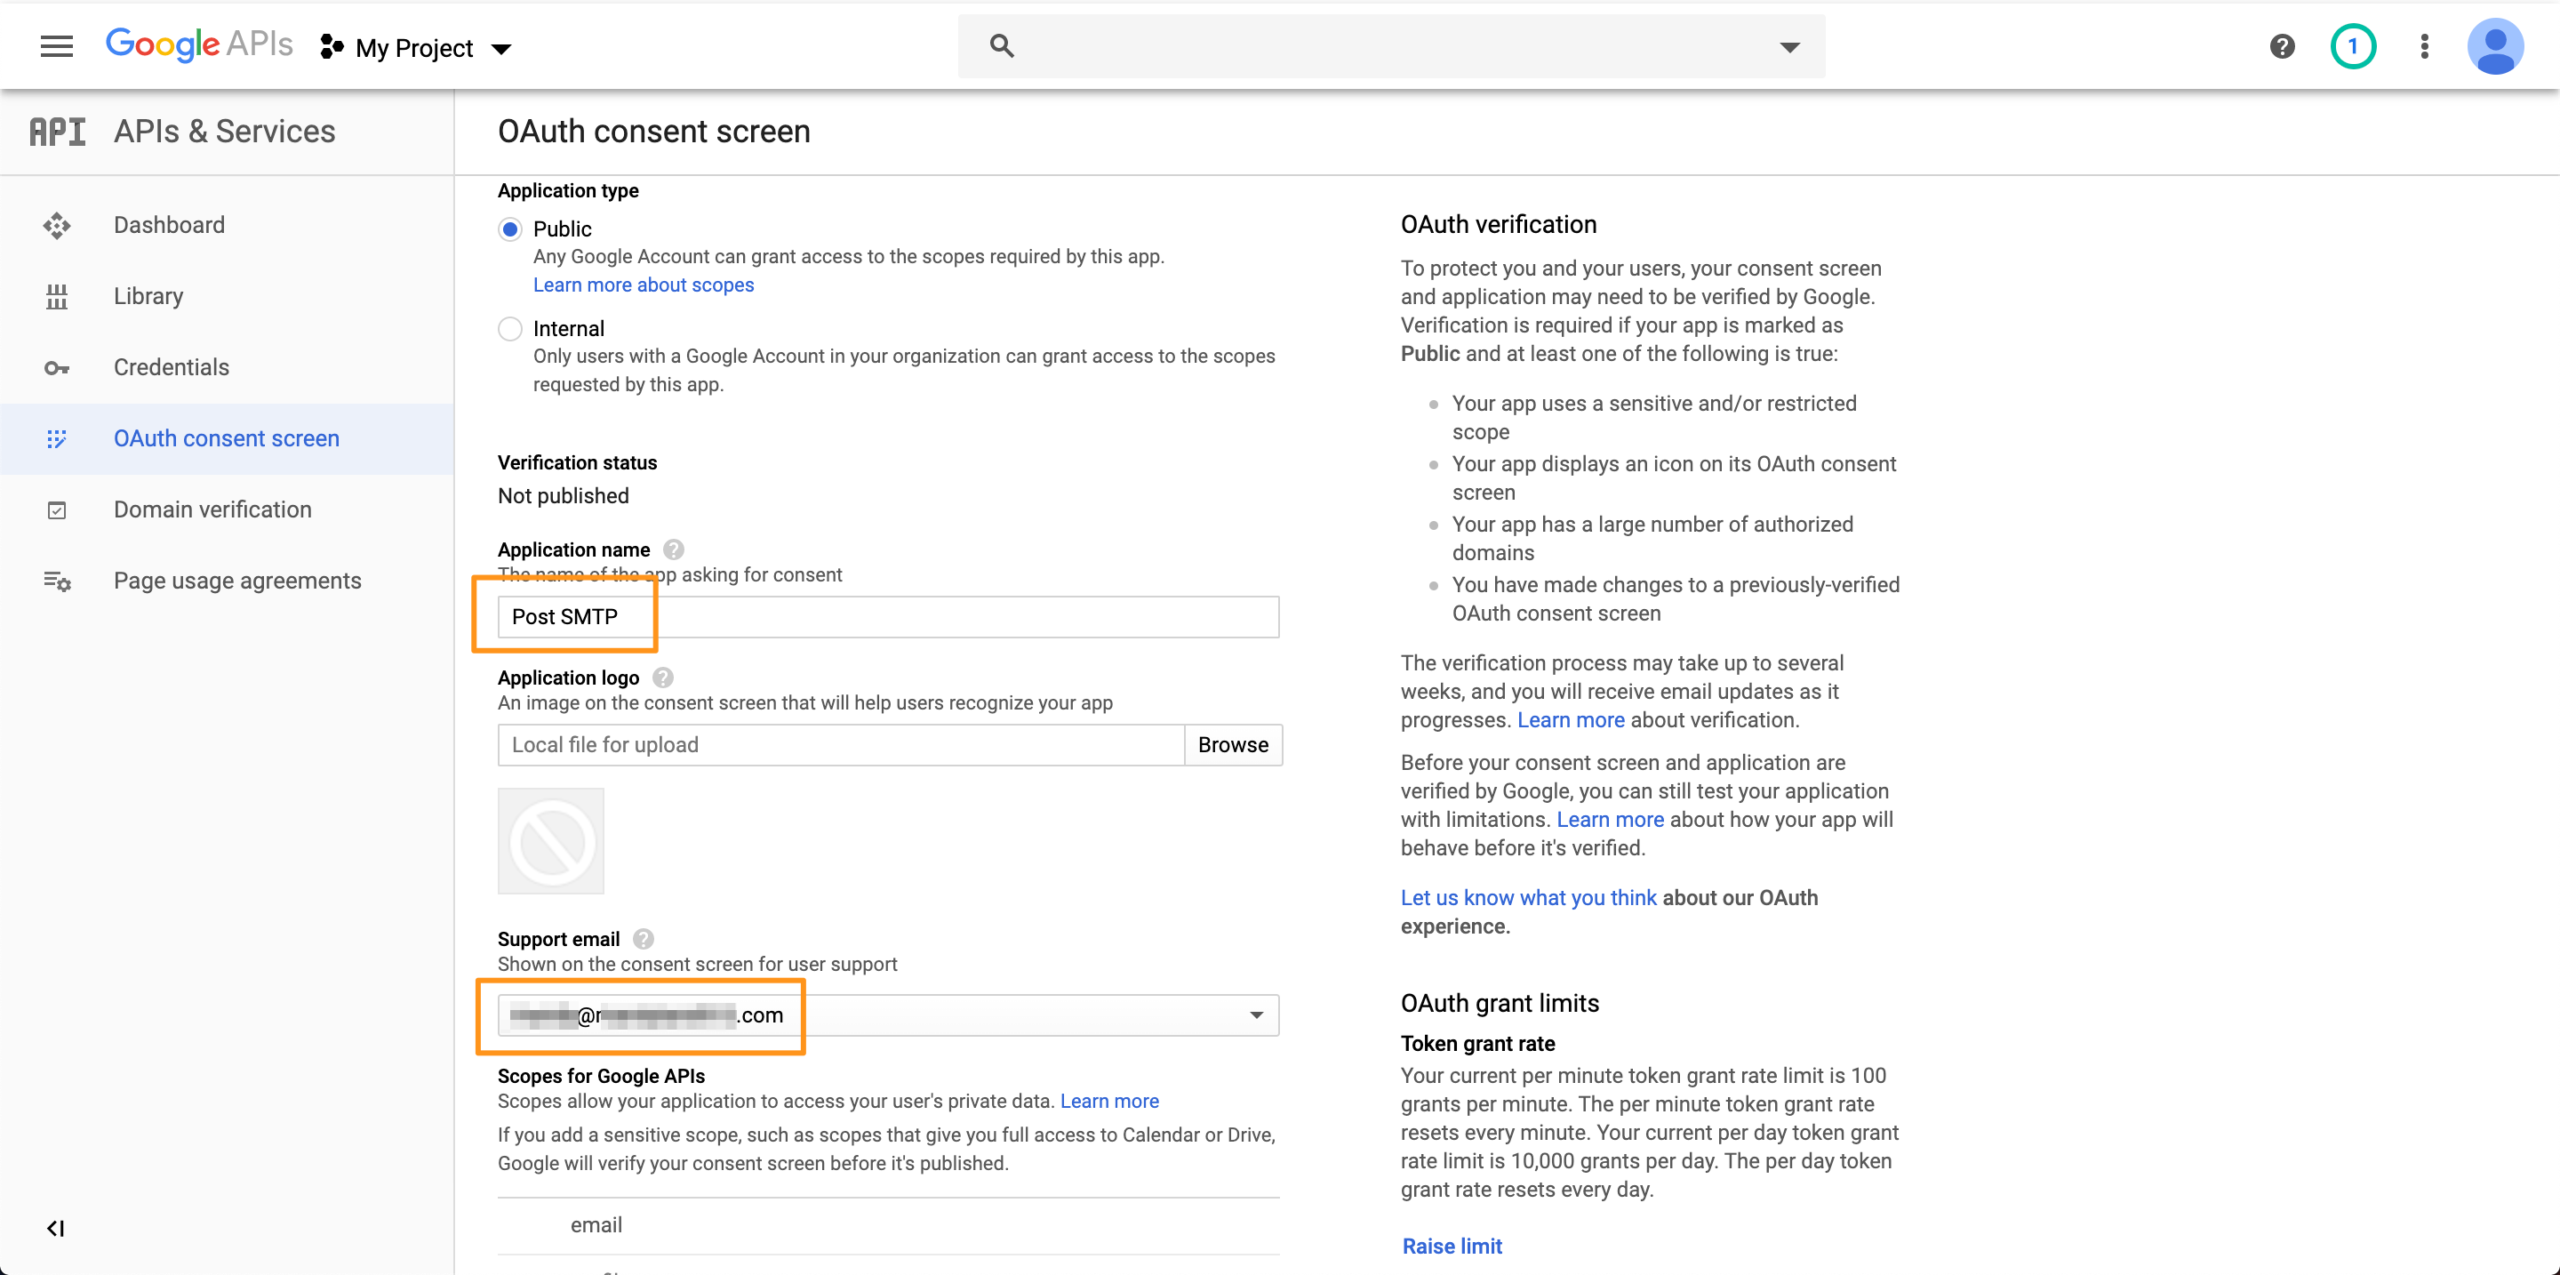
Click Configure Consent Screen.

Set the User Type to Internal, then click Create.
On the next screen, set the Application name to Post SMTP.
Set the Support Email to your new email address.
Under Authorized Domains, enter your domain. For example: mydomain.com
Scroll down and click Save.
Click Credentials on the left menu.
Click Create Credentials.
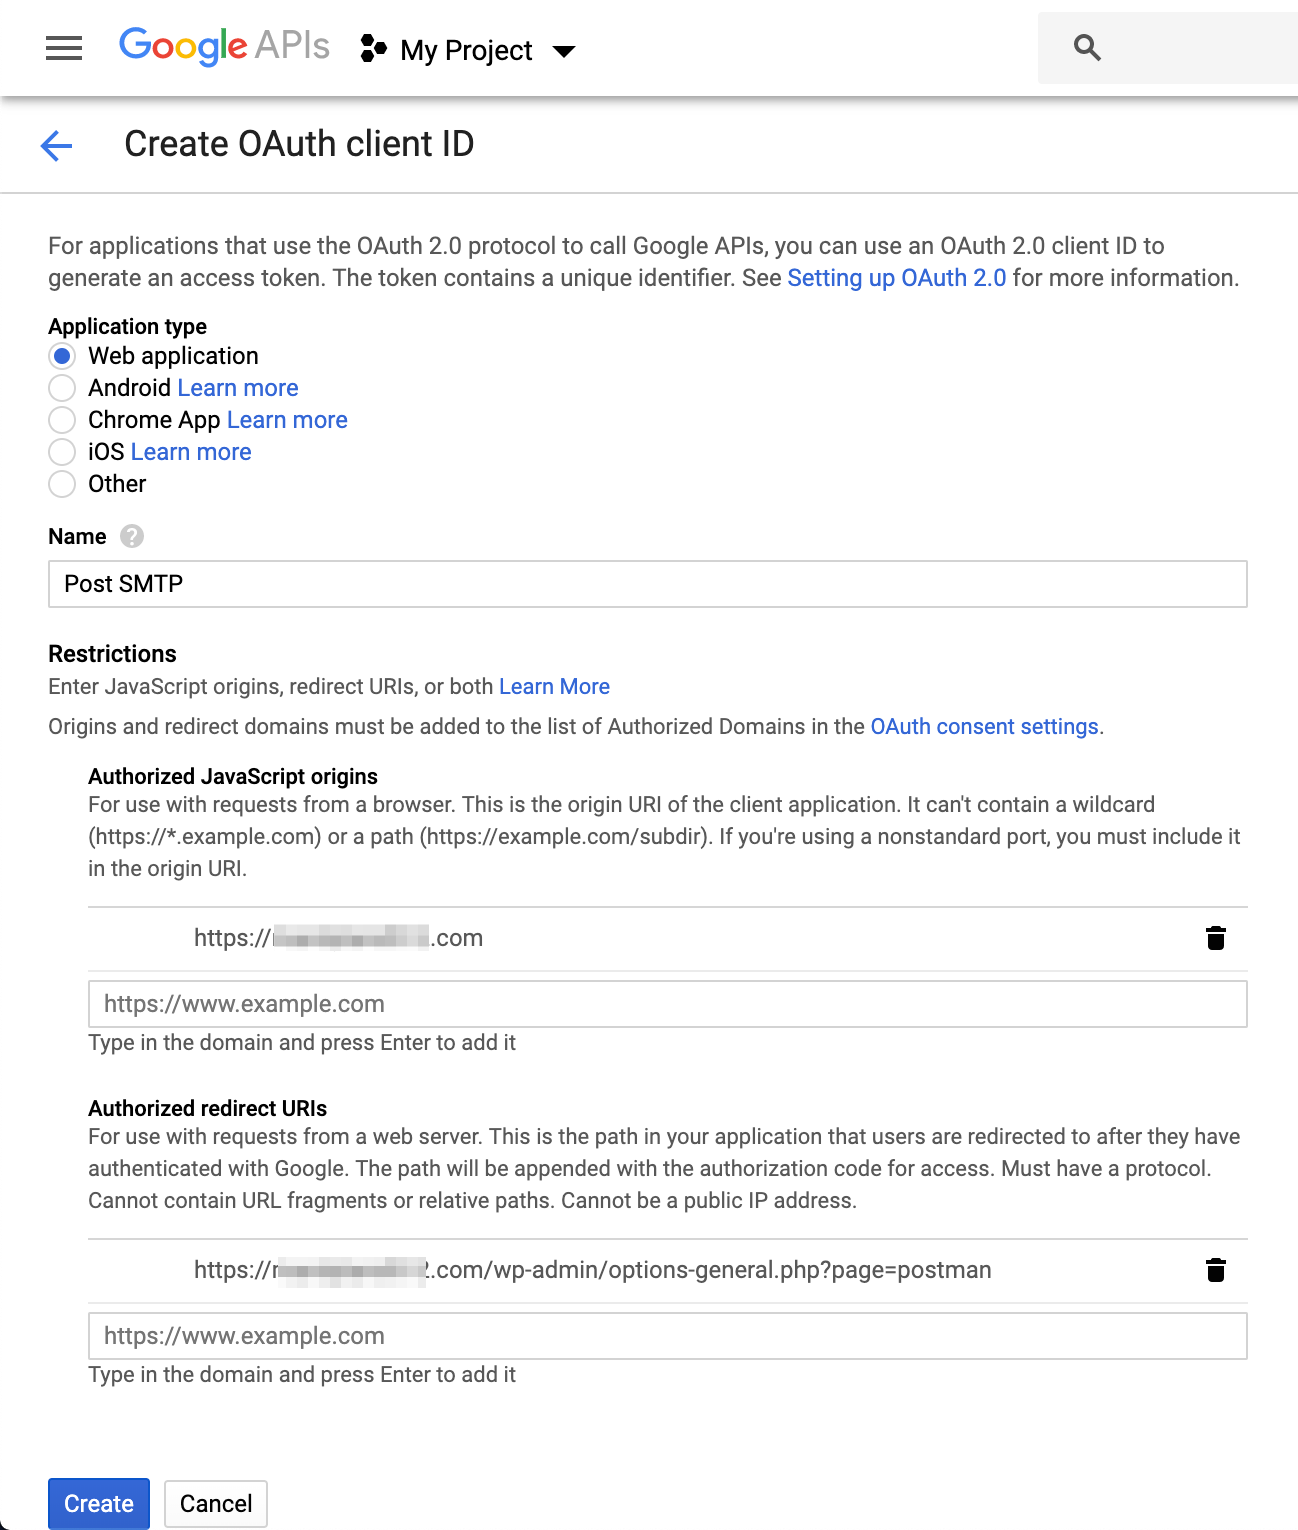
Select OAuth client ID.

Select Web Application then enter the project name as Post SMTP.
Return to your Post SMTP wizard settings page in your WordPress admin dashboard.

Copy and paste the Authorized JavaScript Origins and Authorized Redirect URI from the Post SMTP settings page into their respective fields within the Google API Console.
Click Create.
After clicking Create, you will be redirected to a page displaying your Client ID and your Client ID Secret.
Copy and paste the Client ID and the Client ID Secret from the Google API Console into the Post SMTP settings wizard.
From Post SMTP, click Next.
Notifications can be configured, if desired, on the next page. If not, simply click Next again.
Click Finish.
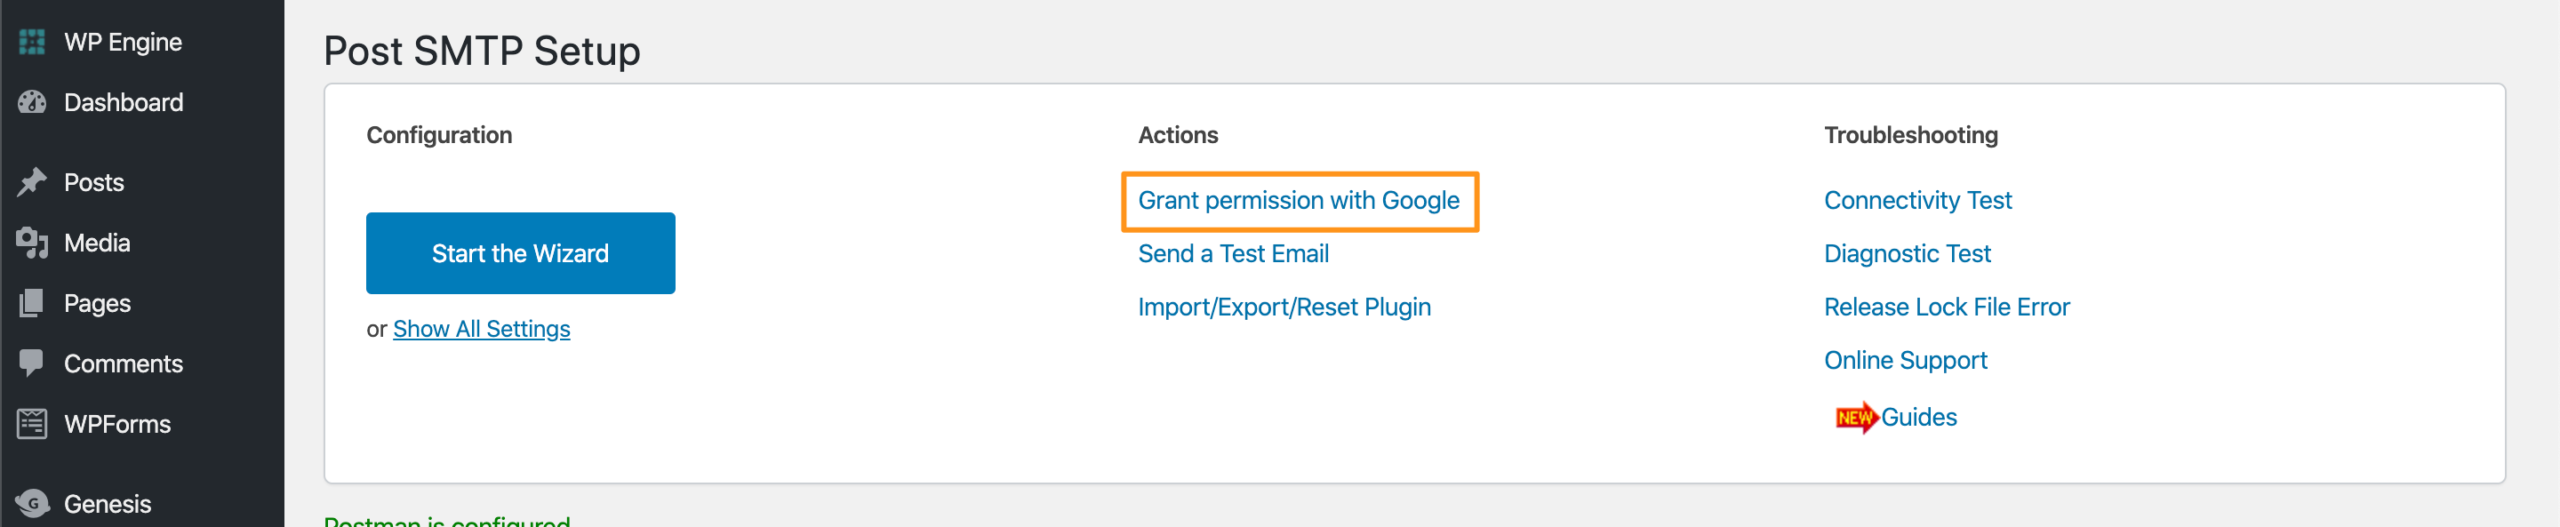
On the Post SMTP plugin page, locate Actions and select Grant permission with Google. You will be prompted to select the Gmail account you just created. Then click Allow.
After verification you will see the following status message to indicate you’ve successfully completed the permissions process:
Postman will send mail via the Gmail API.

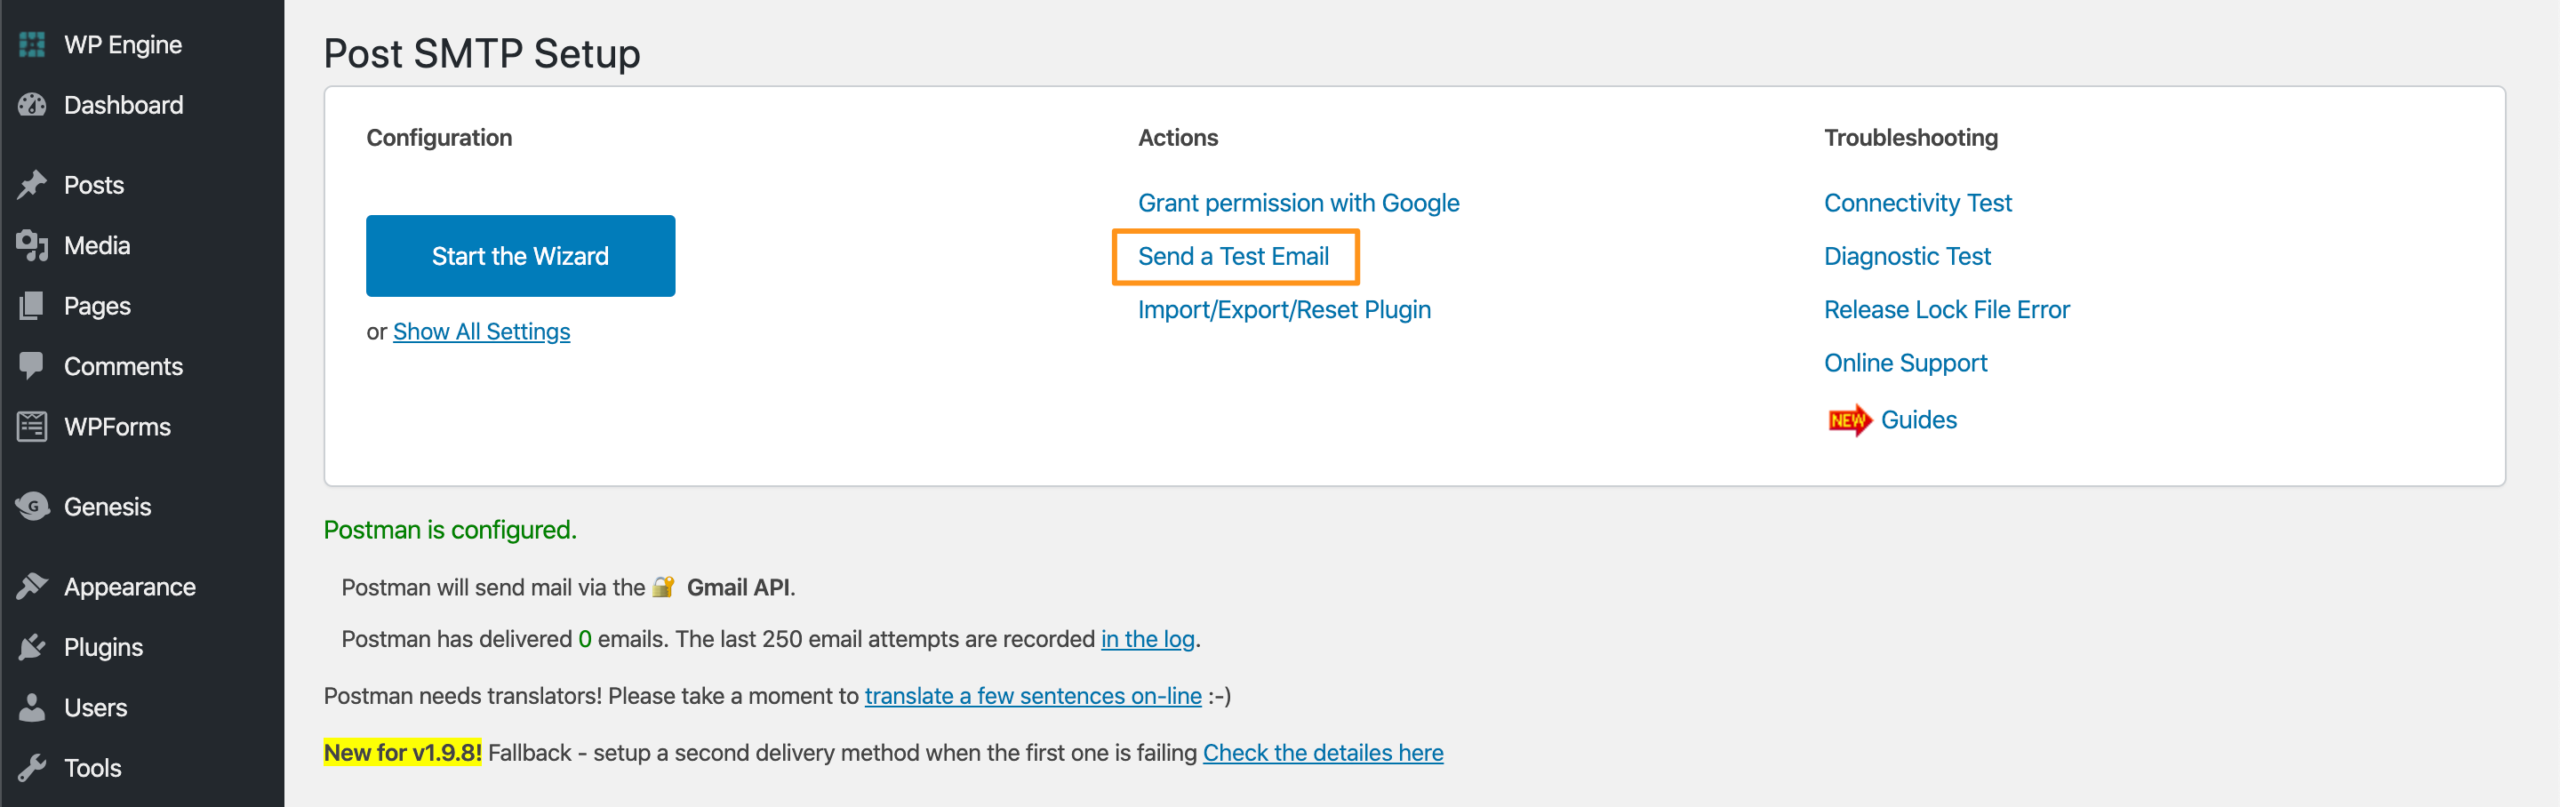
Now that your Post SMTP and Gmail API settings are configured, you can send a test email to confirm functionality.
NEXT STEP: Use DMARC policies to ensure emails can be delivered