Get Started
Migrate LargeFS to a New Region
Tags:
Key Takeaways
Migrating LargeFS data to a closer region optimizes website performance. Moving images to a geographically closer location can enhance loading speeds and user experience.
Creating a new bucket and IAM User streamlines the migration process. Following AWS setup guides and creating necessary user permissions ensures a smooth transition.
Duplicating content and making it public ensures seamless image serving. Copying content and adjusting permissions are crucial steps for successful migration.
Contacting WP Engine Support post-migration ensures proper bucket configuration. Seeking assistance post-migration can help resolve any issues and optimize the setup.
When WP Engine initially rolled out the LargeFS media offload to Amazon S3 feature all buckets were set up in the us-east-1 region. As more regions have become available, images may need to be migrated to a geographically closer location to where the website is hosted.
Please be aware that different regions have different pricing associated with storage and data transfer, or bandwidth. For the current list of prices in each region check out AWS’s S3 Pricing page.
Create New Bucket
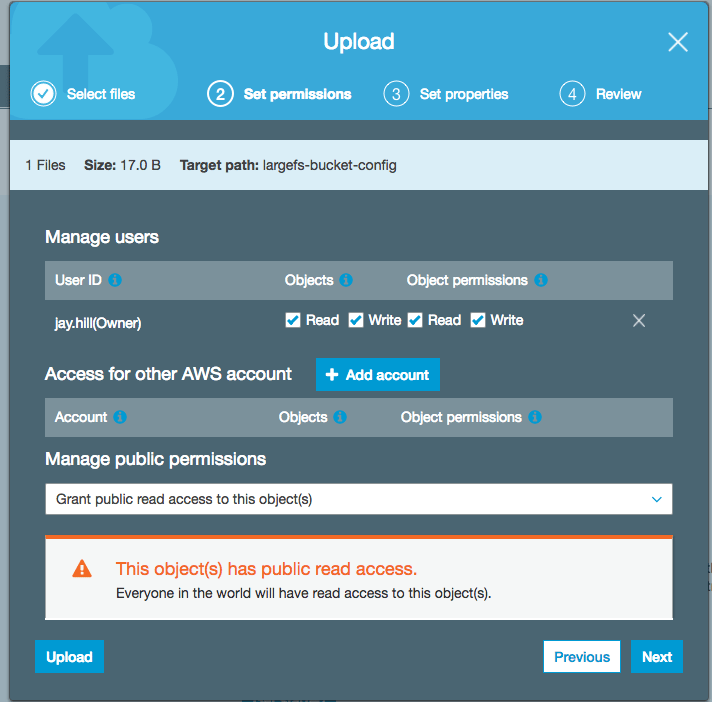
First, create a new bucket in the desired region via the AWS Console following the Setup Guide on WP Engine. Once the bucket is created (including enabling static website hosting and bucket policy) download the LargeFS validation file (ends with .largefs) found in the root of the old bucket and upload it into the new bucket with Public-Read permissions.
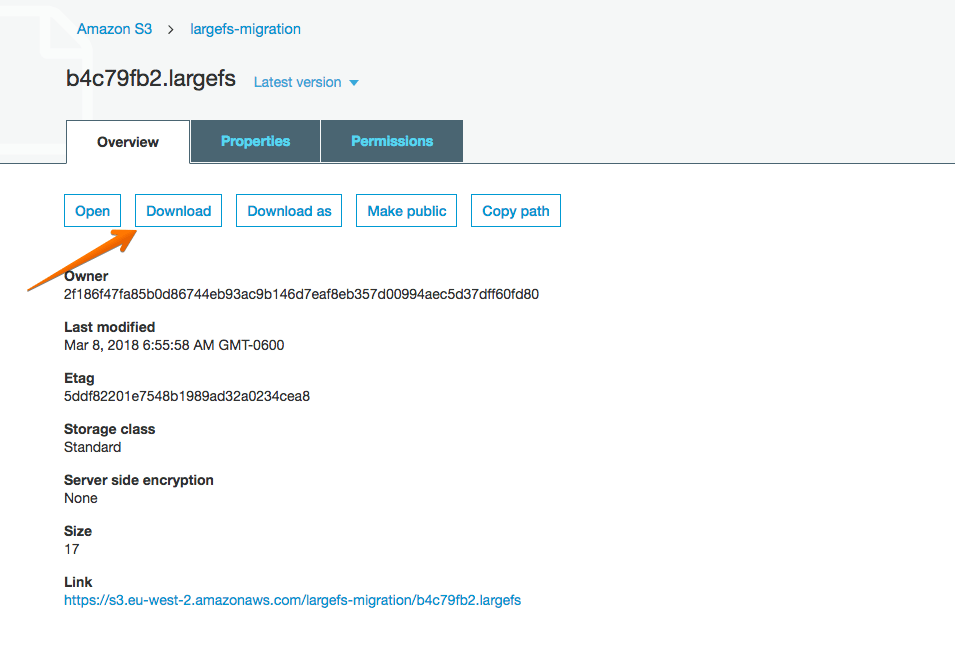
This validation file will be used by WP Engine Support to confirm the bucket is configured properly.
Create IAM User for S3
Now that the new bucket is created, we’ll need to create an IAM User for Cyberduck to be able to connect to the S3 account and manipulate the buckets and objects within. Under Services in the AWS Console, in the Security, Identity, and Compliance section navigate to IAM. 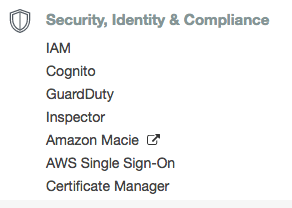
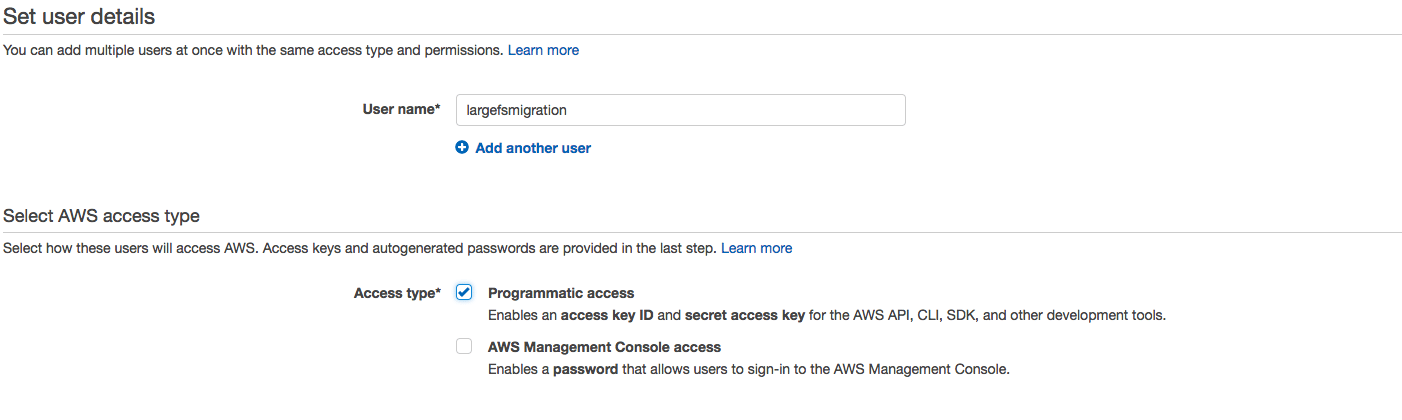
Once on the IAM page, select Users and then the blue Add User button. For Username, choose any name to use with Cyberduck (e.g. S3Admin, largefsmigration, etc). Check the box labeled Programmatic Access to be able to generate the proper keys to connect to the S3 buckets.
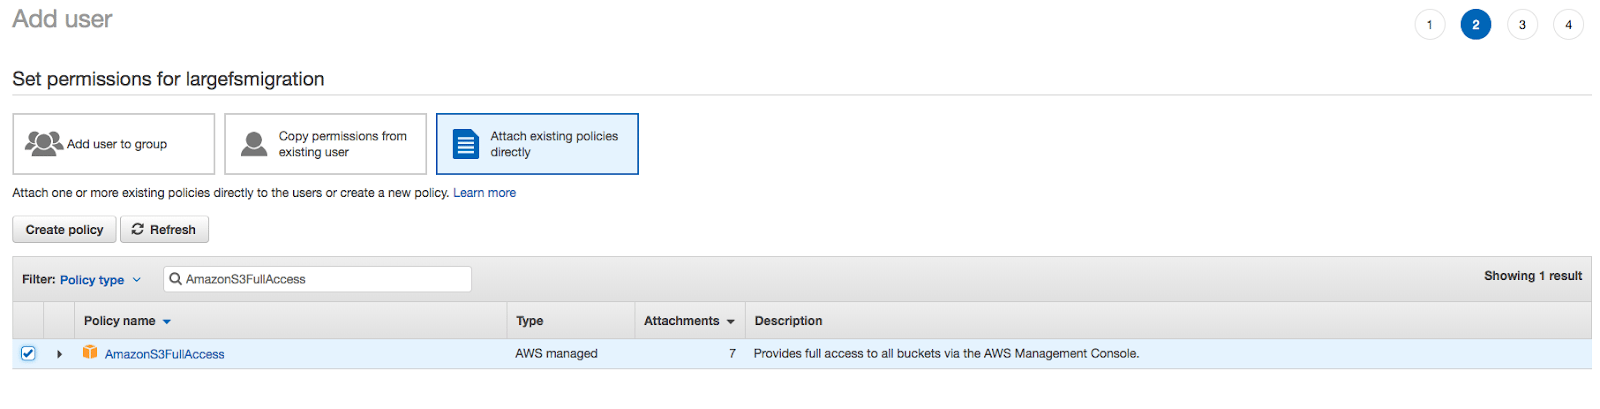
Move on to the Permissions page. Select the box for Attach existing policies directly, and filter for AmazonS3FullAccess. Check the box next to the AmazonS3FullAccess option and move on to the next page.
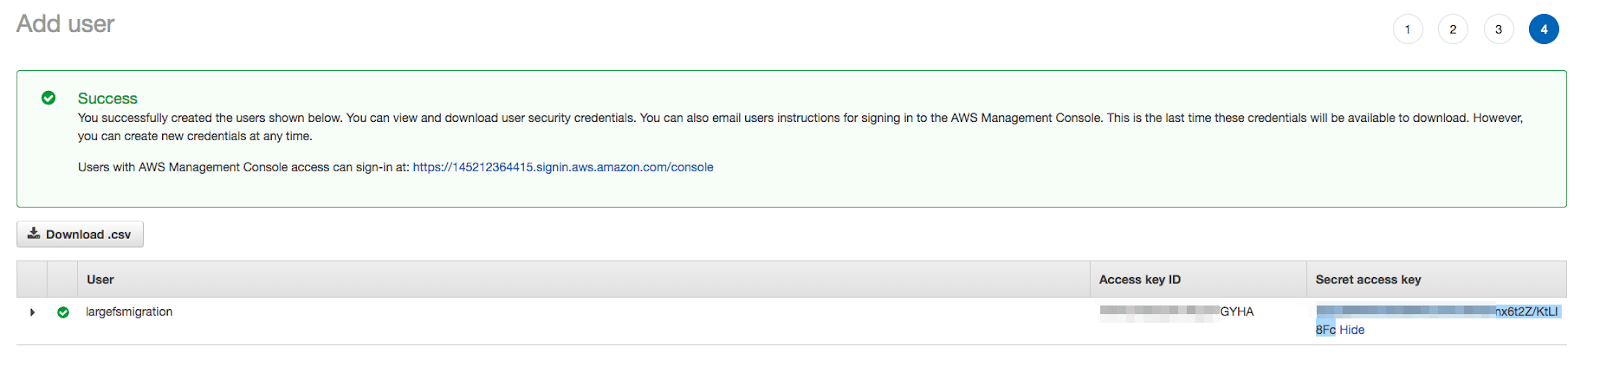
This next step is important, to retrieve Access and Secret keys. Once everything looks good go ahead and click Create User. On this next page, it’s recommended to download the CSV file that stores the credentials and keep it in a safe spot. Alternatively, just copy and paste the keys displayed on the screen.
Duplicate Content
Now that the setup part is all taken care of, copy the content from the old bucket to the new one. These steps are shown with Cyberduck, however Transmit can be used on Mac OS X.
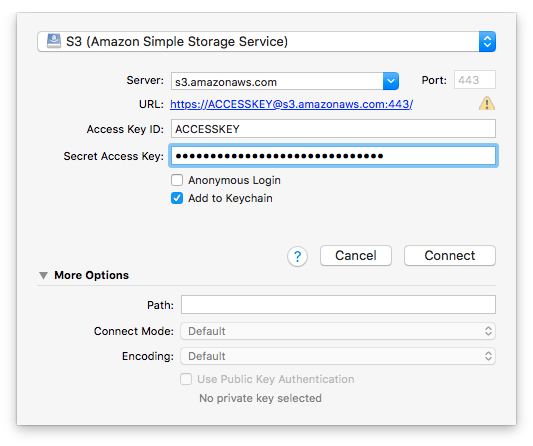
Cyberduck can be downloaded for free from the Cyberduck Website. Once installed opened Cyberduck, click Open Connection and choose S3 from the top dropdown menu. Enter the Access and Secret Keys into the appropriate fields then click Connect.
Once connected, the account’s S3 buckets will display. Due to how S3 operates, first duplicate the content within the bucket so that it can move it into the new bucket. Right-click the folder with the WP Engine environment name, and choose Duplicate. The new name can be left as-is, as it will be changed back once it’s been moved over to the new bucket. Depending on the total size of the objects, this may take a few minutes.
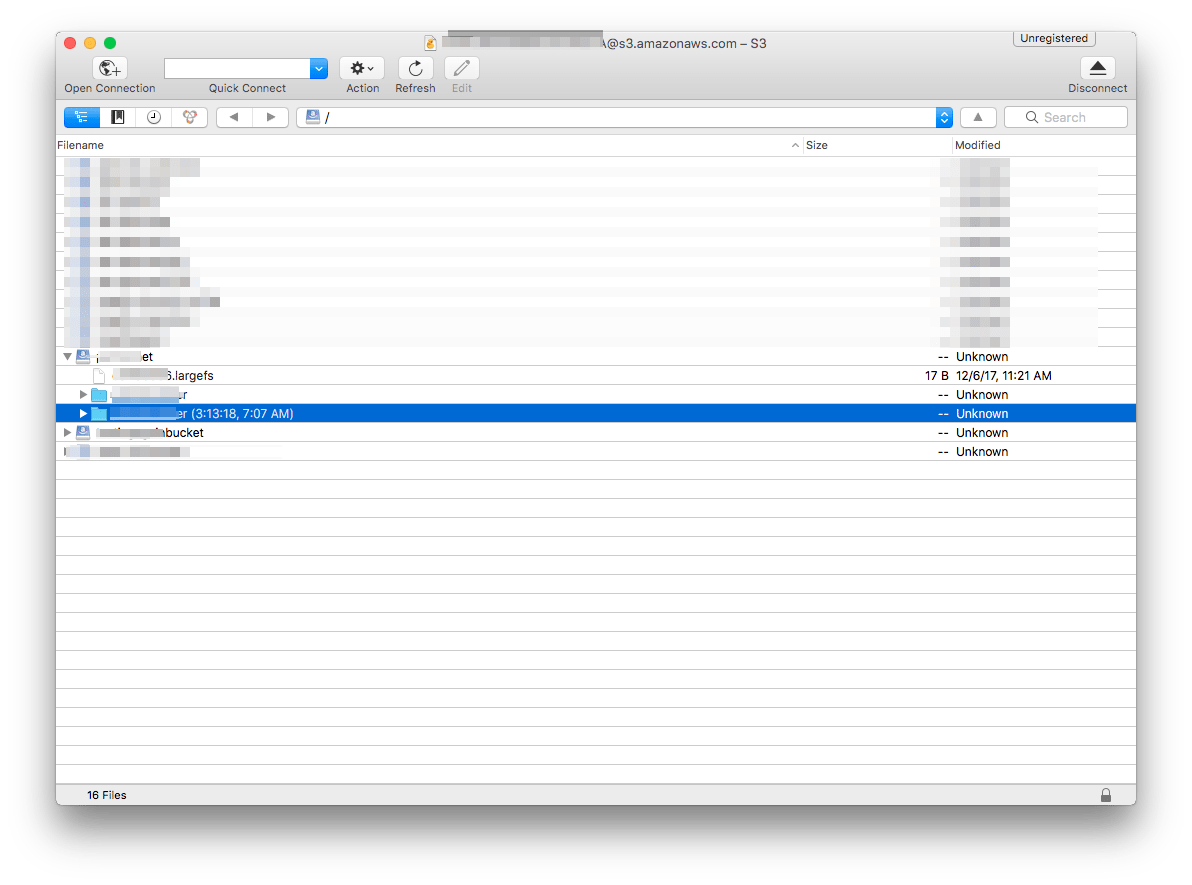
Now drag the new folder into the new bucket. This step may also take a bit depending on the total size of the objects.
Make New Bucket Public
Once everything has been copied over, make all new objects publicly accessible so the website can serve those images. This is done automatically by WP Engine when uploading files to the S3 bucket, but since we made a copy we need to perform this step using Cyberduck.
Right-click the new folder that was brought into the new bucket and choose Info and click on the Permissions tab. Click the gear icon and choose Everyone. Then, next to Everyone, choose Read.
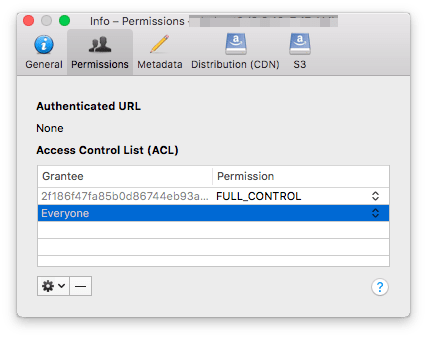
A pop-up regarding applying the policy recursively to the folder will appear. Check the option for Always (to prevent clicking yes for every subfolder within the bucket).
Now, rename the new folder in the new bucket. This will ensure the bucket transition is seamless. Right-click the folder name, choose Rename, and set it to the WP Engine environment name as it was on the old bucket.
Once this has completed, contact WP Engine Support so that we can change the bucket name and add the bucket region. Support is available 24/7 via Live Chat in the User Portal. If everything was performed properly, the images will display correctly on the site. If there are broken images, ask WP Engine Support to put the old bucket back in place while reviewing the steps in this article again.
Once everything looks good, delete the objects from the old bucket to avoid paying double storage fees. At this point it’s also recommended to create an archive within Cyberduck, and download it to the local machine as a backup of the website’s content.
NEXT STEP: Learn how to copy media between S3 buckets