Get Started
5 Steps to Get Your Store Live
Tags:
Key Takeaways
Launch your online store faster with the eCommerce Solution quick installer. Automatically set up a professionally designed starter store with demo products and sample pages, requiring only branding customization and content replacement before going live.
Update page content easily with block-based editing. Customize demo pages, add new pages, and use pre-designed layouts for quick content creation.
Customize site branding to match your company’s identity. Adjust color settings, add logos, and update footer text for a cohesive brand experience.
Update store settings for payments, tax, and shipping before selling. Ensure all necessary details are configured for a smooth customer experience.
Launch your online store faster with the eCommerce Solution quick installer. We’ll automatically set up a professionally designed starter store for you that’s equipped with demo products and sample website pages. You can see an example starter store here.
All you’ll need to do before going live is customize your site’s branding and store settings, and replace the demo products and content with your own.
In this article, we’ll go over each task that needs to be completed before making your store live.
Update Page Content
Your starter store comes with the following demo pages:
- Home
- About (Shop Information)
- Shop
- Cart
- Checkout
- My account
The Home and About pages can be edited, duplicated, or removed in the Pages section of your wp-admin dashboard. You can also add an unlimited number of additional pages to your site as needed.
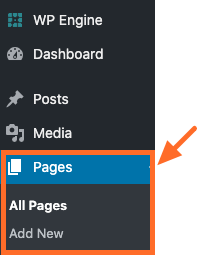
Find Pages in wp-admin
Go to Pages > All Pages to see the list of existing pages in your site. Or go to Pages > Add New to create a brand new page.
Page-Building Blocks
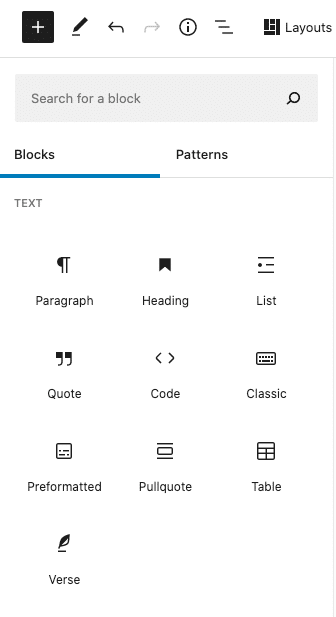
The pages on your site are built using “blocks.” Blocks are elements that you can add to pages to create your content and layouts. Each item you add to a page is a block. For example, there is a heading block, paragraph block, image block, video block, gallery block, etc.
The image below shows just a few examples of the blocks you can use to build your pages.
The demo pages in your starter store have been built using a combination of default WordPress® blocks, eCommerce blocks, and the page-building blocks that come with Genesis Blocks Pro.1 You can use any blocks you’d like to customize and build your site’s pages.
Here’s a quick overview of the default WordPress blocks and how to work with the block editor.
You can also refer to our Genesis Blocks documentation for detailed information about each Genesis block and their available settings.
Update Demo Page Content
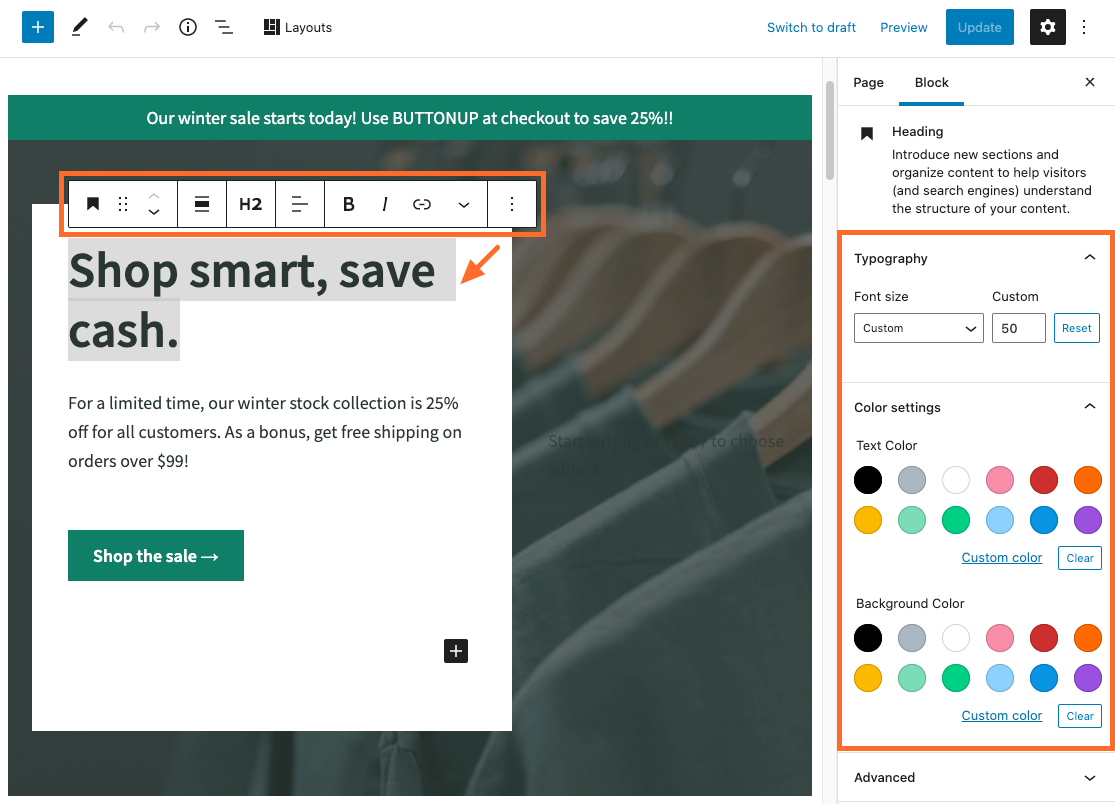
To update the text and images on the demo pages, go to Pages > All Pages and open the page you’d like to edit. Then click directly on or highlight the element you’d like to change to reveal the block settings for that element.
In the example below, we’ve highlighted a heading which revealed the available settings for the Heading Block. The toolbar directly above the heading gives options for alignment, bold, italics, etc. The panel on the side gives options for font size, text color, and background color.
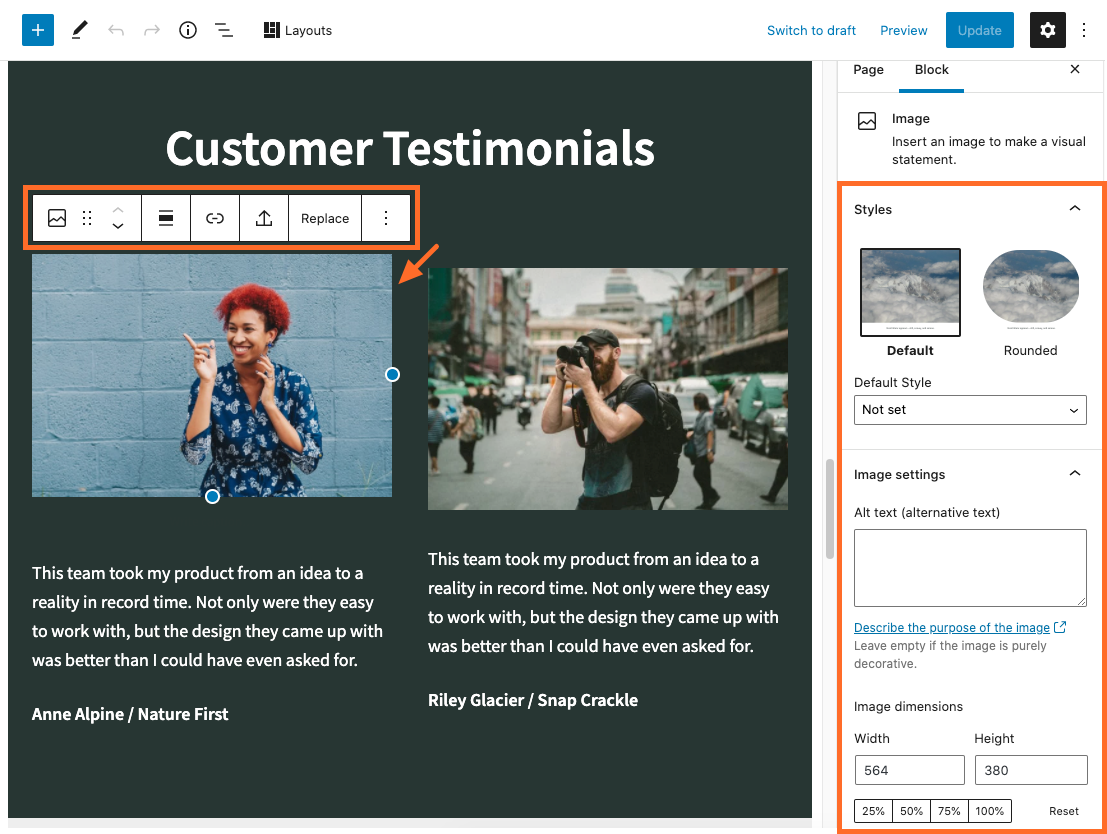
In the next example, we’ve clicked directly on an image which revealed the available settings for the Image Block. The toolbar directly above the image gives options for alignment, linking, or to completely replace this image with a different one. The panel on the side gives options for selecting the image style, setting the alt text, and fine tuning the image size.
Create New Pages
To create a new page, go to Pages > Add New and give the page a title. Then you can add any block to the page to begin adding your content.
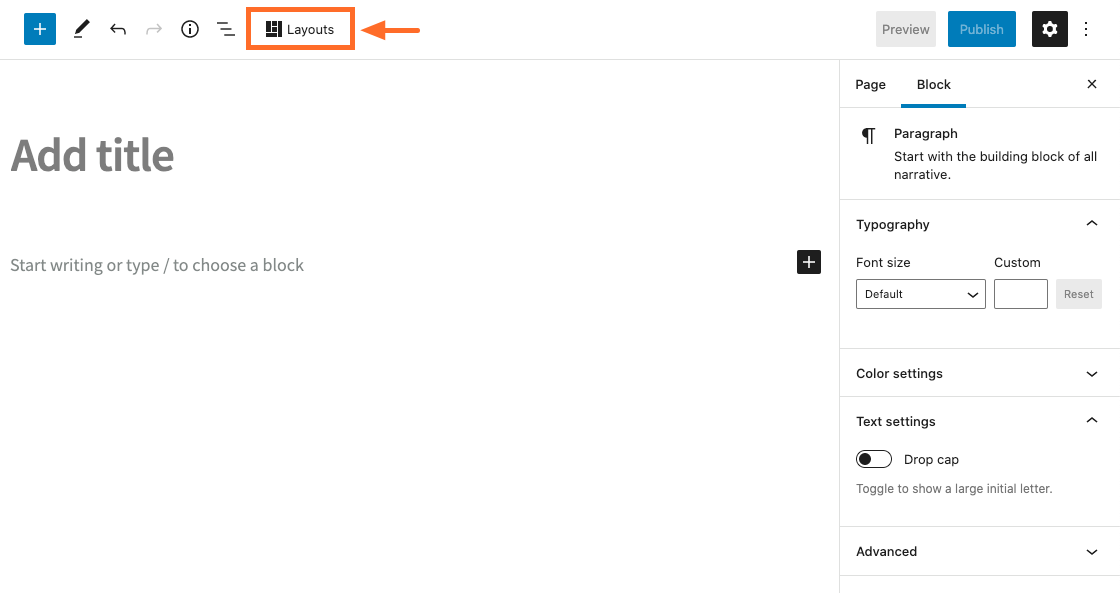
To help you build new pages quickly, you can use the Layouts block. This block includes a library of pre-designed Sections, Layouts, and Collections that make it easy to create coordinating site pages.
To use this block, click the Layouts button at the top of the page editor as shown below.
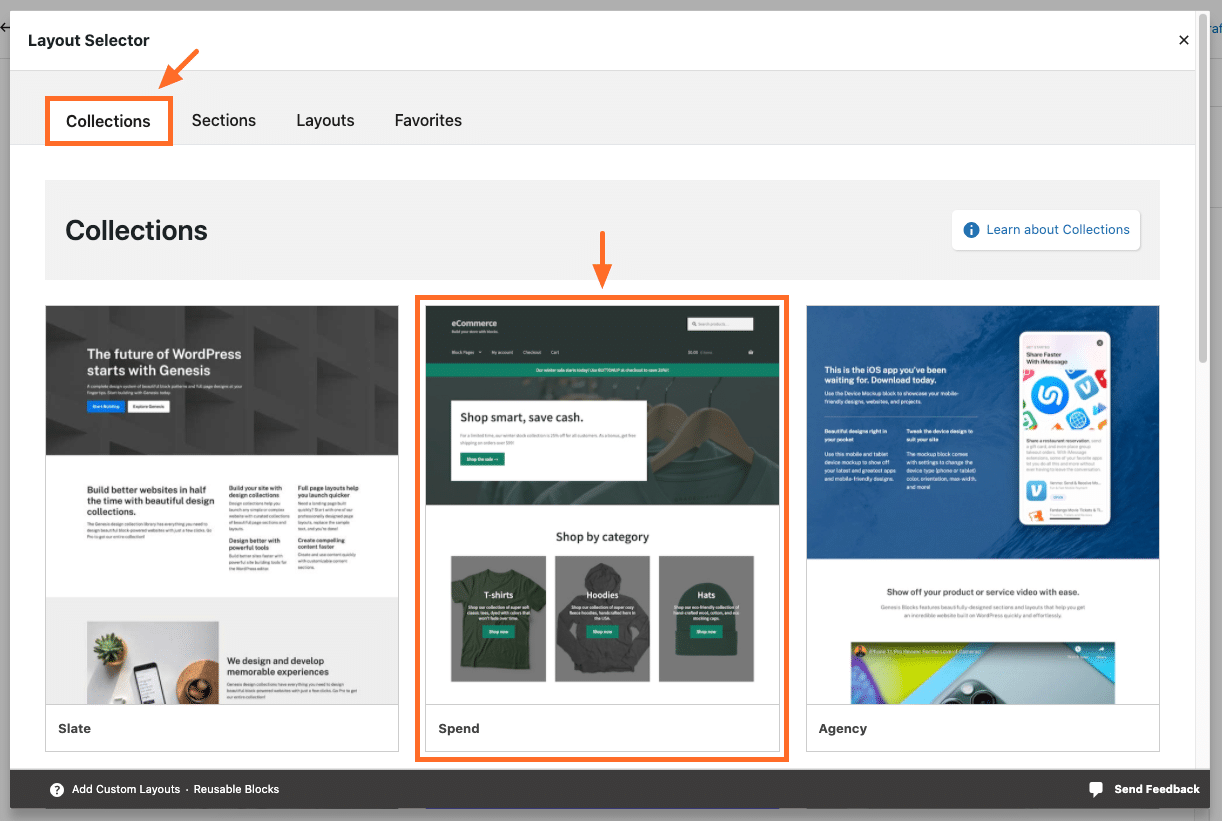
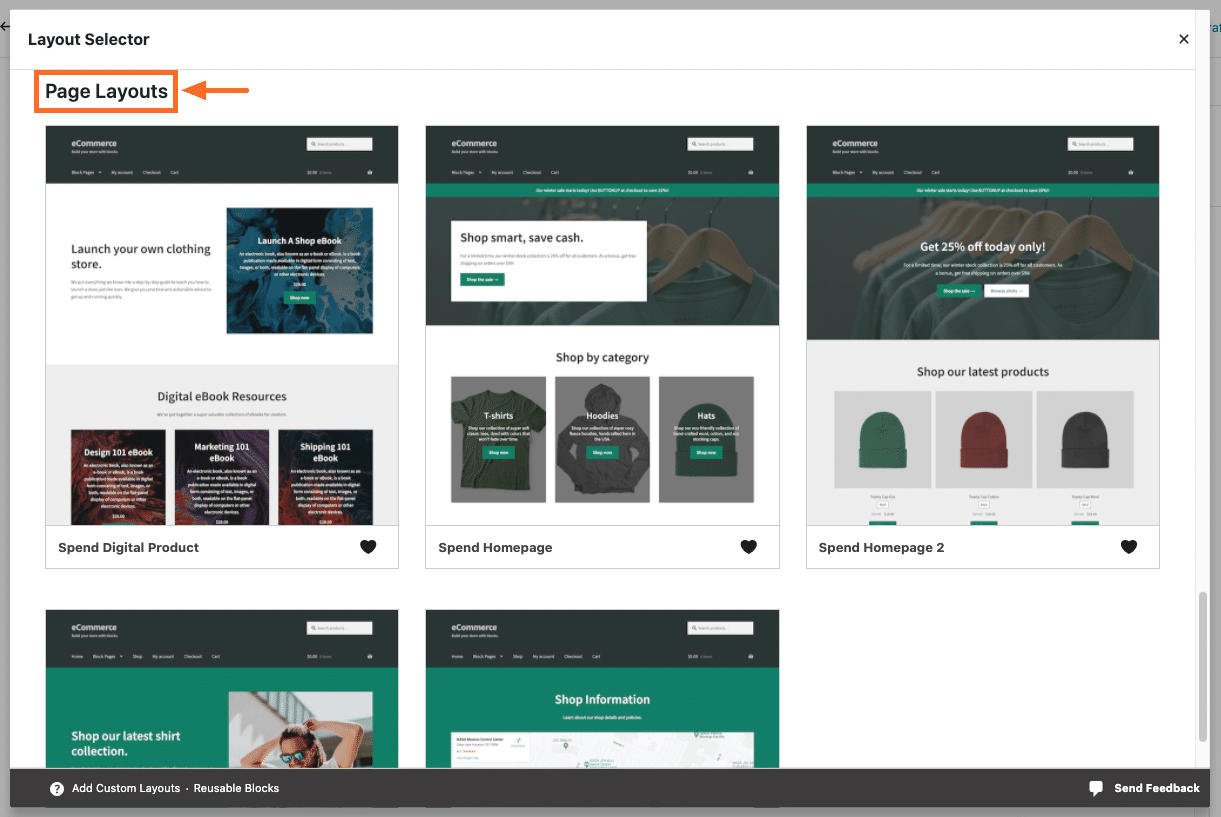
A Layout Selector window will appear which contains several Collections, Sections, and Layouts for you to choose from when building your pages.
To keep your store’s design consistent, we recommend using the Sections and Layouts that are available in the Spend Collection because this is the collection that was used to create your starter store.
To access the Spend Collection, click the Collections tab and then click directly on the Spend Collection as shown below.
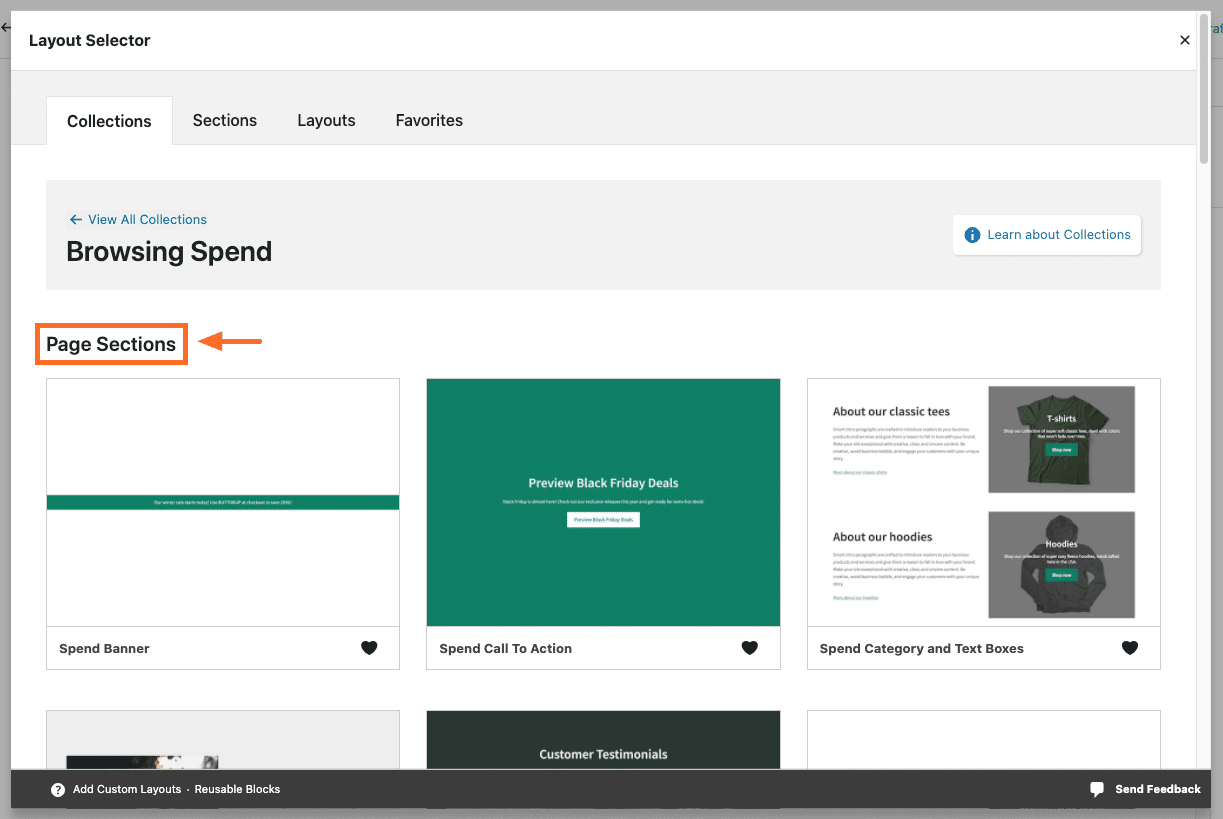
At the top of the window, you’ll see several Page Sections that are included in the Spend Collection (shown below). You can add as many of these sections to a page as you’d like. They all coordinate with each other so you can use them to easily create a full page.
And when you scroll down within this window, you’ll see several Page Layouts that are included in the Spend Collection (shown below). These Layouts make it easy to create a full page design instantly. You can also add more Sections to these Layouts as needed.
After adding Sections and Layouts to your pages, all you need to do is update the demo content with your own text and images.
Set a New Homepage
Your starter store comes with a pre-configured homepage, but you can set a different page as your site’s homepage if you wish.
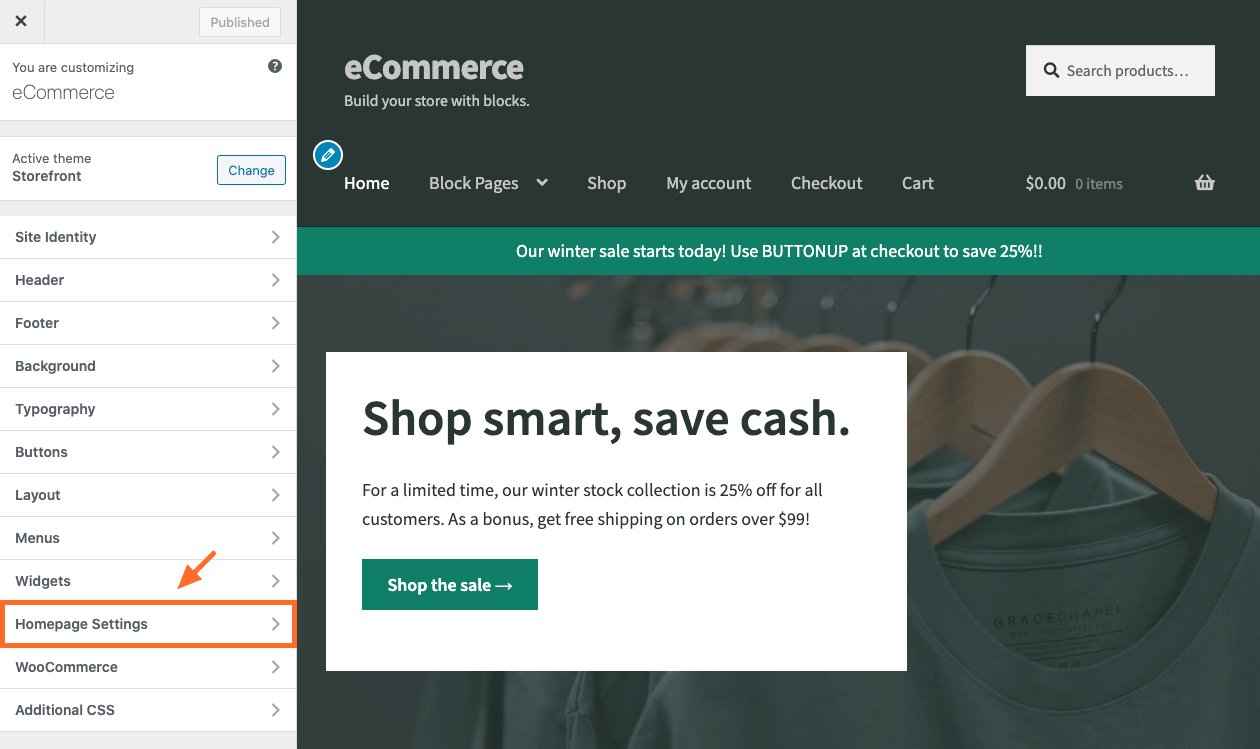
To do so, go to Appearance > Customize > Homepage Settings as shown below.
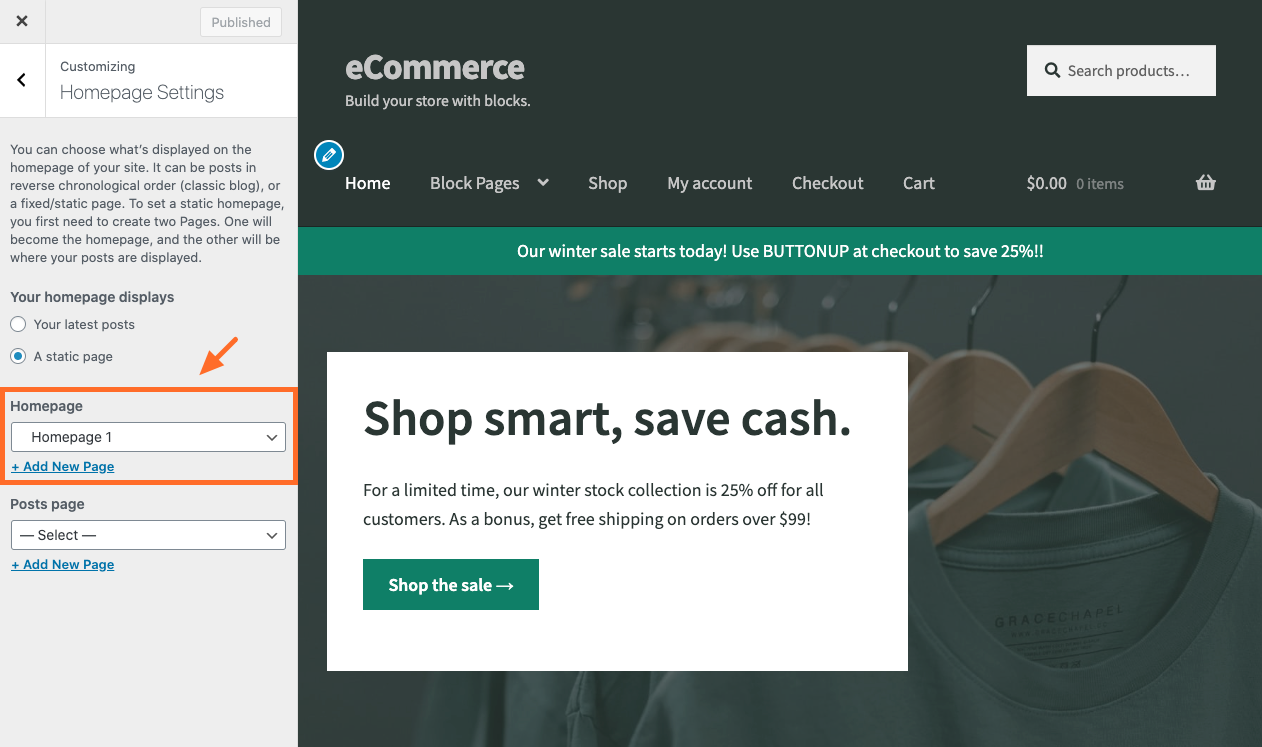
Then use the pull down menu to select which page you’d like to set as the new homepage as shown below.
Update Widgets
You may also wish to update the widget content. Widgets are small blocks of content or functionality (like a search box) that appear in widget-ready areas. These widget-ready areas are typically displayed simultaneously on all pages of the site (where enabled) instead of just a single page.
For example, your starter store features a footer widget area near the bottom of each page.
To update the widgets, go to Appearance > Customize > Widgets as shown below.
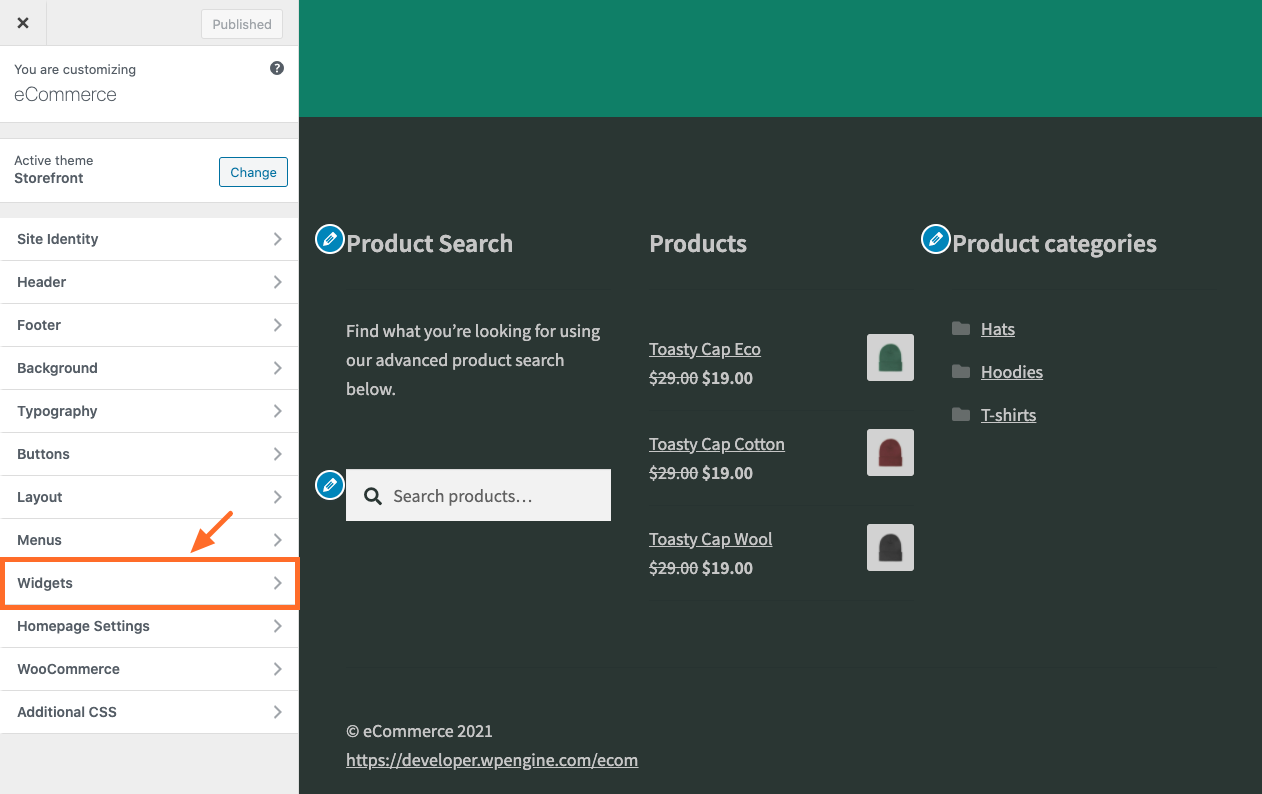
You will then see a list of widget-ready areas that are available to use as shown below. Click a widget area to open it and update the existing widgets or to add or remove any widget.

In your starter store, widgets have been added to the Footer Column 1, Footer Column 2, and Footer Column 3 widget areas.
Update the Menu
When you’re finished updating and adding pages, you can edit the site’s navigation menu to make sure the links located there match your site’s content.
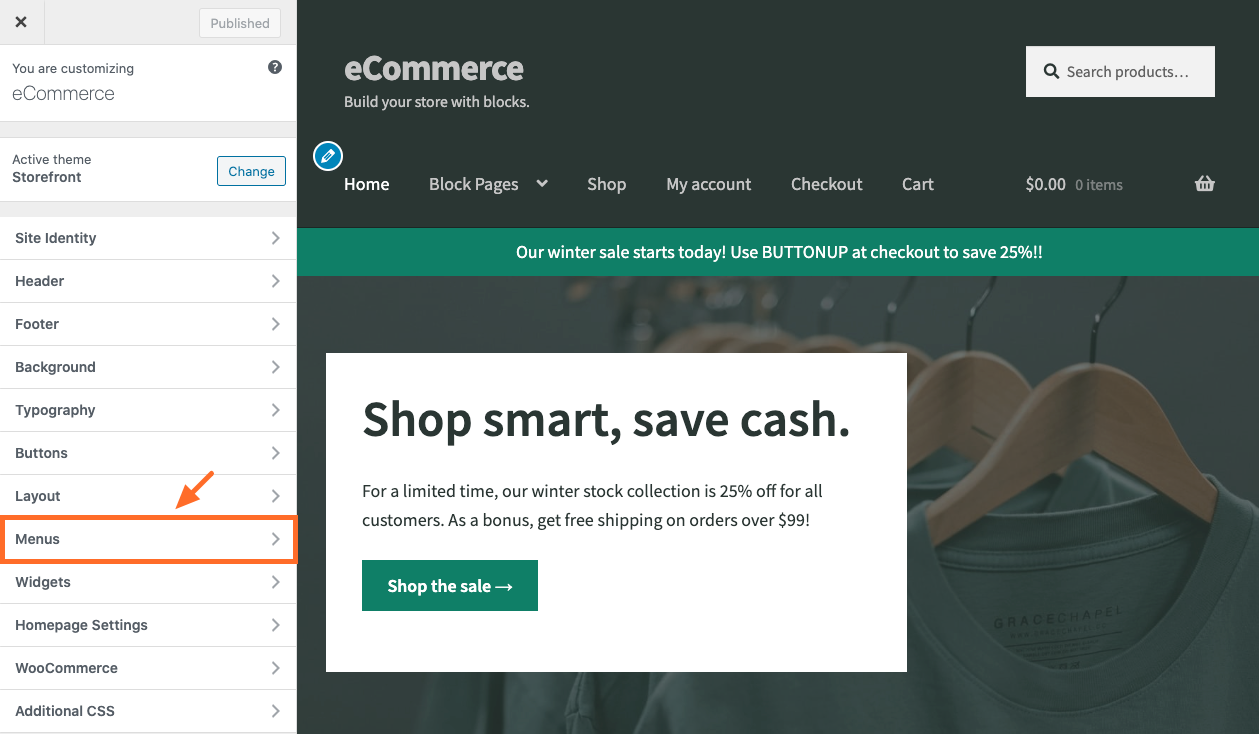
To edit the menu, go to Appearance > Customize > Menus as shown below.
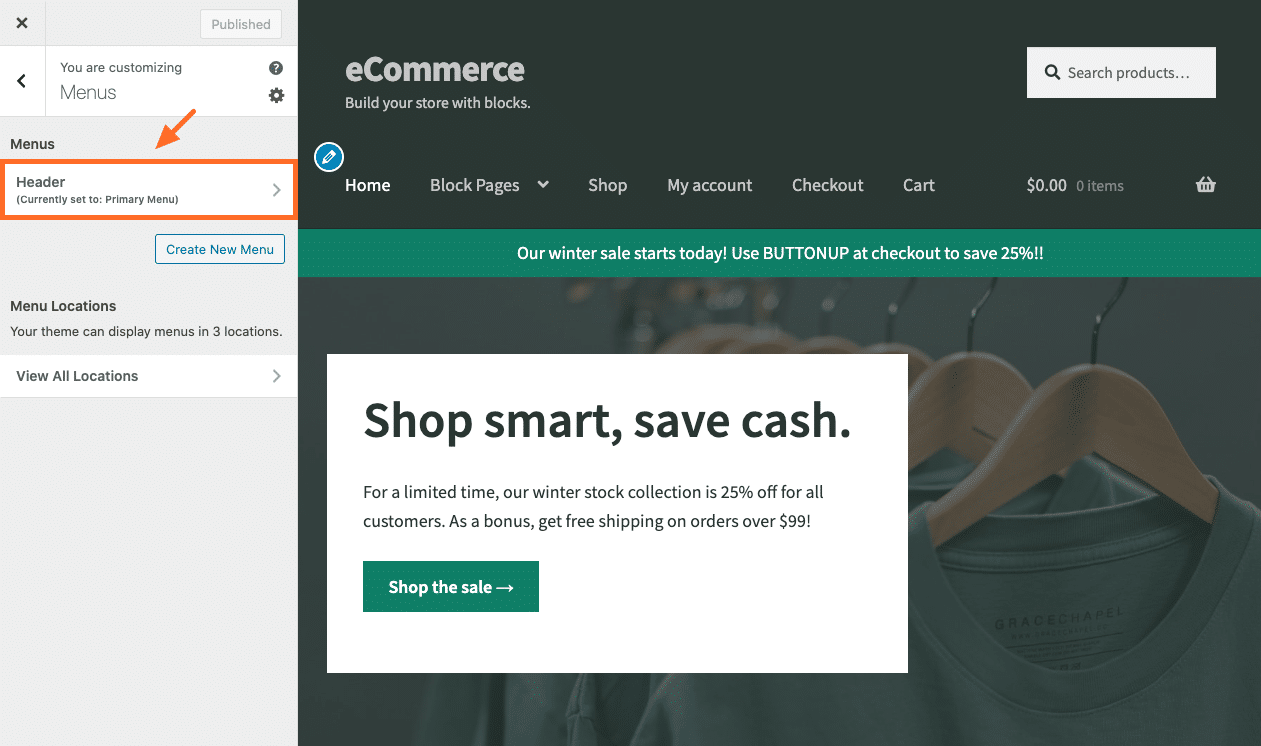
Then select the Header Menu as shown below.
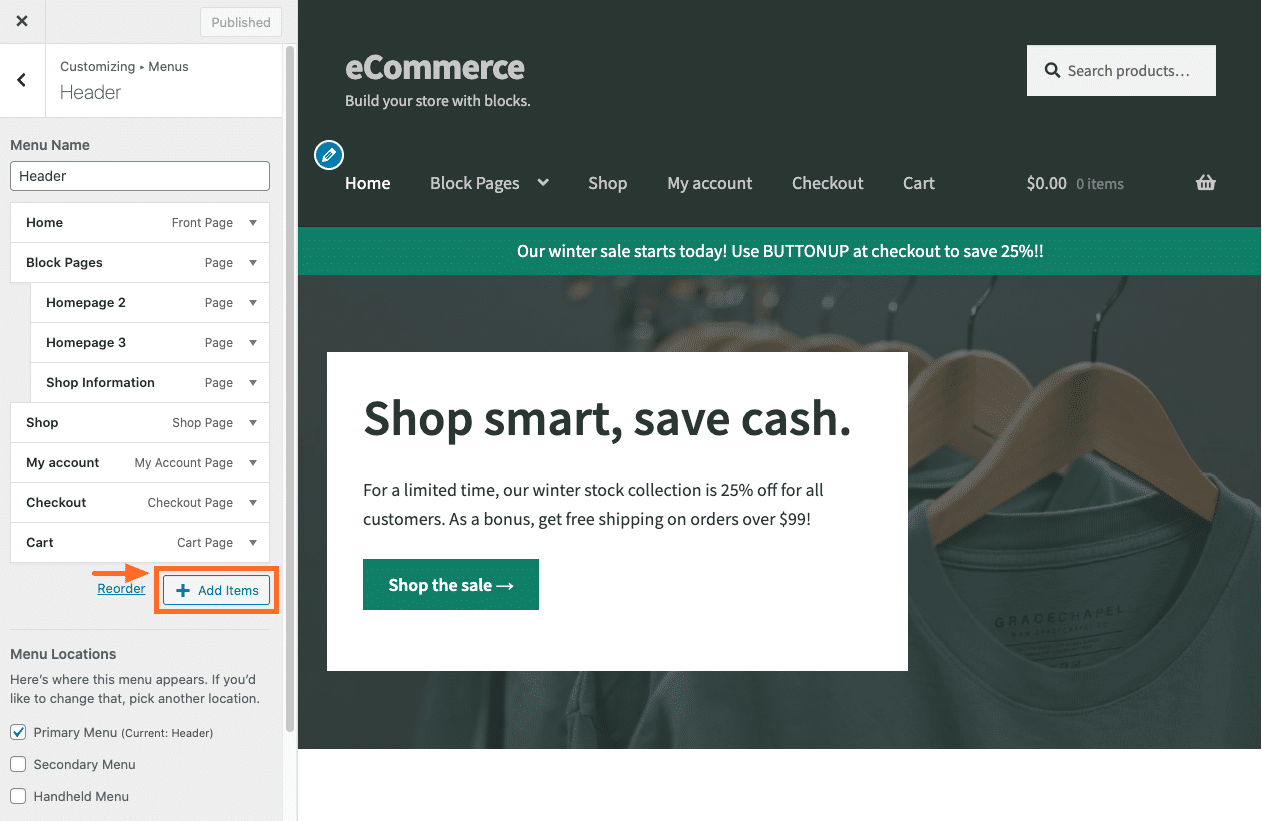
Now you’ll see the list of links that are currently in the menu. You can click on them to edit or remove them and click the Add Items button to add new links as needed.
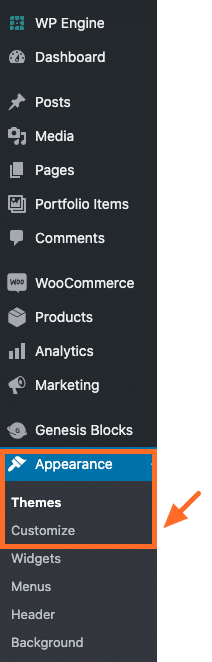
Customize Site Branding
Now you’re ready to customize your site’s branding so it matches your company’s branding.
Go to Appearance > Customize to get started.
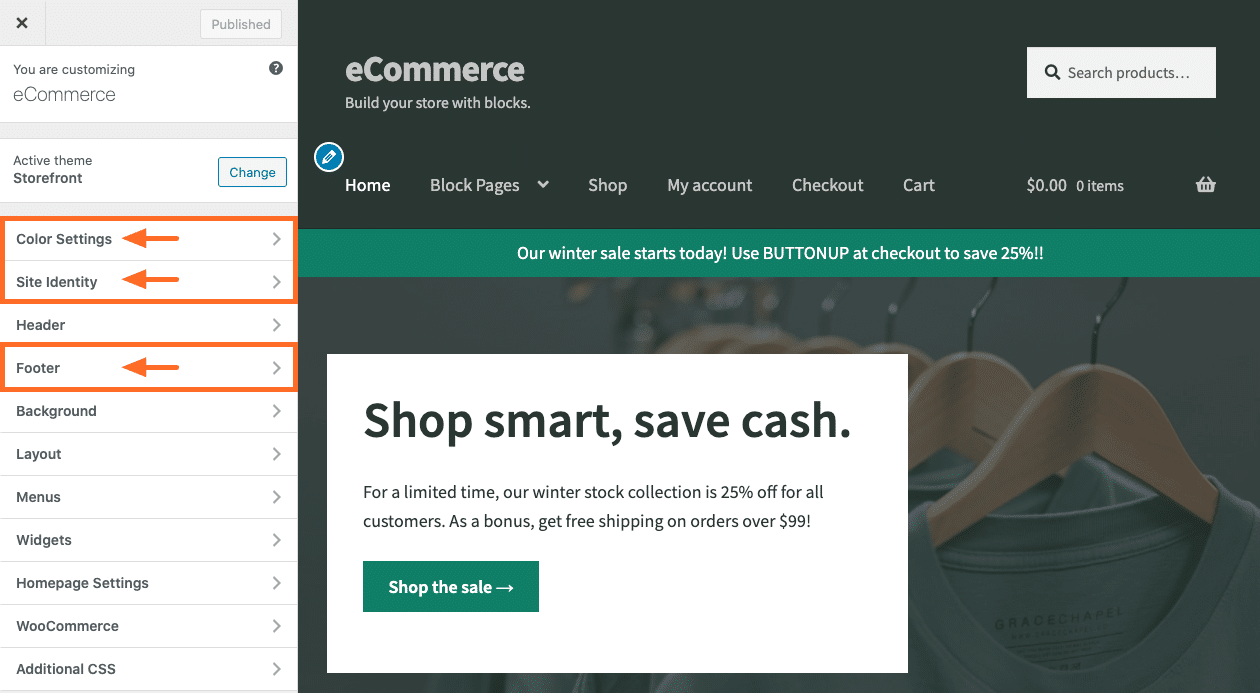
For this step, we’re focusing on the Color Settings, Site Identity, and Footer options (shown below).
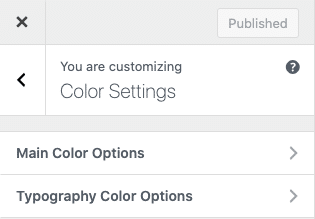
Color Settings
The Color Settings option allows you to change site-wide default colors so they match your brand’s colors.
The Main Color Options (shown below) allow you to change the default background and text colors of the header and footer areas. You can also change the default accent color which is applied to items like buttons, banners, page content section backgrounds, etc., and the default link color.
The Typography Color Options (shown below) allow you to change the default heading and text colors.
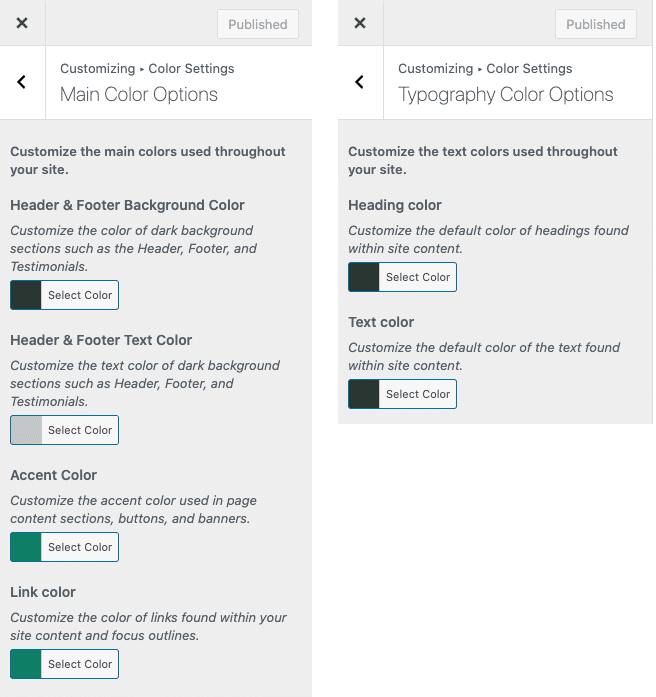
These color settings are applied to the entire site.
For example, if you change the Accent Color to blue, every button that’s added to the site will be blue by default. You can, however, change the color of individual buttons within the Buttons Block settings in the page editor.
Site Identity
The Site Identity option allows you to add your logo, change the site title and tagline, and add a site icon (or favicon) that appears in browser tabs, bookmark bars, etc.
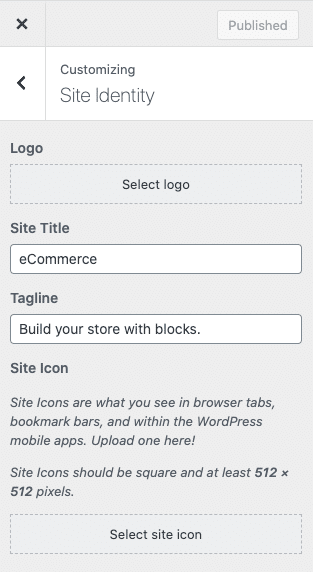
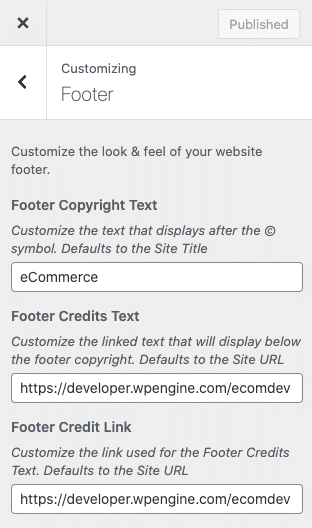
Site Footer Text
The Footer option allows you to change the copyright and credit text that appear at the bottom of every page.
Update Store Settings
Before you begin selling from your website, you need to update your store’s settings with details such as payments, tax, and shipping.
Please refer to your eCommerce service’s documentation for specific instructions.
Add Your Products
Your starter store typically comes with a few demo products to help you get started. These products can be edited, duplicated, or removed in the Products section of your wp-admin dashboard. You can also add an unlimited number of additional products to your site as needed.
Be sure to remove any demo products that may have been added automatically.
Review the Go Live Checklist
Before publishing your site, use the “Go Live Checklist” page in your User Portal to easily keep track of your Go Live processes. On this page you’ll find a list of both mandatory and recommended items to complete when taking a website live.
- Log in to the User Portal and go to the Sites page
- Select the site or environment name you’re taking live
- Click Go live checklist in the secondary lefthand menu (You may have to expand the Manage dropdown section)
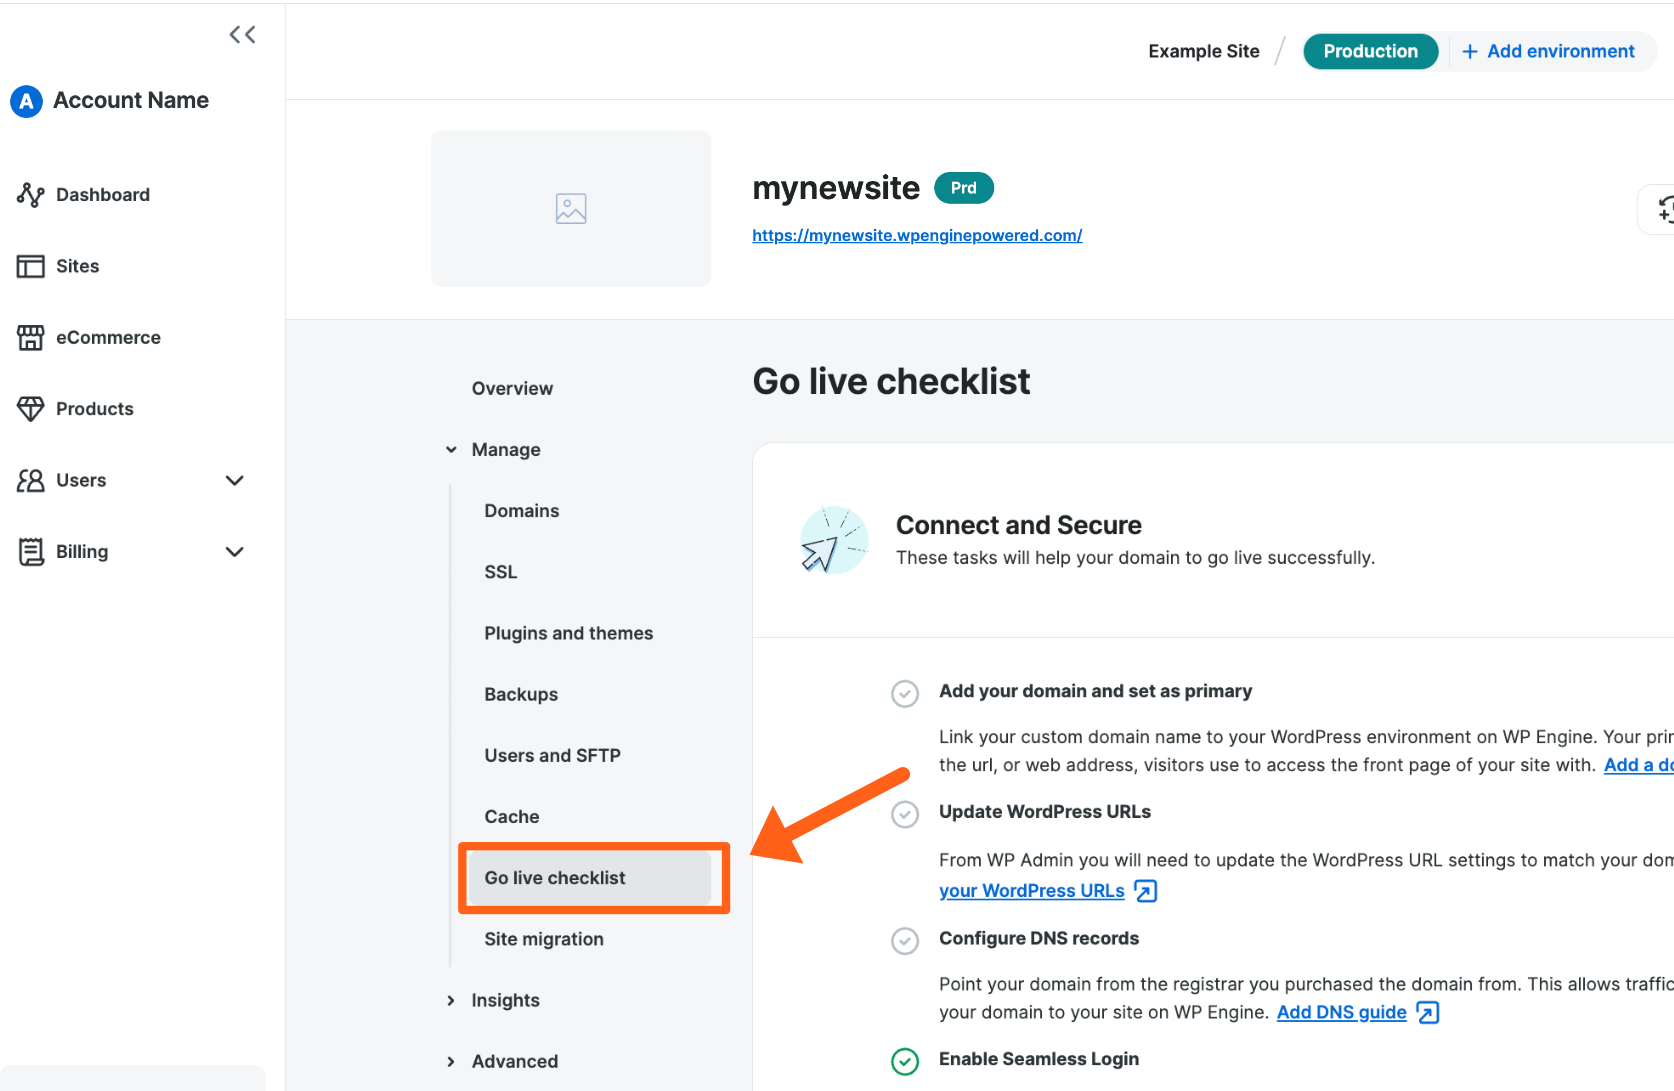
If you have any questions or issues with this checklist, reach out to our Support team any time.