Get Started
Get Started with Genesis Framework and StudioPress Themes
Tags:
Key Takeaways
The Genesis Framework is essential for StudioPress themes. Installing the Genesis Framework is a prerequisite for using any StudioPress theme, ensuring seamless functionality and customization.
Customizing StudioPress themes requires caution. StudioPress themes are designed for customization without risking overwriting customizations, emphasizing user-friendly design.
Staging environments are crucial for theme changes. Testing theme changes in a staging environment prevents disruptions to live websites, maintaining user experience.
Copying changes to production ensures seamless updates. Safely transferring customized themes from staging to production guarantees a smooth transition for users and content.
Utilize available resources for successful website creation. Access Genesis community forums, recommended developers, and theme setup guides for expert guidance and support.
Contact Support for personalized assistance. WP Engine offers 24/7 Live Chat support for StudioPress themes, ensuring immediate help for any issues or questions.
WP Engine offers the powerful and performant Genesis Framework and Premium StudioPress themes to all WP Engine hosting customers, included with your plan.
About Genesis and StudioPress
The Genesis Framework acts as the parent theme for StudioPress: it must be installed in order to use any StudioPress theme.
With your WP Engine hosting plan a plethora of Premium StudioPress themes are included at no additional cost. A full listing of themes can be found here, with new ones being added all the time!
The Genesis Framework will notify in the admin dashboard of your website when it requires an update. StudioPress themes are designed to be customized, so they do not require updates which could overwrite customizations. You will not see a notification in your WordPress® admin when a StudioPress theme is available.1 If you wish to update your StudioPress theme, export any customizations first then treat the process as if you were installing an entirely new theme, then import back in any previous customizations.
Copy to Staging/Development
It is best to change themes in an environment where your live website users will not see the “under construction” phase! If your website is already live, w recommend you start by copying your live website to a Staging or Development environment.
If you do not have a Staging or Development environment, learn how to create a new environment here. You will have the option to easily create the new environment as a copy of production during this process.
If you already have a Staging or Development environment, simply use the Copy environment tool to make a freshly copied version.
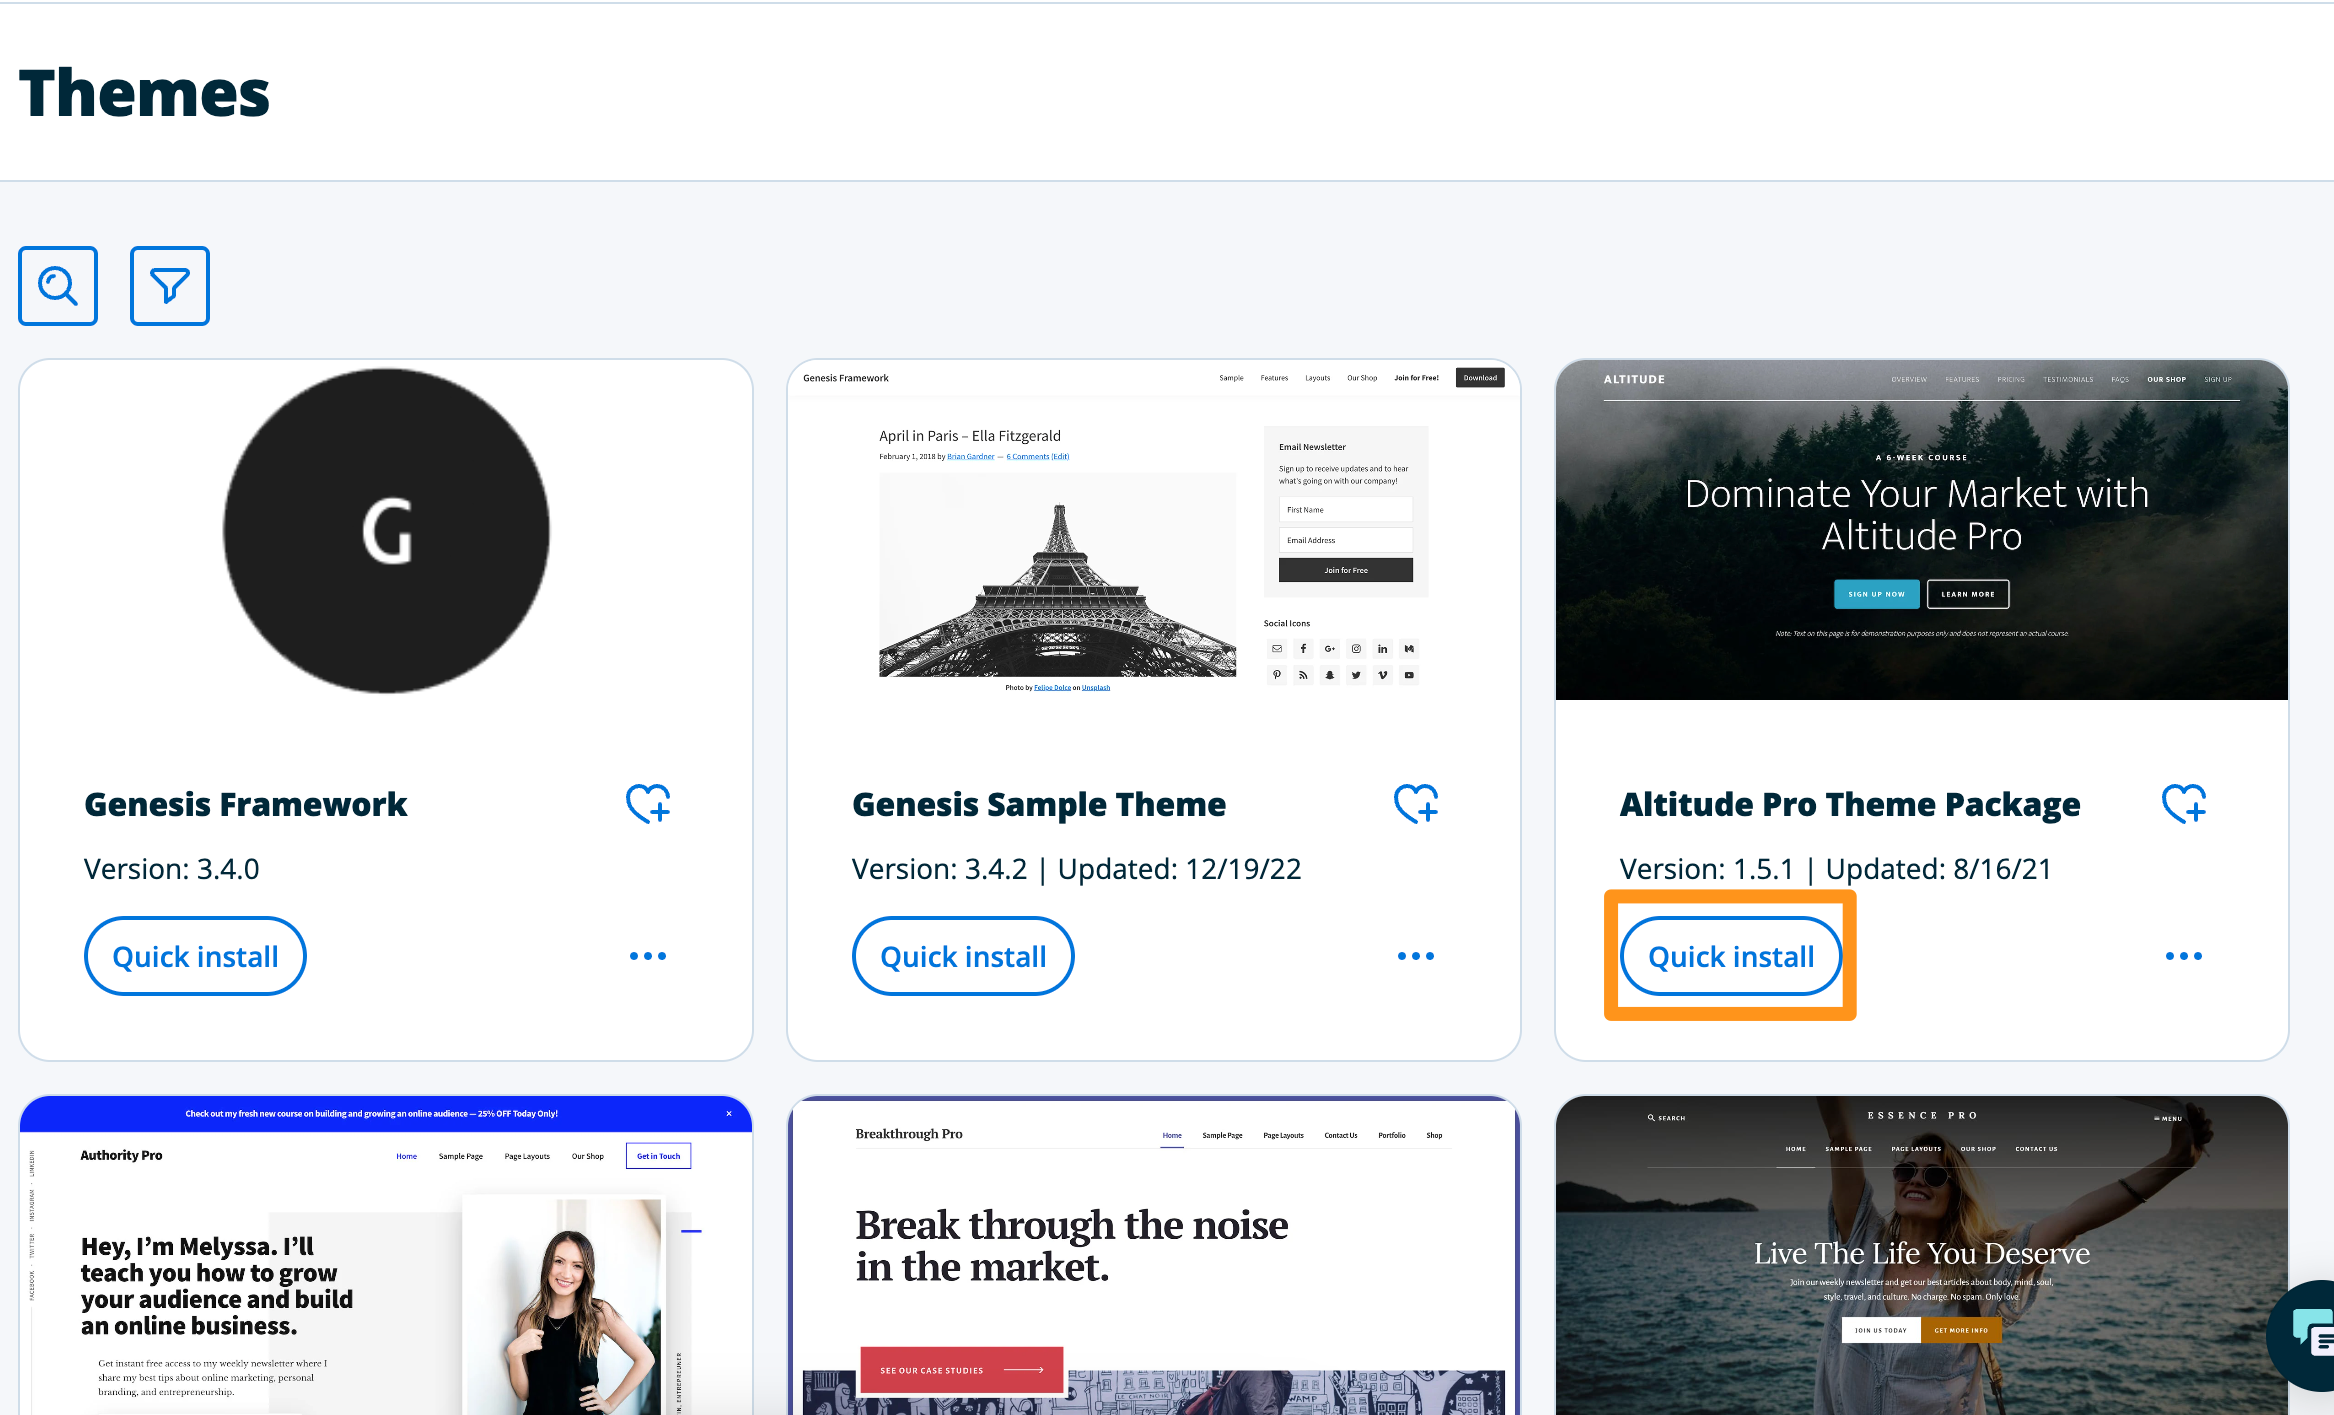
Install StudioPress Theme
- Log in to the User Portal
- Select Products from the main sidebar menu
- Click StudioPress Themes under Your products
- This page can also be accessed directly at: https://my.wpengine.com/themes

Quick Install under any of the available items will automatically install the theme on a selected WP Engine environment. StudioPress theme packages include the required Genesis Framework in quick installation by default.
The Genesis Framework acts as a “parent” theme to all the premium StudioPress themes, which means installation requires installing both the Genesis Framework and a StudioPress theme. Genesis does not have to be activated, but should remain installed when using a StudioPress theme.
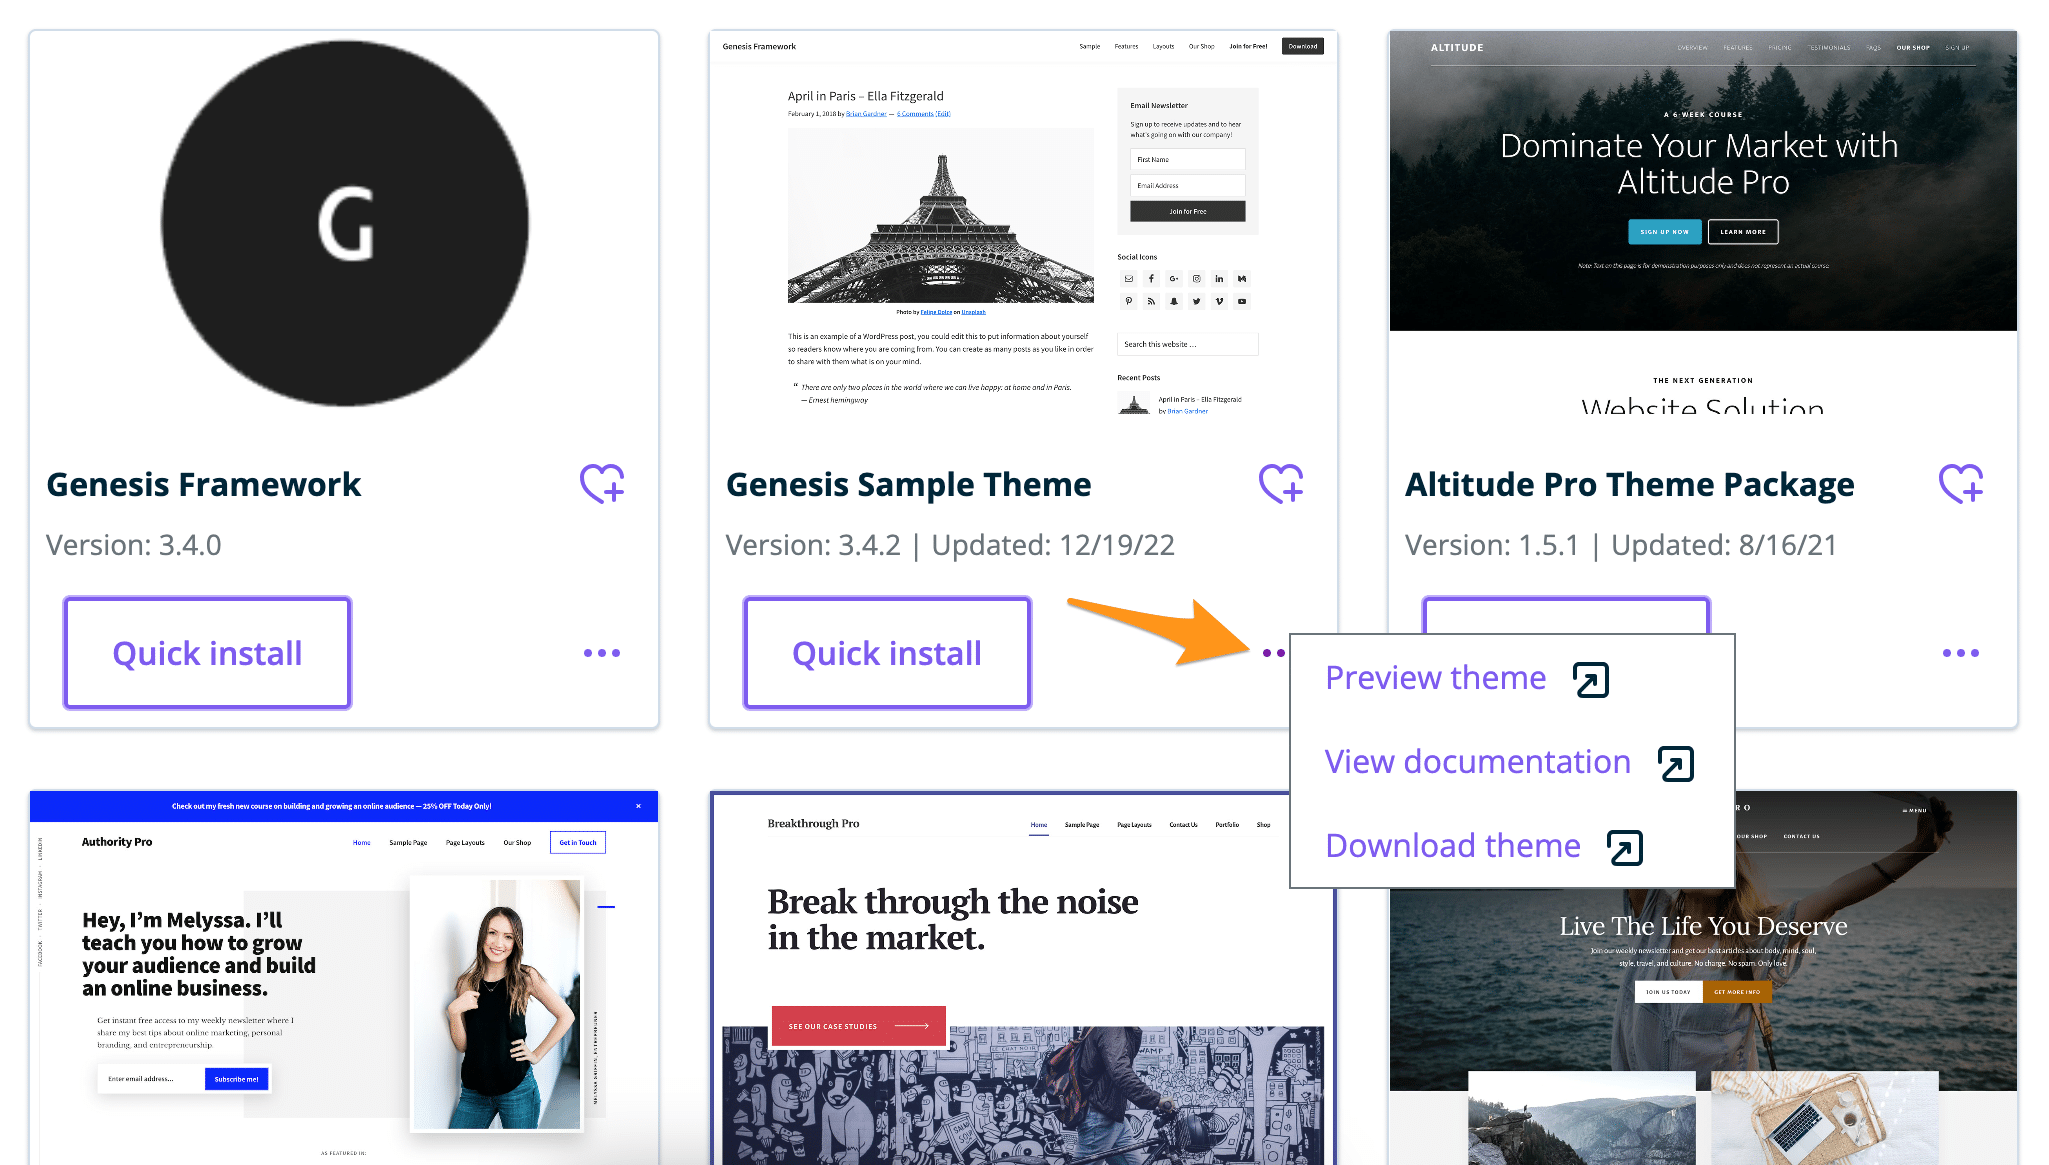
More actions can be accessed from the three dot menu icon located at the bottom right of each item tile:
- Preview theme: View a live demo site using this theme
- View documentation: View theme documentation for this theme on StudioPress
- Download theme: Download files to install manually on any WordPress site, or for use locally
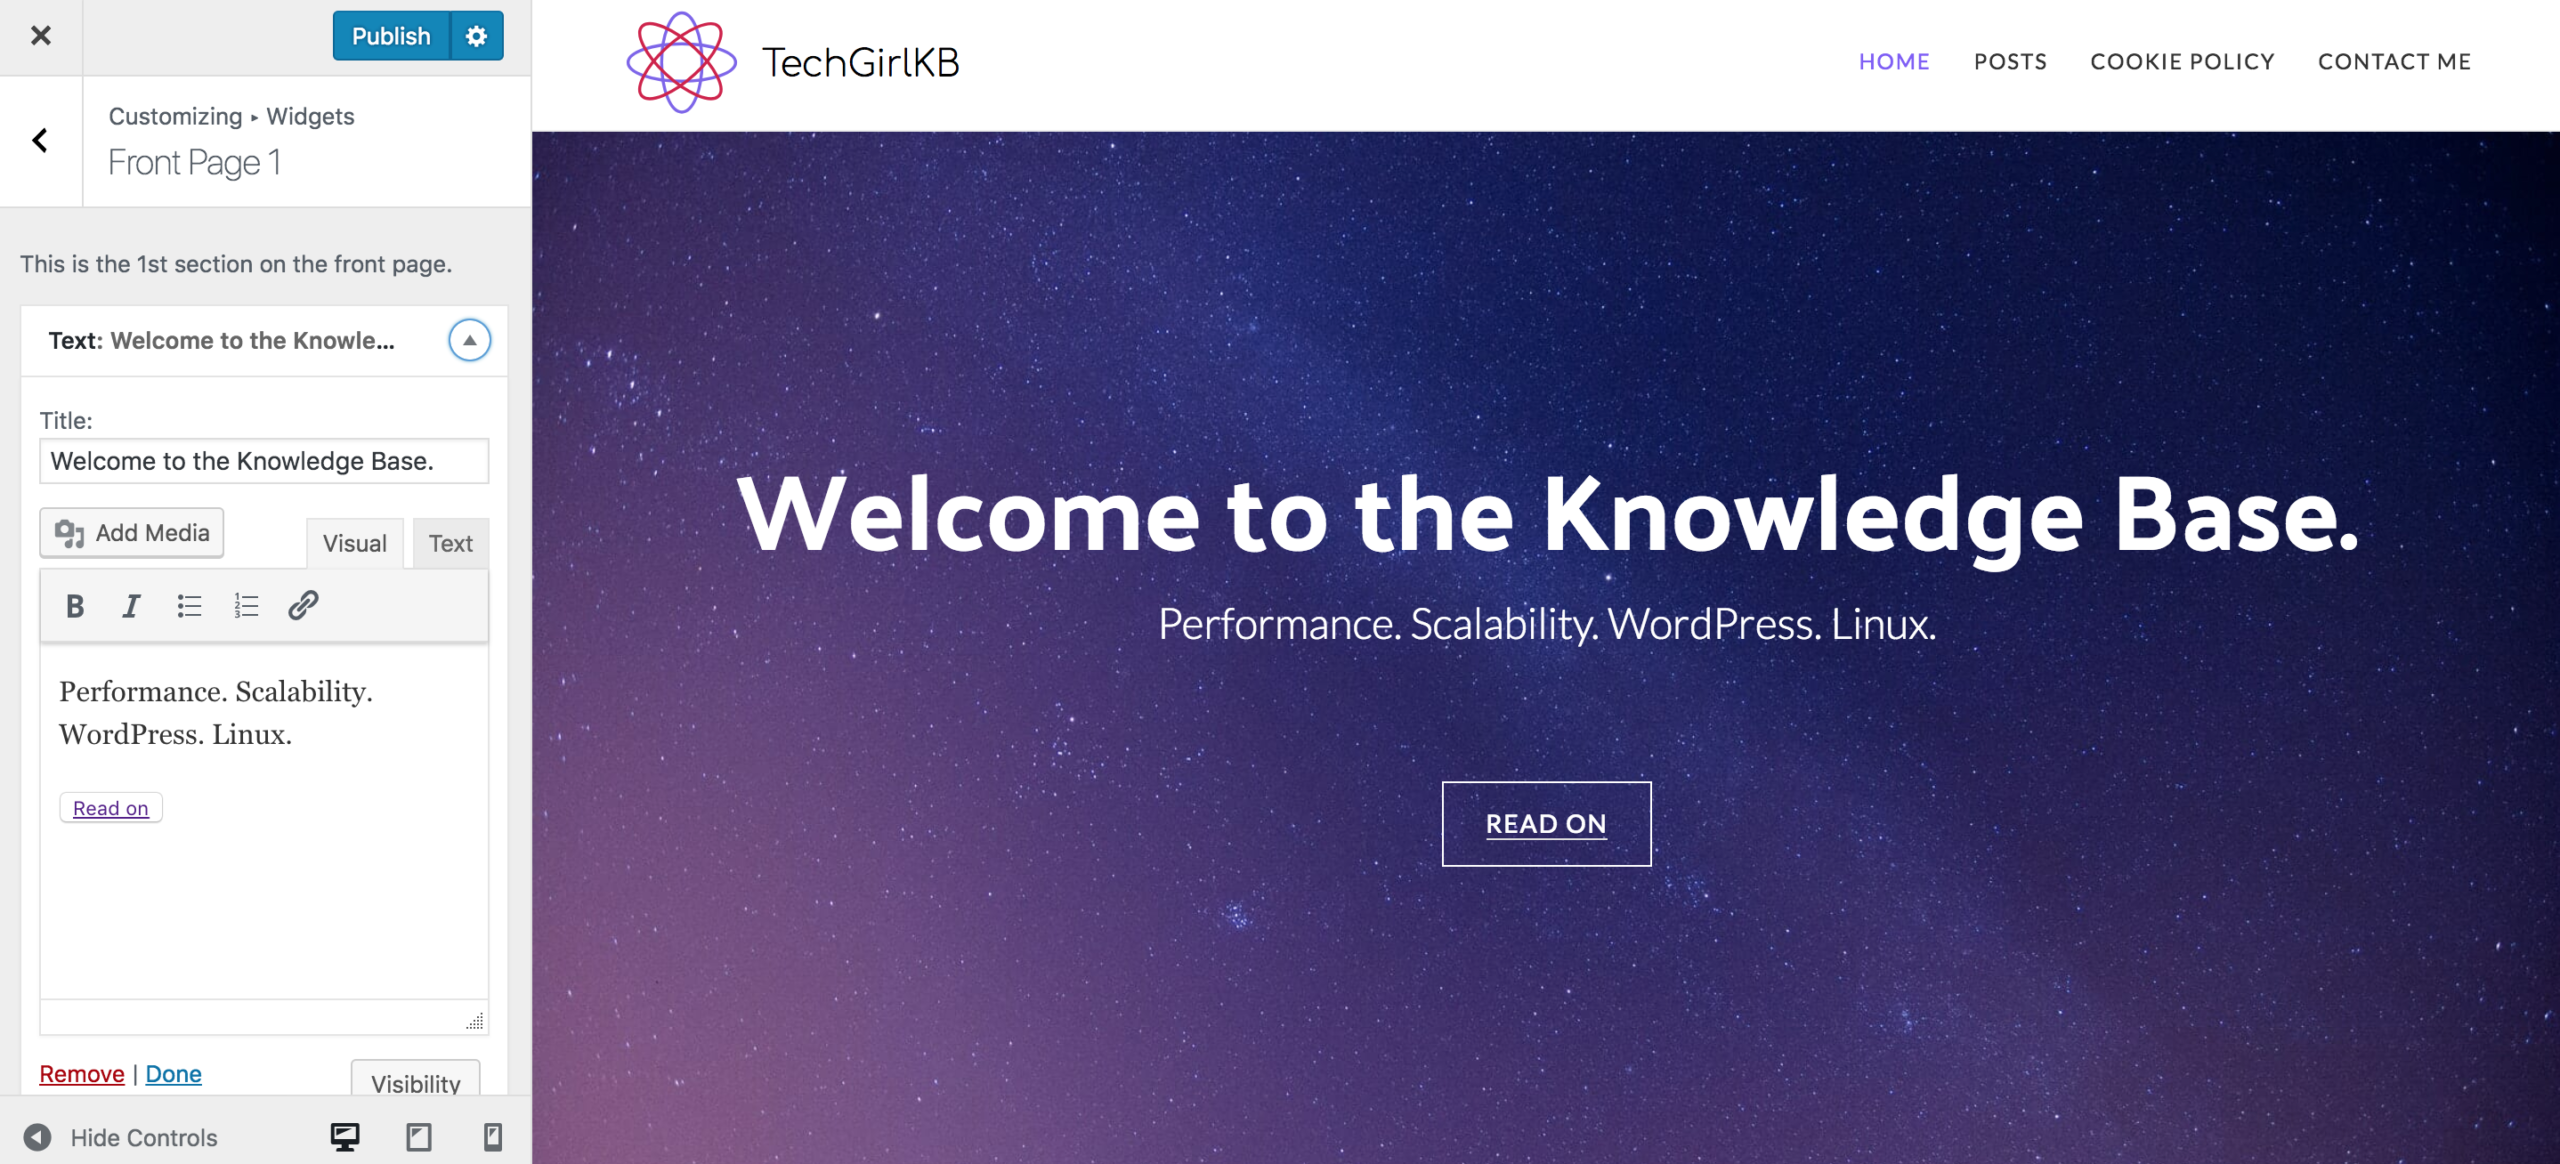
Customize Site
- Log in to the website’s wp-admin dashboard
- Select Appearance
- Click Themes
- Activate the StudioPress theme that you’ve just installed
- Select Appearance
- Click Customize
The Genesis Framework is built to use the Customizer fields like background images and colors, logos, Widgets, and Front page settings.
In the Themes section of your WP Engine User Portal, you will find links to your theme setup guide which explains which settings to configure to make your site look like the demo. Your setup guide will also include a link to a Sample Content XML file–this file can be imported to provide some content to use when building a new site.
This step can take anywhere from 30 minutes to a few hours to configure the settings as you desire. Themes based on the Genesis Framework do much of the appearance editing in the Customizer, meaning you may easily edit the appearance of your site without editing a single line of code!
You may also add a number of helpful plugins when creating a site with the Genesis Framework and a StudioPress theme.
Copy to Production
Once you have finished customizing your site and ensuring your content looks right within your new theme, you can copy your changes over to your Production website. Start by making a backup of both environments in your WP Engine User Portal, then select your production environment.
Select Copy from in the top right corner, and choose the environment where you have been redesigning your website. Confirm you would like to copy, and select the backup you just created from the list. Here you will also be asked if you would like to include the database in your copy. If your production website has updated since you made the copy to staging/development (like adding users, orders, posts, etc.), you may not want to copy the database. When you continue, your development or staging environment will be copied to your production website! You will receive an email when the copy completes.
Once you have completed the copy, your production site should then reflect the changes made in staging/development!
Resources
As you create or redesign your website, there are several resources available to you for help:
- Genesis for Beginners
- Genesis community forums
- Recommended Genesis developers
- Genesis community on Facebook
- Genesis slack channel
- StudioPress theme setup guides (User Portal)
Have questions? Contact Support via 24/7 Live Chat in your WP Engine User Portal (view scope of support for StudioPress)