Manage Plugins and Themes Manually
While WordPress® makes managing plugins and themes easy through the wp-admin dashboard, plugins and themes can also be readily installed and updated manually through the dashboard or by using SFTP.1
Install a Plugin
The first step is to locate the plugin on the Plugin Repository OR directly from the developer of the plugin, and download the package to your computer. If you need to download the latest version of a free WP Engine owned plugin you will need to use the download links in this article: Install and Update WP Engine Owned Plugins and Themes.
Be sure to save this file on your computer where you can easily find it later!
Install Plugin in WP-Admin
Plugins can be installed and updated manually through the WP-Admin dashboard. This process can install a new plugin, or update an existing plugin.
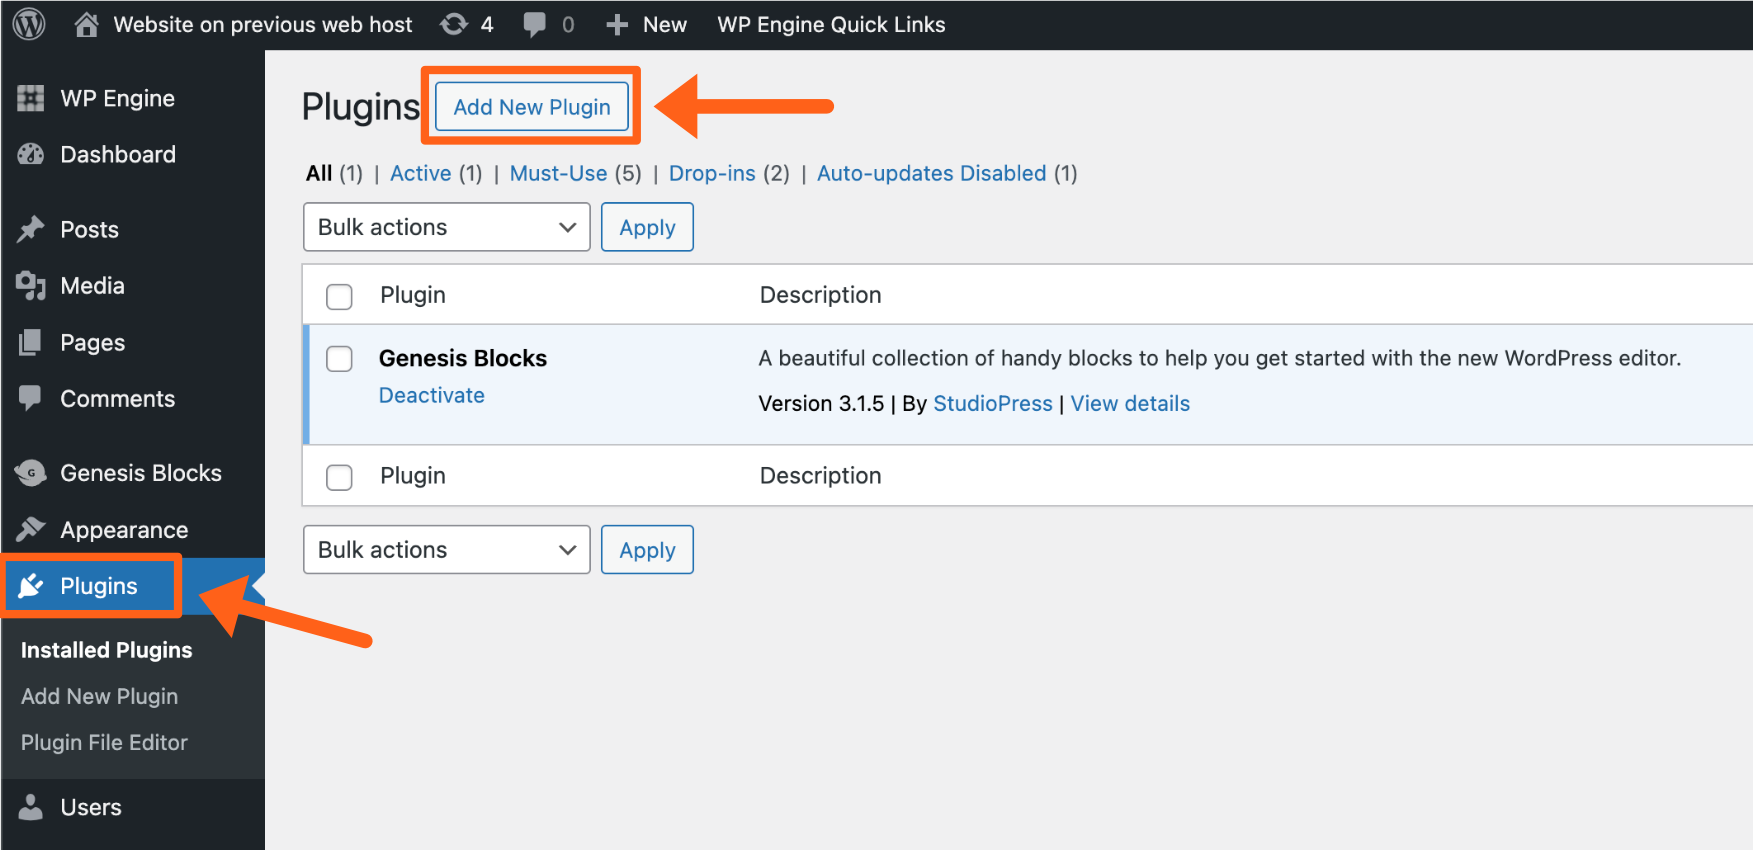
- Log in to your website’s wp-admin dashboard
- Visit the Plugins tab
- Click Add New Plugin at the top of the page (/wp-admin/plugin-install.php)
- Click Upload Plugin at the top of the page
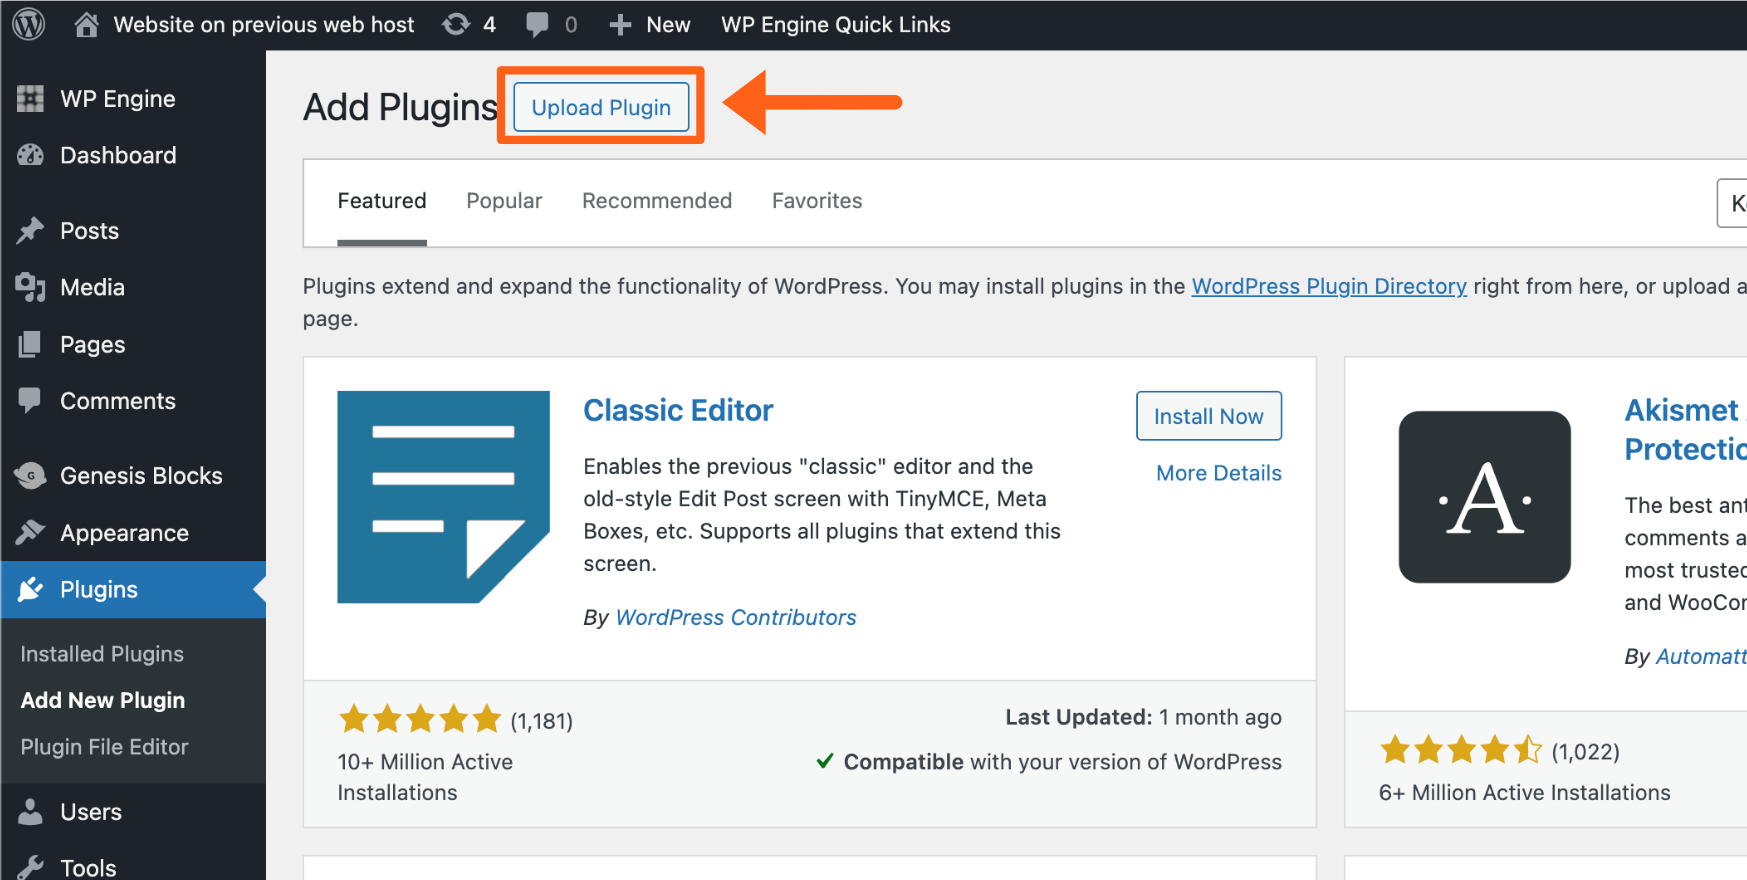
- Locate and select the plugin ZIP
- Click Install Now
- If updating a plugin, click Replace current with uploaded
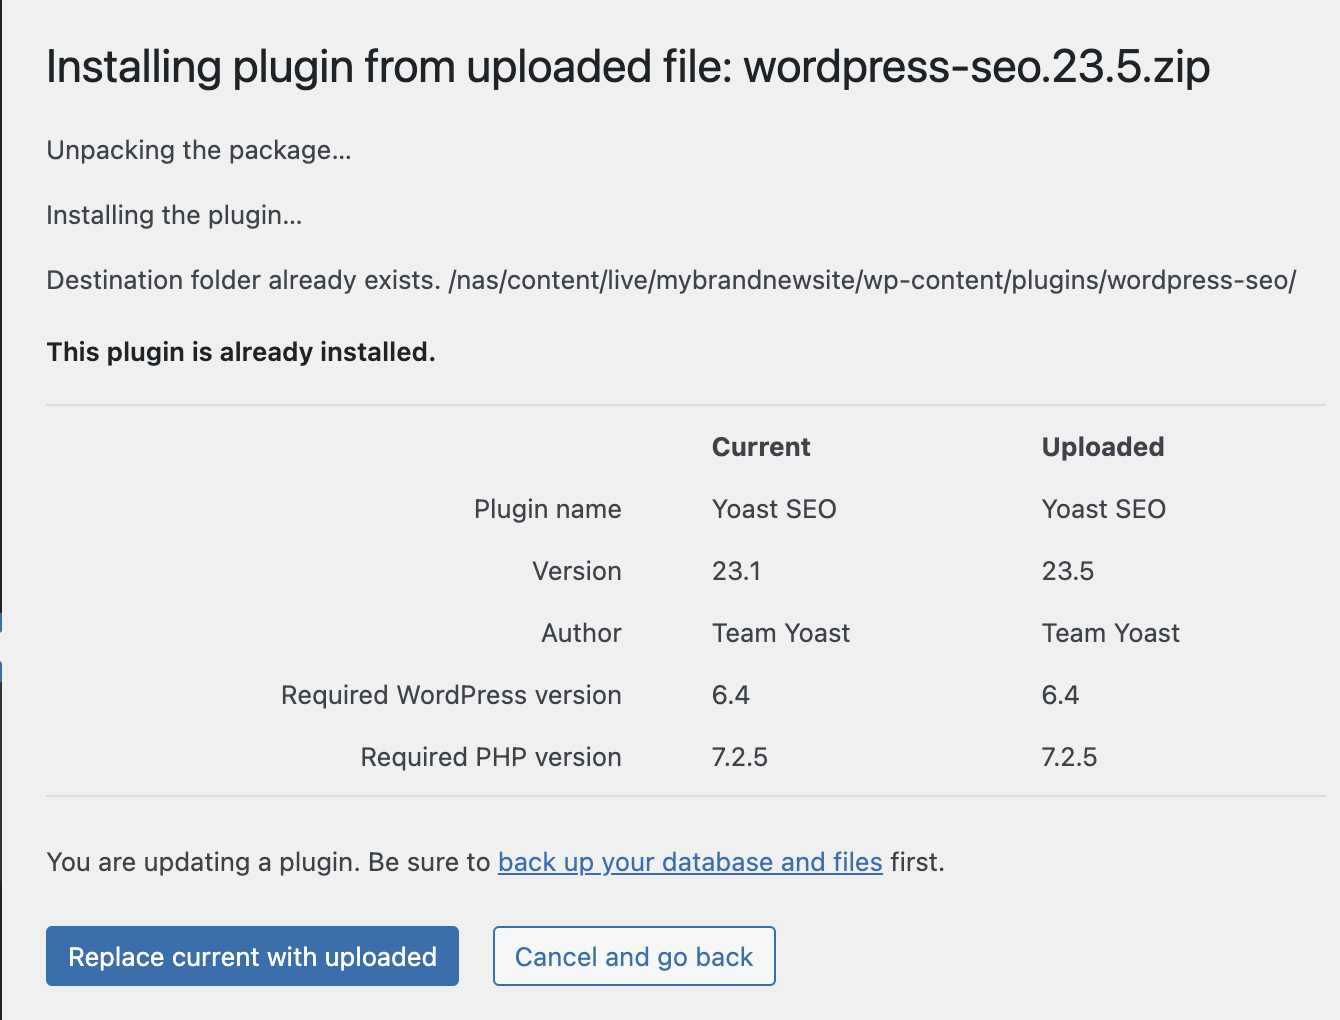
- If updating a plugin, click Replace current with uploaded
- Click Activate Plugin
That’s it! Your plugin is now installed, active, and ready to use on your website.
Install Plugin with SFTP
If you prefer not to or cannot access the wp-admin, plugin files can also readily be managed using SFTP. This process can install new plugins, or update existing plugins.
- If the plugin package you have downloaded is zipped, you will need to unzip the package locally before it can be uploaded.
- Connect to your website using SFTP
- Navigate to wp-content
- Navigate into plugins
- Drag and drop the plugin file into the plugins directory
- To update a plugin, overwrite the contents of the existing plugin directory with the new files
Activate the plugin by visiting the Plugins page of the wp-admin and clicking Activate, or by using the WP-CLI command wp plugin activate [plugin-name] over SSH Gateway.
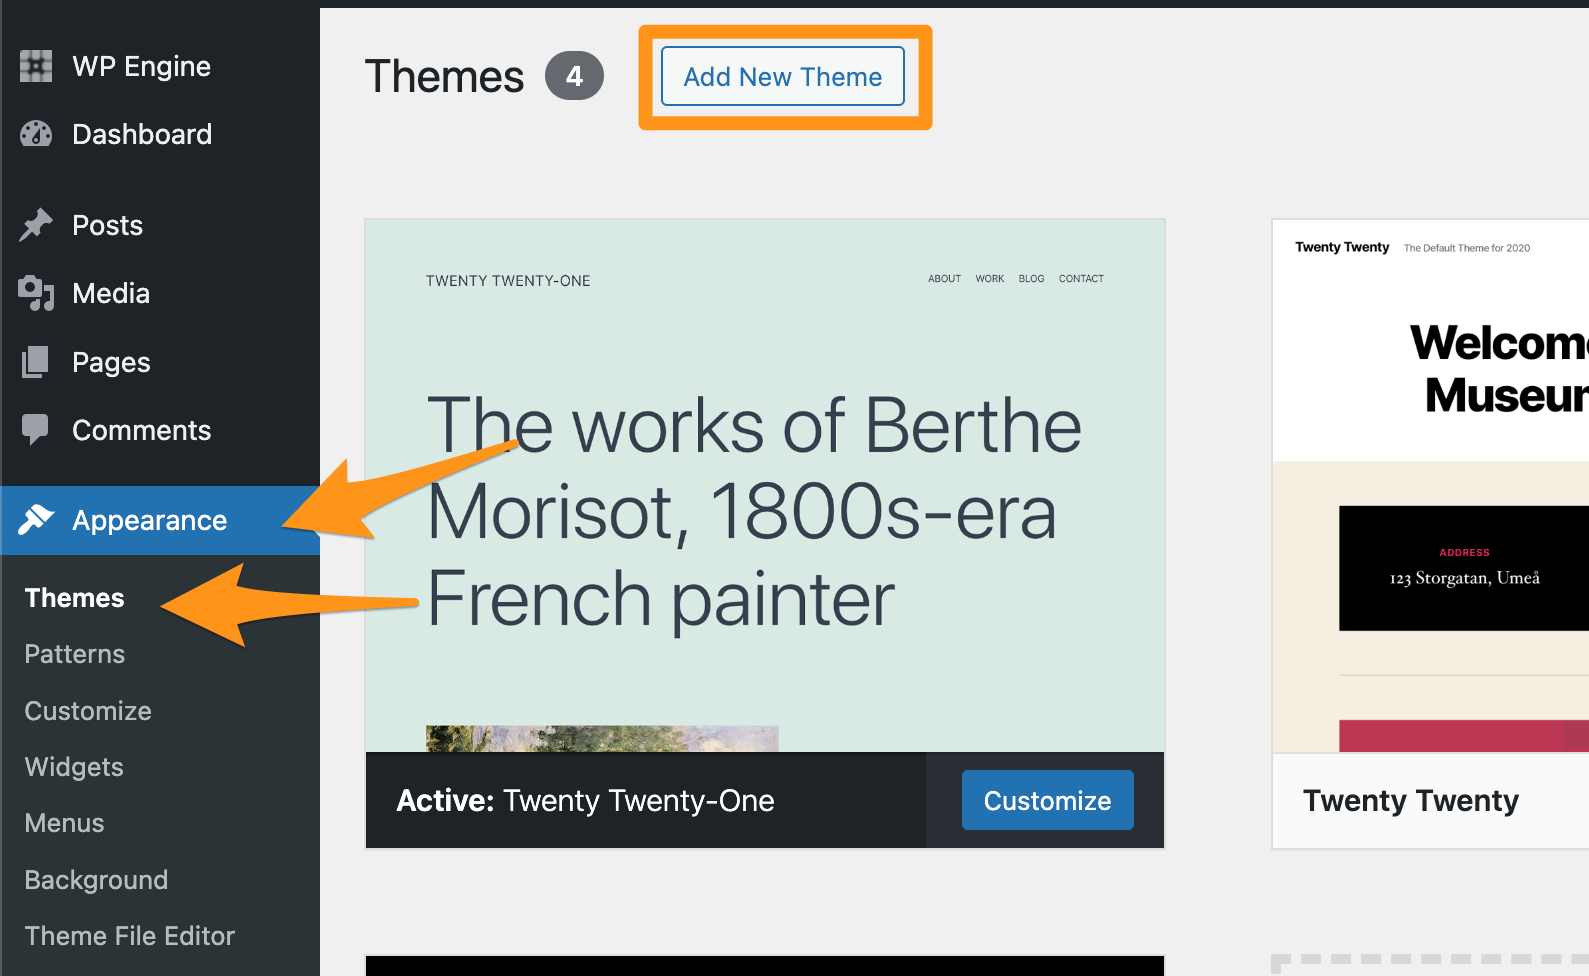
Install a Theme
The first step to install or update a theme is to locate the plugin on the Theme Repository OR directly from the developer of the theme, and download the package to your computer.
Be sure to save this file on your computer where you can easily find it later!
Install Theme in WP-Admin
Themes can be installed and updated manually through the WP-Admin dashboard. This process can install a new theme, or update an existing theme.
- Log in to your website’s wp-admin dashboard
- Click the Appearance tab
- Select Themes
- Click Add New Theme at the top of the page (/wp-admin/theme-install.php)
- Click Upload Theme
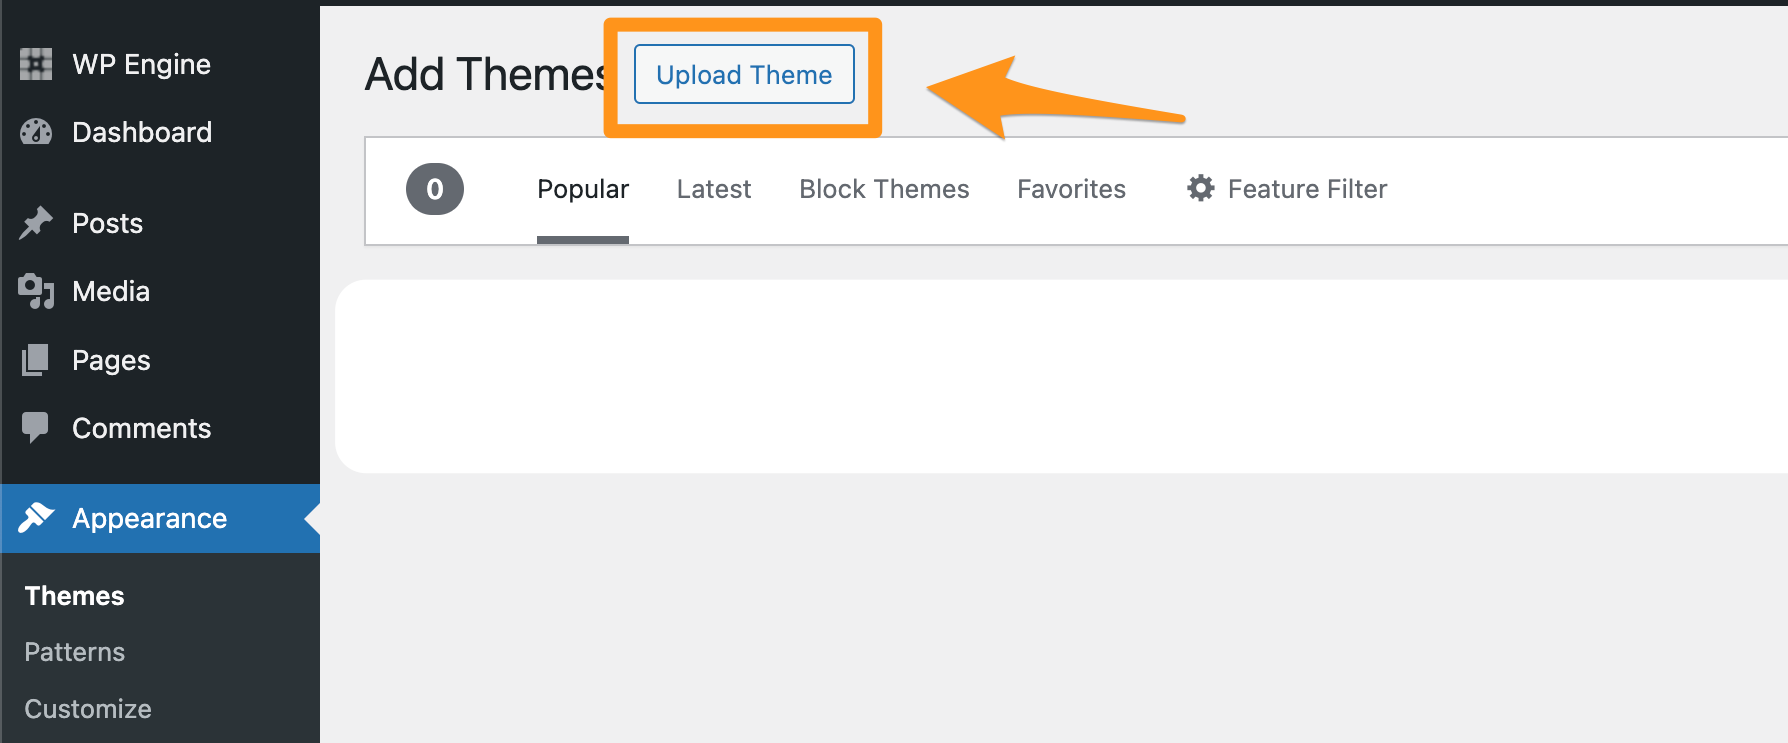
- Locate and select the theme ZIP
- Click Install Now
- Click Activate Theme
That’s it! Your Theme is now installed, active, and ready to use on your website.
Install Theme with SFTP
If you prefer not to or cannot access the wp-admin, theme files can also be readily managed using SFTP. This process can install a new theme, or update an existing theme.
- If the theme package you have downloaded is zipped, you will need to unzip the package locally before it can be uploaded.
- Connect to your website using SFTP
- Navigate to wp-content
- Navigate into themes
- Drag and drop the theme file into the theme directory
- To update a theme, overwrite the contents of the existing theme directory with the new files
Activate the theme by visiting the Appearance > Theme page of the wp-admin and clicking Activate, or by using the WP-CLI command wp theme activate [theme-name] over SSH Gateway.
Update with Local
Updating your website has never been easier than with Local. With Local you can update WordPress plugins and themes, then push the changes to WP Engine.
Note
Local Connect is not compatible with Multisites or overly large installs.
Here’s how to update WordPress plugins or themes using Local:
- Download and install Local (for free!) to your computer.
- If you’ve already downloaded Local, ensure you’re updated to the latest release.
- Connect to WP Engine.
- Enable WP Engine API Access for your WP Engine account.
- Connect Local to your WP Engine account.
- This is done inside Local’s Preferences pane; see Step 3 here.
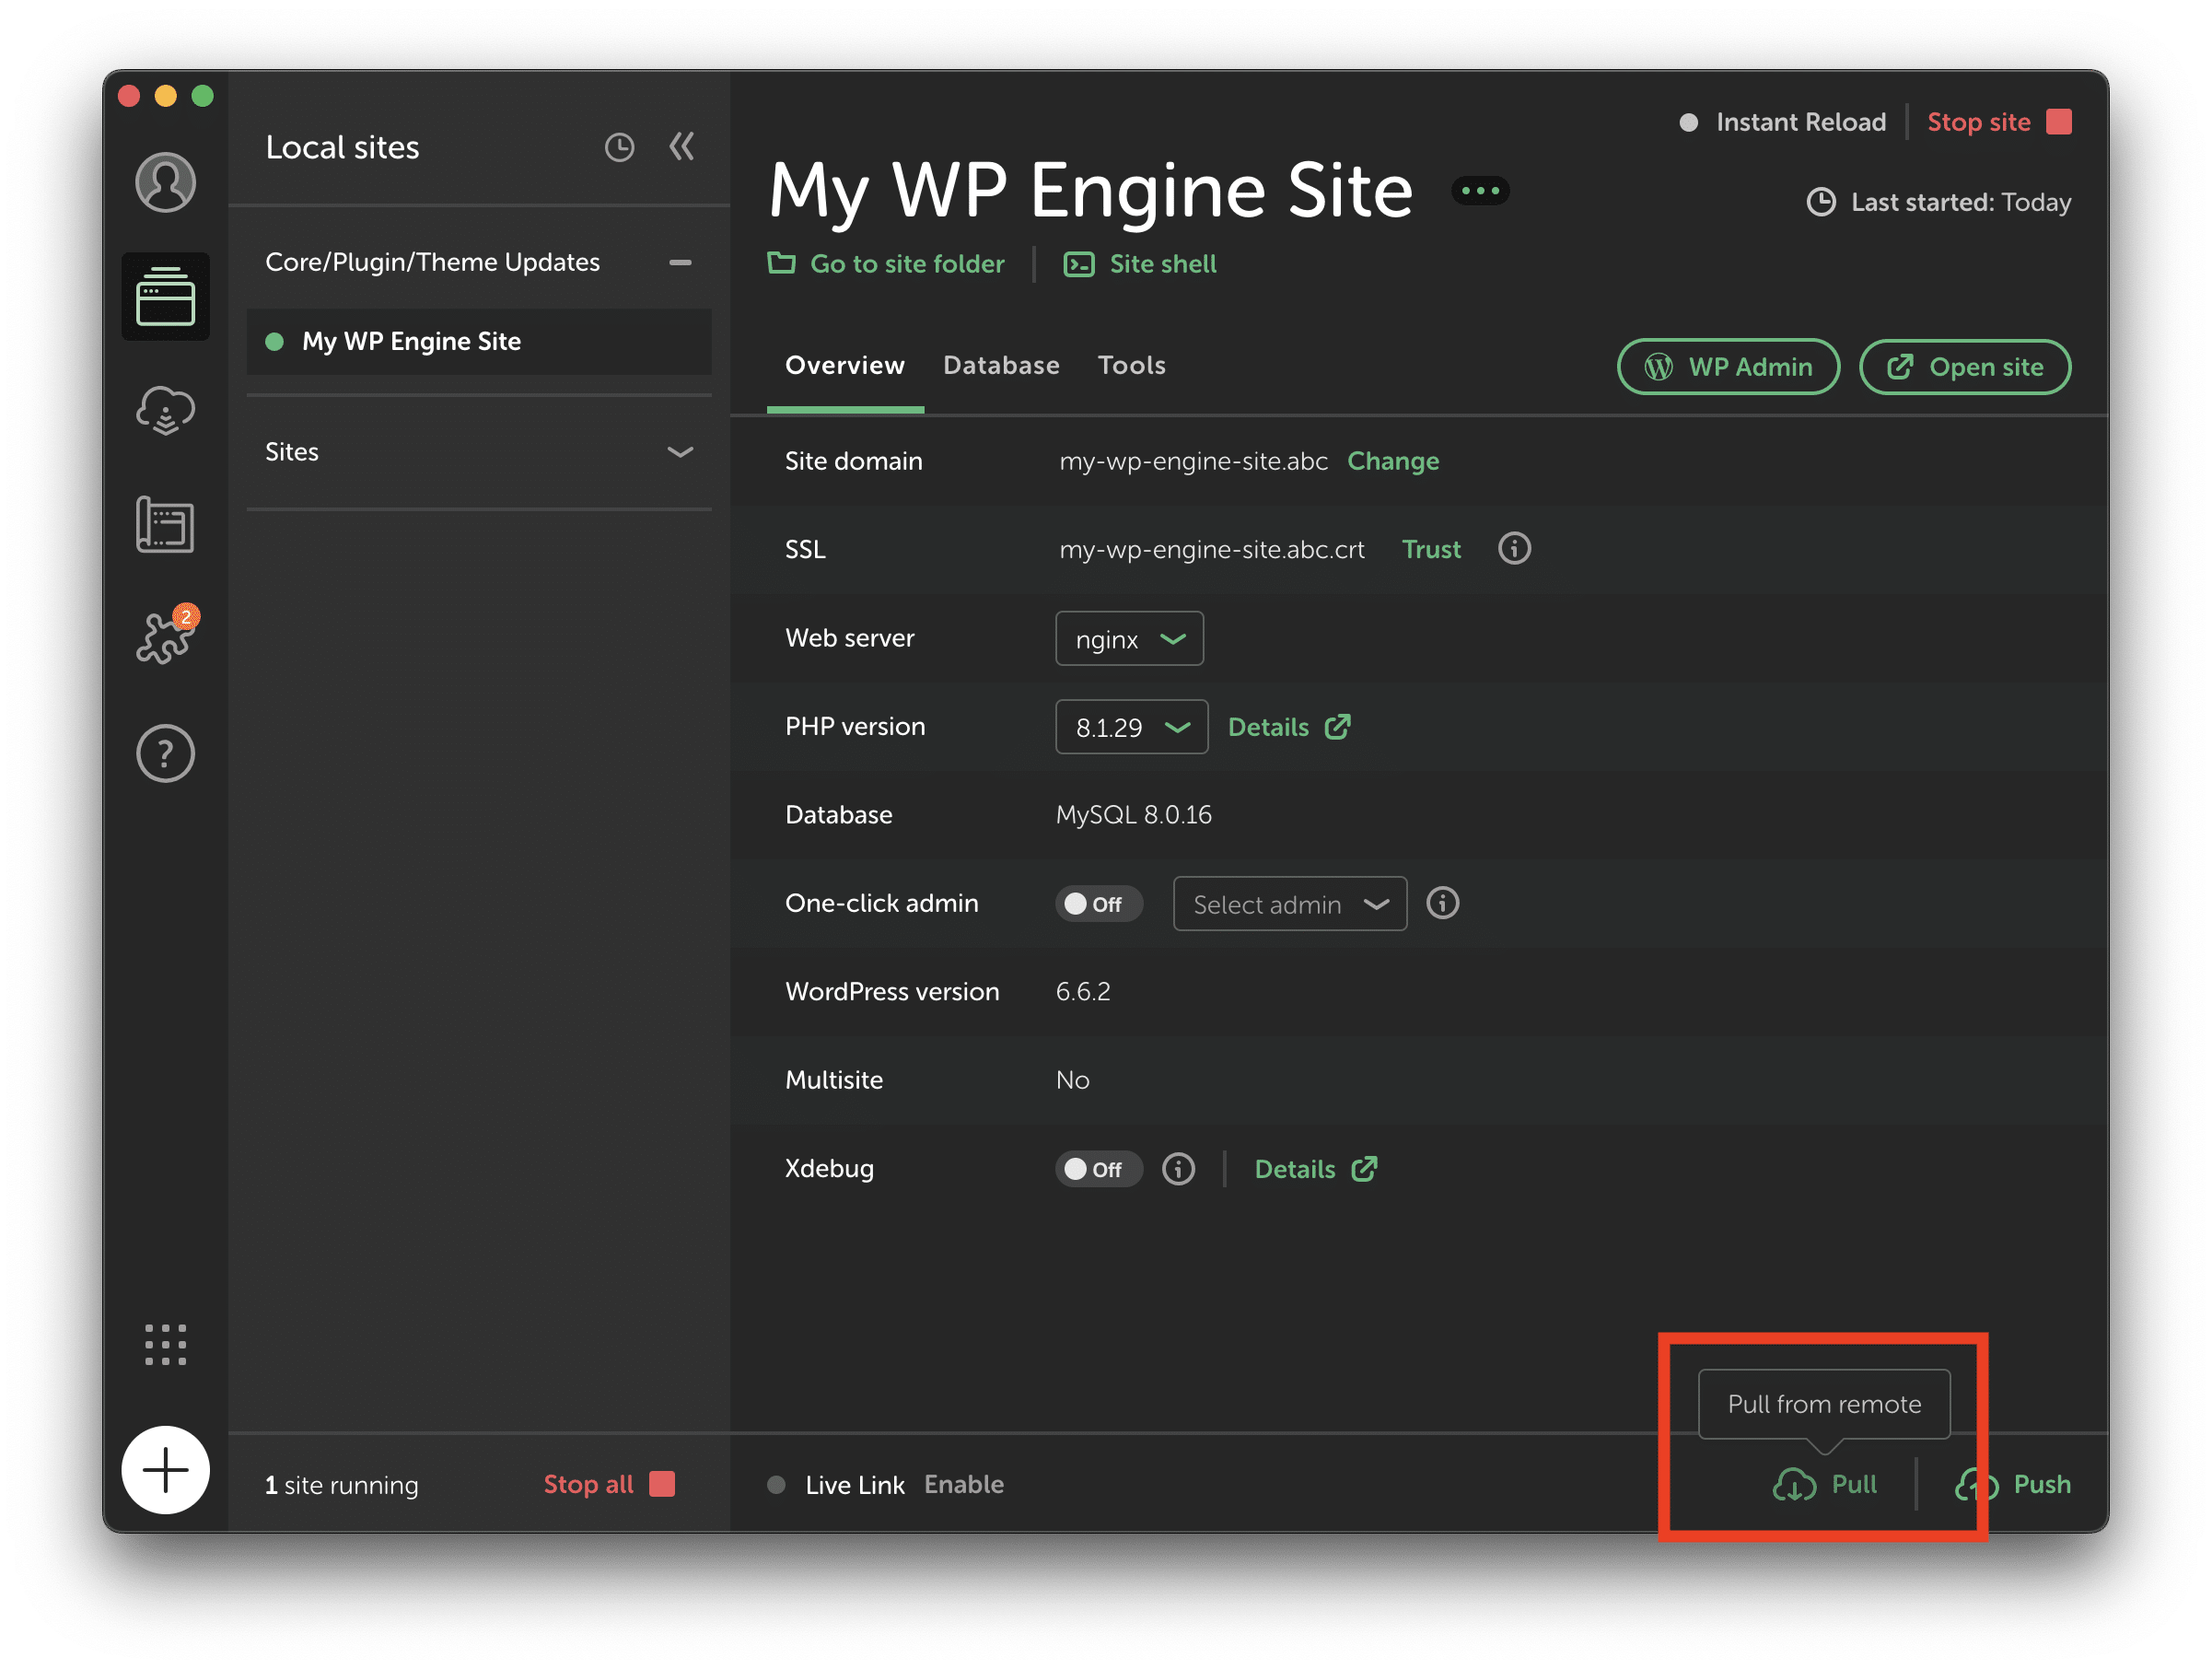
- Pull your website to Local.
- Create a new site (use the plus + icon in the bottom left-hand corner) OR Select an existing Local site to pull to.
- As a best practice safety precaution it is recommended in many cases to Pull and Push changes to a Development or Staging environment first to make sure there are no breaking changes, before deploying changes to a Production site through the WP Engine User Portal.
- Pull your site down to Local using the “Pull” button in the bottom right-hand corner.
- Create a new site (use the plus + icon in the bottom left-hand corner) OR Select an existing Local site to pull to.
- Launch the WP Admin Dashboard using the “WP Admin” button at the top of your site on the Local App
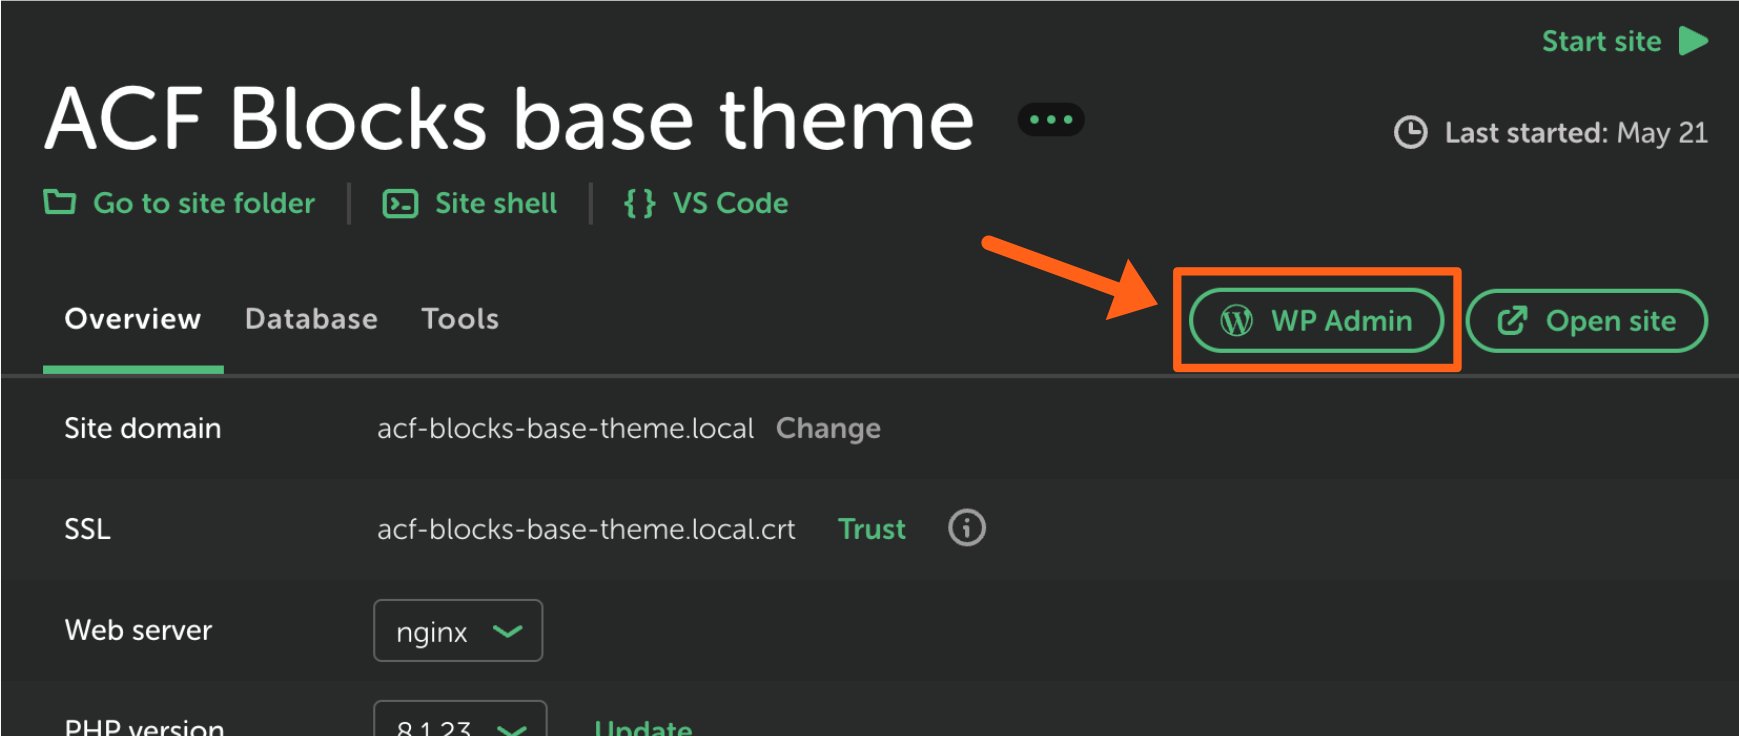
- Pro-tip: Turn on one-click admin and be automatically logged in!
- Update and manage your WordPress plugin and theme versions as you normally would from your Local website’s WP Admin Dashboard.
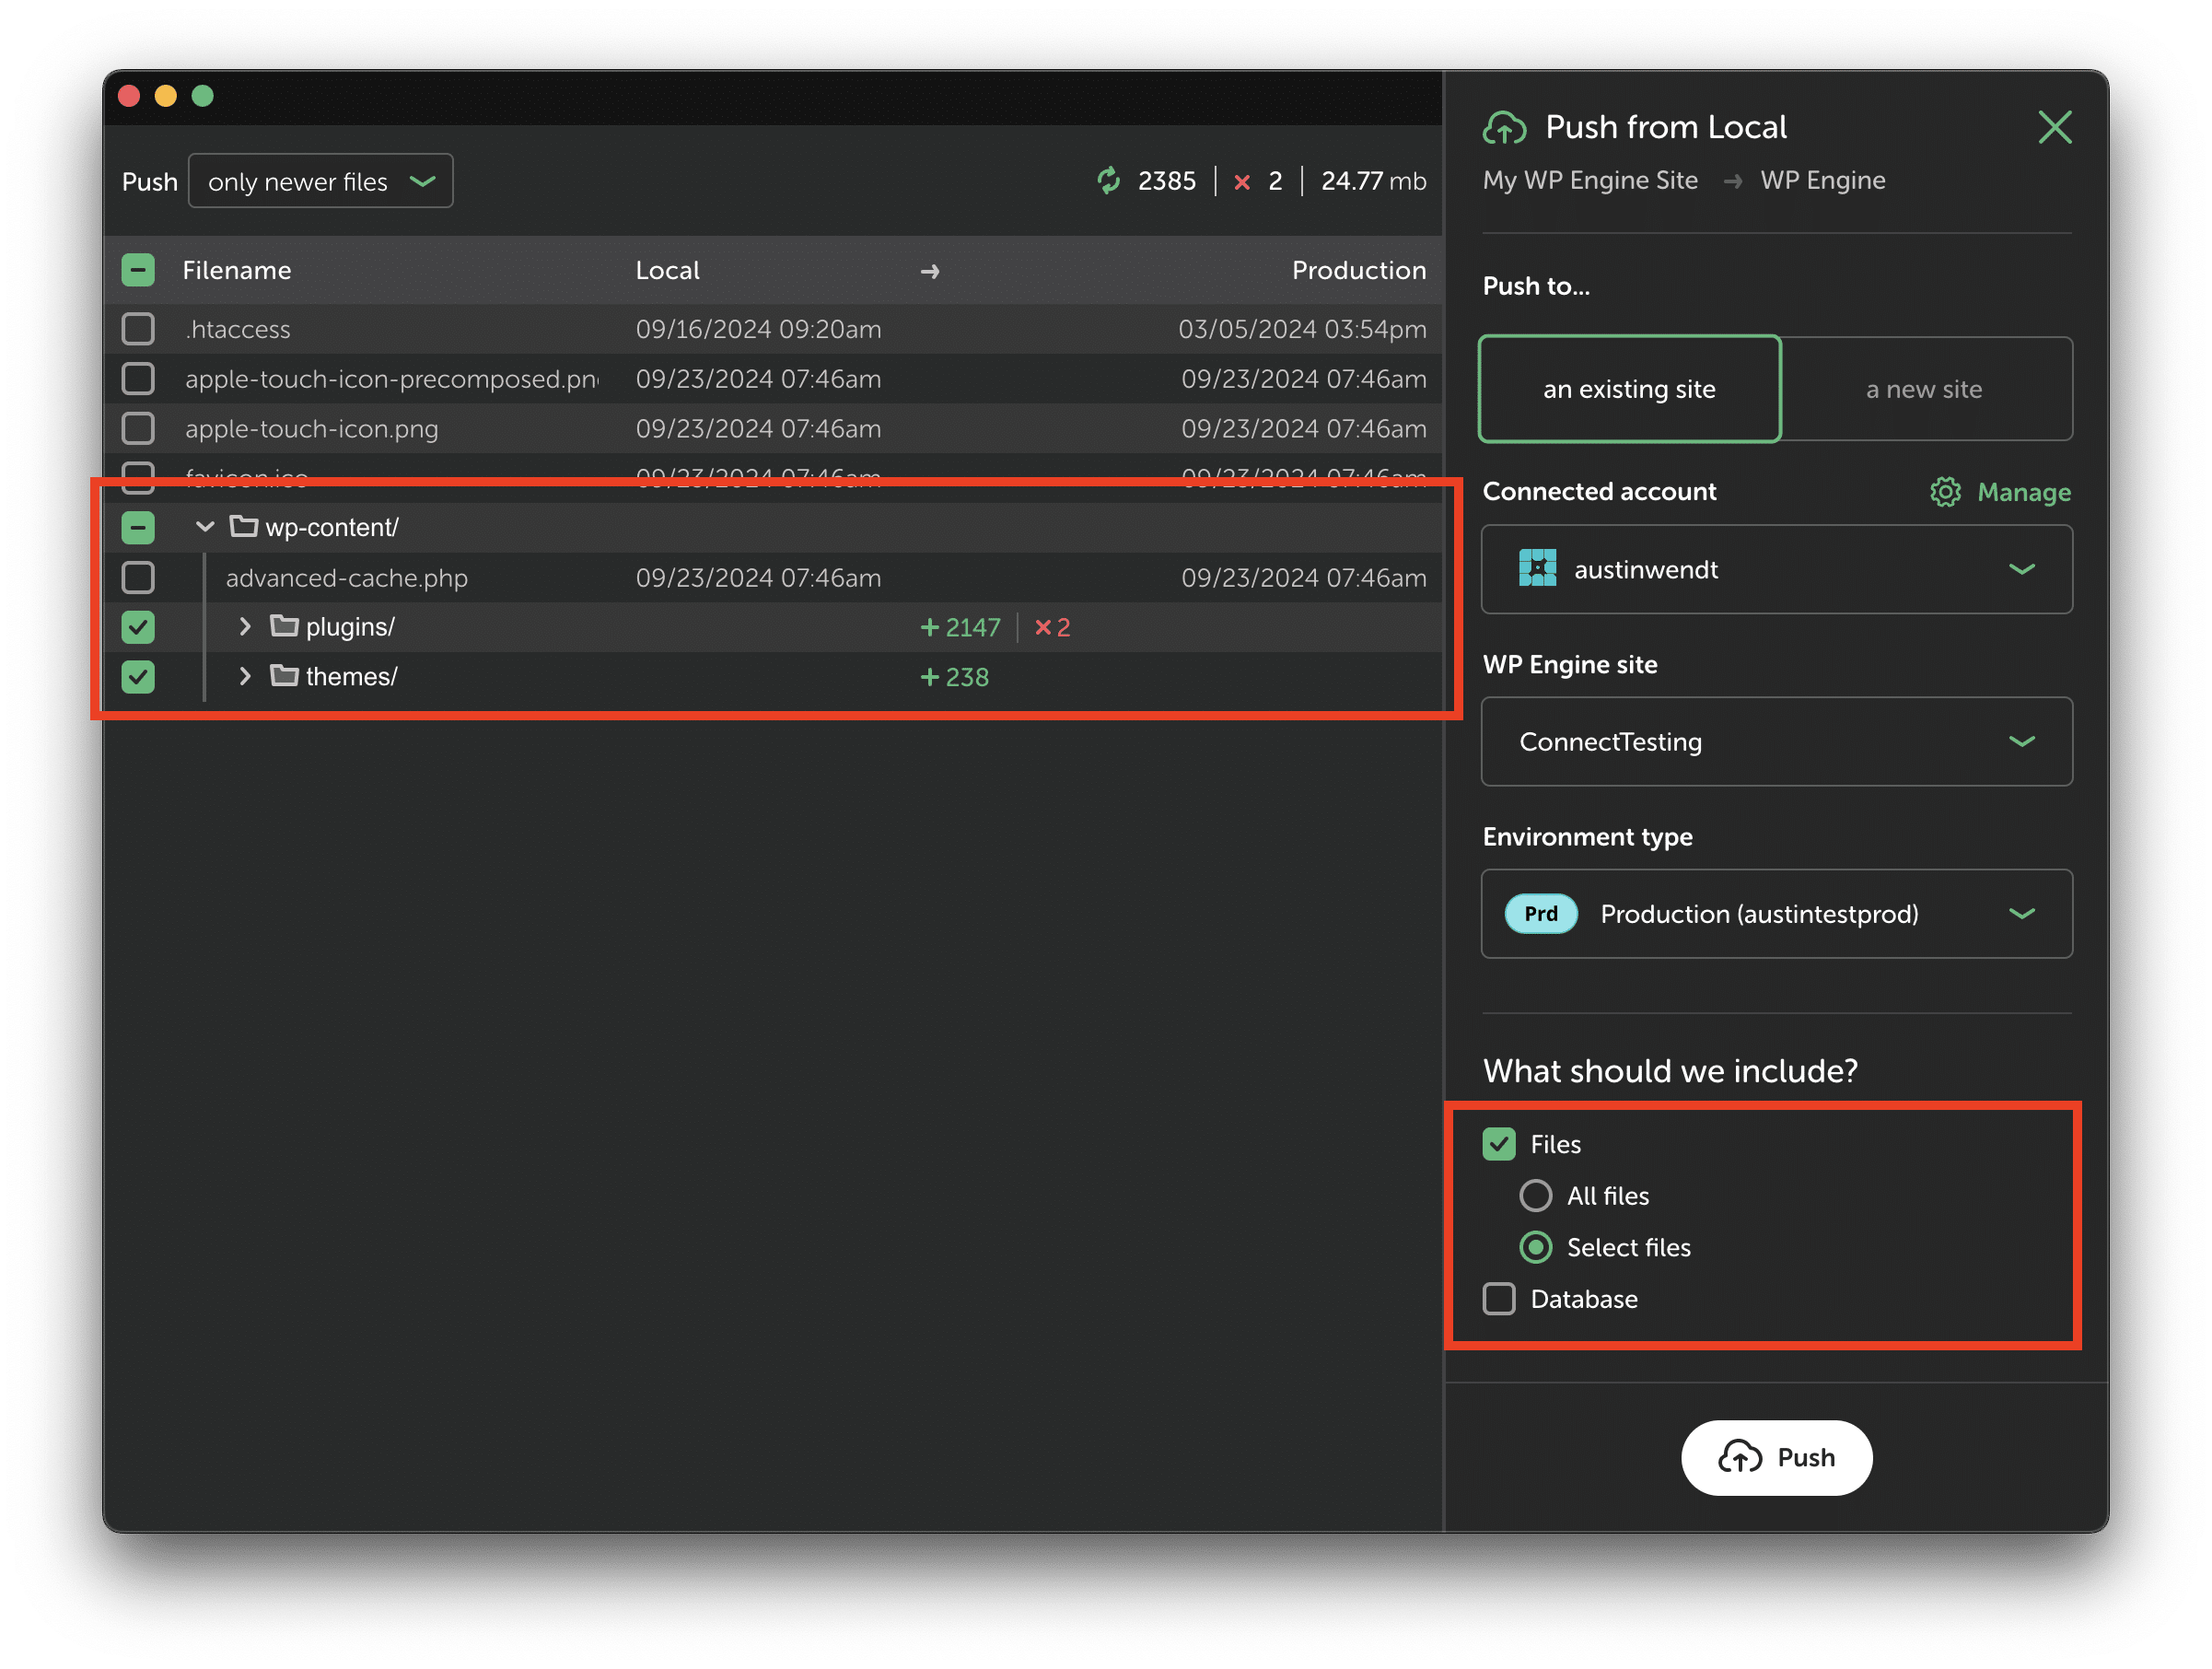
- Finally, push your updates back to WP Engine easily using Local Connect
- Click “Push” in the bottom right-hand corner and choose your destination environment.
- We recommend excluding the database and selecting only the plugins or themes folder using the “Select Files” option, when relevant.
Update with Composer
Composer is a tool for dependency management in PHP. It allows you to declare the libraries your project depends on and it will manage (install/update) them for you.
For developers that prefer this method, here are some of our plugins with Composer support with links to their Composer documentation.
Damon Cook also wrote a great article on using Composer to manage plugins when deploying to WP Engine.