Get Started
Autoscale: How to Manage Automated Resource Scaling
Tags:
WP Engine Autoscale is our premier high-availability hosting solution, engineered to provide seamless performance for mission-critical sites during massive unpredictable traffic surges. By leveraging a distributed Google Cloud infrastructure, Autoscale allows your Nginx and PHP resources to scale horizontally across multiple nodes automatically. This architecture ensures your site remains fast and responsive, even under the most demanding conditions.
Prerequisites
Forcing the use of a CI/CD pipeline for deploying code is a far more secure and controlled way for companies to update their WordPress® theme and plugin code.1 Because of this there are some extra considerations when planning your initial setup.
Before moving a site to an Autoscale environment, ensure the following conditions will work for your site:
- GitHub Repository: All code updates must be handled via a GitHub repository.
- CI/CD Pipeline: You must be prepared to use WP Engine’s specialized CI/CD workflow for connecting and deploying your repo.
- WordPress Version: WP Engine will handle WordPress version updates when they’re released after an initial review and testing period. You must be able to maintain compatibility with new versions of WordPress.
- SFTP: SFTP is not available for Autoscale environments.
- Local file writes: Since the application nodes are ephemeral and the file system is read-only, plugins and themes that require writing to local files (other than the /wp-content/uploads/ directory) may require configuration changes.
- Product compatibility: Read our developer docs to review product compatibility, and also read the FAQs section.
How Autoscale Works
Traditional hosting often relies on vertical scaling (adding more power to one machine), which has a ceiling. Autoscale utilizes a modern, distributed architecture:
- Horizontal Application Scaling: As traffic increases, the infrastructure automatically provisions additional “nodes” to handle Nginx and PHP processing. This distributes the load across several machines simultaneously.
- Vertical Database Scaling: To maintain data integrity and avoid the latency of multi-master syncing, the database scales vertically on a single, high-performance instance.
- Distributed File System: Media and uploads are stored on a distributed system, ensuring that every application node has immediate access to your site’s assets.
Workflow and Deployments
To maintain the high stability required for an Autoscale environment, we utilize a containerized deployment process.
- Code Pushes: When you push code to the selected branch of your linked GitHub repository, it triggers our CI/CD pipeline.
- Image Building: Our system builds a “container image” of your site, including your themes, plugins, and core files.
- Deployment: This image is then deployed across all active nodes in your Autoscale cluster.
This workflow ensures that every node in your cluster is running the exact same version of your code, eliminating “drift” between servers.
Backups & Security
Autoscale includes a tailored backup and security suite designed for enterprise:
- Comprehensive Backups: Our system captures the database, the /wp-content/uploads/ directory, and the specific Repository Image ID. This allows for a full-state restore of both your data and your exact code version.
- Read-Only File System: For enhanced security, the WordPress core and application files are read-only. This prevents unauthorized code changes directly on the server or through the WordPress dashboard. The only directory that is writable is the /wp-content/uploads/ folder, and files in this folder are not executable.
- Seamless Login: Autoscale supports strong password enforcement and seamless SSO integration through the User Portal.
Set Up an Autoscale Site
The high level steps for adding a new site are:
- Add a site in the User Portal.
- Set up GitHub repo.
- Set up a pipeline in the User Portal.
- Deploy your code.
- Transfer content (uploads, database).
Follow the steps below for detailed instructions.
- Add a new site as you normally would from the Sites page in the User Portal.
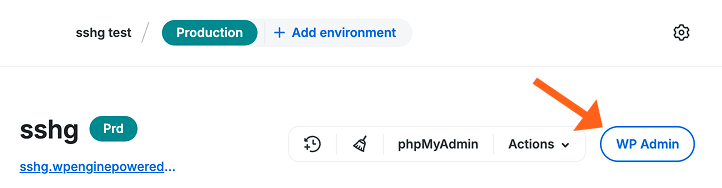
- Confirm that your WordPress site loads. On the Overview page for the new environment, click the WP Admin button.
- Create a GitHub repo with your themes and plugins folders in the root of the project like the pipelines starter template example.
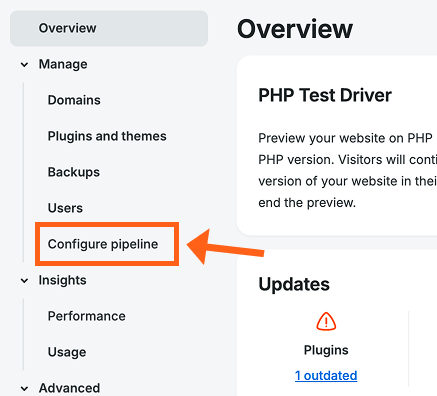
Note: You must commit at least one valid theme or Autoscale will reject the build. - Configure pipeline. In the WP Engine User Portal, go to Manage > Configure pipeline for your environment.
- Connect to GitHub. (If you have already connected, skip to the Add pipeline step).
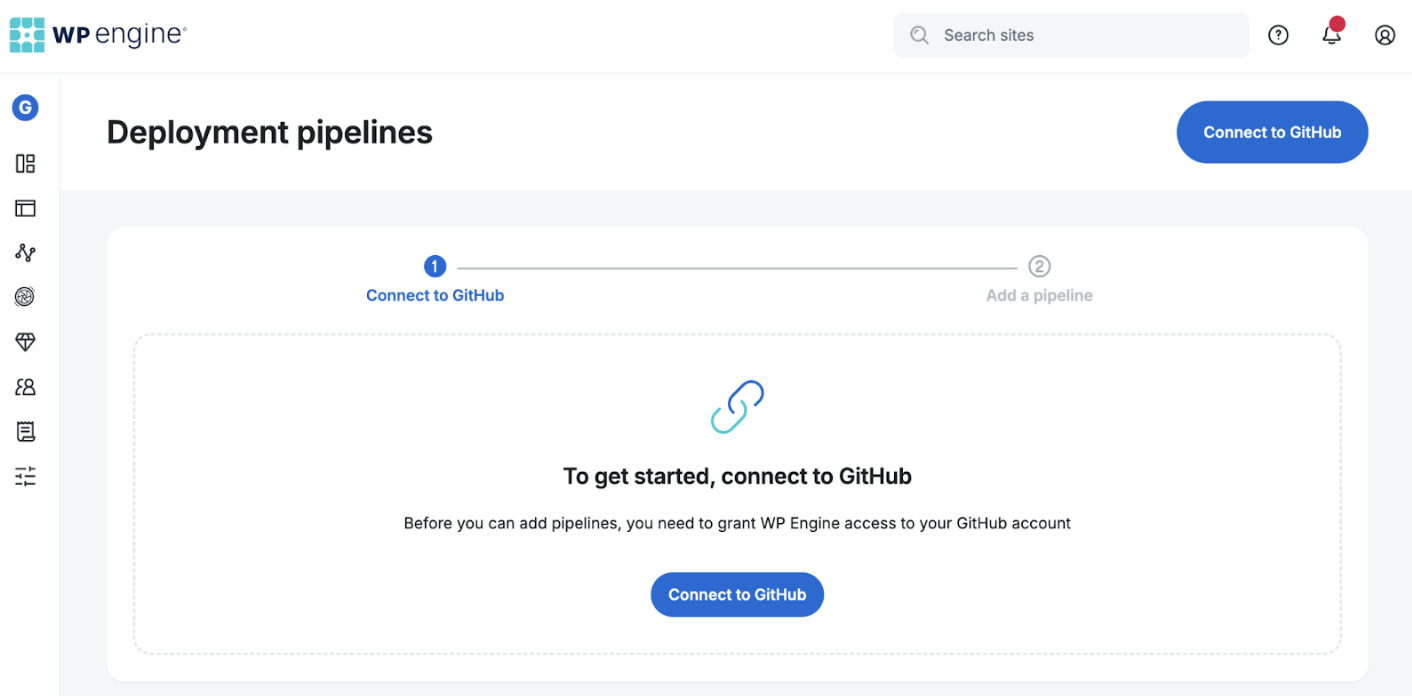
- Follow the prompts to log in to the GitHub account where your repo lives.
- Confirm that you authorize WP Engine Pipelines to connect.
- Select repos that you want to be able to connect, and install the WP Engine Pipelines GitHub app.
- Add pipeline. Back on the Deployment pipelines page of the User Portal, click the Add pipeline button.

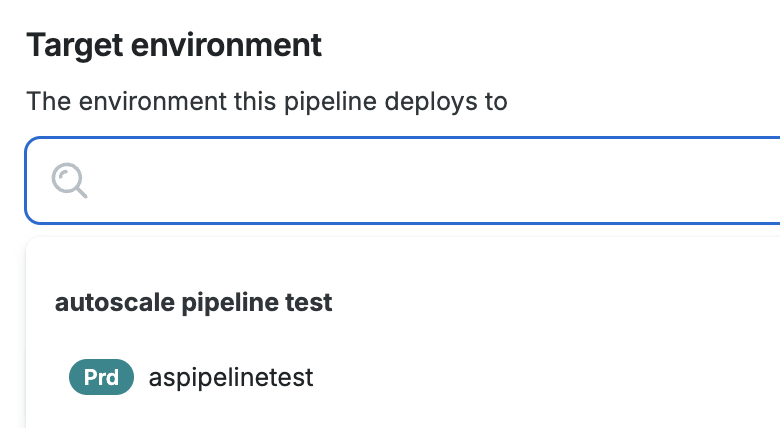
- Select an environment that this pipeline will deploy to. You’ll see a search bar labeled Target environment. When you click into the search bar you’ll be able to type or to scroll through your available environments.
- Select your Git provider from the dropdown list. Initially GitHub will be the only choice so you can leave the default selection of GitHub.
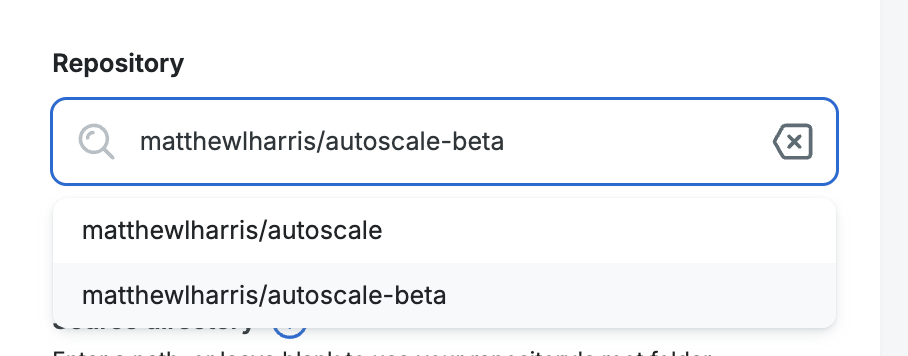
- Select your GitHub repo from the Repository dropdown.
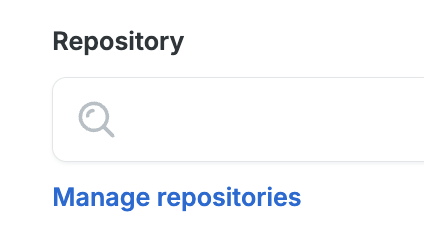
- If you don’t see your repo in the list, then you may have selected to only include specific repos when you connected GitHub. If you need to allow more repos then click the Manage repositories link under the Repository dropdown.
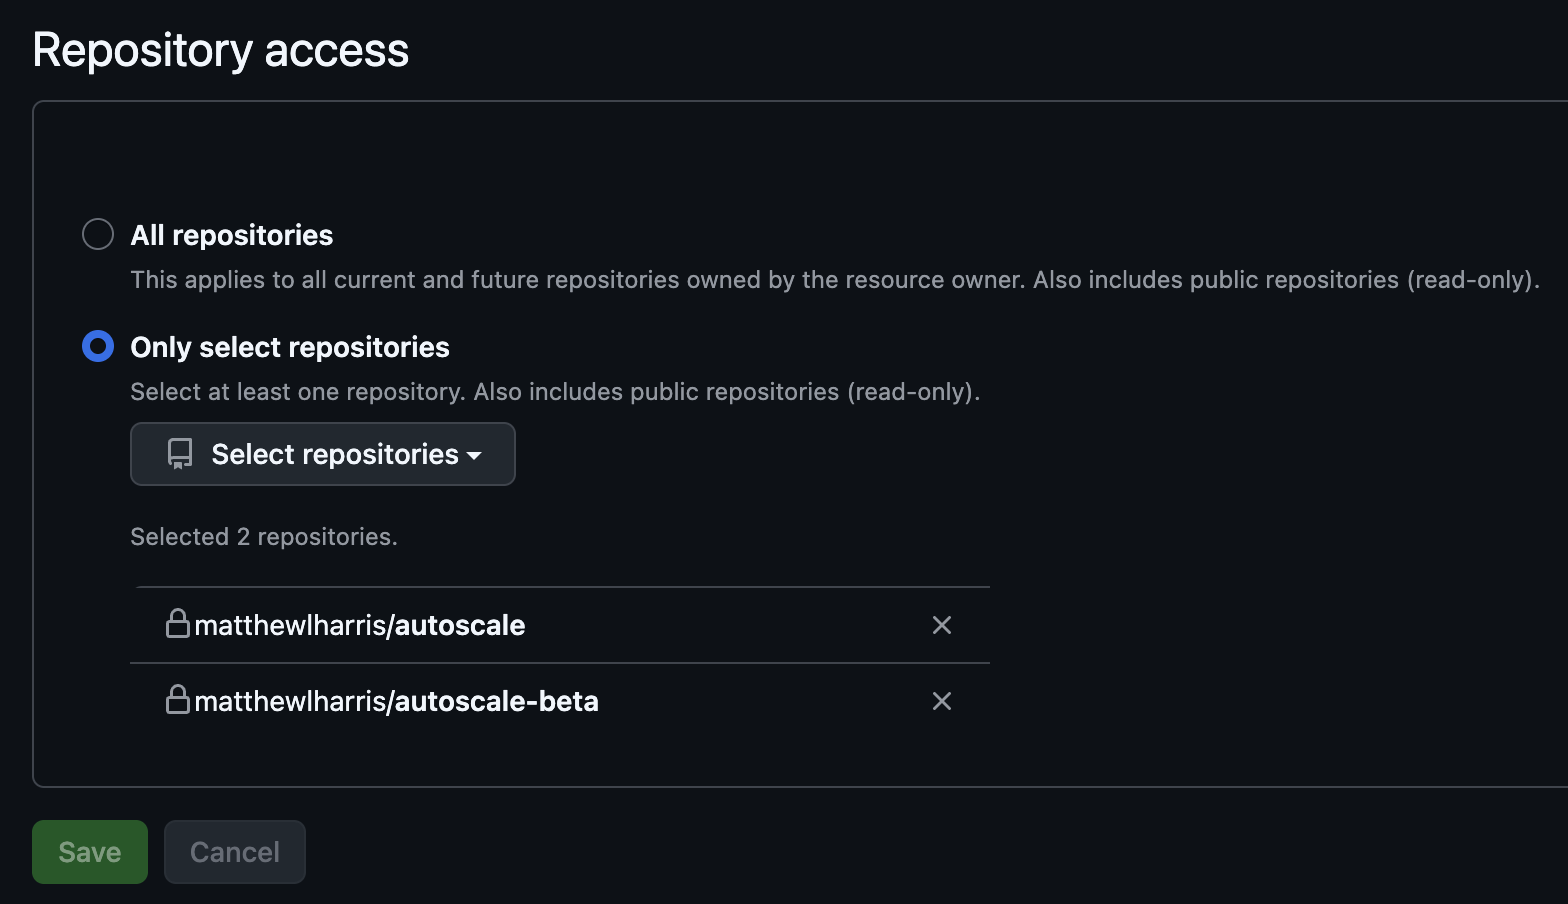
- Select all desired repositories or choose to allow all repositories, and then click the Save button in GitHub.
- Once you’ve allowed additional repos, return to the User Portal and select your desired repo from the Repository list.
- If you don’t see your repo in the list, then you may have selected to only include specific repos when you connected GitHub. If you need to allow more repos then click the Manage repositories link under the Repository dropdown.
- Select a Branch. Choose the branch that you want to trigger the build and deployment to your WP Engine environment.

- Select your Source directory. This is the directory of your repo that contains your plugins and themes folder. If you set up your repo according to our example repo, then you will leave this field blank to use the root folder of your repo.
Example root directory: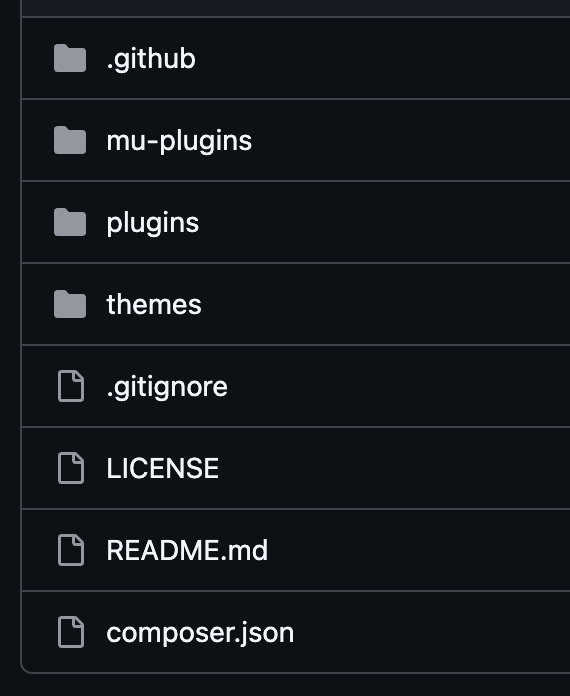
- Click the Add pipeline button to finish adding your pipeline.
- Deploy your code. Push a new commit to your selected git branch to trigger a deployment.
- The current default theme for new Autoscale sites added in the User Portal is twentytwentyfive. If you include the twentytwentyfive theme in the themes folder of your repo, then you shouldn’t see any warnings about the active theme not existing after your first deployment. If you do see the warning then you should be able to simply switch to your newly pushed theme in the wp-admin dashboard.
- Confirm that your theme and plugin code changes are reflected on the site after deployment.
- Be patient for your first deploy. Give it a little time to build and sync up. You should clear cache in the User Portal and also do a hard refresh in your browser.
- Get migration credentials in your Autoscale site. In your new Autoscale WordPress site, activate the WP Engine Site Migration plugin.
- Go to the Site Migration menu in the WordPress sidebar, select the Settings tab, and copy the connection URL to your clipboard.
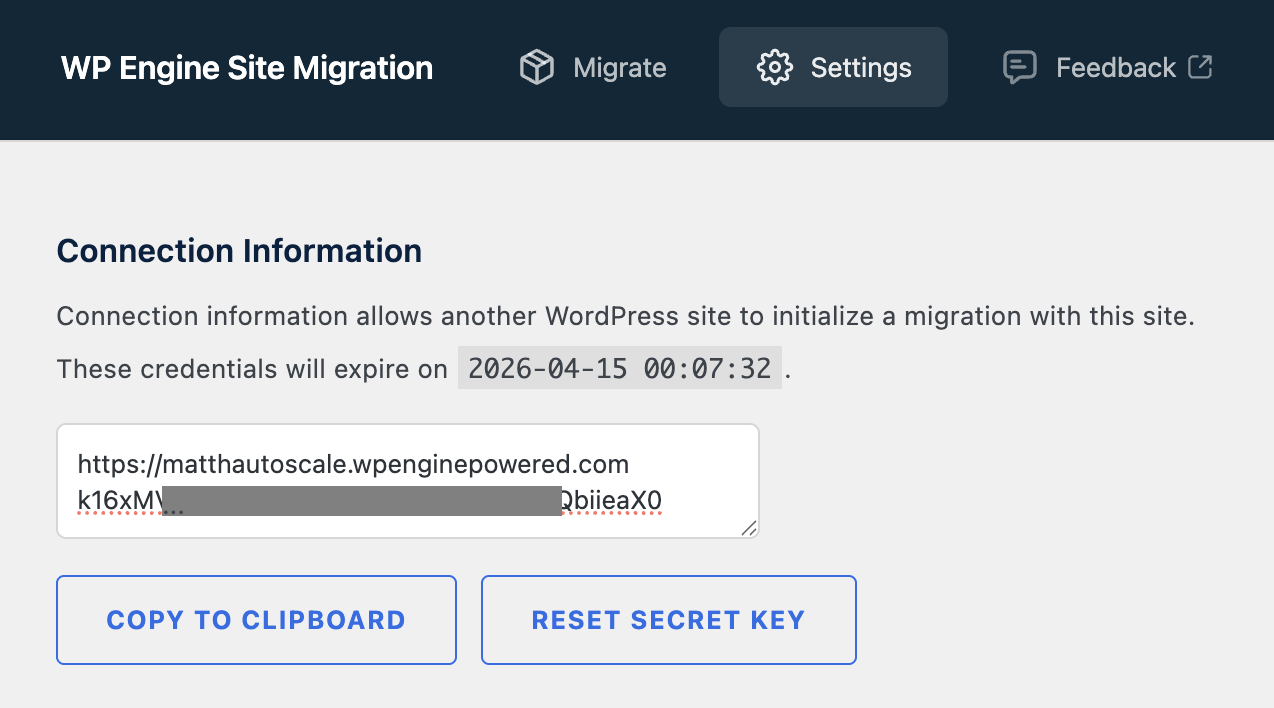
- Go to the Site Migration menu in the WordPress sidebar, select the Settings tab, and copy the connection URL to your clipboard.
- Start the migration from your source site. Go to your source site that you want to copy into your Autoscale site, and log into the WordPress dashboard.
- Use this link to download, install, and activate the WP Engine Site Migration plugin.
- Go to the Site Migration menu in the WordPress sidebar and click the START A NEW MIGRATION button.
- Paste in the connection URL from your Autoscale website, that you copied in the previous step.
- Make sure that only Database and Media Uploads are selected since these are the only items that can be migrated to an Autoscale site.
- Add an email address for notifications.
- Click Start Migration.
- After the migration, you’ll need to log into your Autoscale site again since it will have an updated database. You can use the seamless login WP Admin button in the User Portal.
- That’s it! Confirm that all of your content has been migrated.
Going Live With Your Domain on an Autoscale Site
Going live your domain on an Autoscale site will be mostly the same as for non-Autoscale WP Engine sites. One key difference is that the WordPress site URL is controlled by the wp-config.php file which is not editable for Autoscale sites.
This means that after you are live on your domain, if you want the temp wpenginepowered.com domain to redirect to your custom domain, you’ll currently need to add a Rewrite Rule in the User Portal.
You’ll follow the same steps for adding your domain in the User Portal and pointing your DNS, just as you would for a non-Autoscale site.
After you’ve pointed your DNS then you can add a Rewrite Rule in the User Portal to redirect your wpenginepowered.com domain to your custom domain.
- Go to Advanced > Web rules in the secondary left-hand menu for an environment.
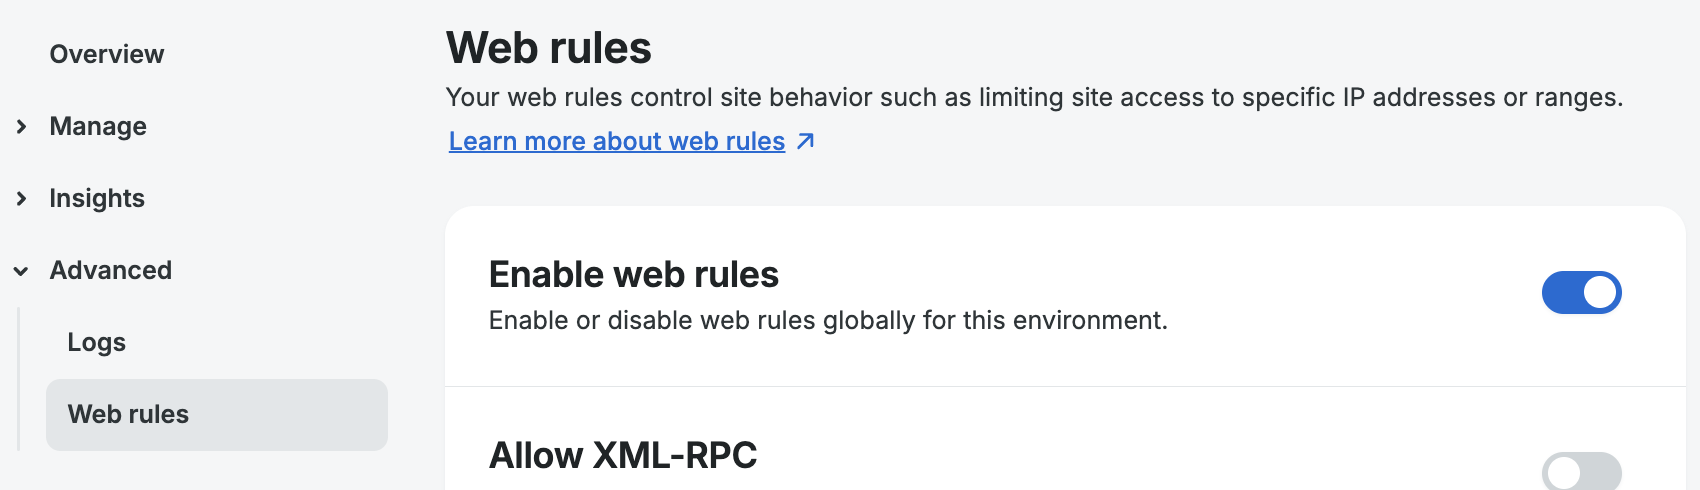
- Scroll down to the Web rules list section and select the Rewrite rules tab.
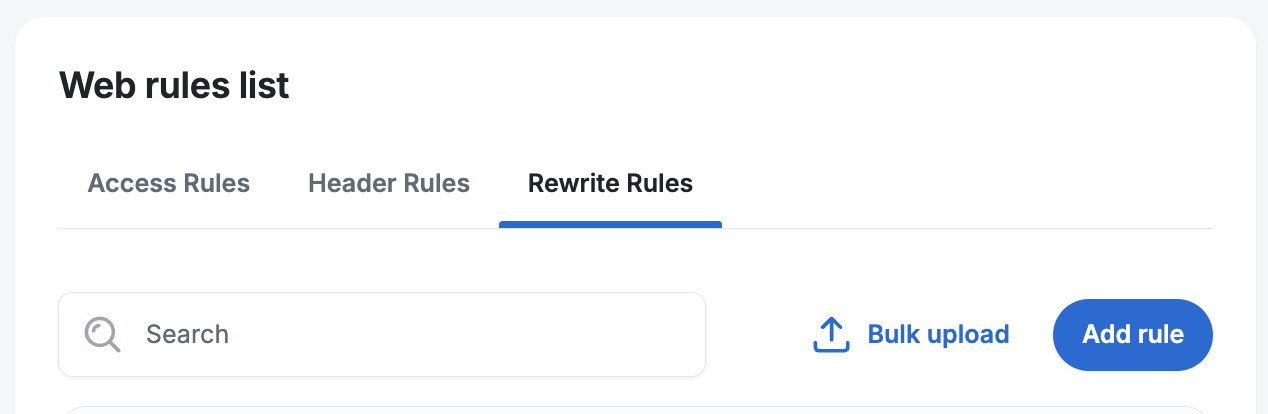
- Click the Add rule button.
- Fill out the rewrite rule form:
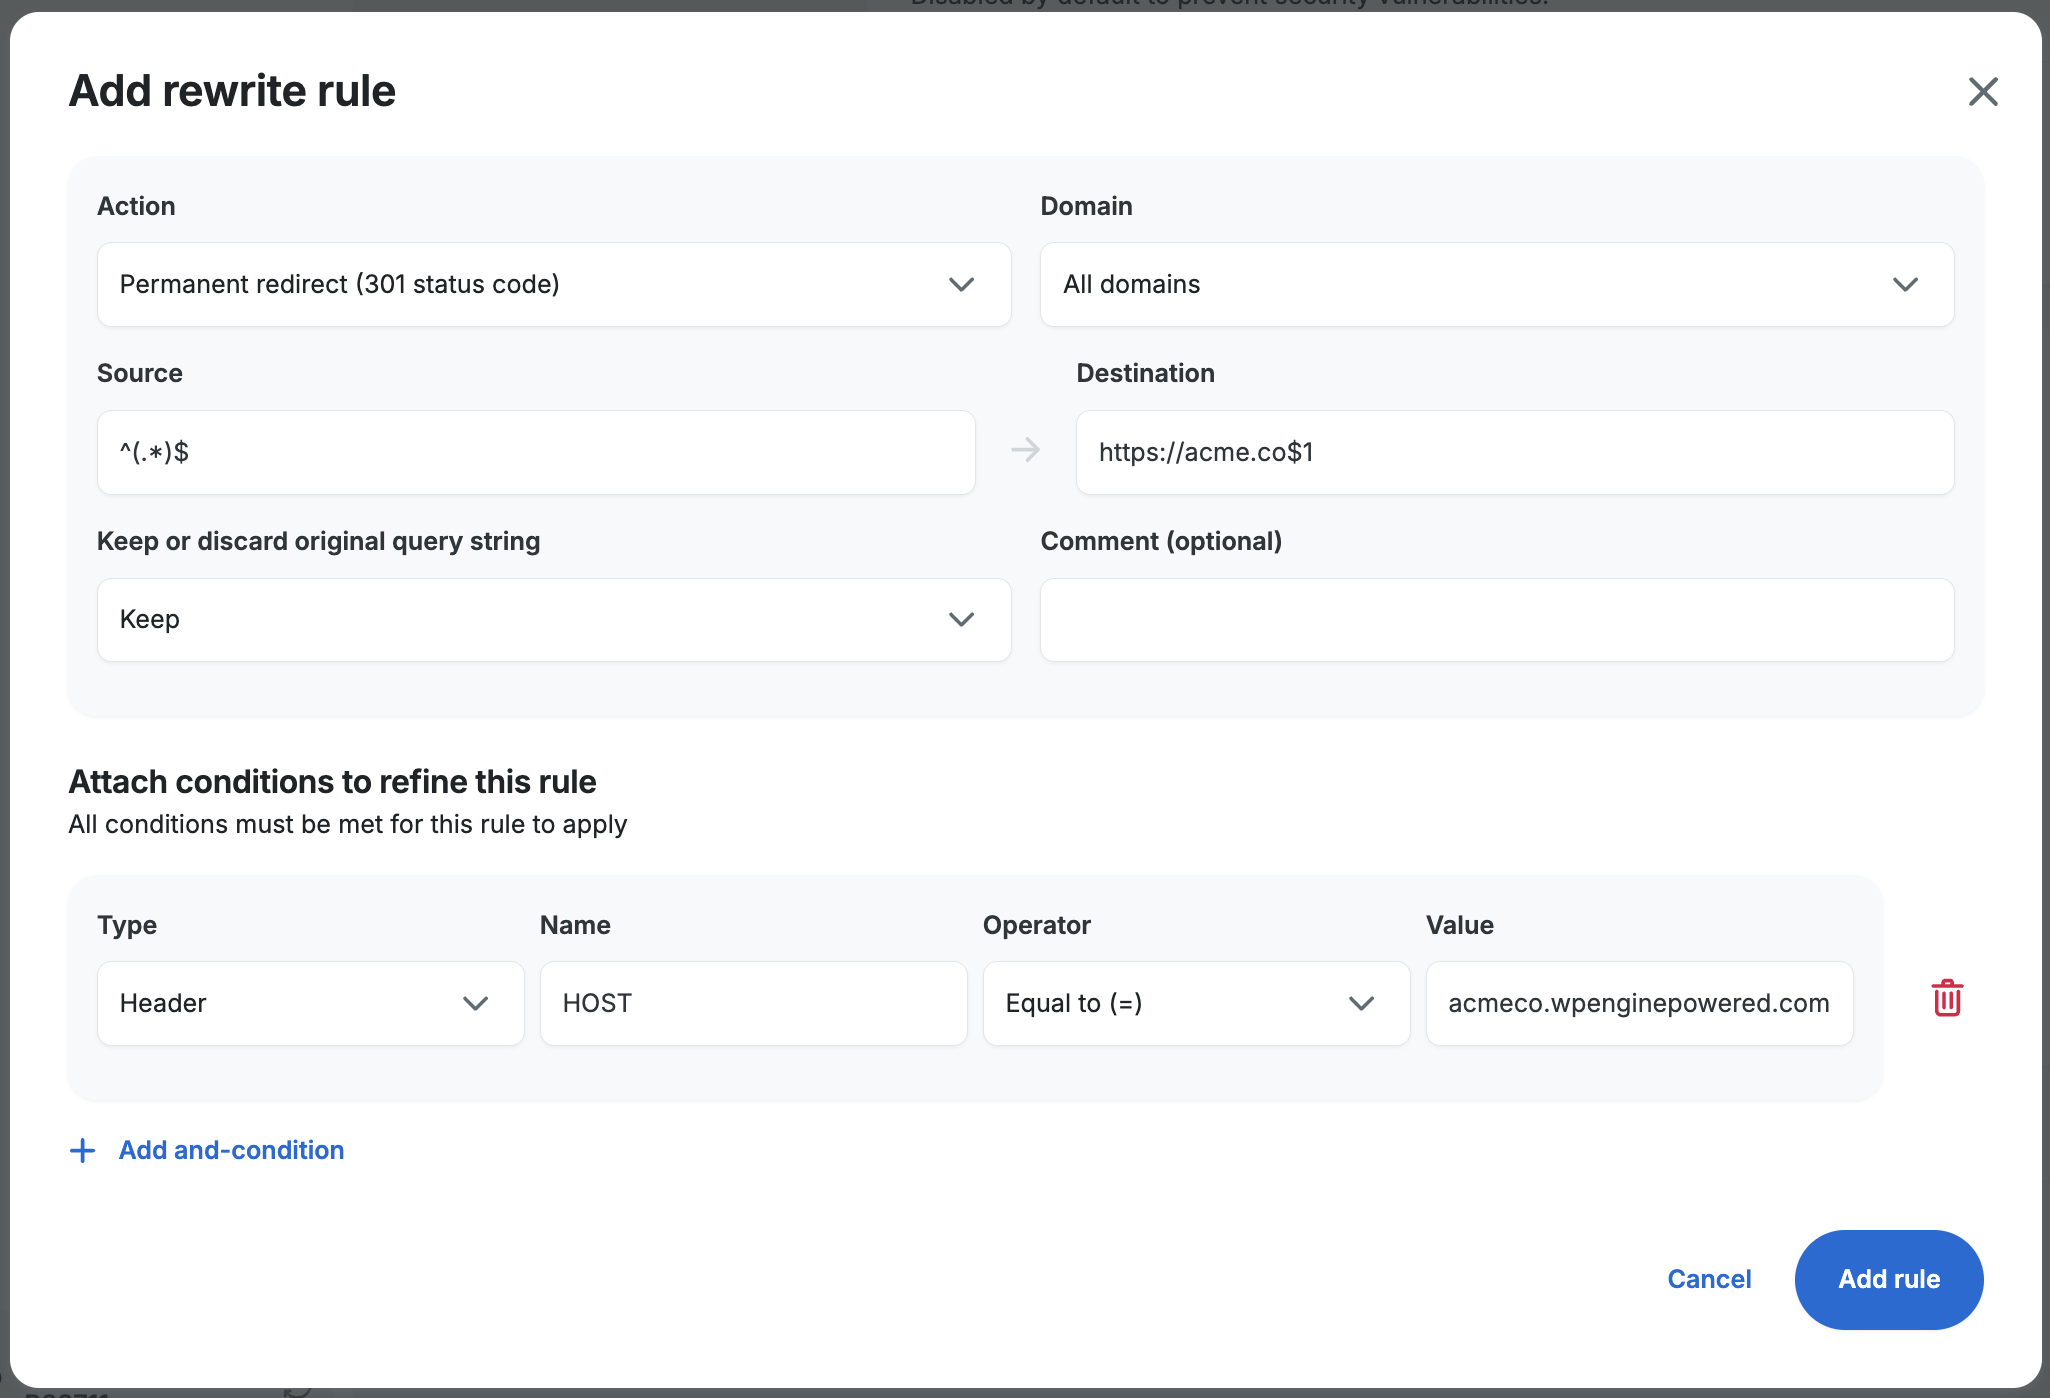
- Action: Permanent redirect (301 status code)
- Domain: All domains
- Source:
^(.*)$
Copy and paste the regex pattern above.^and$mark the beginning and end of the URL part that comes after the root domain name. The parens()signify a capture group which groups everything inside them for use in the destination URL..represents any character and*represents repeating the previous character any number of times. This accounts for any URL pattern that comes after yourdomain.com (e.g. yourdomain.com/about or yourdomain.com/contact). - Destination:
https://yourdomain.com$1
Copy the domain pattern above and replace yourdomain.com with your actual custom domain name. The$1at the end of the domain, appends the first capture group from your Source regex pattern. - Keep or discard query string: Keep
- Add and-condition: Click the Add and-condition button and use the following values for your condition. This will apply your Rewrite Rule, only to requests that meet this condition.
- Type: Header
- Name:
HOST - Operator: Equal to (=)
- Value:
environment.wpenginepowered.com
The Value field will be your temp WP Engine domain. Replace environment with your actual environment name. For example, if your environment name was acmeco then the value you would enter would be:acmeco.wpenginepowered.com
- Click the Add rule button to finish adding your rule.
Developer Docs
Custom examples and more technical information can be found in our Developer Docs:
Autoscale developer docs
To jump to specific sections follow the links below:
- WordPress configuration
Add a config file in your repo to define non-sensitive WordPress constants. - WordPress version
Learn how to specify your WordPress version. - Product compatibility
View compatibility for key products and features.
Deployment Pipeline Status
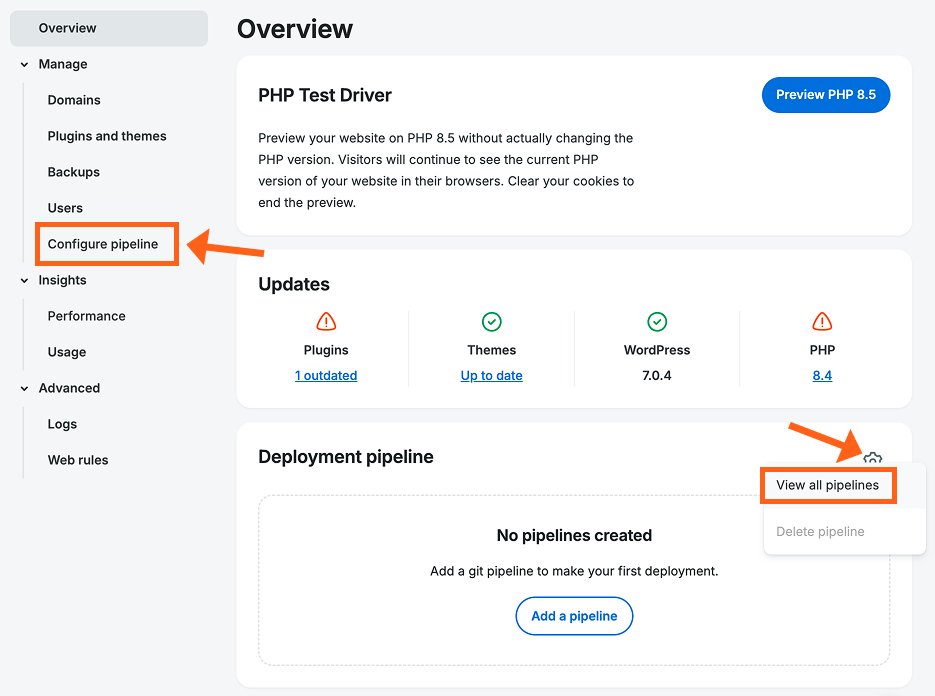
To view the Deployment Pipelines page, go to the overview page for any of your Autoscale environments and use one of the following two options:
- Go to Manage > Configure pipeline in the secondary lefthand menu.
- Find the Deployment pipeline section on the overview page, click the gear icon in the top right of the section, and select View all pipelines.
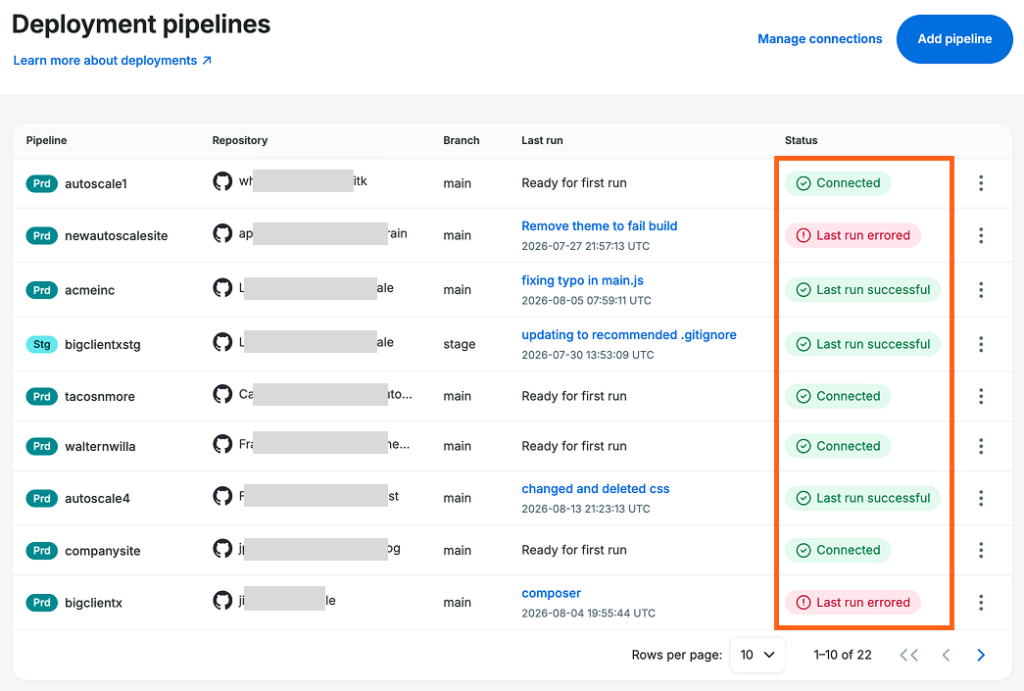
From the pipelines page, you’ll be able to see the following information about each deployment:
- Pipeline: This is the environment name and type.
- Repository: The GitHub user and repository name connected to this pipeline.
- Branch: The branch of the repository that triggers the deployment for this pipeline.
- Last run: The commit message of the last deployment, with a link to the commit.
- Status: The status will show if your repo has been successfully connected, or if the latest deployment is in progress, or if it was successful, or if an error prevented the deployment.
SSH for Autoscale
When connected to your Autoscale site via SSH (Secure Shell), the commands that you can run will be different than other WP Engine sites since none of the folder paths are writable outside of the /wp-content/uploads/ folder. Any commands that try to write to other folders will not work.
The steps to connect to your site via SSH will be the same except for the connection URL itself which uses a different subdomain.
- Generate an SSH key on your computer to allow it to connect to your account. The steps are outlined here:
Generate New SSH Key - Add a reference to your new key in the SSH config file on your computer. The steps to add or edit your SSH config file are outlined here:
SSH Config File
Important: When you add the reference in your config file make sure to copy the applicable lines below instead of what is in the linked article above since you must use the unique subdomain for Autoscale SSH.
Mac:Host *.ssh.as.wpengine.net
IdentityFile ~/.ssh/wpengine_ed25519
IdentitiesOnly yes
Windows: (make sure to switch out your USERNAME in the IdentityFile path)Host *.ssh.as.wpengine.net
IdentityFile C:\Users\USERNAME\.ssh\wpengine_ed25519
IdentitiesOnly yes - Add your SSH key to your WP Engine user profile. The steps to add your key in the User Portal are outlined here:
Add SSH Key - Open a terminal app on your computer and enter the SSH connection command with your URL. In the URL make sure to switch out ENVIRONMENT_NAME with the environment name for your site. You can see your unique environment name in the URL when you are viewing the overview page for your environment in the WP Engine User Portal. In the below example overview page URL, the environment name is:
mybrandnewsite
https://my.wpengine.com/installs/mybrandnewsite
The SSH connection command:ssh ENVIRONMENT_NAME@ENVIRONMENT_NAME.ssh.as.wpengine.net
Autoscale Usage
The usage page for an environment shows data about scaling events. To view the usage page go to Insights > Usage, in the secondary lefthand menu of the overview page for any environment.
On the environment level usage page you’ll see a snapshot of capacity units and page requests, and also graphs and tables that go into further detail about capacity units.
For the snapshot overview you can choose dates ranges of past 30 days, current billing cycle, or a custom 30 day range. For the capacity units tables and graphs you can choose date ranges of past 7 days, or past 30 days.
A Capacity unit is a unit of resources that is either an application resource, or a SQL proxy resource. Your site scales application units and SQL proxy units during traffic spikes to manage performance. Each scale up event scales up either application or SQL proxy units and can add multiple capacity units per scale up event.
Capacity Unit Details
The detail section about capacity units for an environment’s usage includes the following 3 tabs:
- Trends: The trends show the relationship between page requests and the different types of scaled up capacity units.
- Usage intensity: The graphs for intensity show the number of hours spent at different intensity levels, and the total number of scaled up capacity units at each intensity level. The 4 defined intensity levels are:
- Low: 1-34 CU/hr
- Medium: 35-75 CU/hr
- High: 76-168 CU/hr
- Very high: 169+ CU/hr
- Scaling event log: The event log entries show the capacity unit type, the event type, and the starting and ending number of capacity units for the event. There is also an option to download a CSV file of the event log.
Autoscale Performance
The performance page shows info about the intensity of the traffic for your Autoscale site. To view the performance page go to Insights > Performance, in the secondary lefthand menu of the overview page for any environment.
The graphs can be viewed in time ranges of last 7 days, or last 30 days.
There is also a Download CSV option at the top of this page. This will show you a popup with an option to select which of the graph metrics that you want to download.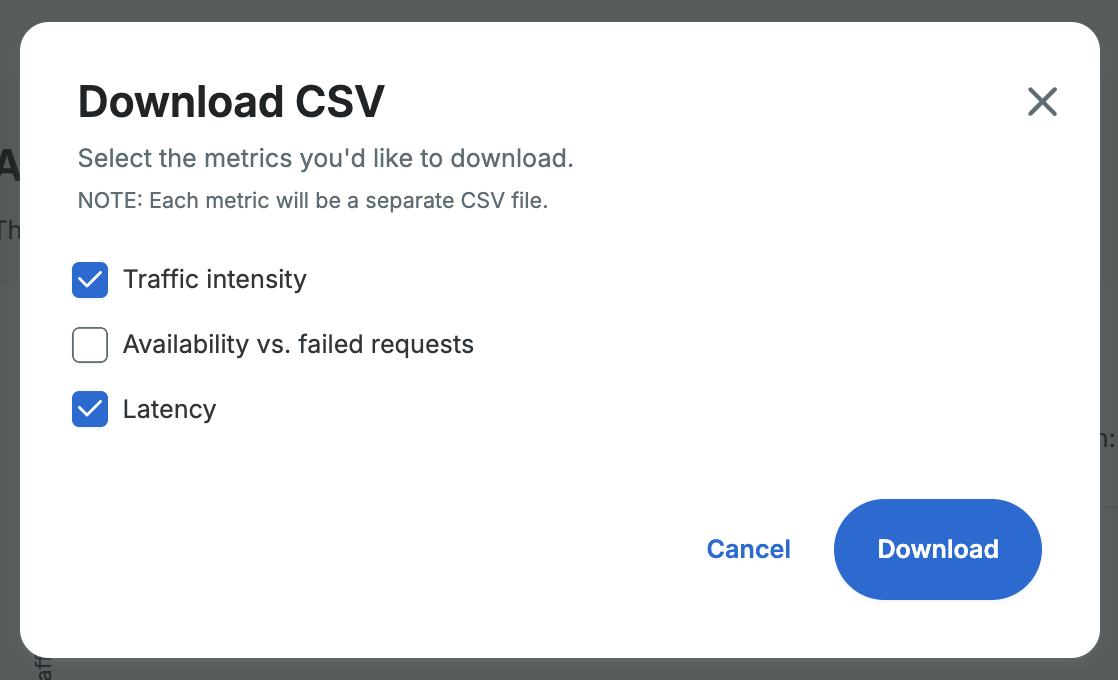
The graphs for the performance page include:
- Traffic intensity: Measures traffic intensity in requests per second (RPS), showing the duration your site spent at different volume levels.
- Availability vs. failed requests: Displays the relationship between server availability and the number of requests that could not be fulfilled.
- Latency: Measures server responsiveness in milliseconds (ms) to show how quickly your site starts loading for users.
Error and Access Logs
The Logs page has tabs for Error and Access logs. To view the Logs page go to Advanced > Logs, in the secondary lefthand menu of the overview page for any environment.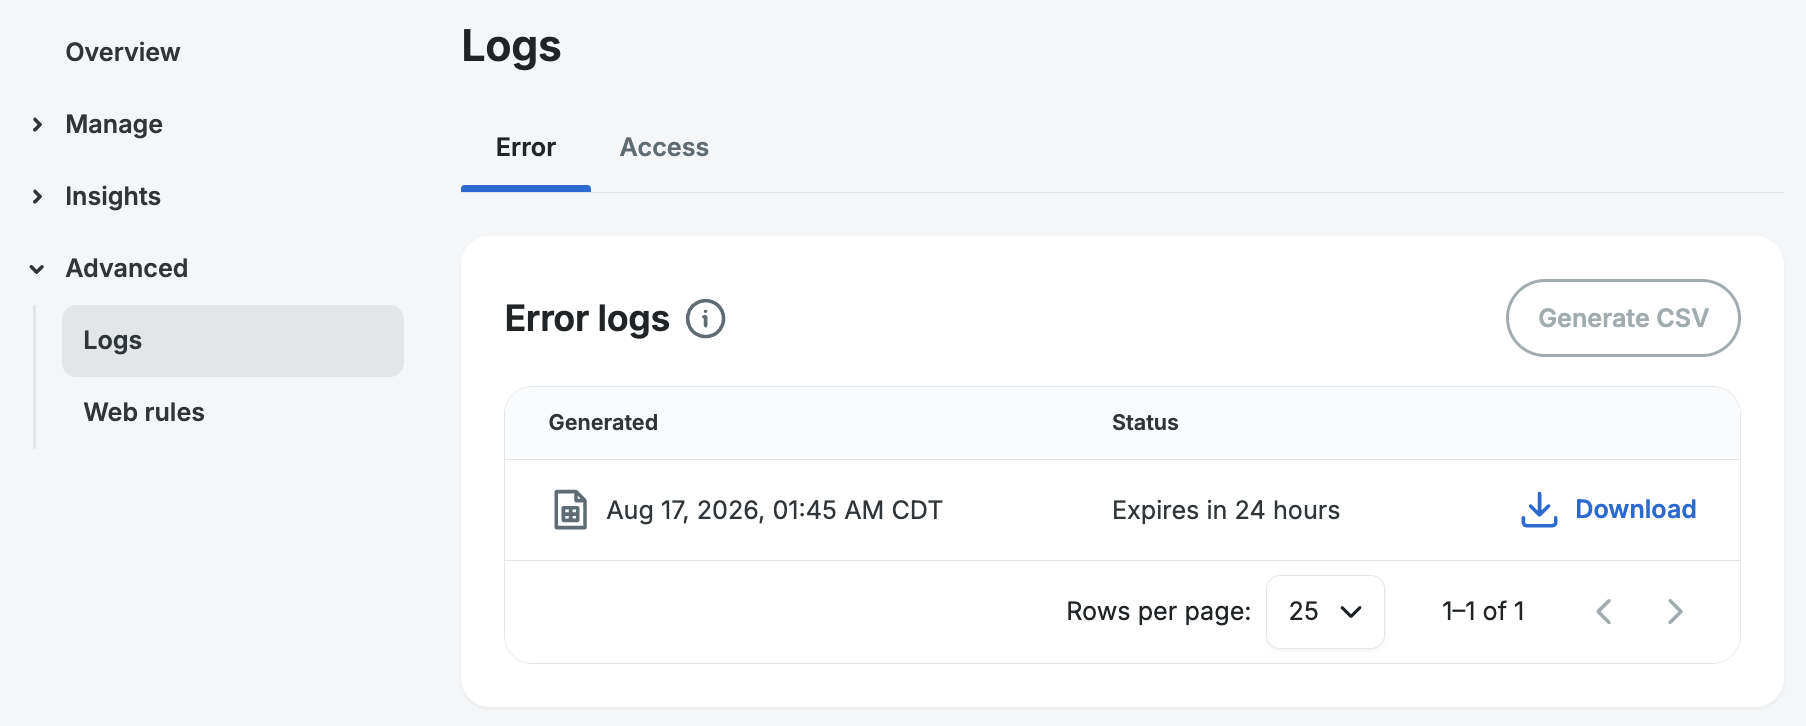
The error and access log tabs each have an option to generate a CSV download link. The CSV will show up to 20 million of the most recent log entries for the last 72 hours. The download link will expire in 24 hours, and you must wait at least 5 minutes between generating download links.
Autoscale FAQs
What are some products and features that are incompatible with Autoscale sites?
View our developer docs to see compatibility for key products and features
Can I transfer Autoscale sites to another account?
The ability to transfer sites to another account is currently not available for Autoscale accounts.
Since files are not writable, can I still upload media in the WordPress dashboard?
We’ve added a custom integration to assure that you can still upload media in the WordPress dashboard as you always have. Media uploaded in the WordPress dashboard will not show in the uploads folder of your GitHub repo.
Note: Plugins can write files to the /wp-content/uploads/ folder, but files in the uploads folder are not executable. It is also not recommended for plugins to make frequent writes to the uploads folder because it can cause performance issues.
Can I use Composer with Autoscale sites?
Composer is not yet supported for managing plugin and theme versions for Autoscale sites. However, you can currently add a composer.json file to the root directory of your repo to specify your WordPress version.
Read more in our developer docs
Can I use the LargeFS service with an Autoscale site?
No. LargeFS is not compatible with Autoscale sites.
Can I add custom nginx rules on an Autoscale site?
No. Custom Nginx rules are not supported on Autoscale sites.
Will varnish caching be used at the WP Engine server level?
No. Varnish caching will not be used at the server level. Autoscale sites will utilize Cloudflare edge caching.
Does the WP Engine Site Migration plugin work with Autoscale sites?
For Autoscale sites, the site migration plugin can only be used to transfer the uploads folder and the database.
Will staging and development environments share resources with the production environment?
Stg and Dev environments will get their own server instance.
Can I copy between environments (Stg, Dev, Prd) on Autoscale sites?
Since Autoscale files are read-only with the exception of the /wp-content/uploads/ folder, the Push/Pull feature in the User Portal will only be used to push or pull copies of the uploads folder and the database between environments. Code changes between environments are handled by pushing code to different branches in GitHub that have a pipeline set up in the User Portal to deploy to different WP Engine Autoscale environments.
Do I need to select a preferred WordPress update source for my Autoscale account?
Themes and plugins can only be updated in your repo through a deployment from your git pipeline, and WordPress core updates will be handled by WP Engine, so it is not necessary to choose a preferred update source for an Autoscale account.
Will I need to update WordPress core files in my repo?
No. WordPress core updates will be handled by WP Engine. WordPress core files should not be present in your repo.
Can I use the WP Engine’s older legacy DNS network?
No. Use of our Advanced Network or Global Edge Security (GES) network is required for Autoscale sites.