Transferring a Site to Another Account
Previously only transferable sites could perform a self-serve transfer without needing to contact our support team. Now you can self-serve transfers for any site. To complete a self-serve site transfer between accounts, Owner or Full(with billing) user permission is needed from both accounts. This can be a different user on each account, or one user that has permissions on both accounts.
We’ve also made some improvements to the transfer process like the ability to enable maintenance mode during the transfer and the automatic inclusion of all of the environments for a site when transferring. The environments for a “site” include production (PRD), staging (STG), and development (DEV).
Review the DNS and Product Extensions sections before moving on to the Start a Transfer section below.
DNS
For sites that require a migration all domains for a site must be using our Advanced Network or Global Edge Security (GES) network for DNS to be able to use the self-serve transfer process. No DNS update is needed when you are on our Advanced Network or GES.
Some examples of account transfers that would require a server migration:
- If either account is on a premium (Core or Enterprise) plan.
These plans all have their own dedicated server. - If the accounts are in different datacenter regions.
If you have a domain that needs to remain on our Legacy Network for DNS, then you can still have our support team initiate the transfer for you. DNS will need to be updated manually upon transferring if you are still on the Legacy Network.
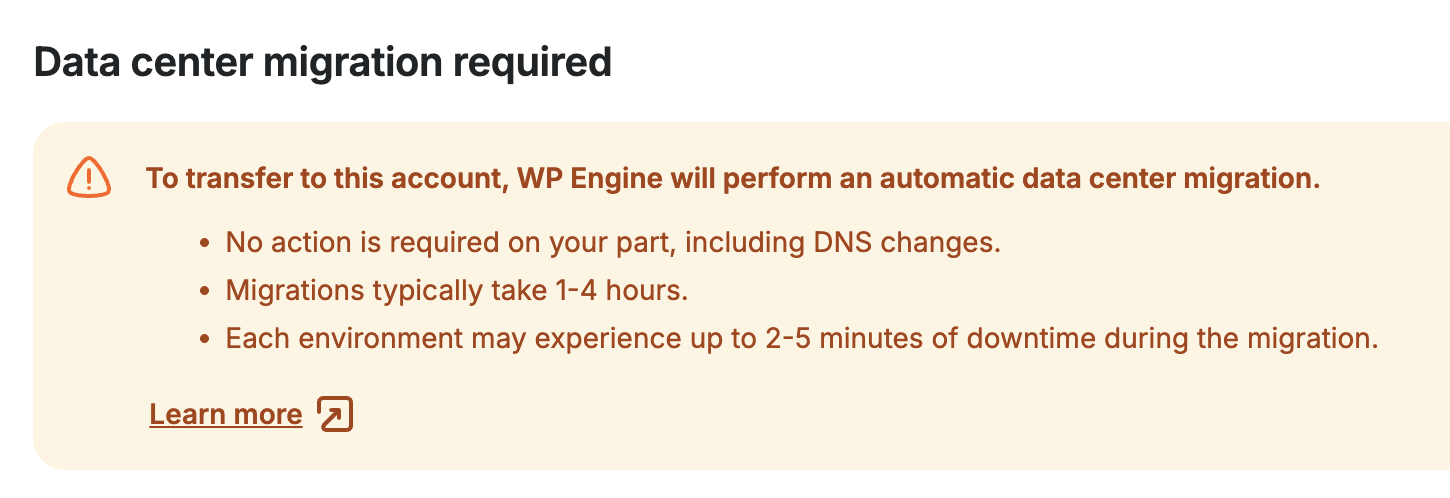
If it is detected that you need a server migration during the transfer process, and it is also detected that you need a DNS network change, you’ll see a message similar to the screenshot below:
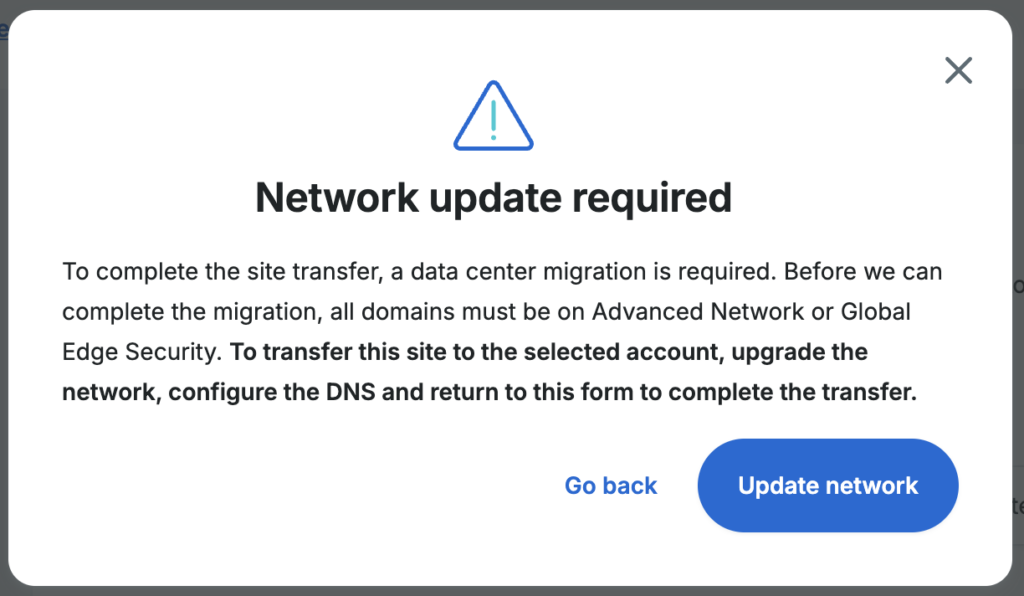
Product Extensions
Enabled product extensions must be reactivated on the destination account. Note that some product extensions will lose their settings and historical data, while others retain this data when the site is transferred. You will see a list of extensions that need your attention, during the transfer process outlined below.
Start a Transfer
There are two scenarios for completing a self-serve site transfer to another account.
- You have Owner or Full (with billing) user permissions on both accounts.
- Skip the instructions for the Destination Account, and proceed to the instructions for the Source Account below.
- You only have Owner or Full (with billing) user permissions on one account and you need to coordinate with a user on the other account.
- The user of the destination account should follow the instructions for the Destination Account below, and the user of the source account should follow the instructions for the Source Account below.
Note
Sandbox sites cannot be transferred to another account. If you want to transfer a sandbox site then it will need to be converted to a billable site.
Destination Account
When users from two accounts need to coordinate for the transfer, there are separate instructions for the user of the destination account.
- In the User Portal use the account switcher at the top of the sidebar to select the destination account for the site being transferred.
- Click the Settings link in the sidebar.
- On the account settings page, toggle on the button next to the label:
Allow site transfers via transfer code. - Copy the transfer code and give it to the user of the source account.
Users with this code will be allowed to transfer a site to your account.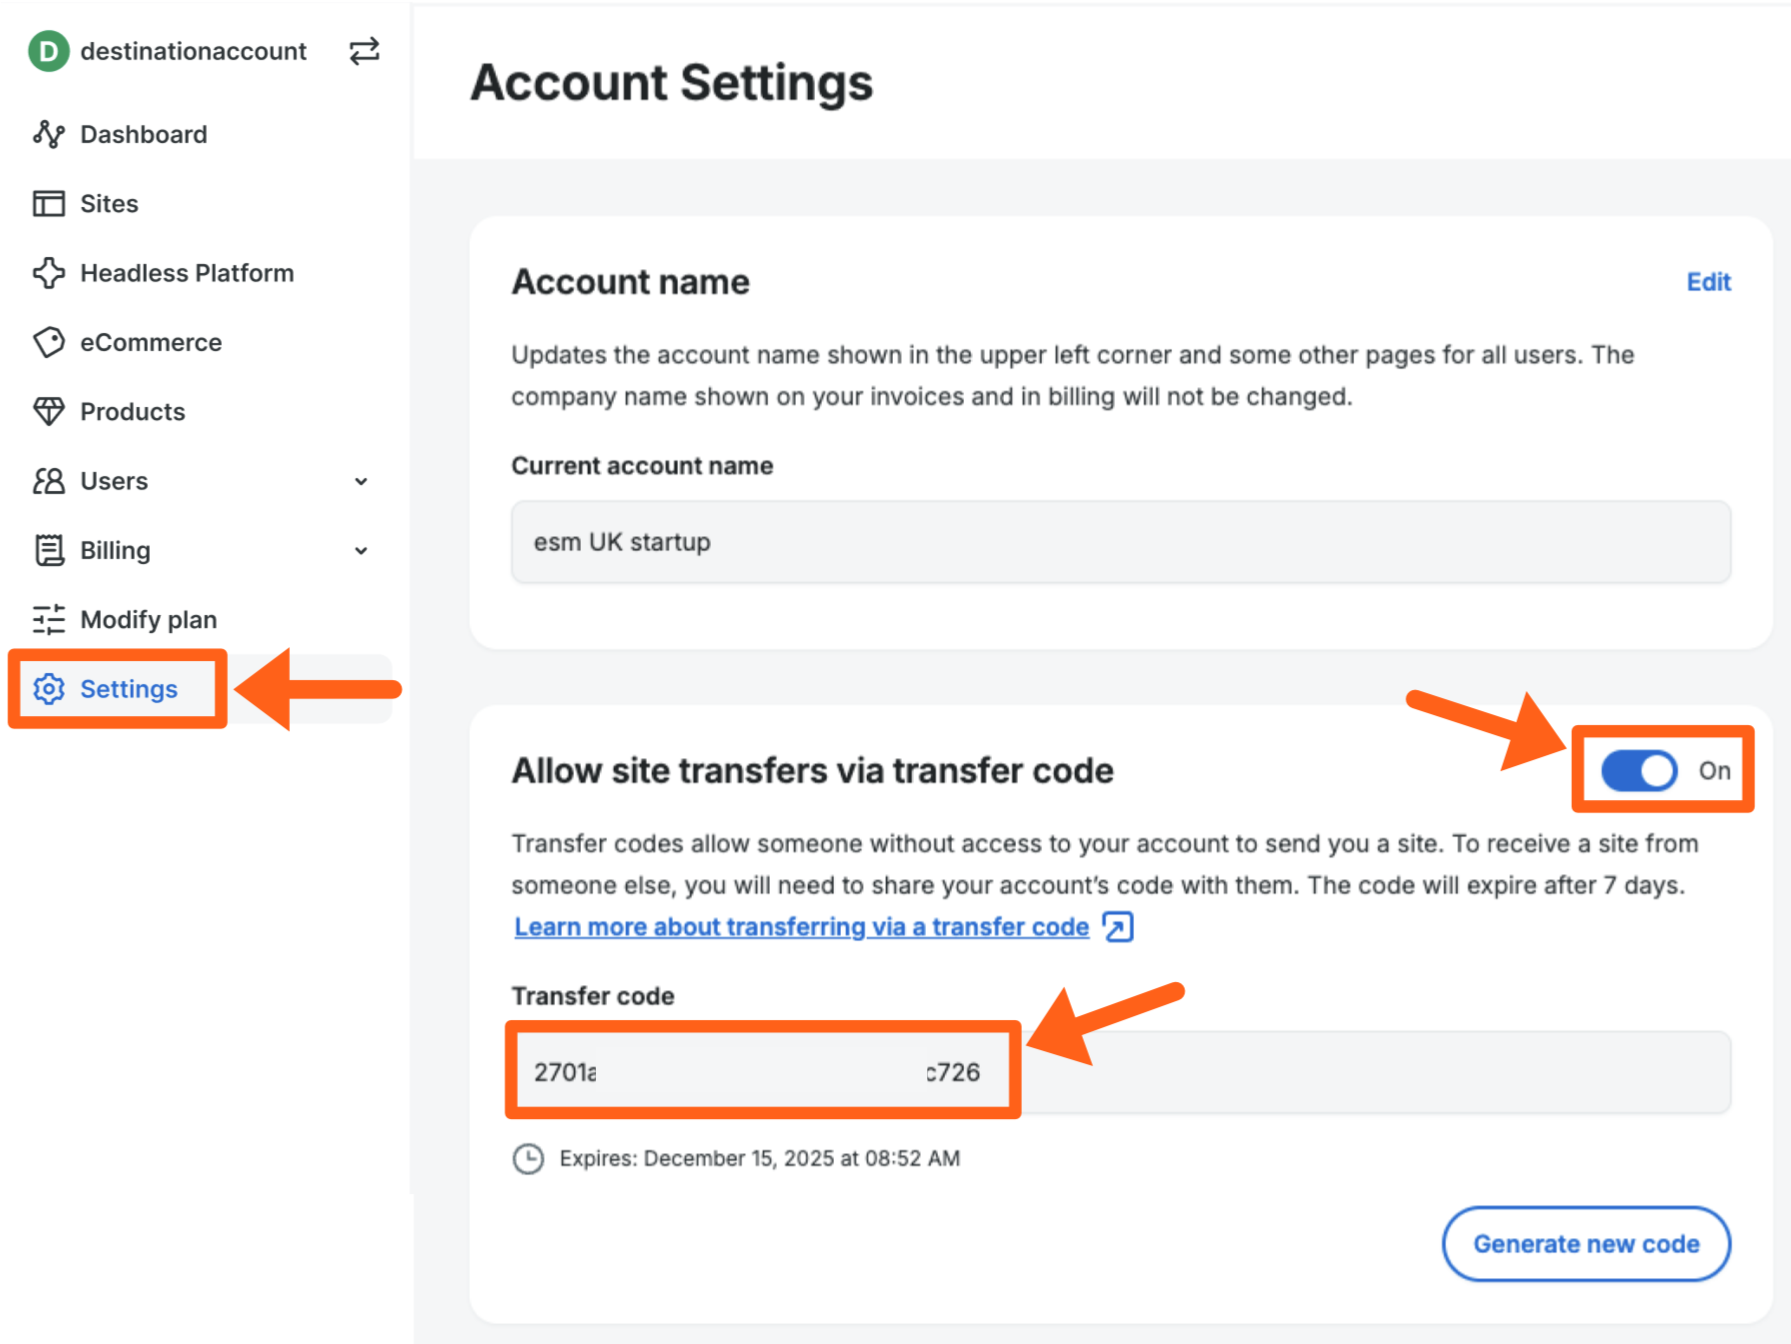
Source Account
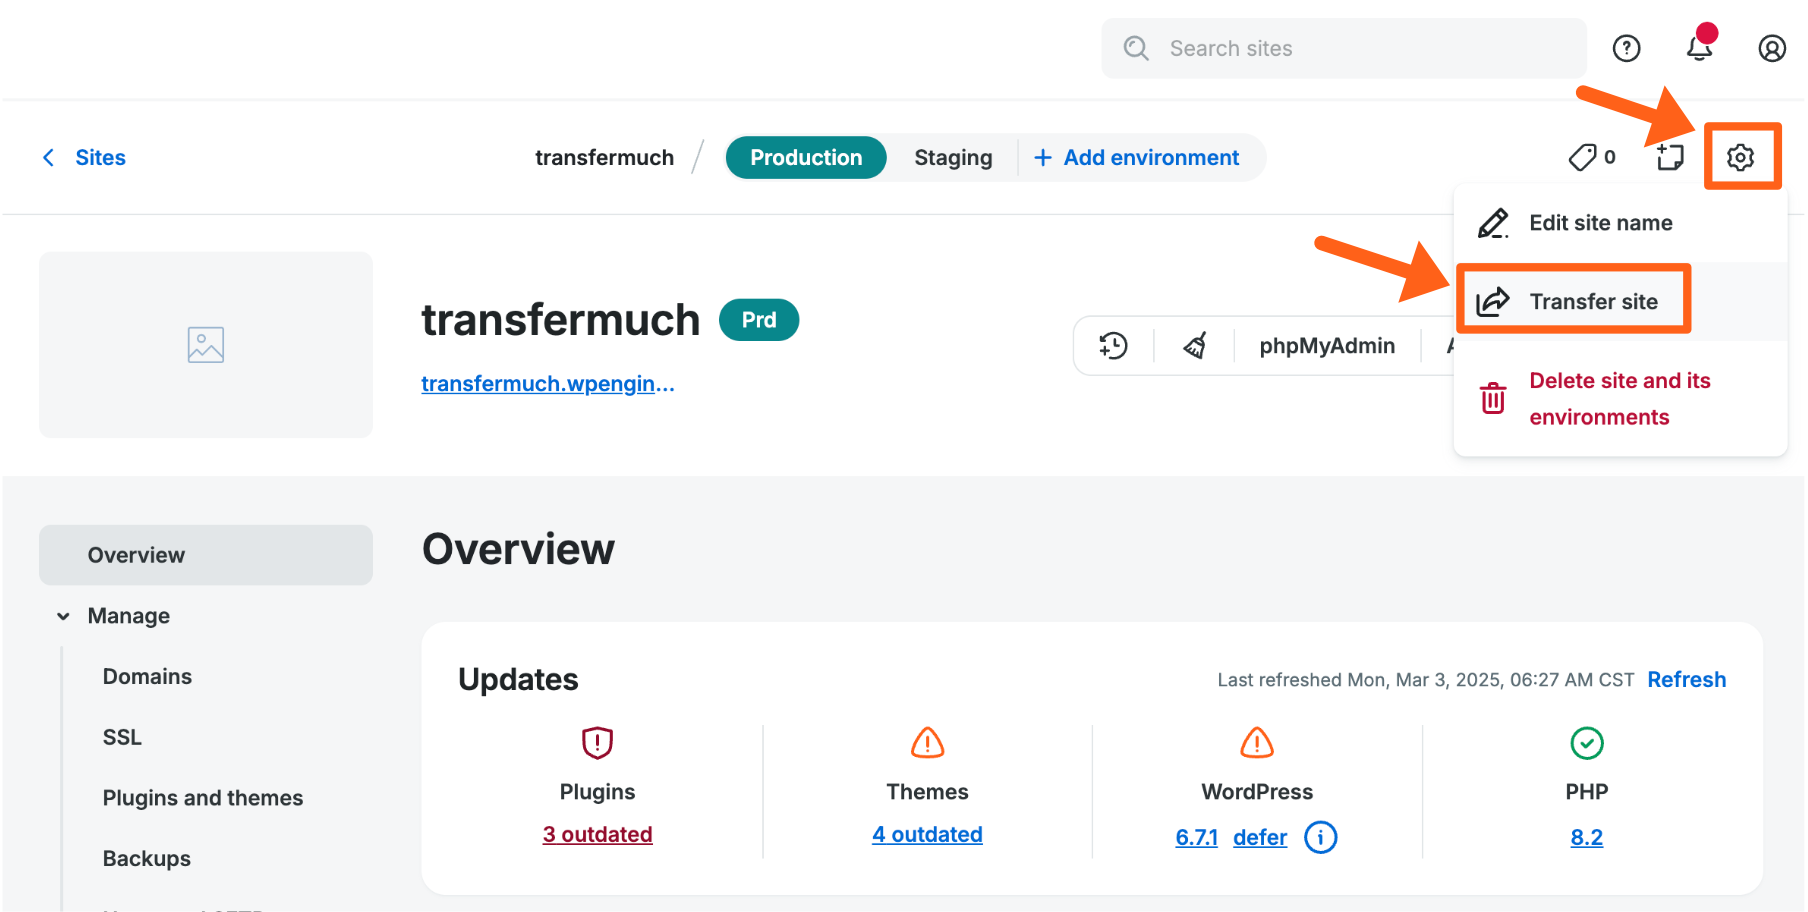
- Go to the Overview page for the site that you want to transfer.
- Click the gear icon near the top right of the page.
- Select Transfer site.
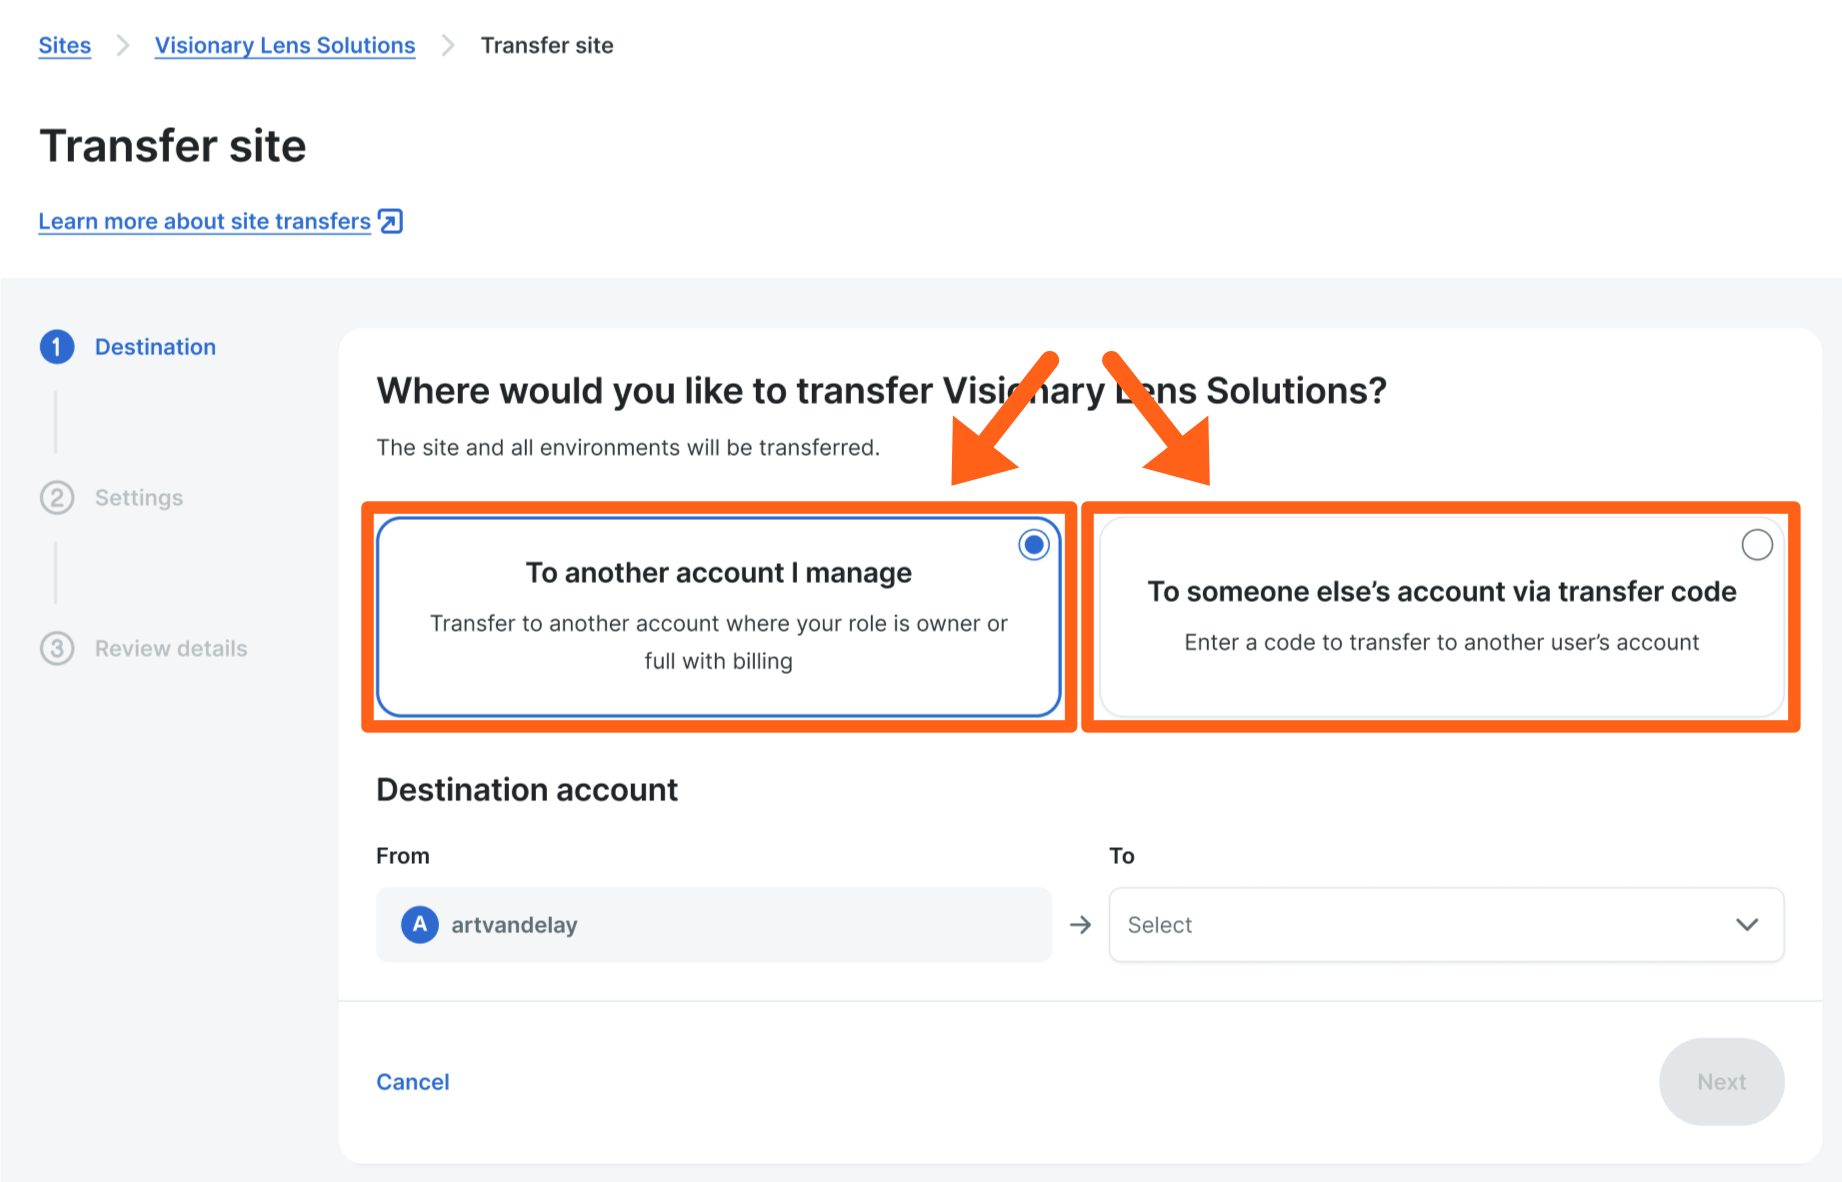
- Select one of the two transfer scenarios that applies to you.
- To another account I manage: Select this option if you have Owner or Full(with billing) user permissions on both the source and destination accounts.
- To someone else’s account via transfer code: Select this option if you do not have Owner or Full(with billing) user permissions on the destination account, and a user from the destination account has given you a transfer code.
- There are two options for this step based on your selection from the previous step:
- If you chose to transfer to another account that you manage, then select a destination account from the dropdown menu as pictured above.
- If you chose to transfer to someone else’s account, enter the transfer code you were given and then click the Find button.
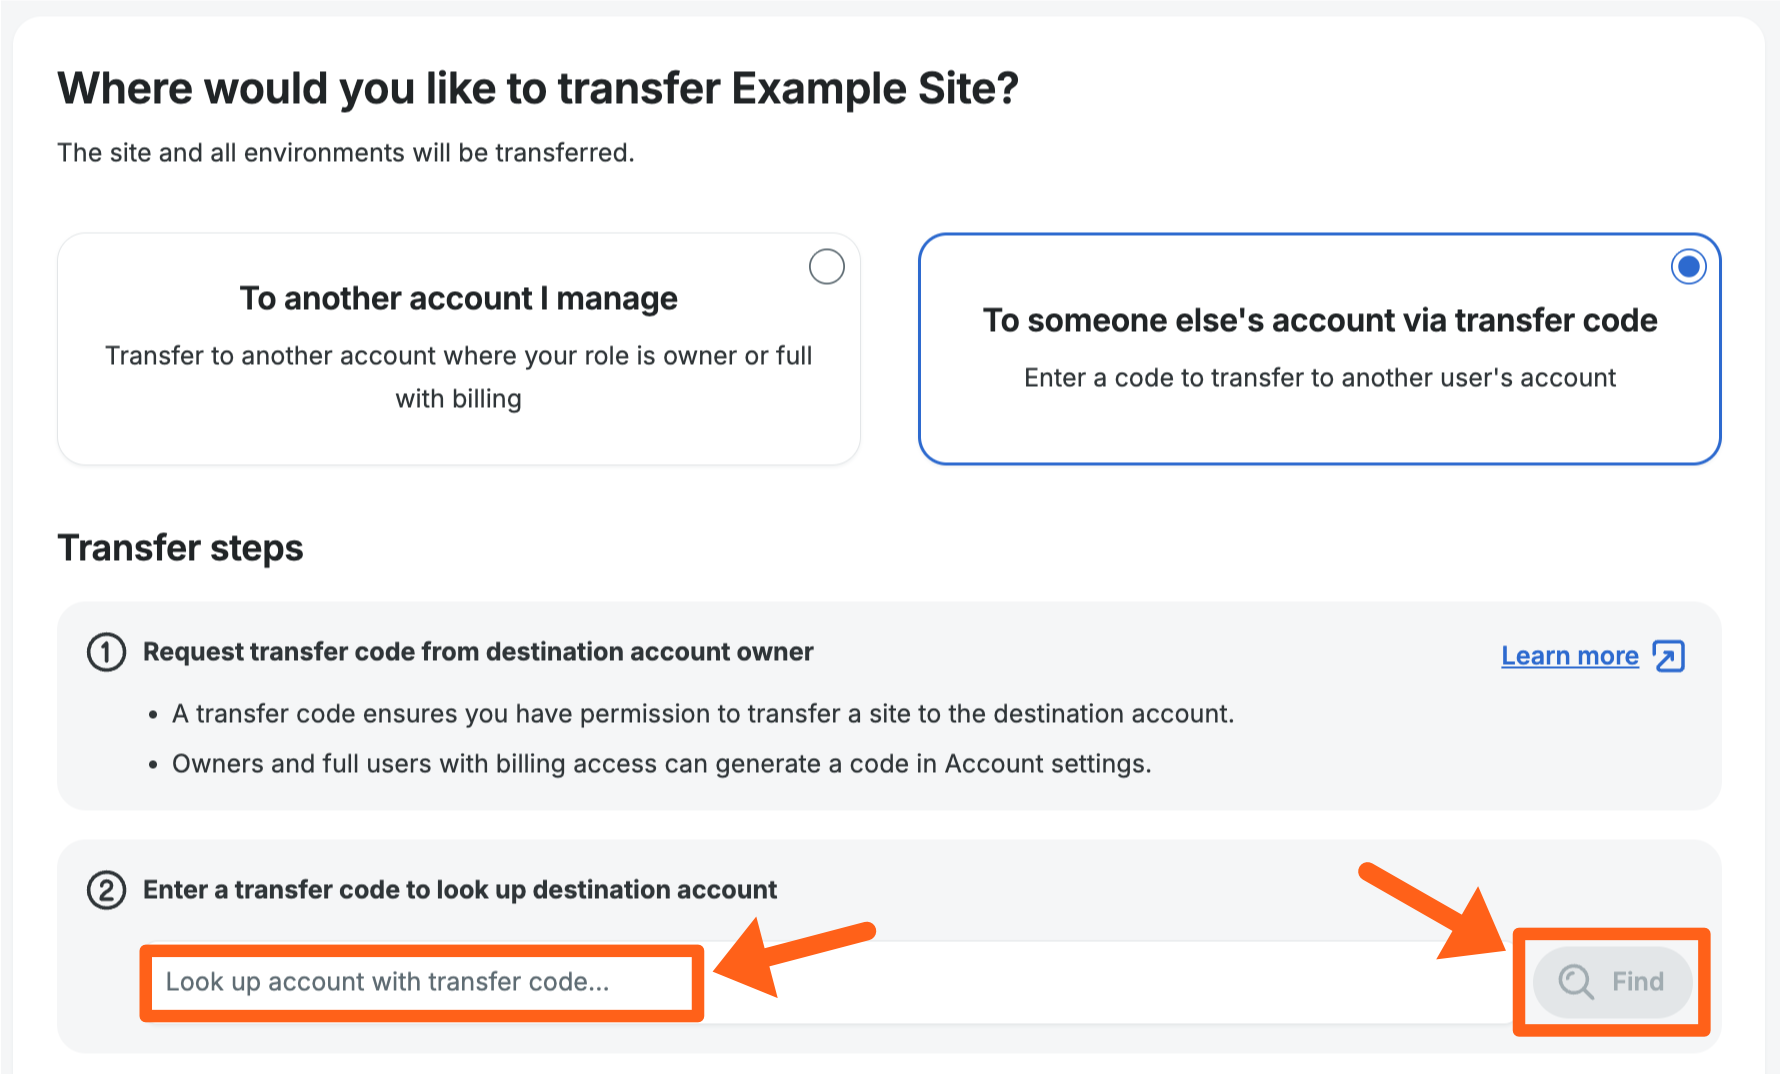
- You should then see the correct destination account populated in the To field.

- You should then see the correct destination account populated in the To field.
- If a migration to a new server is necessary you will see a message similar to the screenshot below.
- In the above case where a server migration is needed, select whether you want maintenance mode to be enabled during the migration as shown in the screenshot below.
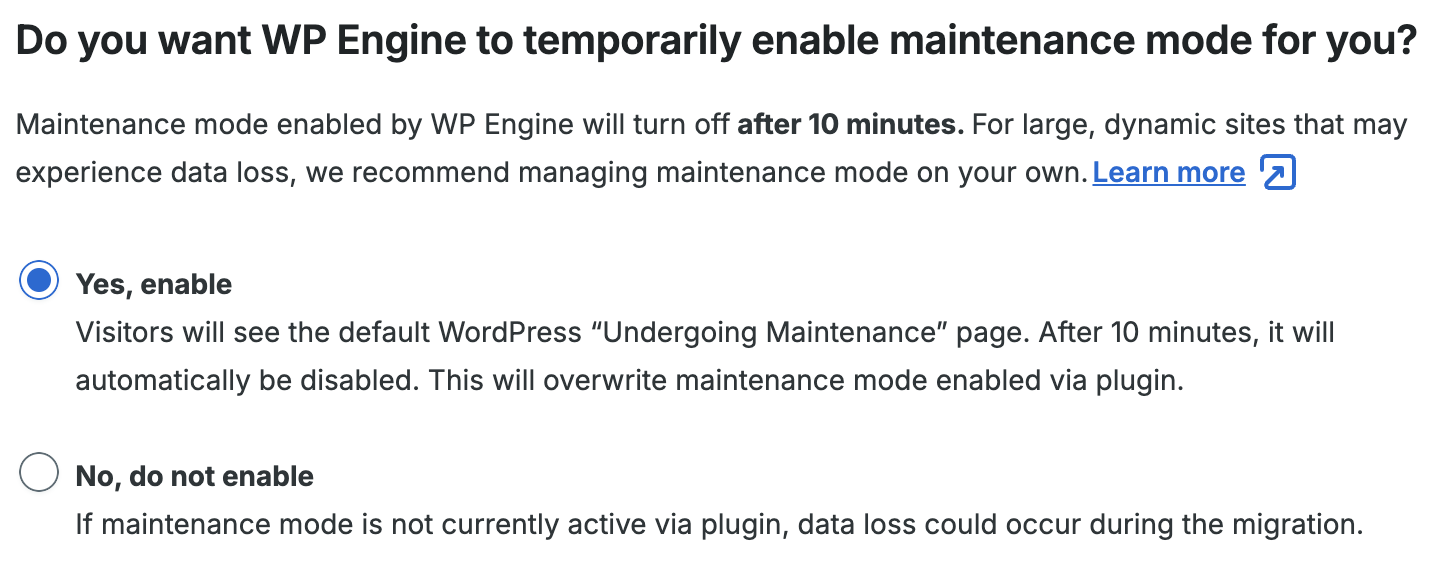
Note: When the migration begins, maintenance mode will only be active for 10 minutes and then automatically deactivate. If you think your migration will take a long time due to the size of your site and you want the maintenance mode to persist longer than 10 minutes, you can select “No, do not enable” here, and then manually enable and disable maintenance mode yourself with a maintenance mode plugin.
- In the above case where a server migration is needed, select whether you want maintenance mode to be enabled during the migration as shown in the screenshot below.
- Click the Next button to proceed to the Settings section.
- Adjust the settings for the transfer.
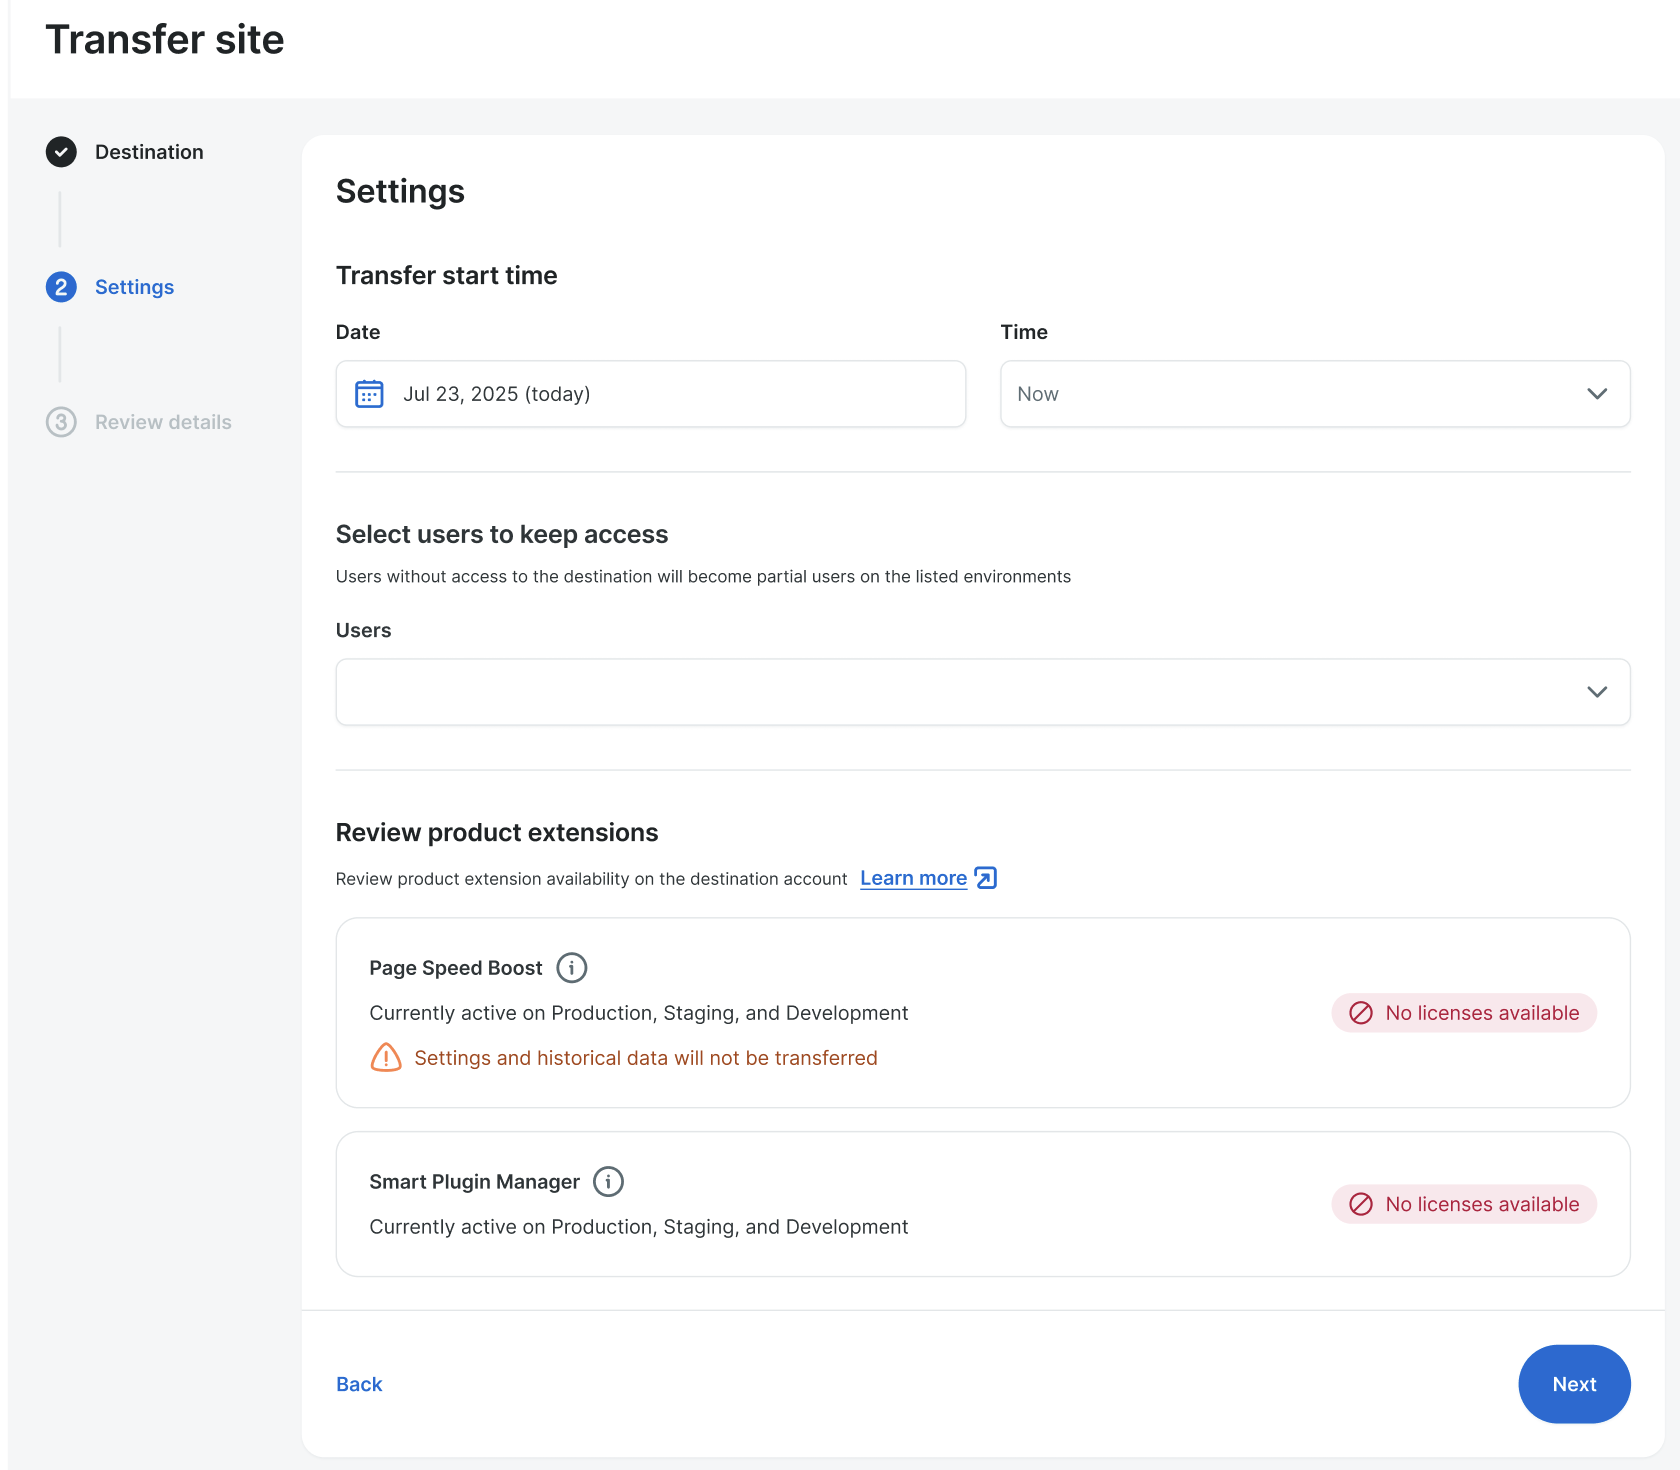
- Select a date and time for the site to be transferred.
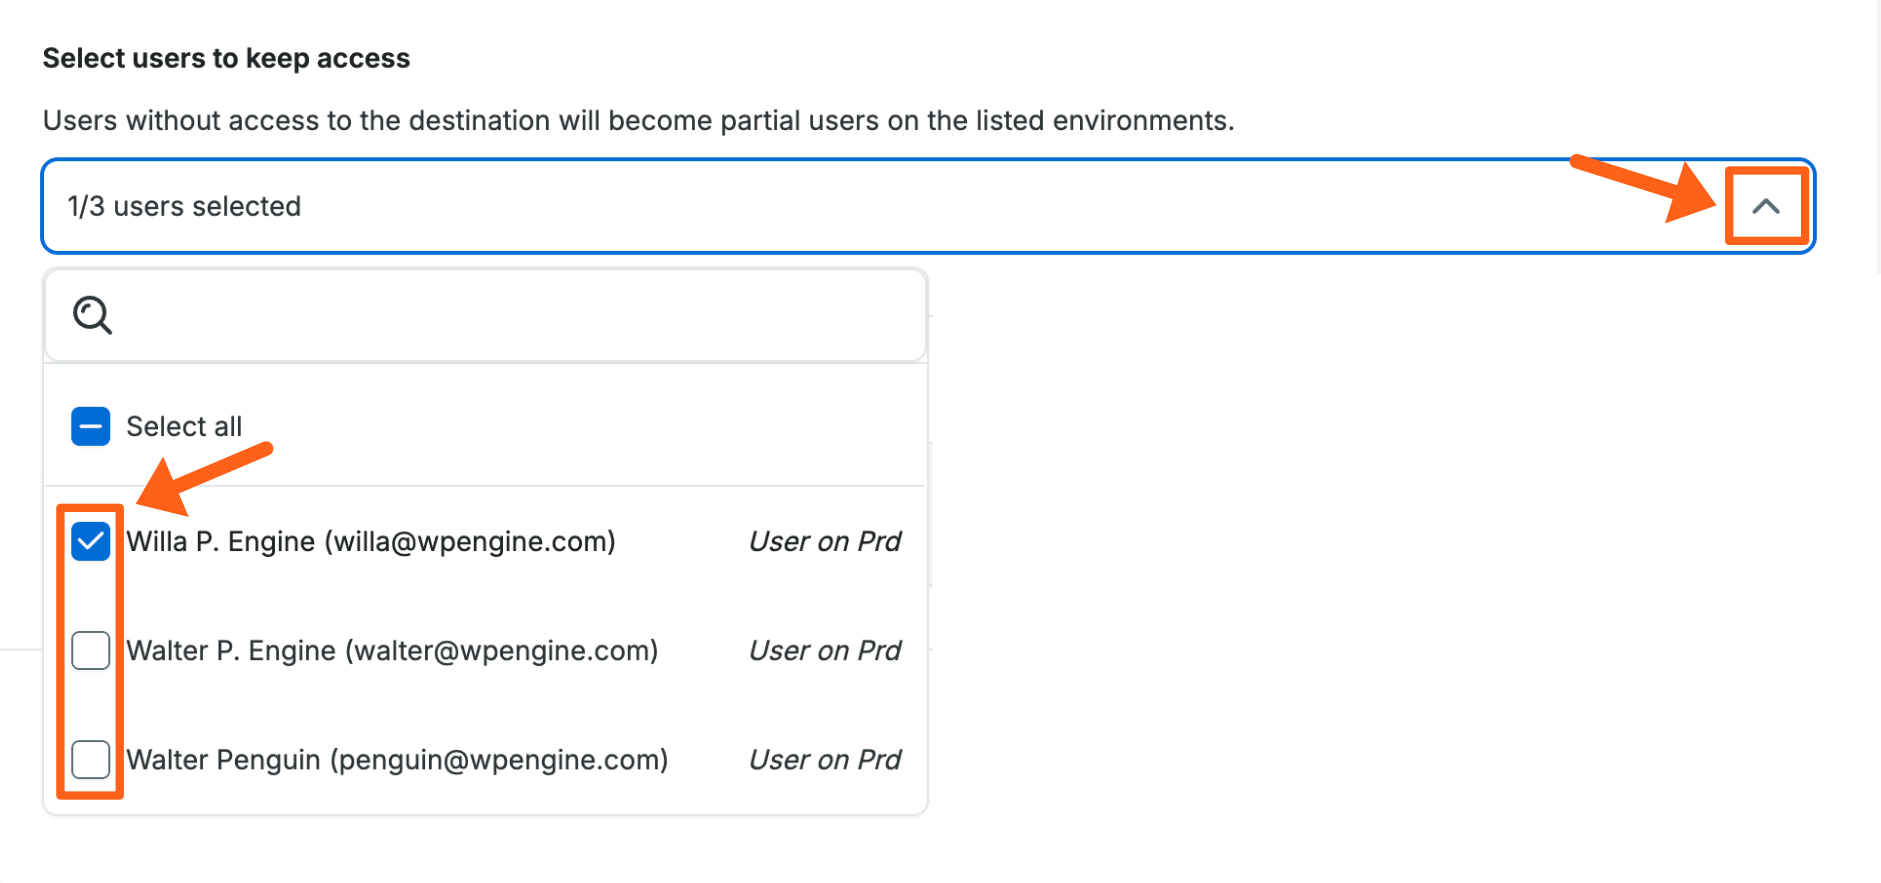
- Select users to keep access – If you have Owner or Full(with billing) user permissions on the destination account, you will see an option to select users that you want to retain access to the site on the new account. All users with access to the site on the source account will be shown in the dropdown list. If any of the selected users do not yet have access to the destination account, they will be added as a Partial user and granted access to just the site being transferred. If a user already has Full or Owner access to the destination account, then it doesn’t matter if they are selected in the dropdown. They will retain their current user level on the destination account and have access to the site.
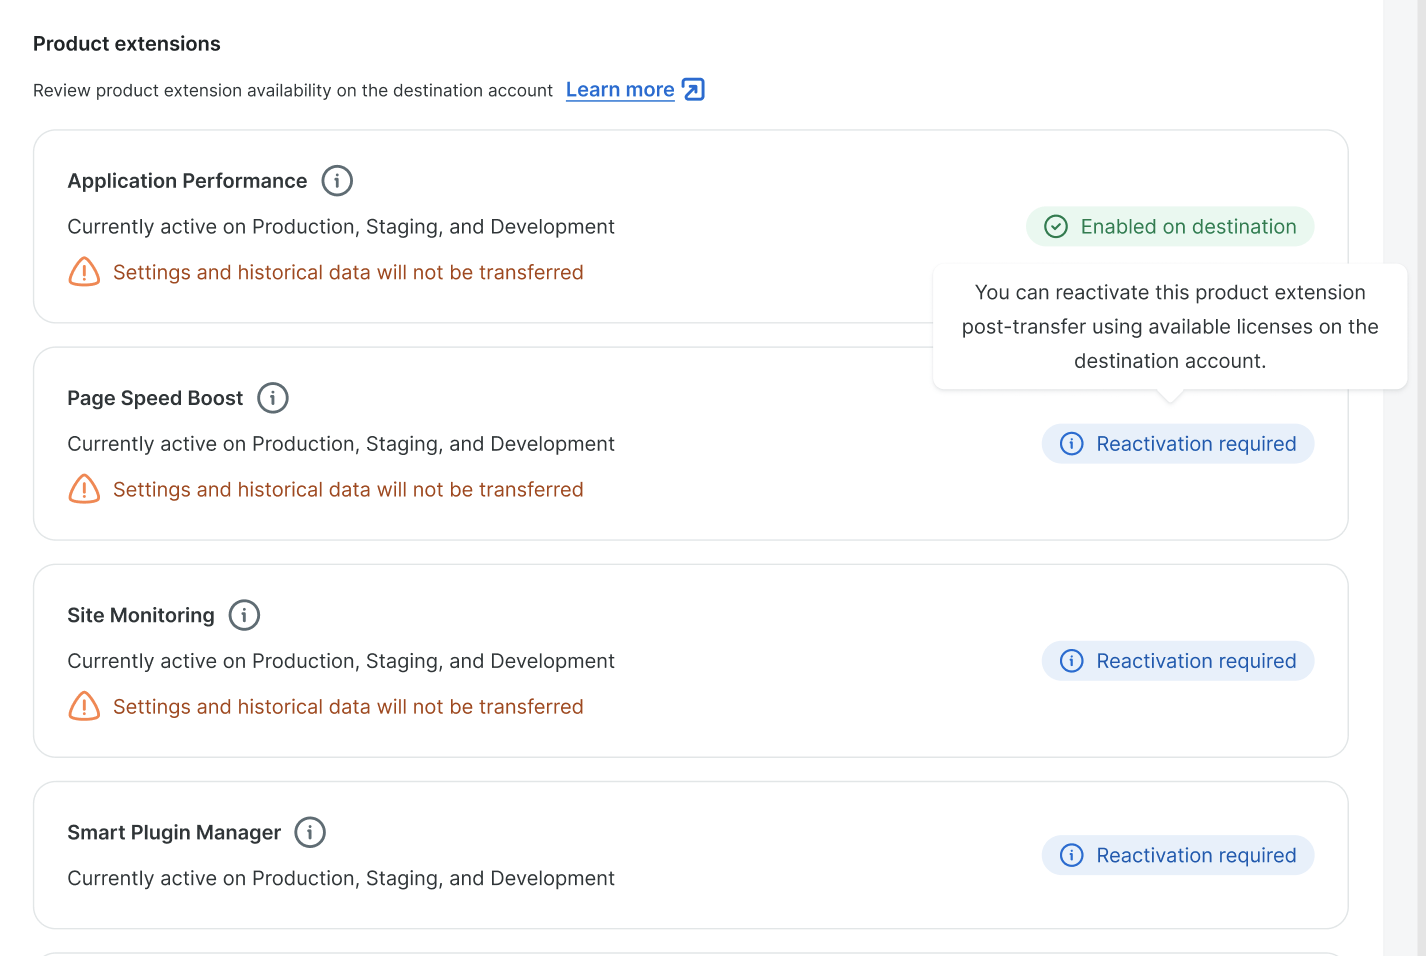
- Product extensions – If you have Owner or Full(with billing) user permissions on the destination account, you will see a section outlining extensions that must be reactivated on the destination account. This section is read only and will show you reactivation details for all of the current product extensions on the source account so you can decide which extensions that you need to add to the destination account. When you hover over the label to the right of each extension you’ll see a tooltip with more info as shown in the screenshot below.
- Review the transfer details including migration notice, environments, source and destination accounts, maintenance mode, and users.
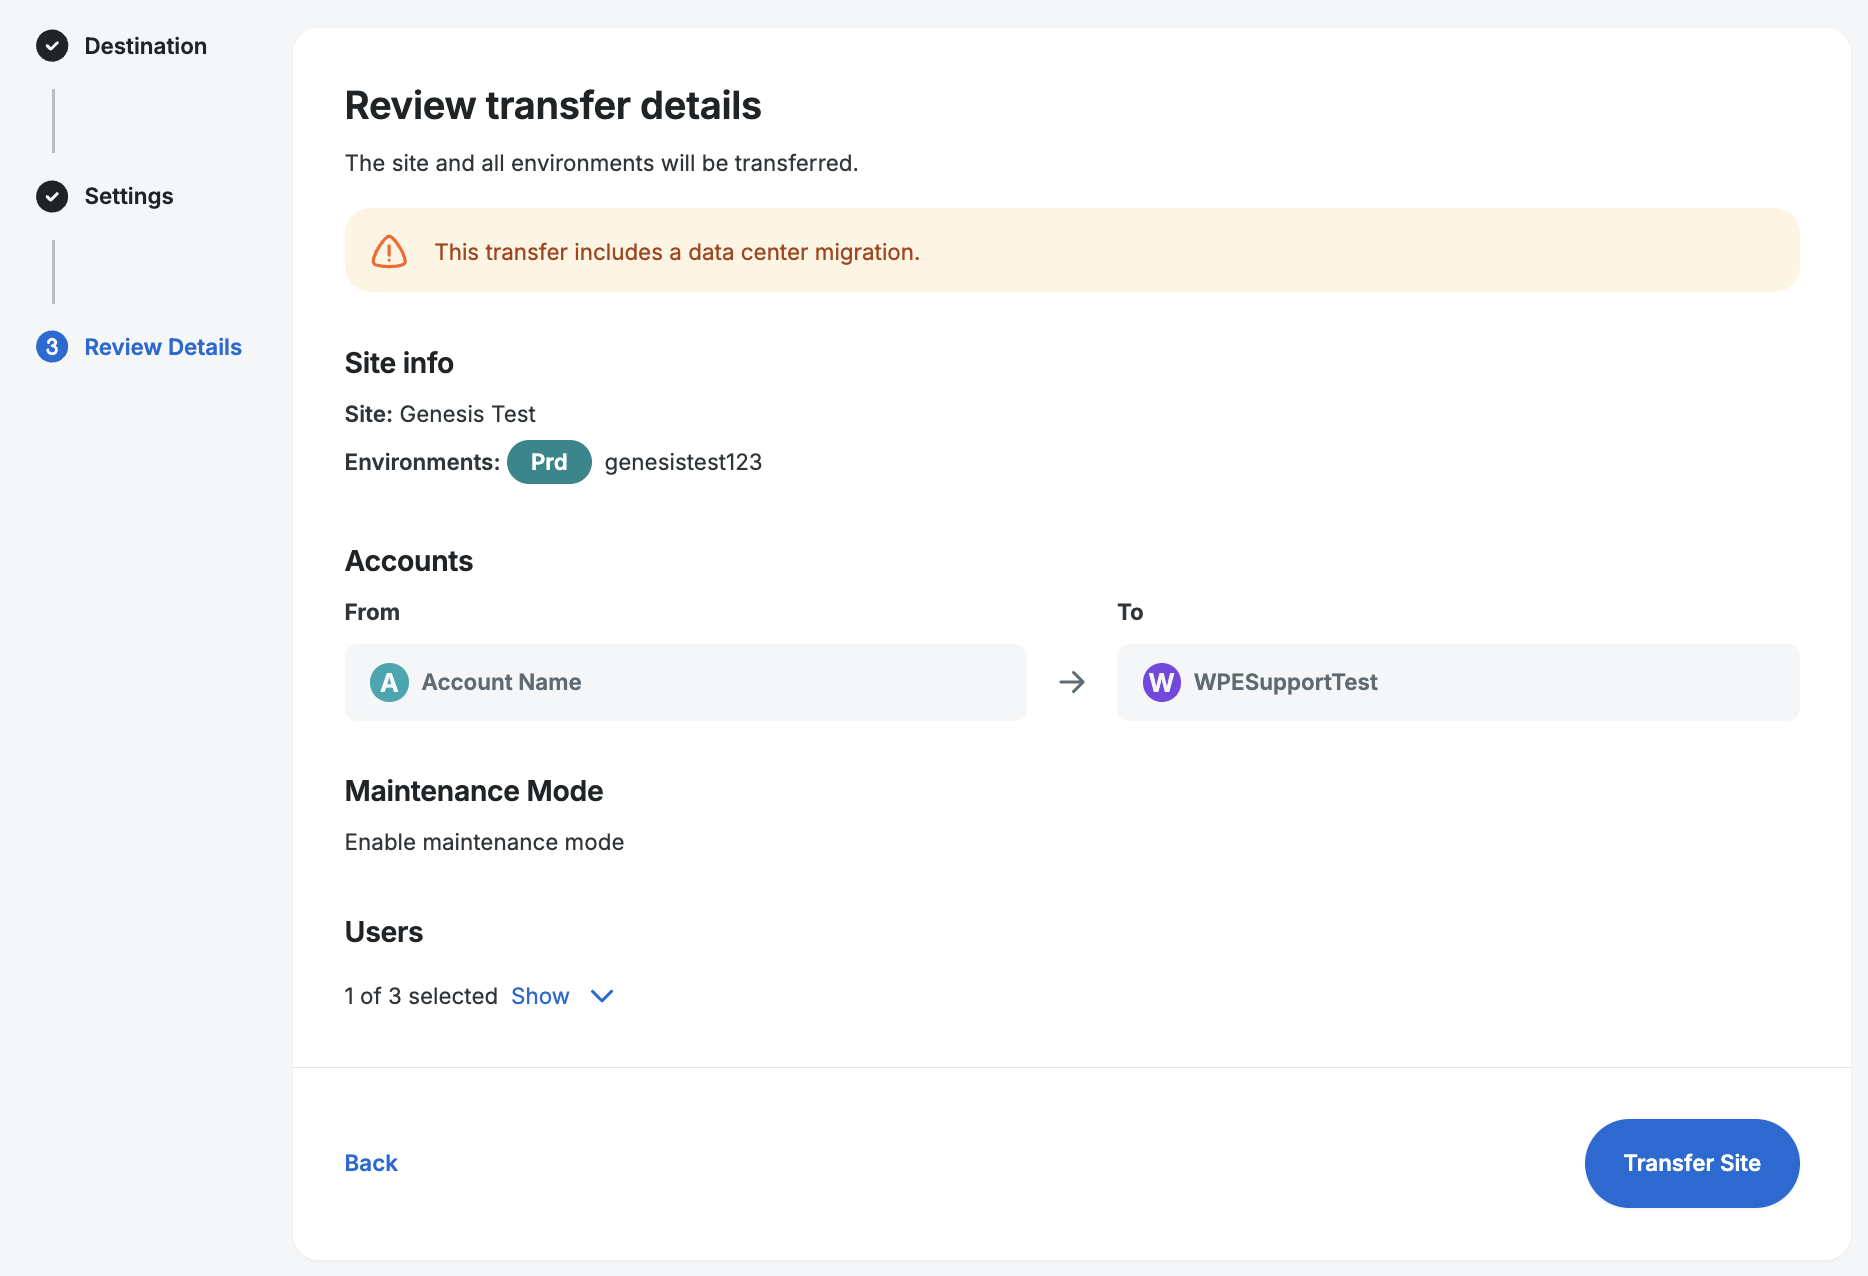
- Click Transfer Site.
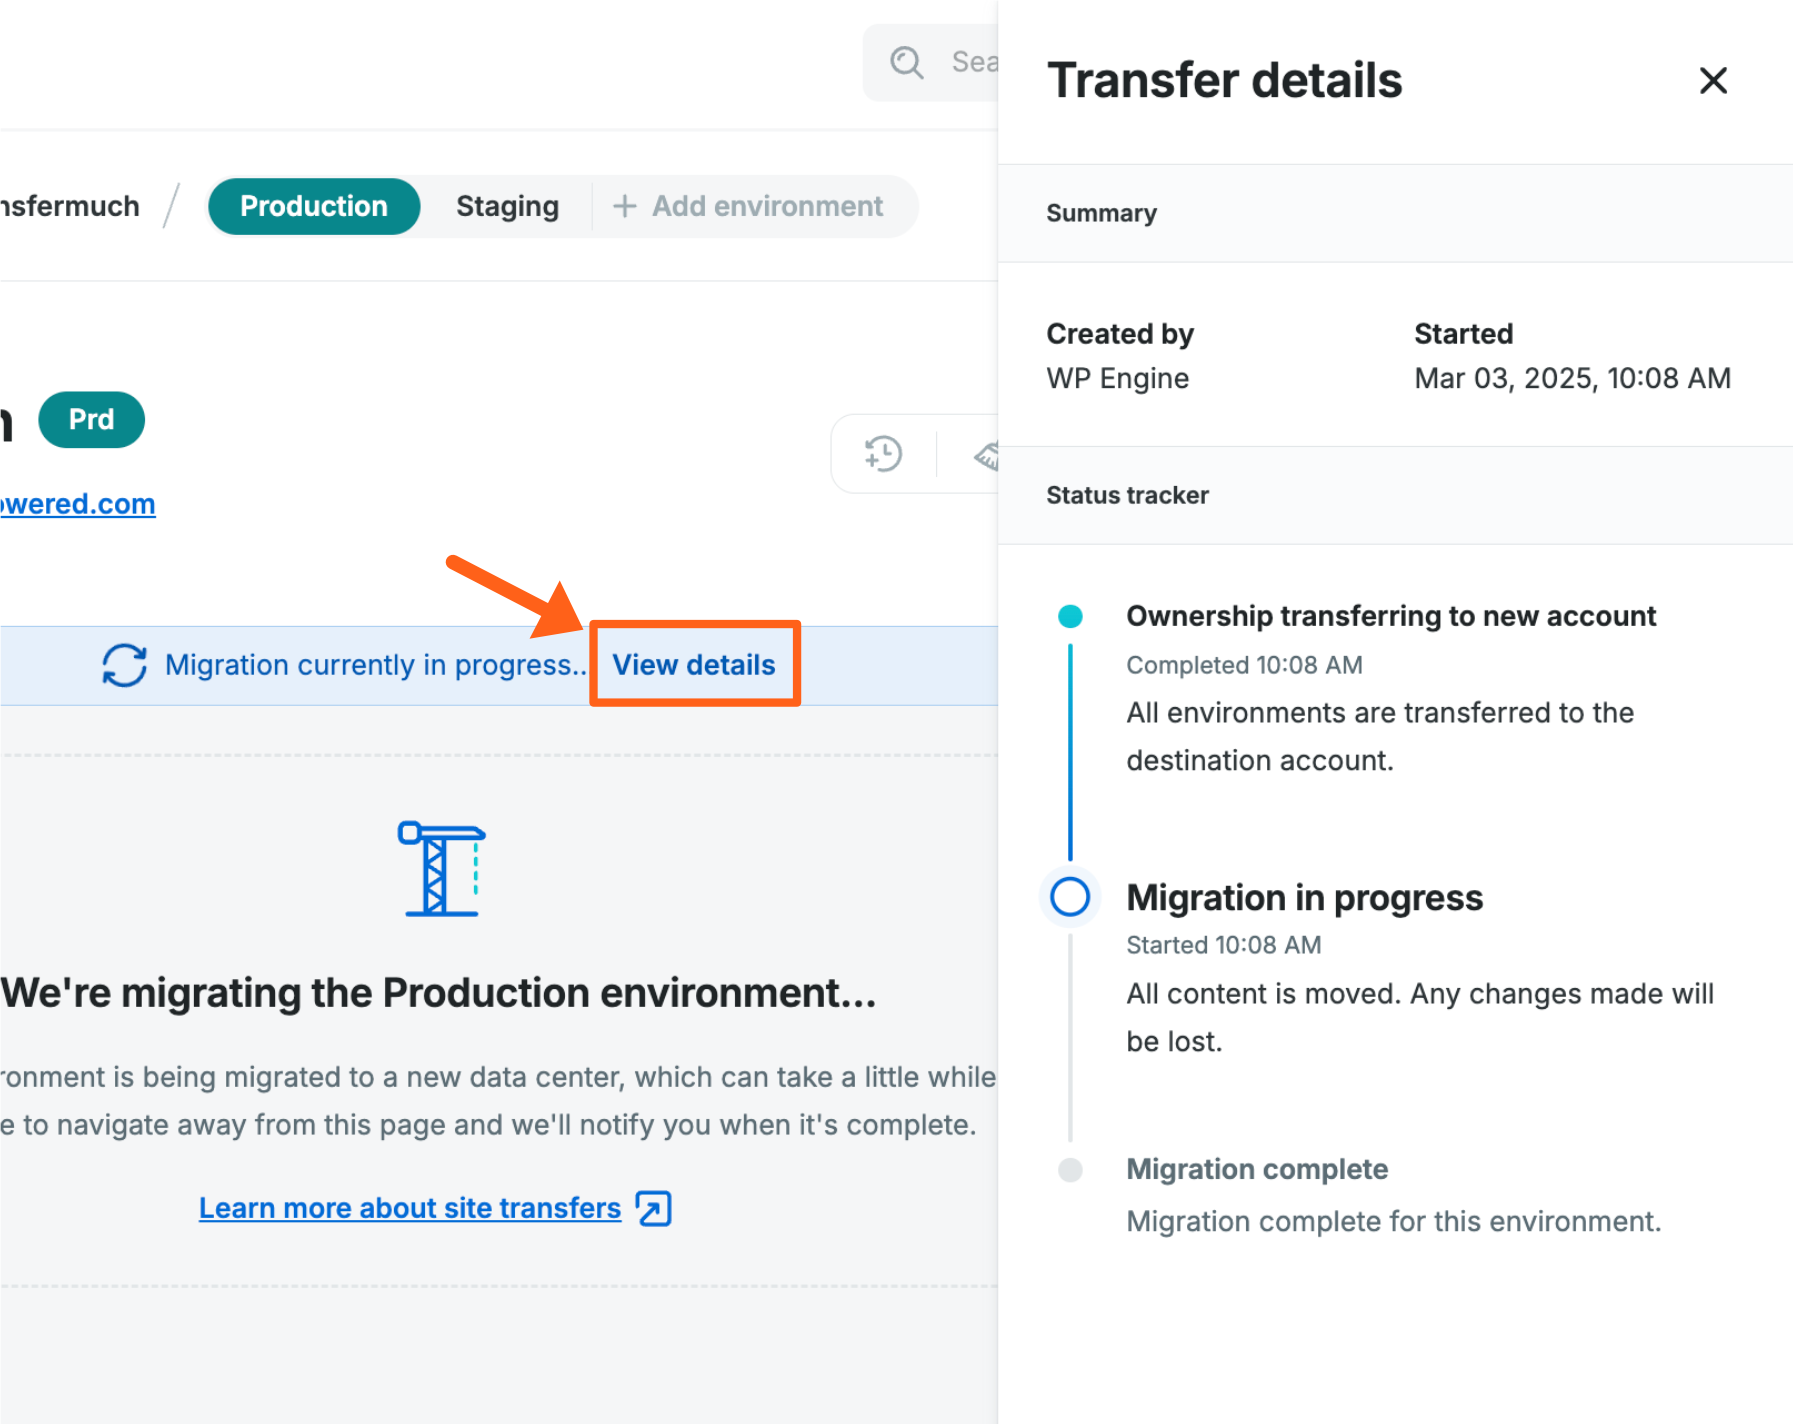
If you chose “Now” for the scheduled time then you’ll see the progress banner immediately.
If not, then it will show at your chosen scheduled date and time when the transfer begins. - Wait for the transfer to complete. Click View details in the progress banner to see more details.
- When the transfer is complete you’ll see a success message in the status banner.

- Activate any necessary product extensions on the destination account and turn off maintenance mode if you enabled it with a maintenance mode plugin.
That’s it, your transfer is complete!
If a migration was needed we suggest reviewing your site for any issues.
Cancel a Scheduled Transfer
If you decide that you need to cancel a scheduled transfer of a site to another account:
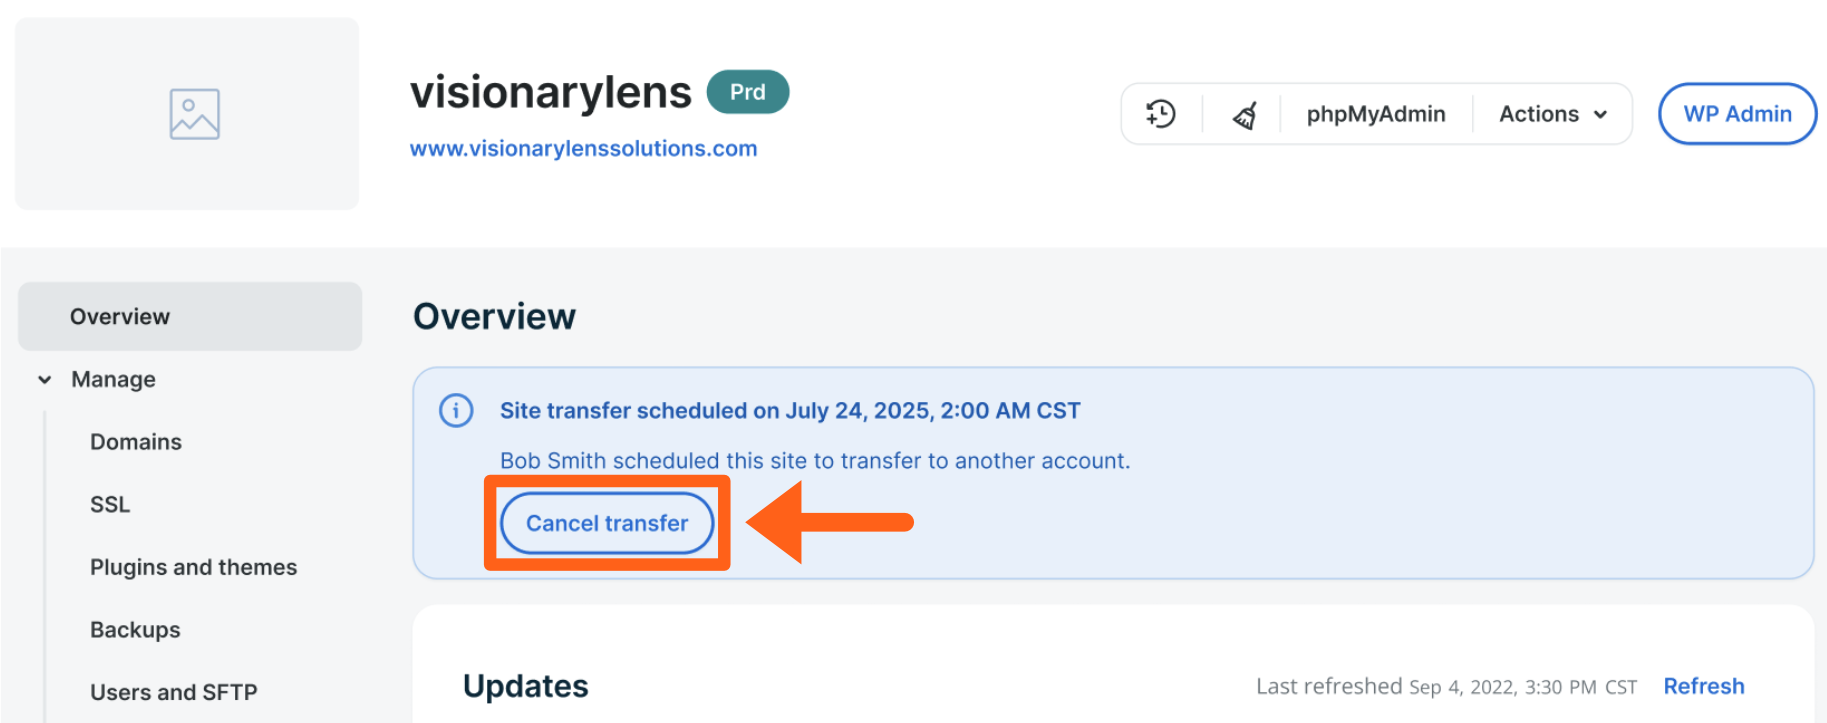
- From the Sites page, select the site name of the site being transferred.
- Look for the notice of the site transfer at the top of the Overview section and click the Cancel transfer button.
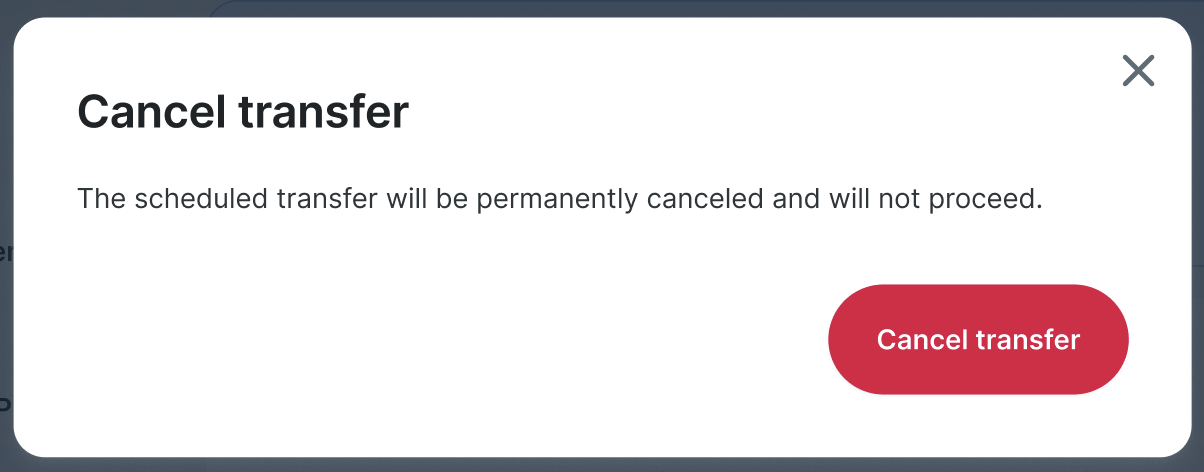
- Click Cancel transfer again in the popup window to confirm the cancellation.
Limitations
- Dedicated Development Environments (DDE) are not supported for site transfers. If you have a Dedicated Development Environment it will not show in the destination list when selecting a destination account.
- Sandbox sites cannot be transferred to another account. If you want to transfer a sandbox site then it will need to be converted to a billable site.