 Get Started
Managed AI Capabilities Setup Guide
Tags:
Key Takeaways
- The AI Coworker agent handles administrative and hosting tasks through natural language prompts. Users can execute operations ranging from content creation and block editing to backups, DNS management, and administration across multiple sites simultaneously.
- Website administrators can deploy a visitor-facing AI Chatbot with customizable appearance and knowledge base connectivity. The chatbot indexes site content to answer visitor questions automatically while offering granular controls for visibility, tone, and active behavior.
- Model Context Protocol (MCP) and developer APIs enable advanced integrations with third-party tools. Developers can connect external environments like Claude or ChatGPT via OAuth or build custom AI features using the developer API.
WP Engine managed AI is a suite of products for intelligent automation and AI agent coworking, to perform tasks in the WP Engine User Portal and your connected WordPress® sites.1
You can chat with our Coworker agent to perform tasks, or you can create your own automated tasks. You can use AI models from multiple different providers, aggregated into one connection that consumes WP Engine AI credits. This can simplify your token use for WP Engine and WordPress tasks into a single billing source, instead of connecting accounts from multiple providers.
Understanding Use Cases
| Feature | Use Cases |
|---|---|
| Coworker: An AI assistant that can help you with tasks and answer questions. | Chat with your Coworker agent in the WP Engine User Portal, or in your connected WordPress sites, and have it perform tasks and retrieve information for you. |
| AI Chatbot: A public facing chat assistant for your website’s visitors. | Help your visitors find answers about your content quickly without needing to contact you. |
| MCP connection: Connects 3rd-party AI tools (e.g. Claude, Cursor, ChatGPT) to your WP Engine account and WordPress sites. | Use it when you prefer working in your own AI tool to manage your sites with tasks like editing content, checking site details, and hosting tasks like taking backups. |
| AI Connector: A WordPress plugin that lets other plugins and themes use WP Engine managed AI to generate text and images. | Use it when building AI features into a WordPress site, such as a “summarize this post” button or an image generator. The site admin connects it once, and developers’ code needs no API key. |
| Abilities: Registered WordPress actions that can be used by plugins, themes, and 3rd-party systems like AI agents. WordPress has built-in default abilities and plugins can also register custom abilities. | Use them when you want Coworker or an MCP-connected AI tool to do something your plugin offers, such as “summarize post 3132.” Abilities sync to WP Engine managed AI automatically and run with the requesting user’s WordPress permissions. |
| AI API: WP Engine managed AI’s developer API, for using AI features from your own code. | Use it for AI features outside WordPress, such as a headless site’s “ask us anything” assistant built on your knowledge base, or for features the AI Connector doesn’t offer, such as image alt text, transcription, or custom agents. Requires an API key from the User Portal. Not for hosting tasks like backups. |
Connect Coworker and Chatbot
Follow the connection steps below to use the AI Coworker, or to use an AI Chatbot for your website visitors:
- Go to the AI menu for an environment. Go to the overview page for an environment and select AI from the environment’s sidebar menu.
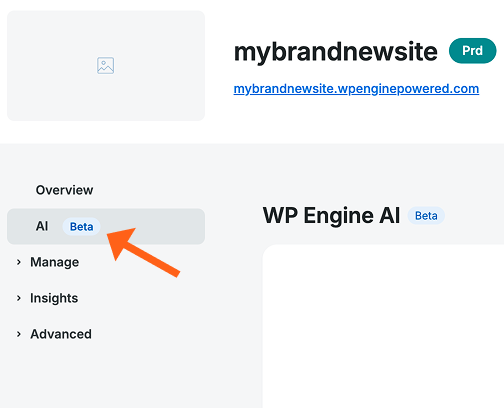
- Click the Install WP Engine AI button. This will install the plugin in WordPress. There is also a download link here if you want to install the plugin manually instead.

- After it installs, click the Connect in WP Admin button. This will bring you into your WordPress Admin dashboard.

- Click the WP Engine AI menu in the WordPress sidebar.
- Click the Connect to WP Engine button. This will prompt you to log into and connect your WP Engine account.

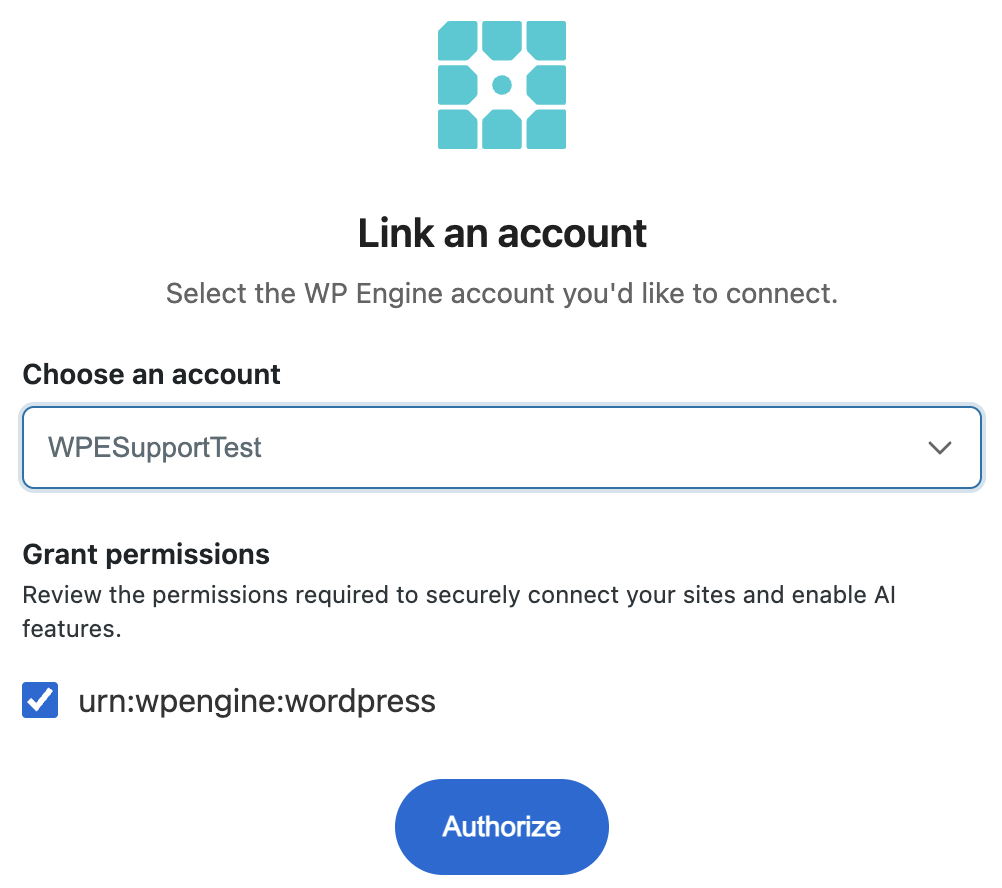
- After logging in, you’ll see a screen to select an account. Select the account associated with the environment you’re connecting, and then click Authorize to connect the account.
- On the next screen, click the Install buttons next to the tools you want to use. There are install buttons for the back end Coworker AI, and for the front end AI Chatbot for your visitors. After your selected tools are installed, click the Continue button.

- After continuing, you’ll be back on the main WP Engine AI page. You’ll see two new menu items under WP Engine AI in the WordPress sidebar of Coworker and Chatbot. You’ll also see options to Open each from the main overview page.

- Open Coworker to start chatting with the AI agent and have it help you with tasks in your WordPress dashboard.
Read more about Coworker below. - Open the Chatbot to start configuring the look and personality of your front end visitor chatbot before you activate it.
Read more about your customer Chatbot below.
- Open Coworker to start chatting with the AI agent and have it help you with tasks in your WordPress dashboard.
Coworker
The AI Coworker agent can help you with tasks in your WordPress dashboard, and tasks in your WP Engine User Portal. You can chat with it in both dashboards.

Coworker in the WP Engine User Portal
To open Coworker in the User Portal you can go directly to my.wpengine.com/coworker, or you can follow the instructions below to find the link:
- In the Portal (my.wpengine.com), select AI in the left sidebar.
- Select AI Coworker in the secondary sidebar menu.
- Click the Open Coworker button.

Coworker in WordPress
To open Coworker in your WordPress dashboard:
- Make sure you’ve connected your WordPress site by following the directions in the Connect Coworker and Chatbot section above.
- In your WordPress dashboard, go WP Engine AI > Coworker, in the WordPress sidebar.

Example Coworker Tasks
To get an idea of the tasks you can do with Coworker in the User Portal, the easiest way is to ask Coworker what it can do. Since capabilities can change, this is a good way to get a current list.
Some example tasks Coworker can perform for you include:
- Create, edit, search, and delete posts and pages.
- Find and replace text across site content.
- Edit blocks live in the block editor.
- Manage categories, tags, and other taxonomies.
- Register custom post types, taxonomies, and ACF field groups.
- Search the Media Library, upload images, and find free images on Openverse.
- Moderate comments.
- Check site health, site info.
- List and activate plugins.
- Answer questions from the site’s knowledge base.
- Create, restore, and download backups.
- Add domains, check DNS and SSL status.
- Purge caches and manage cache exclusions.
- Create, copy, and delete environments.
- Manage account users and SSH keys.
- View usage and site performance reports.
- Work across multiple sites and WP Engine accounts at once.
Chatbot
The AI Chatbot lets your website visitors ask questions about your content and products.
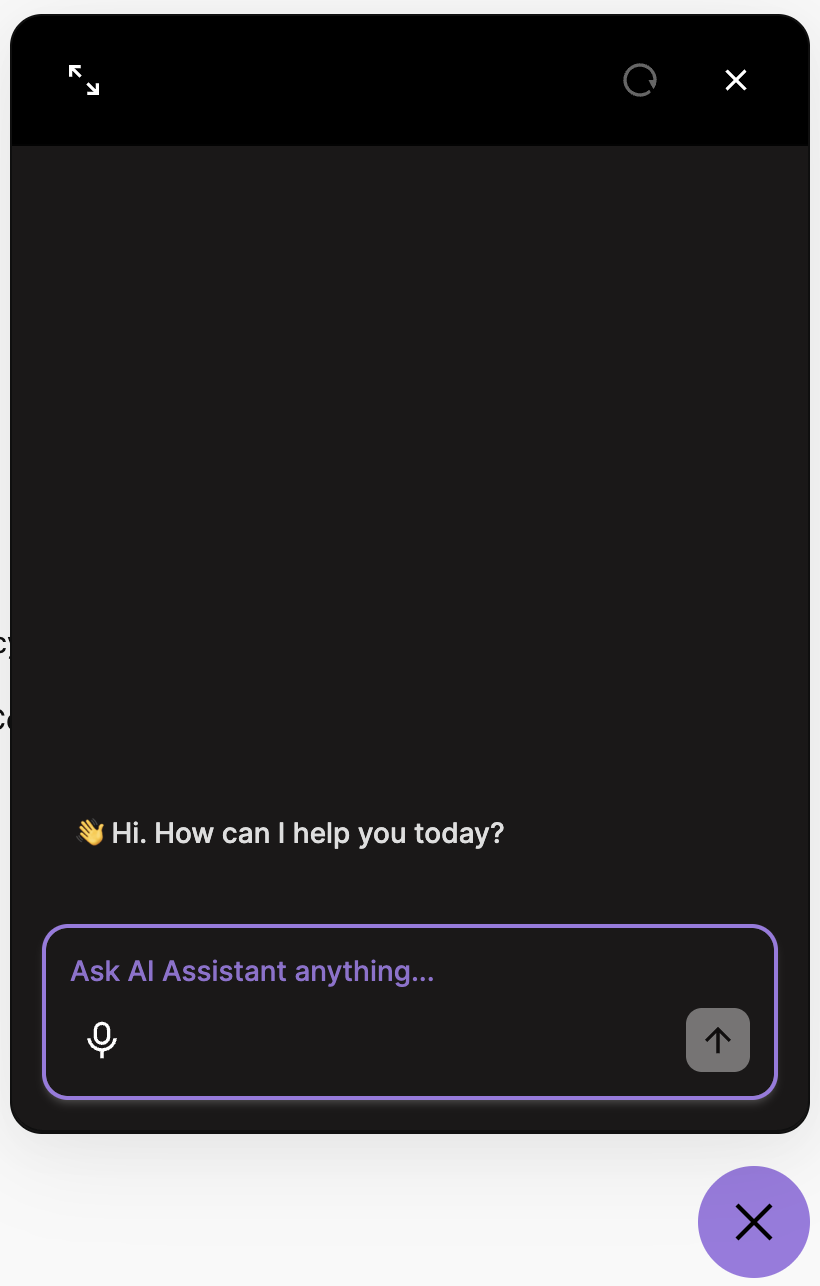
Customize Your AI Chatbot
To start customizing your Chatbot before you enable it:
- Go to WP Engine AI > Chatbot, in the WordPress sidebar.
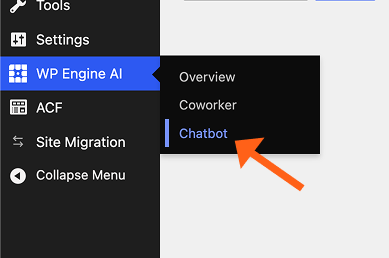 You’ll see three tabs here:
- Appearance
- Personality
- Settings
- In the first tab labeled Appearance, customize the look of your chat window with options like colors, icon, and typography.
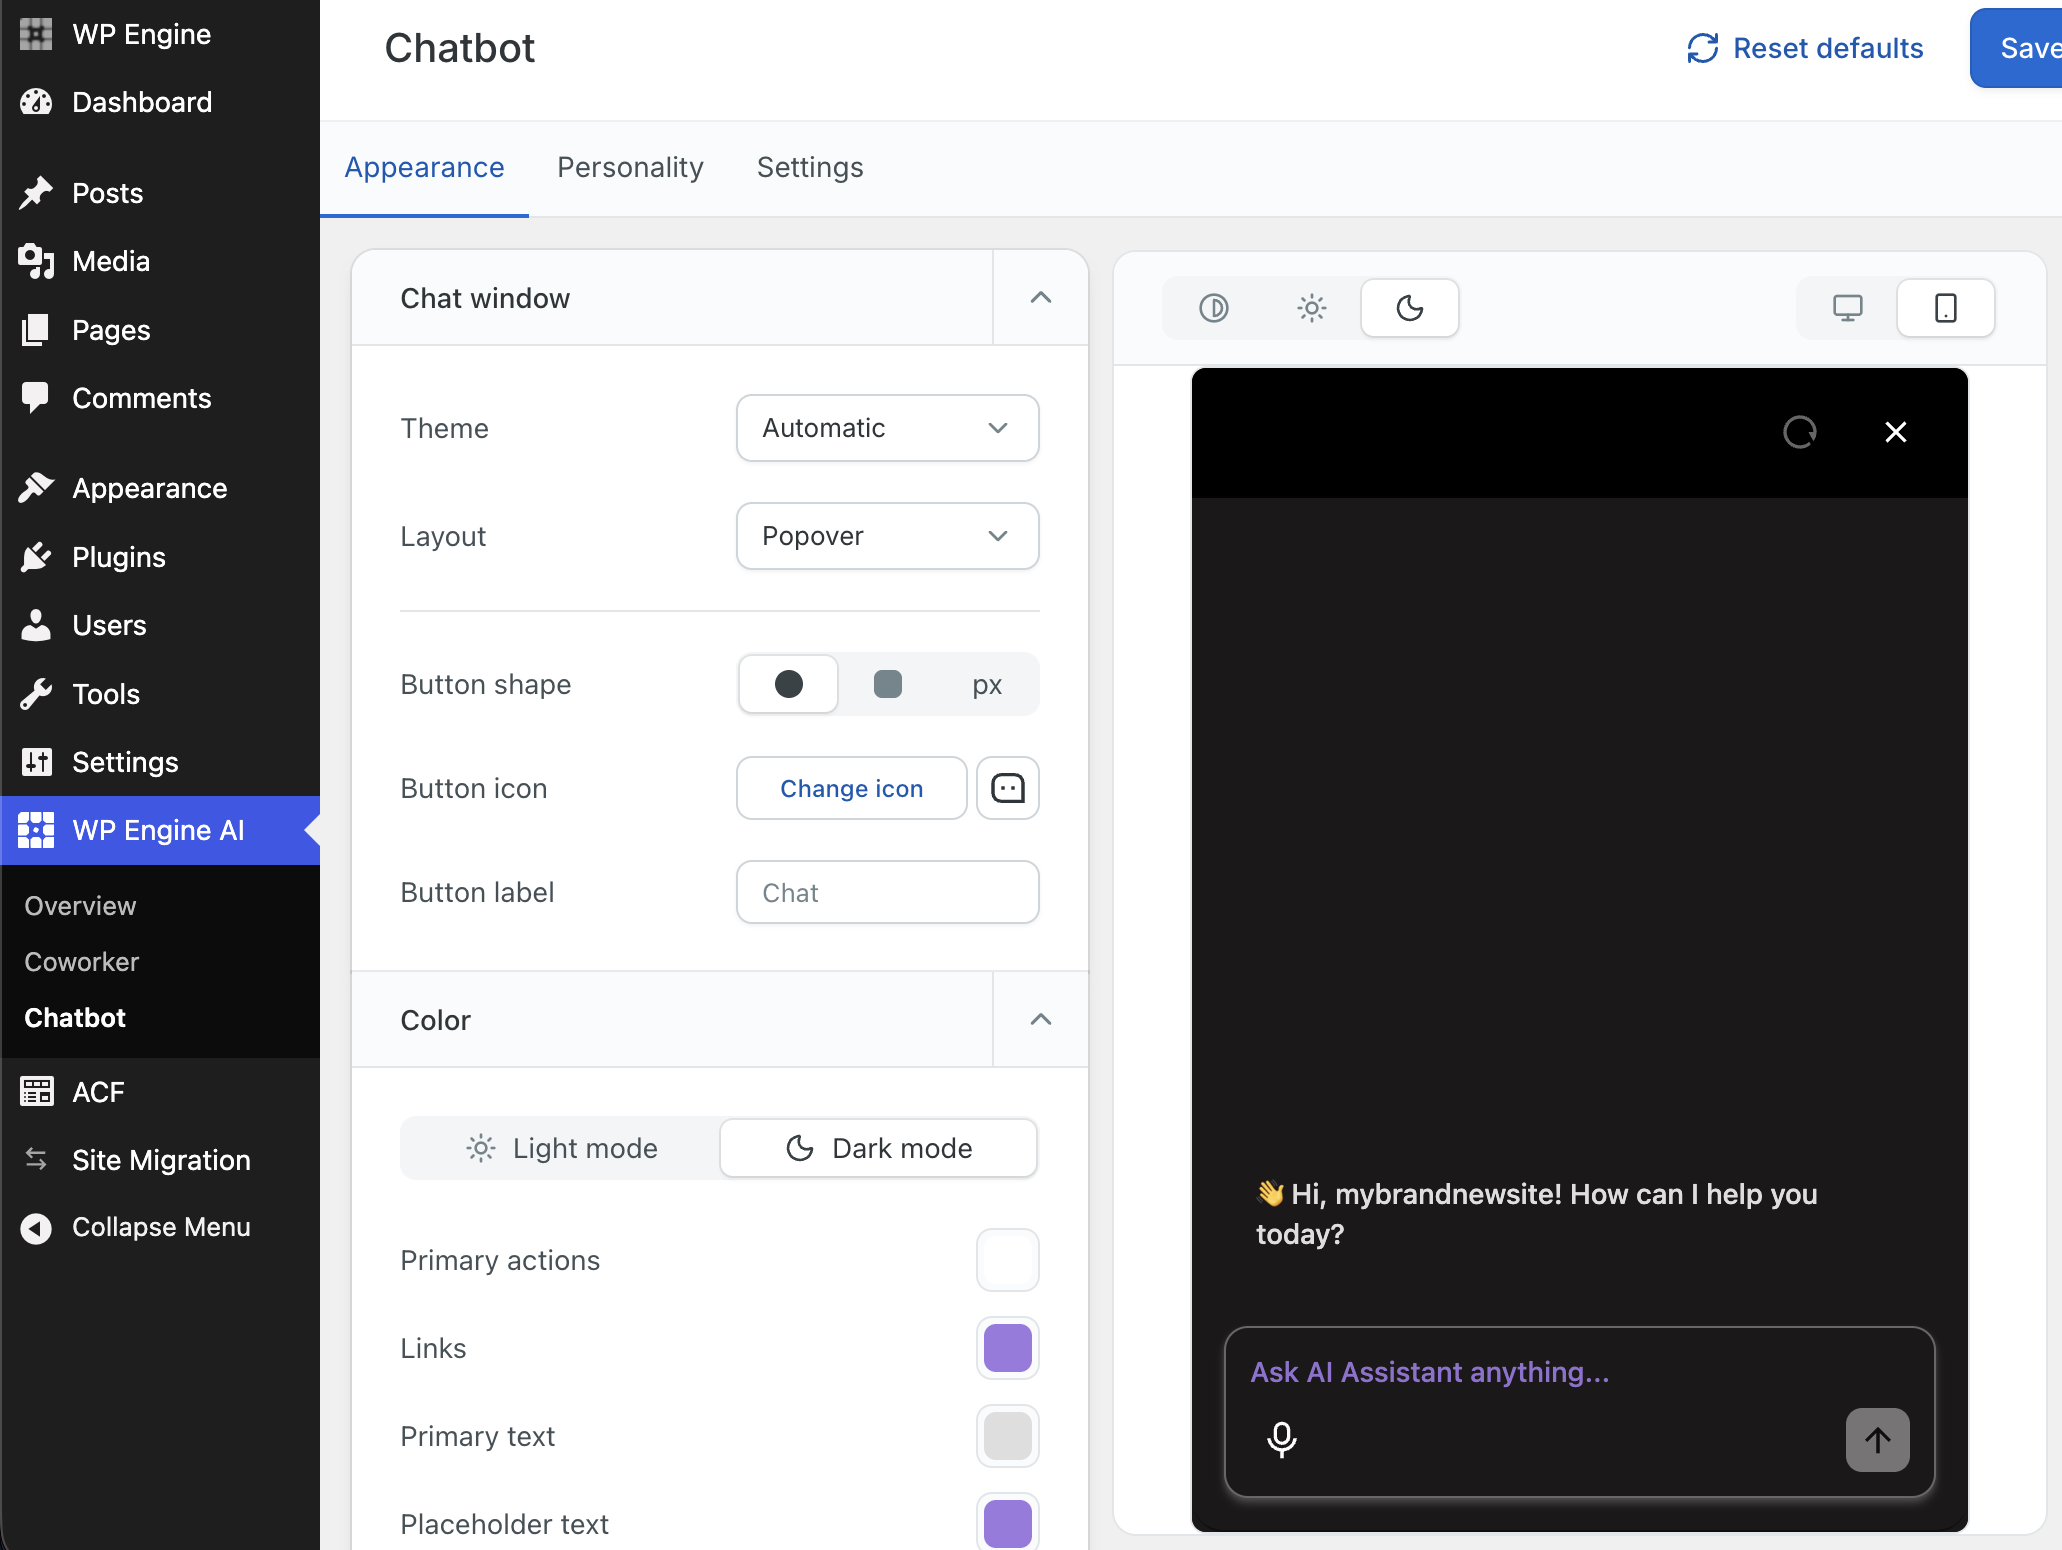
- Select the Personality tab, and set your choices for personality, tone, greetings, and conversation starters.

- Select the Settings tab, and adjust your Chatbot settings. You can choose from options like:
- Toggle the Chatbot on or off.
- Write instructions for your Chatbot’s AI agent to describe its role and guidelines for interacting with your website visitors.
- Connect your site’s content to the available knowledge base of the AI agent. When connected and your content is indexed, the Chatbot will be able to answer your visitor’s questions about your content.
- Set the visibility of the Chatbot based on user type or selected pages.
- Set proactive messages based on page interaction triggers.
- Select the AI model used for the AI agent.
- Click Save in the top right once you’ve made your selections.
MCP
WP Engine’s MCP (Model Context Protocol) service lets you connect 3rd-party AI tools (e.g. Claude, Cursor, ChatGPT), to your WP Engine account and WordPress sites, to perform tasks similar to the WP Engine Coworker agent.
Follow the instructions in our developer docs to make the MCP connection. After providing the commands to your 3rd-party AI tool, you’ll be prompted to make an OAuth connection by logging into WP Engine to complete the connection.
AI API
The AI API is WP Engine managed AI’s developer API, for using AI features from your own code. You can perform tasks with LLM models from code outside of your WordPress site, or for tasks within your WordPress site that the AI Connector doesn’t offer.
Follow the instructions in our developer docs to connect and use the AI API:
Some example types of tasks that you can perform with the AI API are:
| Topic | Tasks |
|---|---|
| Chat and text | Have a conversation or answer a prompt with an AI model; count tokens |
| Content | Summarize content; suggest categories and tags |
| Images | Generate an image from a text prompt; write alt text for an image |
| Audio | Turn text into speech; transcribe audio to text |
| Knowledge base | Create collections, add (index) documents, and search them |
| Agents and sessions | Build your own AI assistant with instructions and tools, and hold ongoing conversations with it |
| Sites | Register a site and link it to a knowledge base collection |
| Models | List the available AI models, from Google, Anthropic, OpenAI and others |
| Usage and credits | Check usage and the account’s credit balance |


